
In this blog, we will be discussing how to convert a YYWWD code into a Date Value. This tutorial was based on a response to a query of an Enterprise DNA Support Forum member. You may watch the full video of this tutorial at the bottom of this blog.
The member asked for a way to convert his Confirmed delivery date field, which is in a year, week, and day of the week format, and transform it into a date field.
In his example, the member explains that the code 20145 should be converted to 2020-04-03. So from this, we can conclude that the first two digits correspond to the year, the next two digits correspond to the week number, while the last digit corresponds to the day of the week.

Now that we already have an idea on how to tackle the query, let’s get started.
Breaking The Code Apart For A Proper Date Value
To make our work easier, let’s load up our data in the Power Query Editor.
The first thing I noticed when I loaded the data into Power Query is that it immediately made a change type step, as shown below.

Since we don’t need this, we can remove this step by clicking the X button next to it.
Now, let’s start breaking the code apart into separate columns for the year, week, and day of the week.
Year Column
As I mentioned earlier, the first two digits of the code correspond to the year of the date value.

To add a separate column for the year, we need to make sure that the Confirmed delivery date column is selected. To do this, go to the Add Column tab, click Extract, and then select First Characters.

Since we only need the first two digits for the year column, enter ‘2’ in the Count tab and click OK.

Now, let’s modify our new column by editing the Formula Bar. So to change its column name, change the First Characters in the Formula Bar to Year. To turn it into its proper year value, let’s add 2000 to each of our values.
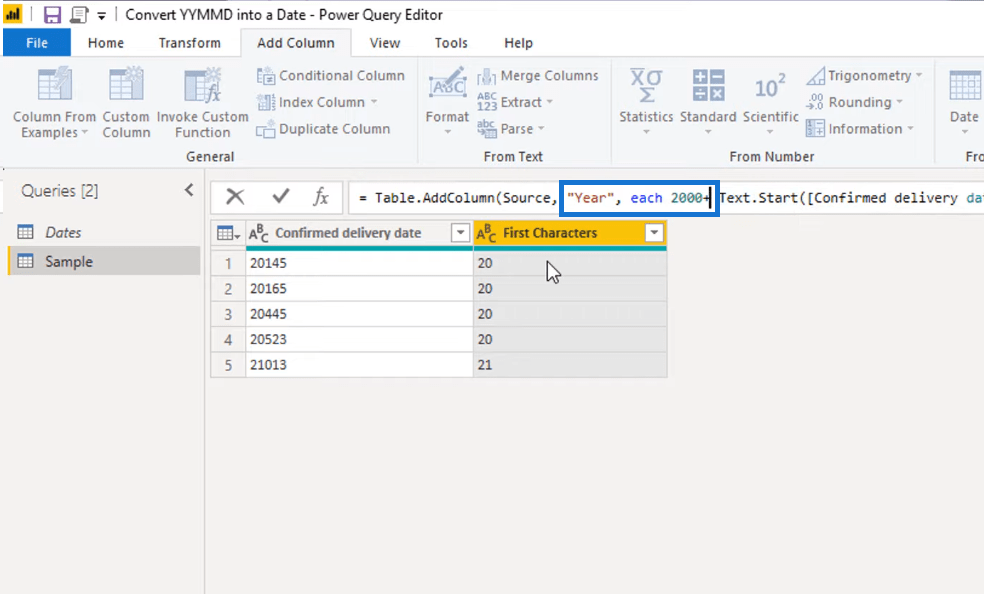
Notice that after we modify our formula, we will receive an error because of a type mismatch.
The error message says that we can’t apply the operator + to the number and text type values.

To fix this, we need to edit our formula so that the text value will be converted to a number. We will be using the function Number.from to do this and enclosing the succeeding parts in parentheses. Then, change the return type from text to number.

Week Column
Let’s now extract the week number from the code.
Again, make sure that the Confirmed delivery date column is selected, go to the Add Column tab, click Extract, then select Range.

To get the third and the fourth digit of our code, we need to start counting from 0 since Power Query is zero based. This means that to get the third digit of our code, our range should start from 2.
And since we only need 2 digits from the code for the week number, we’ll enter 2 in the Number of Characters field.

Again, the same logic applies here. To transform the column label to its proper name, change Text Range to Week in the Formula Bar.
Also, add the Number.from function in our formula, enclose the succeeding parts in parentheses, and change the return type to a number.

Day Column
For the day column, we only need the last digit of the code. To extract it, select the Confirmed delivery date column, go to the Add Column tab, select Extract, and then click Last Characters.
Enter 1 because there’s only one digit left from the code that we need to extract.

Like what we did earlier, in the Formula Bar, change Last Characters to Day so that our new column has its proper name.

Again, add the Number.from function, enclose the following parts of the formula in a parentheses, and change the return type to number.

3-Way Lookup To Get A Date Value
Now that we have all the components to retrieve a single date from our calendar table, the only thing left to do is to perform a 3-way lookup.
To do that, go to the Home tab and select Merge Queries.
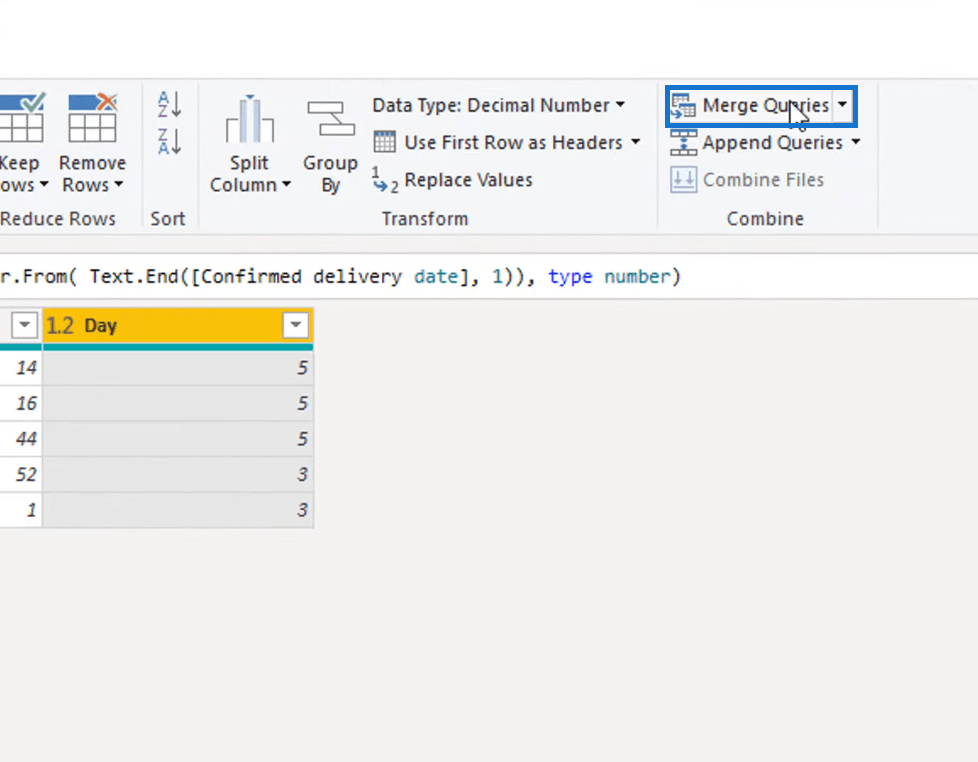
Since we’re going to merge with our Dates table, click the drop down tab and select Dates.
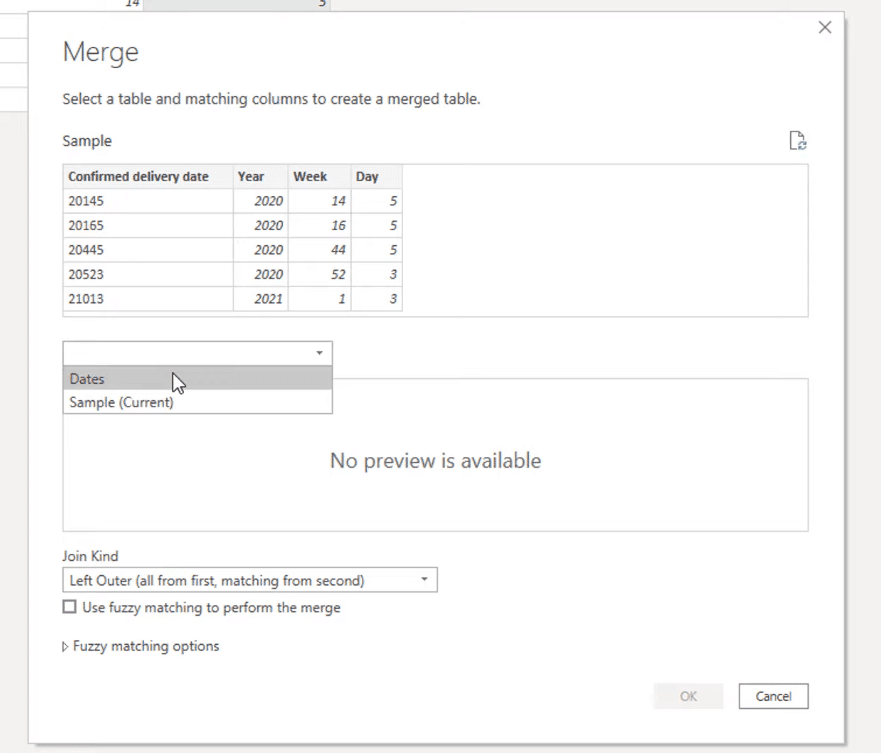
Identifying The Pairs
Now, we’re going to identify the pairs that belong together.
From the upper table, select the year column, and then pair it to the year column of the table below.
To select another pair, press down on the Ctrl button on your keyboard, select the week column from the upper table and pair it to the week number column of the table below.
Lastly, while still pressing down on the Ctrl button, select the day column from the upper table, and pair it to the DayInWeek column of the table below.
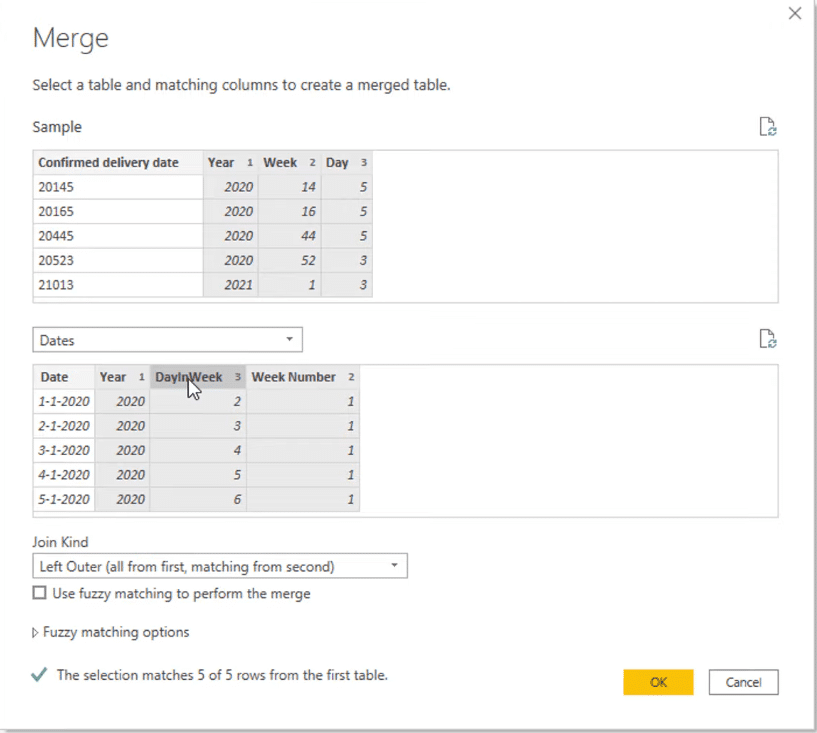
To ensure that the columns are paired correctly, check whether the index number matches with each other.
As shown below, the Year columns should have an Index 1, the Weeks column should have an Index 2, and the Days column should have an Index 3.

Getting the Proper Date Value
Because we only need the dates column, deselect all the other columns, and leave the dates column checked as shown below.

As you can see, the first value on our new dates column is 4-4-2020. However, remember that in the forum, the code 20145 should be converted into 3-4-2020.

This is because if we examine our dates table, we can see that in the DayInWeek column, the count starts from 0 to 6 and not from 1 to 7.
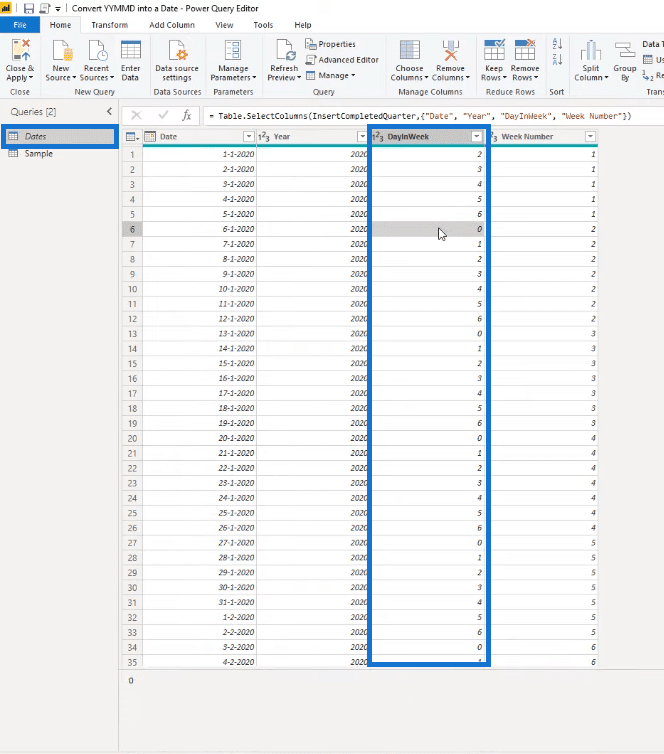
Subtracting From The Day Column
To fix this, let’s subtract 1 from all the values in our Day column.
From the Applied Steps section, click the step where we’ve added the day column. This was the Inserted Last Characters step.

In the Formula Bar, subtract 1 right after the parentheses.

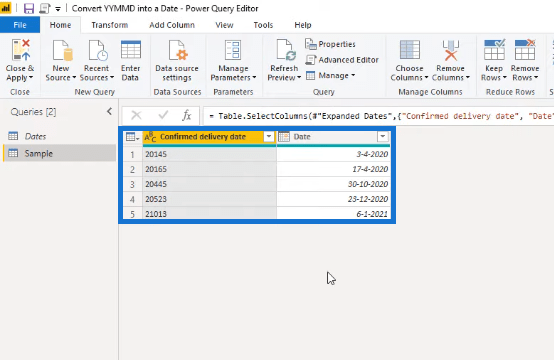
After doing that, we can see that we already have the correct values in our date column.
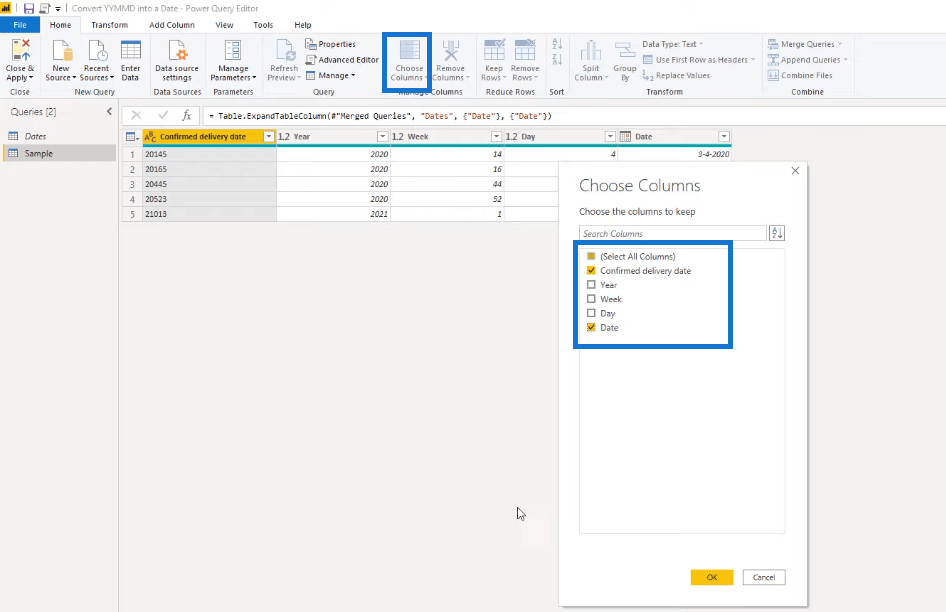
Finally, the last thing we need to do is clean up and remove the columns that we no longer need.
To do that, select Choose Columns, deselect everything else, and leave the Confirmed delivery date column and the date column checked.
And we’re done! The result of our work should look like this.

***** Related Links*****
Show Results Up To Current Date Or A Specific Date In Power BI
Preventing Year To Date Results From Projecting Forward
Filtering Data By Custom Fiscal Years And Quarters Using Calculated Columns In Power BI
Conclusion
In this blog, we converted a code which is in a year, week, and day of the week format to a proper date value. We broke the code apart and created 3 columns out of it. By using a 3-way lookup, we merged these columns together to achieve a single date value.
The technique that we used to tackle the problem in the support forum can be used in other scenarios. So make sure that you understand them well.
All the best,
Melissa


