In this tutorial, we’ll examine an interesting question that was raised on the Enterprise DNA Forum about how to dynamically merge a changing number of columns in a Power Query table. You can watch the full video of this tutorial at the bottom of this blog.
This scenario deals with raw data exports that cause the data to spill into an unknown number of adjacent columns. When you look at the example, you can see the description has spilled over into Column 4, and Description 2 has been split over two adjacent columns. But that won’t always be the case. In the next cycle, this number of columns could change.

Before we jump into the solution, let’s examine the M code that Power Query generates when you merge columns.
Power Query Table M Code
There’s a couple of ways to merge columns. One is to select both the description column and pressing down either shift key or control key then select column 4 as well. Then, right-click and choose Merge Columns.

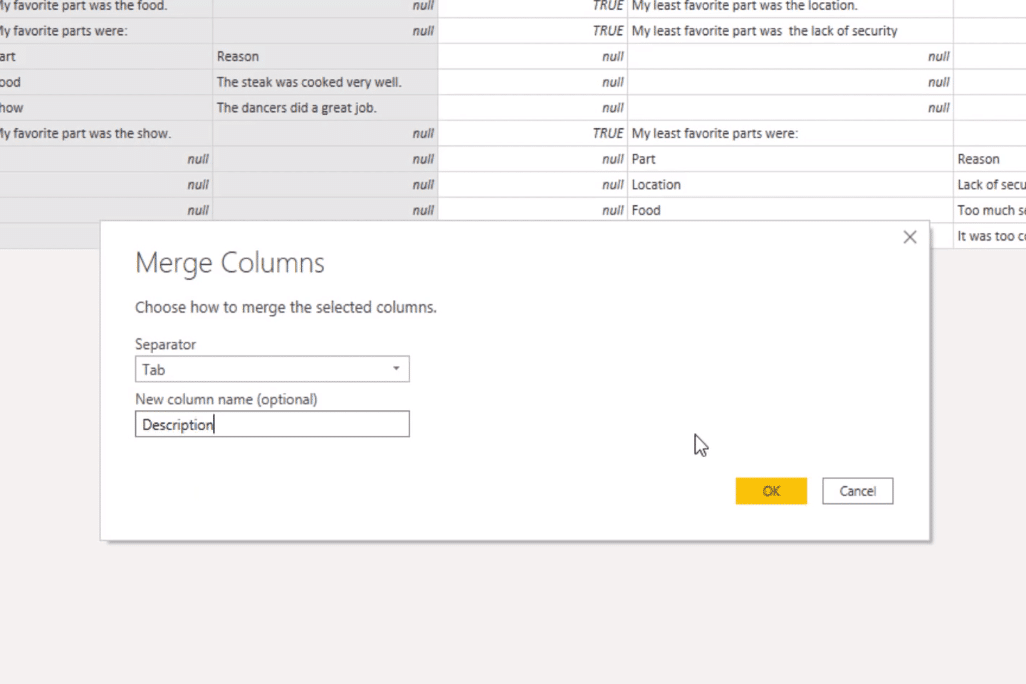
Or, on the Transform tab, select merge columns. And this dialog box will appear, which allows you to select the Separator.

In the pop-up box, choose Tab, and you can enter a new column name. In this case, I named it Description.

In the formula bar, we see the M code that this transformation step has created.

If the formula bar is not visible on your screen, go to the View tab and turn it on.

So the function that Power Query uses to merge columns is Table.CombinedColumns. The first parameter it takes is a table. That table is returned by the previous step in our code, so in the Applied Steps, you’ll see that this is called Source.
Then, it hard-coded the column names in a list. Here you see list initializers, and between in-text values, the column name description, and the column name column 4. Then, it calls another M function to combine the text values in those columns.

And finally, it passes the new column name as a text so we can adjust that.

So if we want this function to dynamically merge a changing number of columns, we’ll have to change that second parameter value that now contains a list of hard-coded column names.
Merging A Changing Number Of Columns In A Power Query Table
I’ll step back to my raw data query, and if we take a closer look at the column names, we see that each of the spill columns is anonymous. They don’t have proper names, but they all start with the text column, followed by a number. Let’s see if we can use that. First, I’ll create a reference by right-clicking here and selecting Reference.

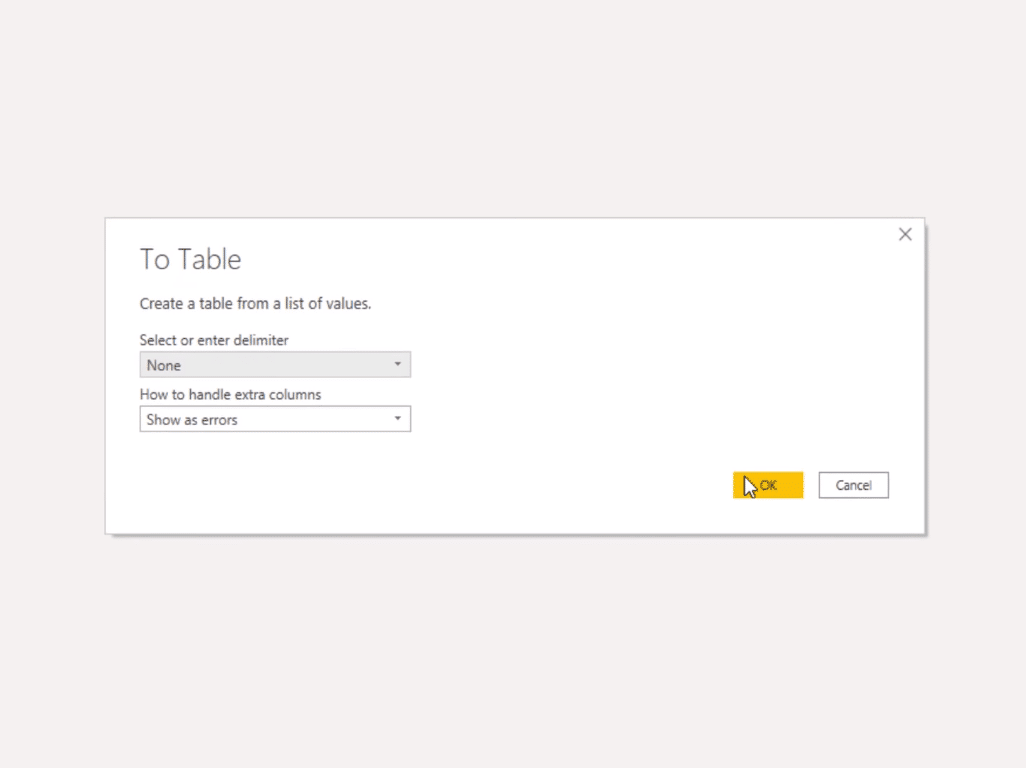
And to get the column names inside the formula bar, I can add Table.ColumnNames. This function returns a list with all the column names from that table. Let’s turn this back into a table by clicking on To Table.

In this pop-up box, click OK.

Then, on the Add Column tab, I’ll select Format, and then Trim.

Now, this isn’t a transformation that I want to perform, but it does generate the bulk of the M code for me. All I have to do is replace that trim function with my own logic.

So inside the formula bar, instead of Text.Trim, we can say if Text.StartsWith, and then point it to our Column 1, and I’ll copy that immediately. It wants that text that we’re looking for, so that’s going to be Column. So if it starts with a text column then we want “null” – for everything else, we want whatever is in Column 1. We can also rename that column, so inside the formula bar, instead of Trim, let’s call it GroupColumn.

Now, all we need to do is fill them at these values. So I’ll right-click my header, select Fill, and Down.

So the next time data comes in and that number of columns has changed, this group will automatically pick it up.

Let’s rename this query, I’ll call it column groups.

Let’s make sure that its load has been disabled because this is just a supporting query.

I can reference this supporting query and I’ll rename this later. Let’s leave that for now. So if you remember, we started by merging two columns and that created a hard-coded list with the column names, but now we can filter on Description in our GroupColumn.

So if we do that filter on the Description inside Column 1, we get the columns that meet that criteria.

However, this is a table and not a list. We need to extract whatever remains in that first column because we need to include those columns in our merge operation. So to do that, we can right-click our Column 1 header and select Drill Down.

And now we get a list. So let’s give this query a proper name (ListDescr) and let’s check if it’s disabled from load.

Now we can step back to our Result query and replace that second argument here with our dynamic list. So here, we can reference our ListDescr.

Let’s repeat this for Description 2 as well. I’ll go to my ColumnGroups query. I’ll create another reference and select the columns that I need. Then I’ll filter Description 2, which will return these three columns. I’ll right-click my header and select Drill Down and rename this query as well (ListDescr2).
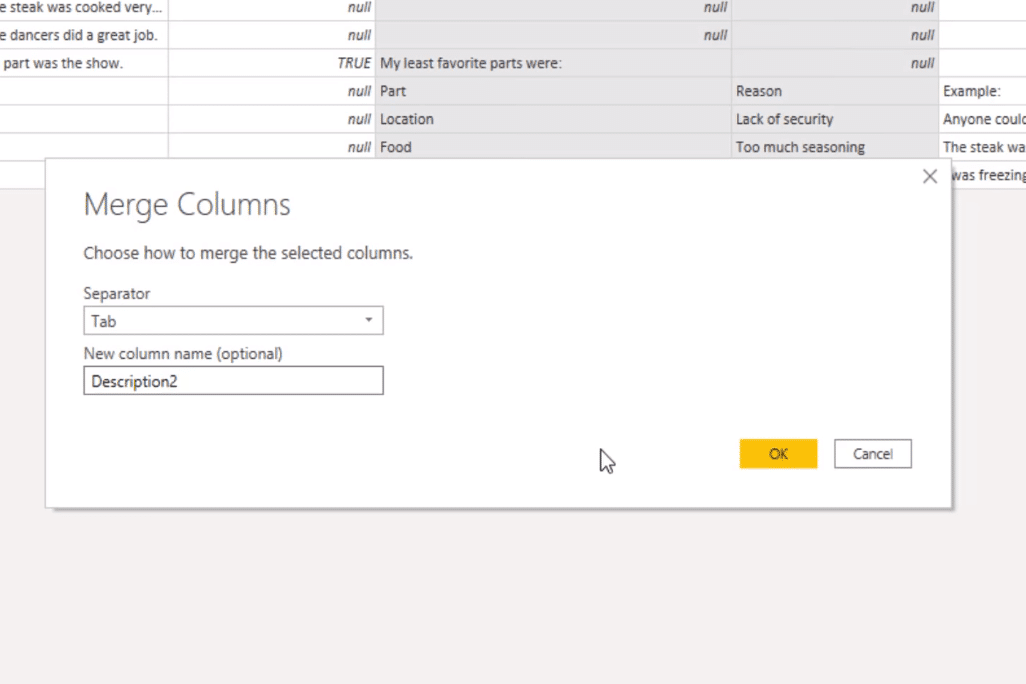
I’ll then step back to my Result query, select Description2 column, and press on either shift or control to select the next column as well (column2). I’ll right-click the header and choose Merge Columns.

In the pop-up box, I’ll choose Tab as the Separator and I’ll call this Description2.

I’ll just change the column name here on the formula bar. I’ll change that hard-coded list as well from the list we’ve just created. And now, as you can see, this has also picked up column 8 that we previously excluded.

***** Related Links *****
How To Merge Queries In Power BI
Power BI Query Parameters: Optimizing Tables
Sorting Date Table Columns In Power BI
Conclusion
In this blog, I’ve showed you how to use M codes in Power Query to dynamically merge columns. It’s not difficult as long as you are familiar with how the Power Query works and what M codes to use.
I hope you’ve enjoyed this one. Please check out the links below for more related content.
All the best!
Melissa


