Did you know you can use Power Automate to create chat functions and bots within teams? In this tutorial, I’ll show you how you can mix Power Automate with Teams to create workflows that trigger every time a message is sent. You can watch the full video of this tutorial at the bottom of this blog.
What we’ll be going through will simply scratch the surface of what’s possible when you integrate Power Automate with Teams to create very powerful automation. Let’s get started with a quick demo of what the solution looks like.
Using Power Automate With Teams For Chat Automation
Let’s go through our use case. I have my Teams open here and I’m in a conversation with myself, Brad, Jamie, and Luke. In this conversation, I had messaged them to send a personalized letter to a particular customer named Xander, to his office, and customize it to his brand. Brad Pitt replies, asking for his office and his brand.
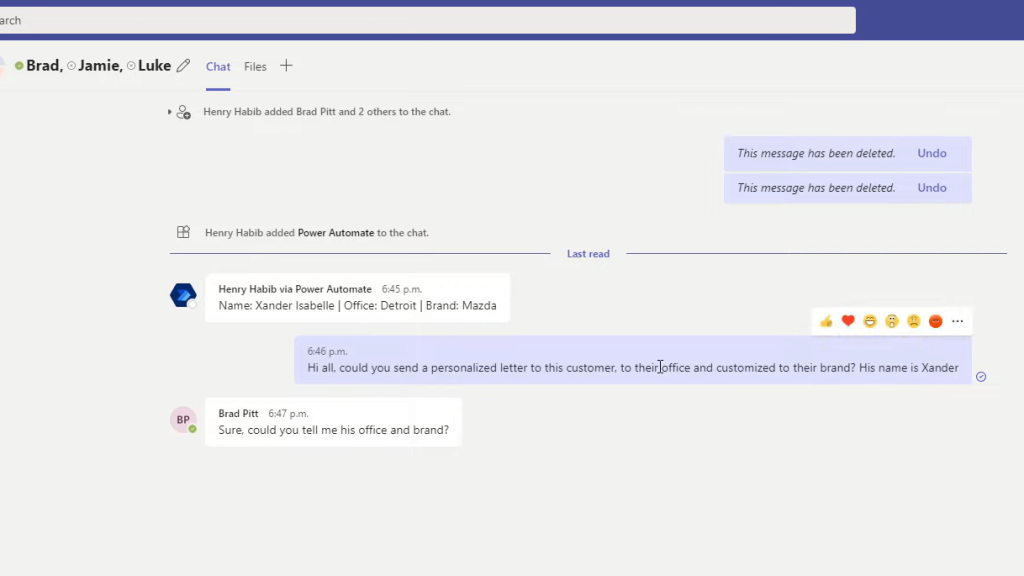
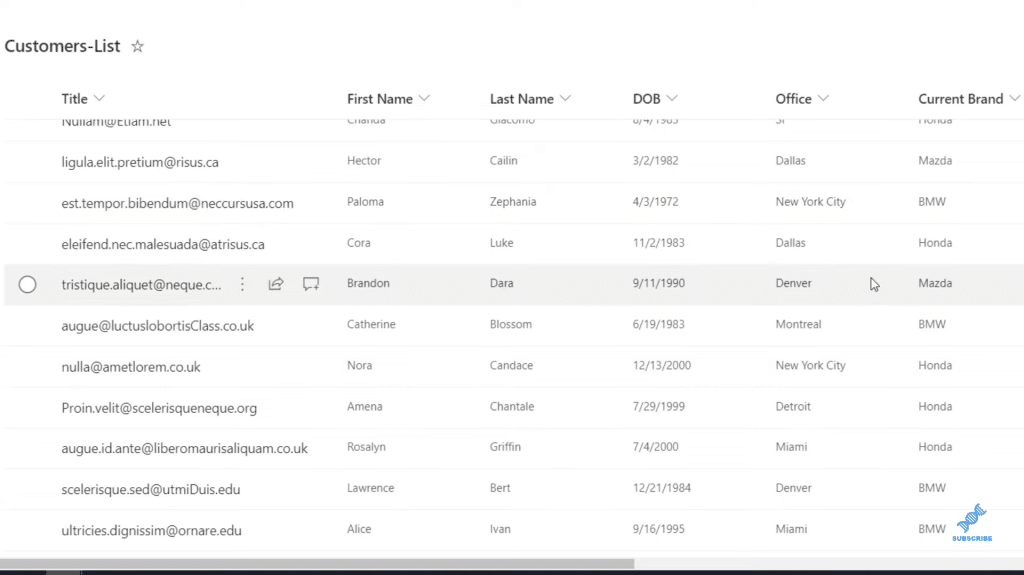
We could simply go to our Customers List and go to that customer, Xander, and try to find his office and brand using this list, or Brad Pitt could go and do that. But we do this so many times for Teams that we want to do this in an automated function.
So, I’ve created a function within Power Automate with Teams, where I can simply just type in back slash get (/get), and then the name of the customer, which is in this case, Xander. Power Automate, in the background, is picking this up. It’s searching that list and then it returns (as we can see here) the name, the office, and the brand.
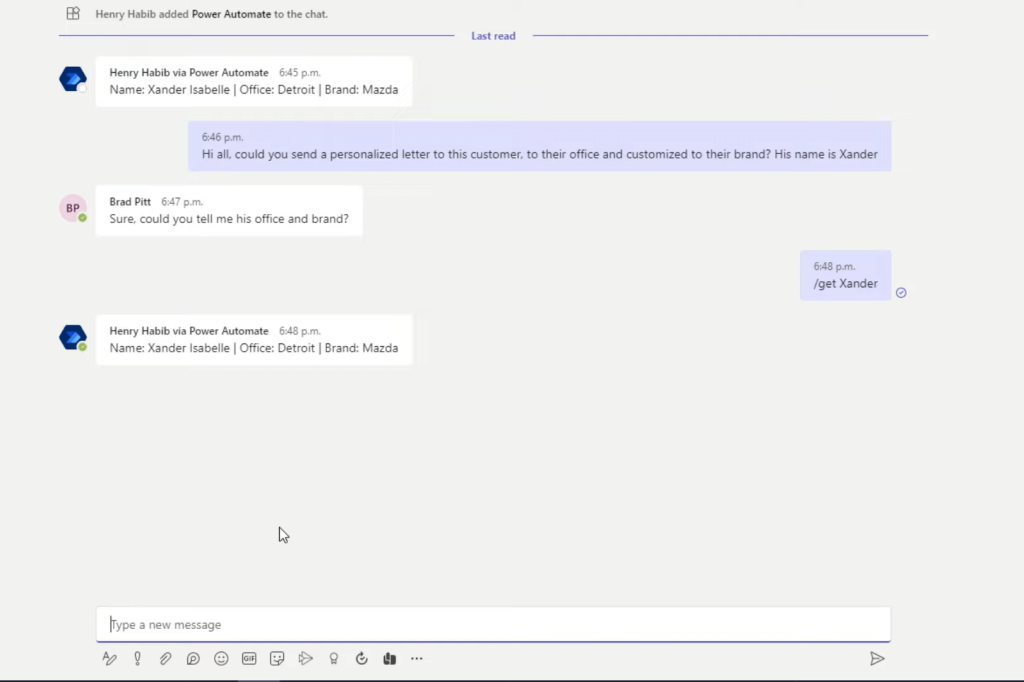
I can do this for any customer. What’s nice about this is that this is a function within Teams, which means that no matter who I’m chatting with, or if I’m in a channel chat, it doesn’t matter. Even if I’m in a meeting with external people, I can still use this function.
Now let’s see how we can do that on Power Automate. I’ve already built the entire flow and I’m just going to go through each flow to show you what each function does.
Our trigger for this Power Automate is when a new chat message is added. This triggers every single chat message, no matter what. That can be a big deal because you don’t want this to get sent out or automatically triggered every single time for every single chat. You want a specific use case. So, in our use case, it’s the /get is that activates our Power Automate flow.
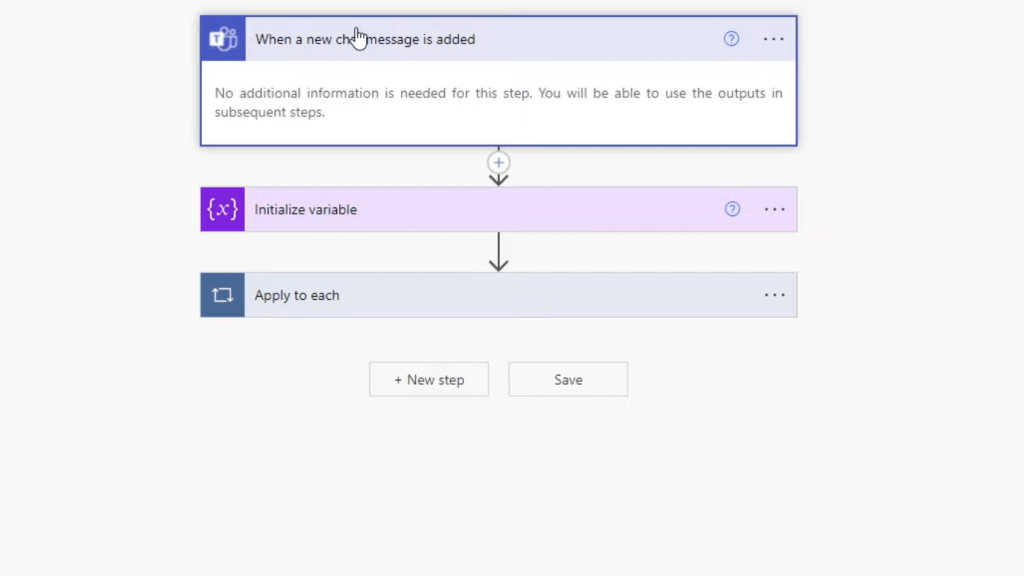
Next, we initialize the variable (which we’ll go through later), and then we get the message details. We need the message details because the dynamic content that’s produced by the first step does not produce the actual message contents. It doesn’t produce the actual message itself.
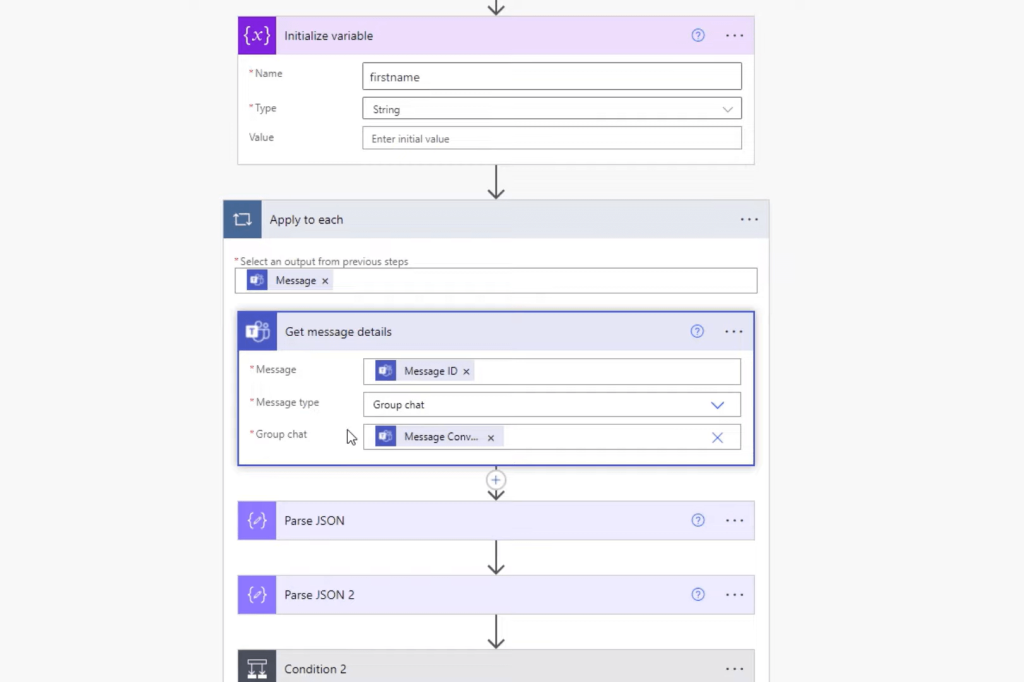
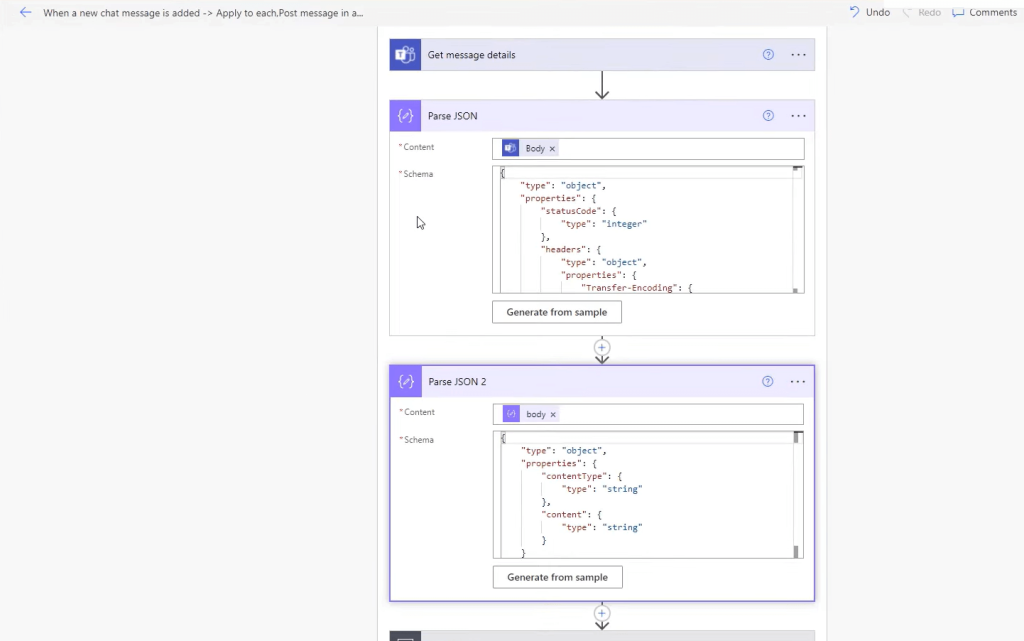
This then returns a big set of JSON object and you have to parse through it twice. If we go to Get message details, we can look at the output and you can see that these are all the details related to that message. Look how much Teams captures for your message.
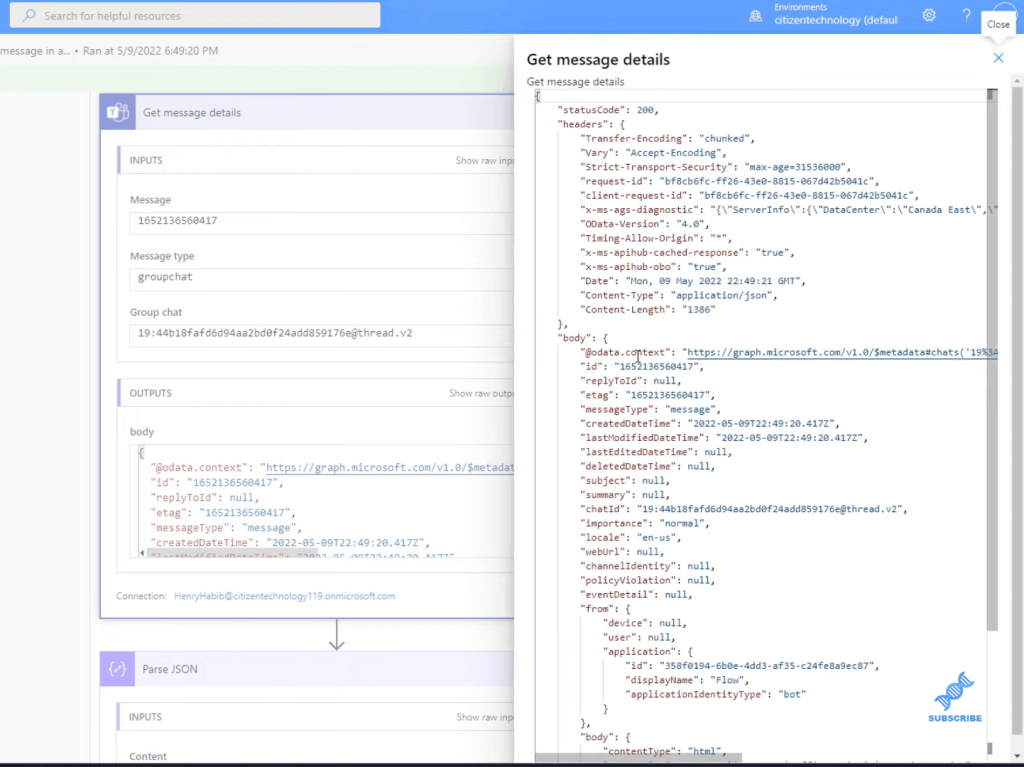
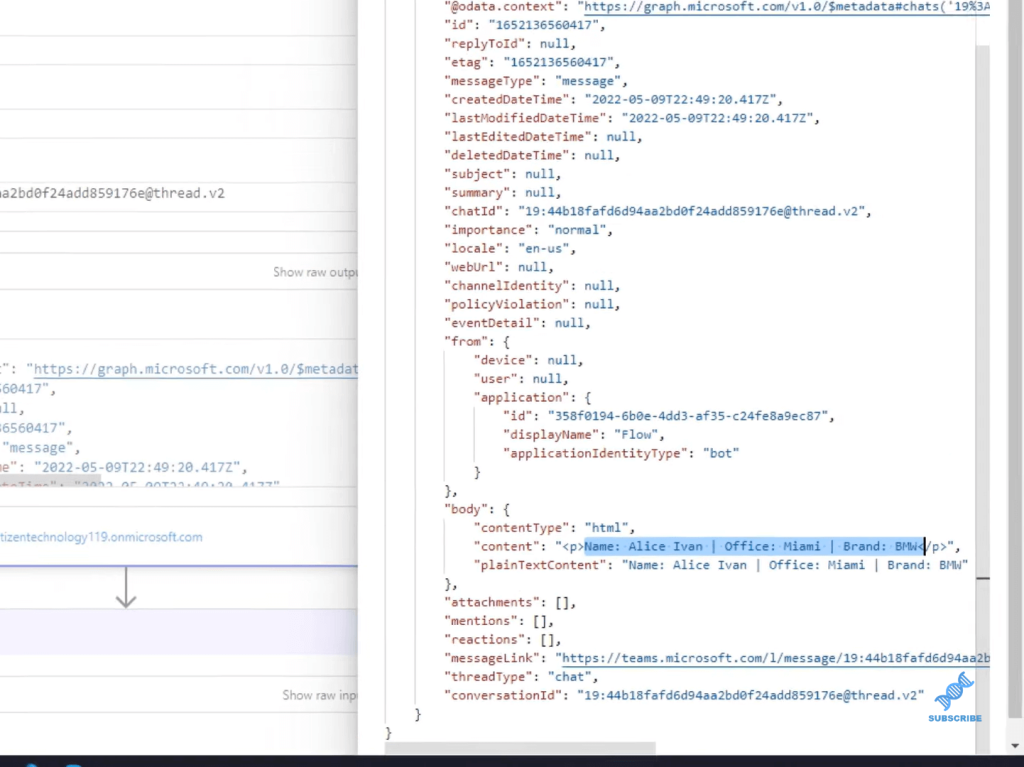
If we look inside the body of the body, and then inside the content, we’ll find what we need.
Let’s go back to our flow, where we parse the JSON first. The good thing is that this creates a dynamic content at the first level. However, it doesn’t create the dynamic content for two levels down, which is what we need.
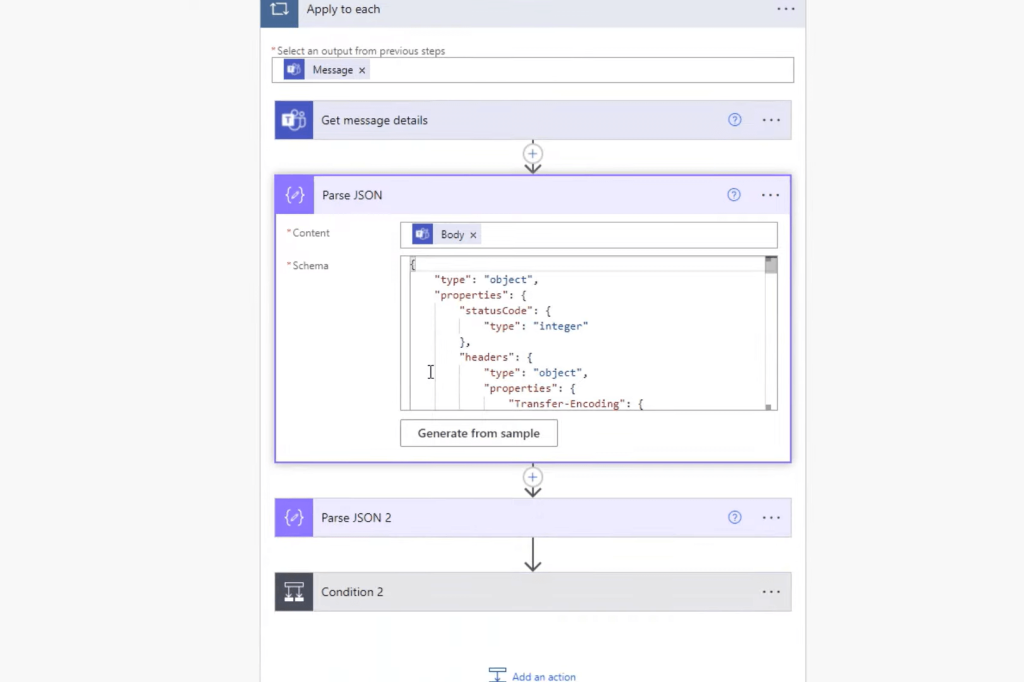
So then, we have to parse the JSON again.
Then, we go to our condition. Our condition statement says, only run this flow if the message starts with /get, otherwise don’t do anything, because we don’t want this message to run every single time.
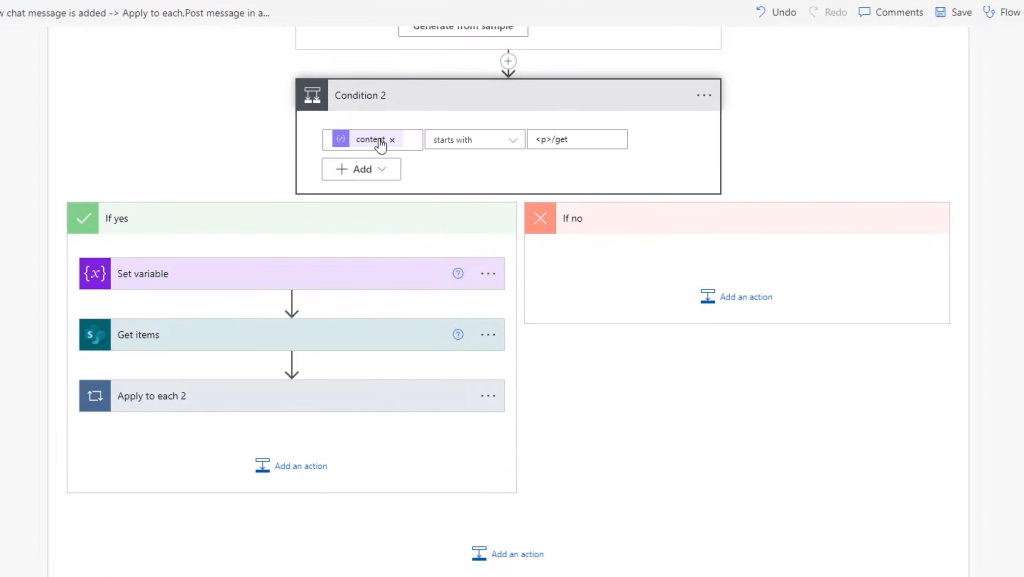
The next thing we’re going to do is if this is yes, then we’re going to set a variable called, firstname.
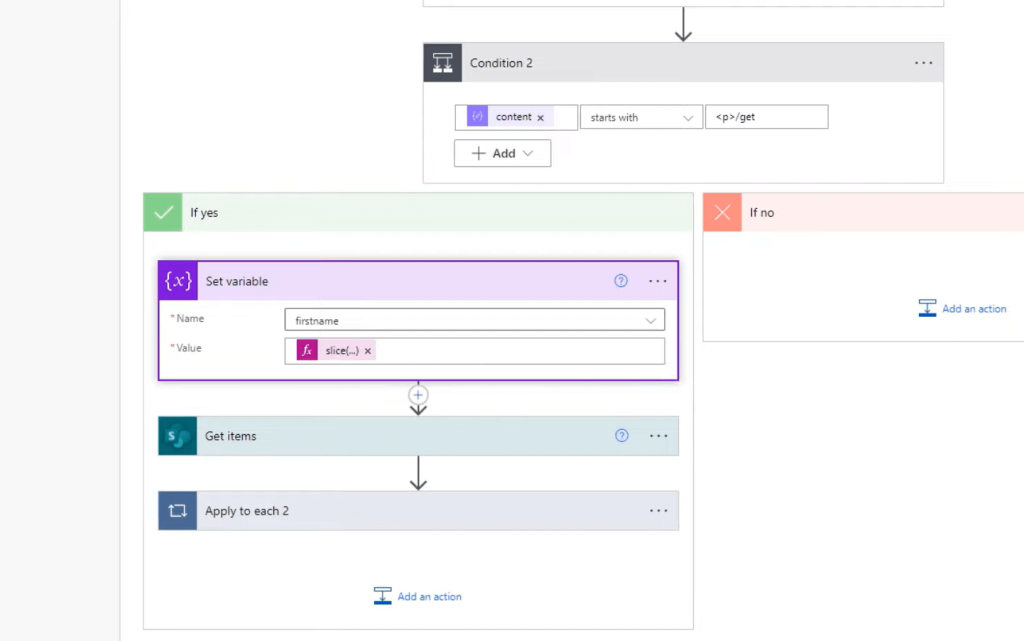
This is a very complex formula, but it’s a very simple string manipulation, or a slice of a string. We use the slice function. The slice function takes three arguments. The first argument it takes is a string. The next thing it takes is an integer, which represents the starting character, and then it adds 1 to it. The last argument is where the string should end, which is at the full length of that string minus 4.

After that, things are very simple. We then ask Power Automate to search Customers List. Field 0 is the First Name in the Customers List.
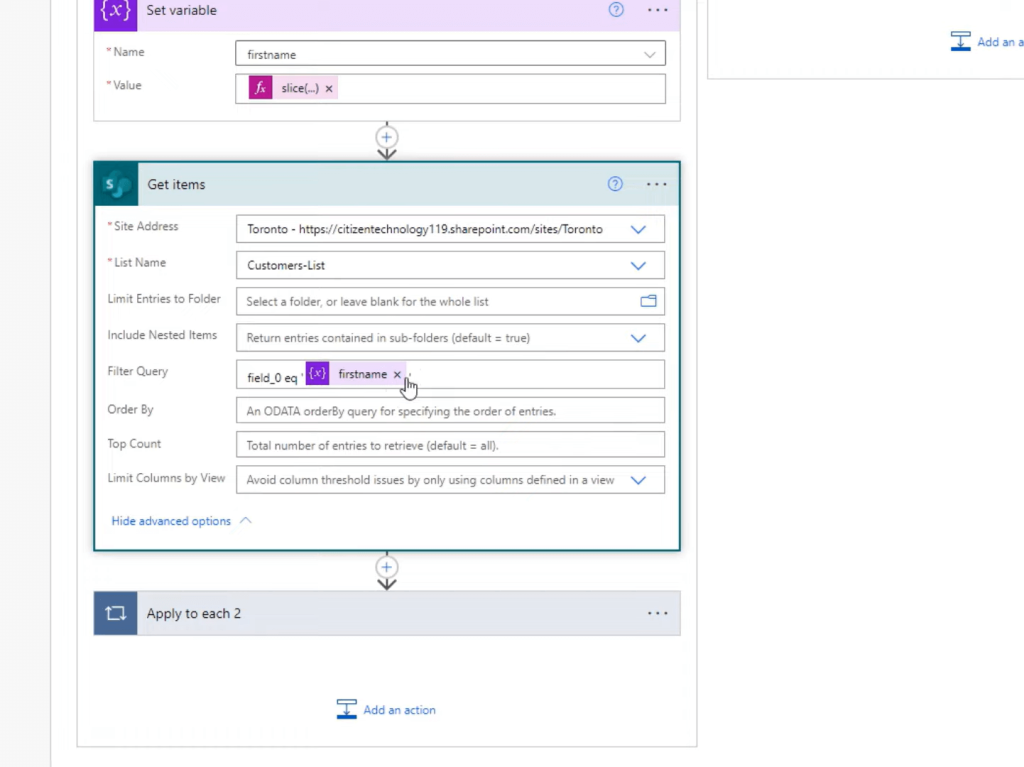
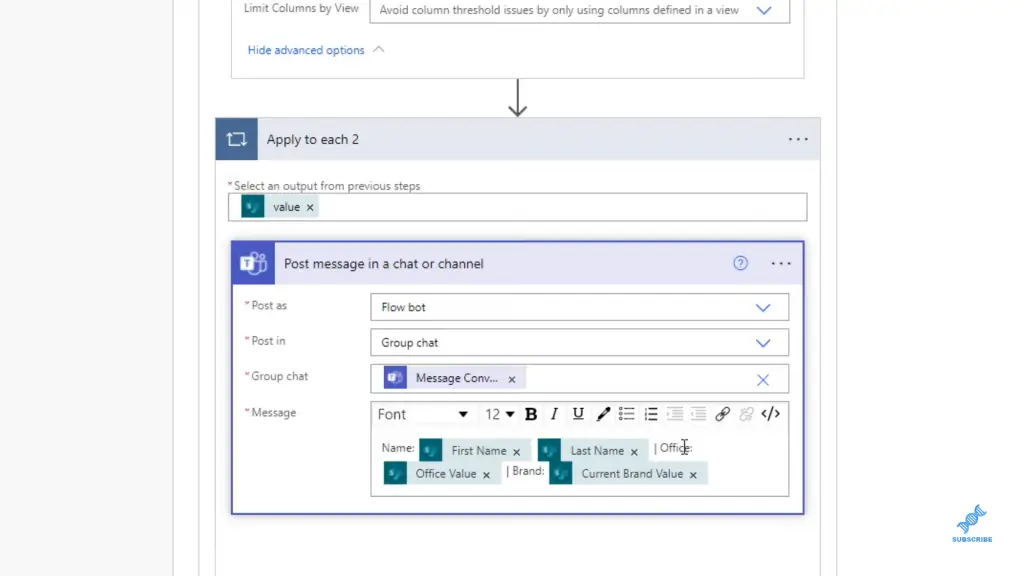
What it does is for each item that’s returned, where this matches (if there’s multiple analysis, for example, this will still work), you want to post a message in the chat or channel with the first name, the last name, the office, the office value, and the brand.
***** Related Links *****
Schedule A Desktop Flow To Run In Power Automate
Send Emails With Power BI & Power Automate Platform
Power BI Integration In MS Teams
Conclusion
That is the entire workflow. You can use these Teams chat functions with Power Automate very powerfully. I really recommend you do this because it’s just awesome and it’s a great way to show off your Power Automate with Teams capabilities. You can have a lot of fun with it.
Again, this is scratching the surface, but I hope you take this and really project it forward. In this tutorial, I’m assuming you have certain knowledge already of Power Automate. But if you don’t, there are a lot of tutorials on this website about Power Automate and there’s an entire course available as well. You can check out the links below for more related content.
All the best!
Henry
[youtube https://www.youtube.com/watch?v=dfodNoTEDCE&w=784&h=441]


