Power Automate offers a variety of connectors that we can use to create workflows. In this tutorial, we’ll familiarize ourselves with some built-in Power Automate Connectors that transform strings into another format. We’ll talk about Number Functions, Text Functions, and Date Time.
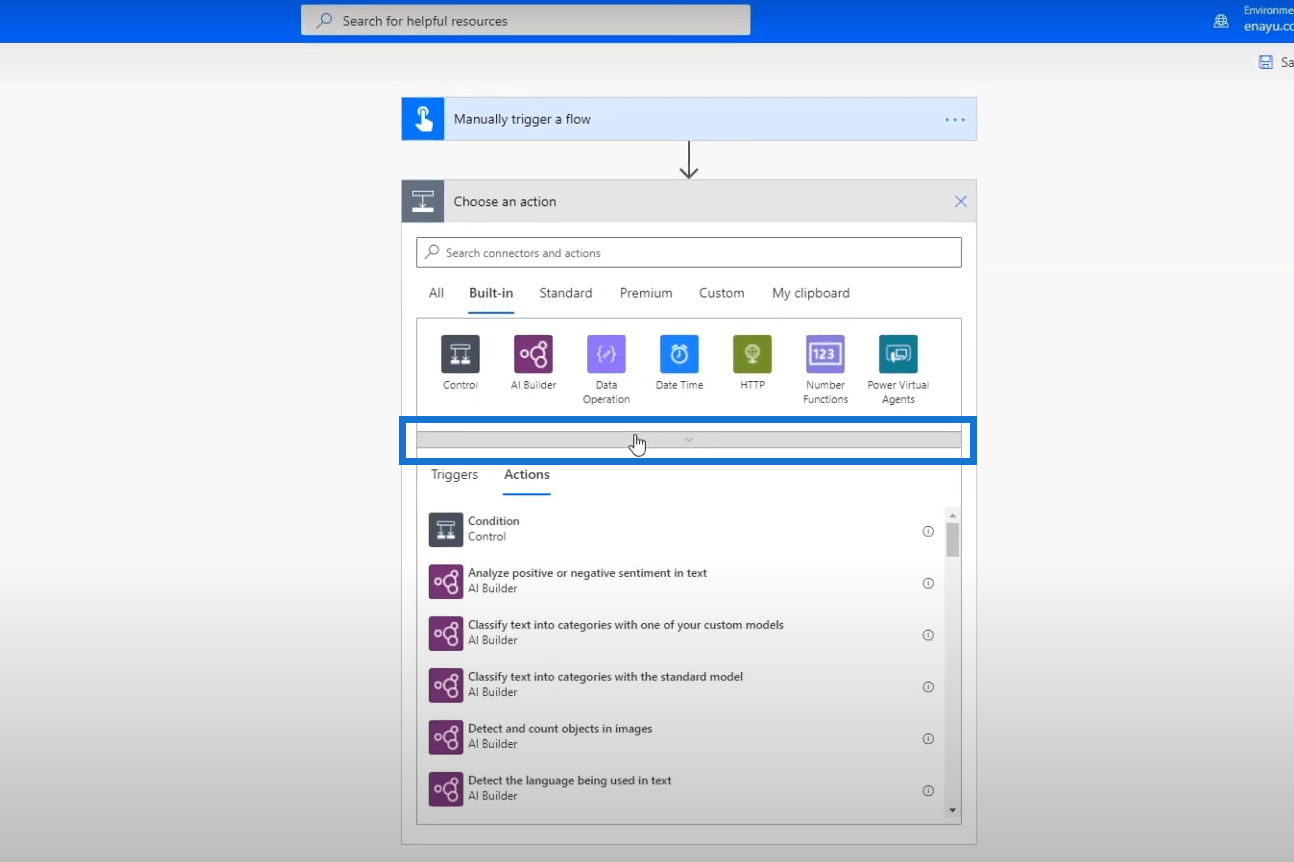
Using these Built-in connectors is quite easy. Just click the arrow bar to see all the available Built-in connectors.

Power Automate Connectors: Text Functions
Let’s click the Text Functions connector.
We’ll then see that there are two available actions – the Find text position and the Substring action.
We can click the icon alongside the action to see the description pertaining to that specific action.
Power Automate Connectors: Number Functions
We also have the Number Functions.
The main action for this connector is the Format number that’s basically for formatting numbers using a format string.
Power Automate Connectors: Text Functions
The Date Time connector is used to format date and time.
This connector has 6 different actions: Add to time, Convert time zone, Current time, Get future time, Get past time, and Subtract from time.
For example, let’s click the Convert time zone action.
We’ll then see the steps to easily format time zones.
Using Transformative Power Automate Connectors In A Flow
Let’s now try to use the Text Functions connector. For this example, let’s create a flow where the user needs to enter an input.
After that, click Add an input.
These are the different types of user inputs that we can use on our trigger.
Click the Text option.
Then, the Input field will be displayed.
In the given set of built-in connectors, click the Text Functions.
Then click the Substring action.
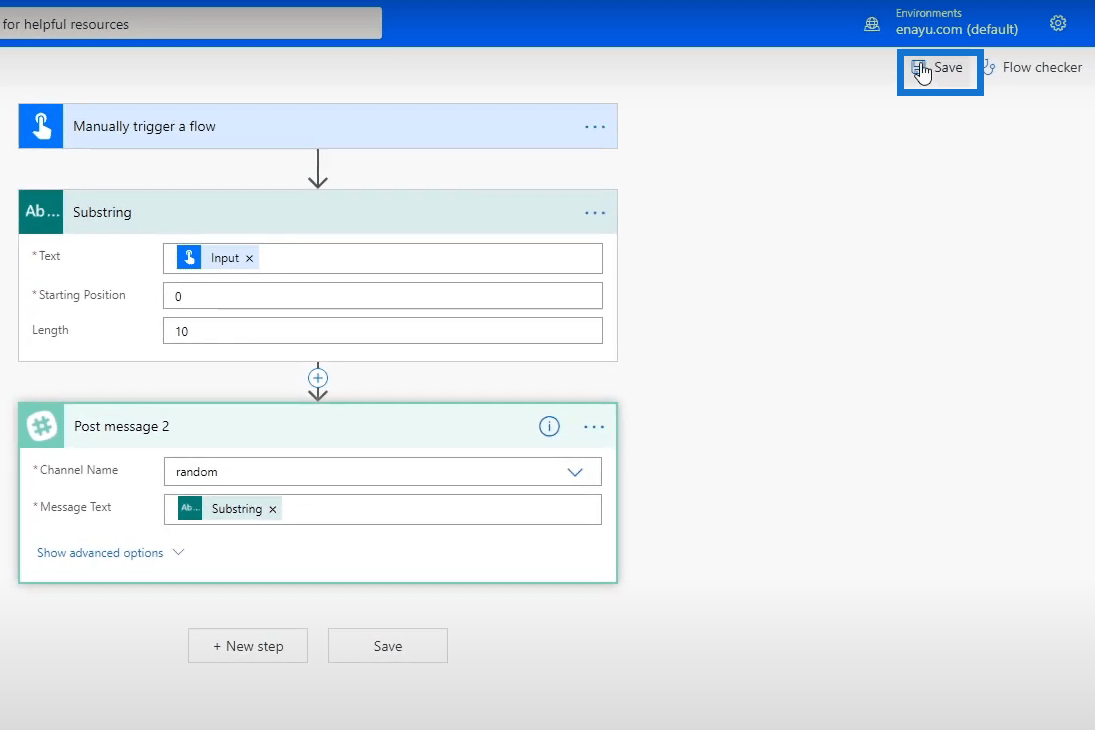
For the Text field, choose the variable Input under the Dynamic content tab.
After that, type 0 into the Starting Position field and type in 10 at the Length field. This will allow us to get the first 10 characters of the input that the user types in.

Next, click the New step button.
Let’s search Slack in the Search field and click the Slack connector.
Choose the Post message action.
After that, choose random for the Channel Name field.
For the Message Text field, click the Dynamic content variable Substring.
Lastly, click Save.

Testing Transformative Power Automate Connectors In A Flow
Let’s now test our flow and see how it works.
Choose the I’ll perform the trigger action option. After that, click the Save & Test button.
Then click the Continue button.
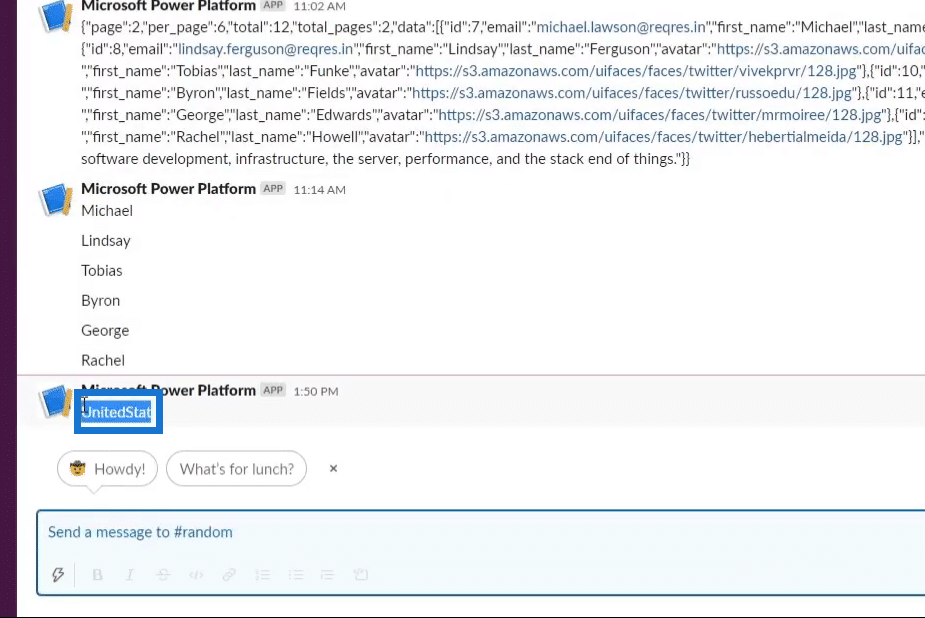
Let’s type “UnitedStatesofAmerica”. After that, click the Run flow button.
Once the flow runs successfully, click Done.
Go to Slack and we’ll see that our input appeared with only 10 characters as specified.

Using The Substring Function
We also have the option to not use the Substring variable. Instead, we’ll use the substring function. Let’s try to do that by editing our current flow.

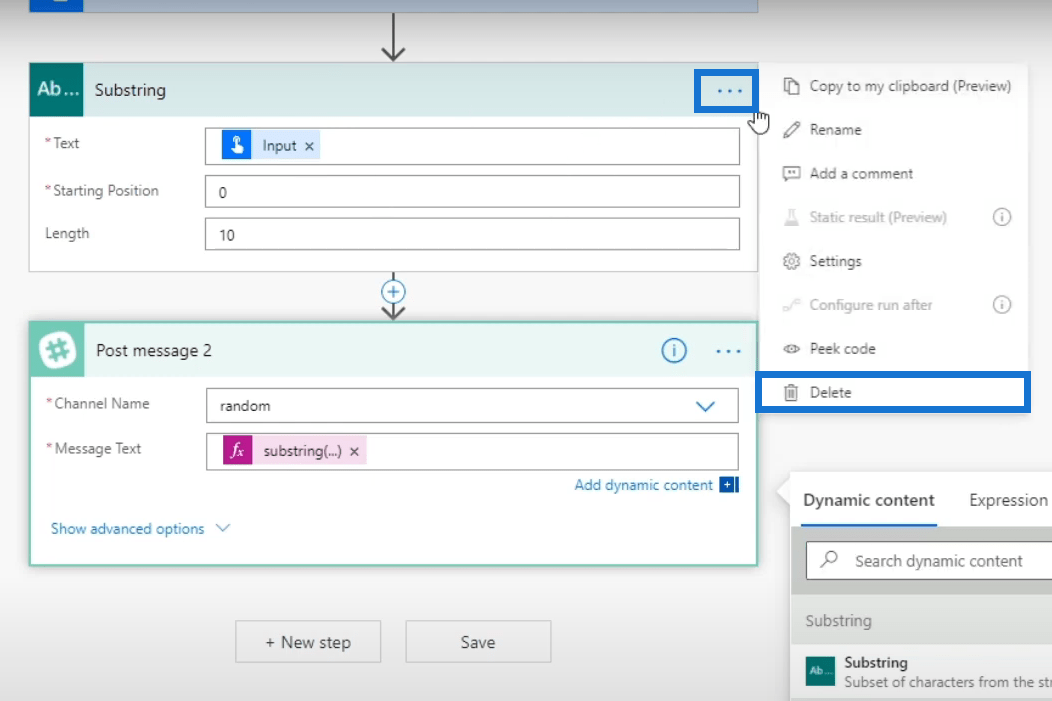
Remove the Substring variable.
Then, click the Expression tab. Search and choose the Substring function.
When clicked, we’ll see the Substring function keyword that’s already provided for us in the Function field.
Place the cursor in the middle of the parenthesis and click Dynamic content.
We need to use the same input that the user enters. So, let’s choose the Input variable.
After that, type in the starting point (0) and the length (10). Make sure to add a comma and a space right after each content.
Lastly, click OK.
Since we don’t need our Substring connector anymore, we can just delete it.

A dialogue box confirming the action will pop up. For that, just click OK.
Testing The Flow
Let’s now click Test.
Then click Save & Test.
Type in “UnitedStatesofAmerica” in the Input box field and click Run flow.
Lastly, click Done.
In our Slack, we’ll see that our input appeared similarly to our previous output even though we used the substring function instead of the Substring connector.

***** Related Links *****
Power Automate Actions | A Deep Dive Tutorial
Microsoft Flows: Editing And Tracking In Power Automate
Power Automate Expressions – An Introduction
Conclusion
There are lots of available Power Automate connectors that are designed for user-friendliness. You can definitely use them and they’re much easier to use in workflows. However, you can also simply use Expressions, which can do the exact same thing.
If your goal is to get certified as a Power Automate user, I highly recommend you to be equally familiar with both the built-in connectors and expressions.
All the best,
Henry


