
In this tutorial, we’re going to talk about how to create the detail screen and form screen in Power Apps from scratch.
Because Power Apps was built for ease of use, it readily comes with templates that has existing screens, galleries and other basic elements. However, there will be times when you’ll need to build your own app from scratch knowing that you might have unique goals in building your app.
This is why it’s important to understand the building blocks that make an app. The screen is one of them.

Creating The Detail Screen In MS Power Apps
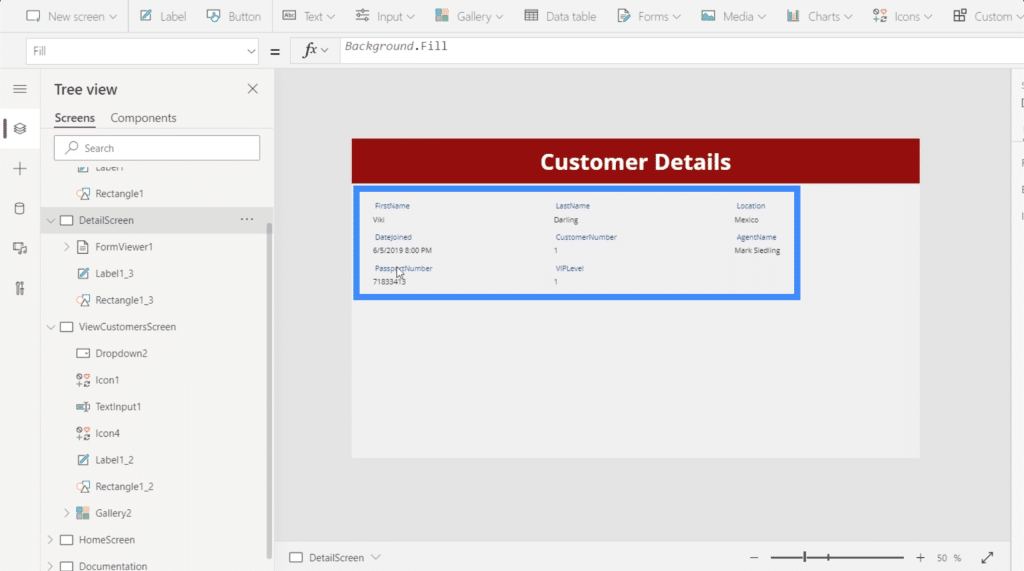
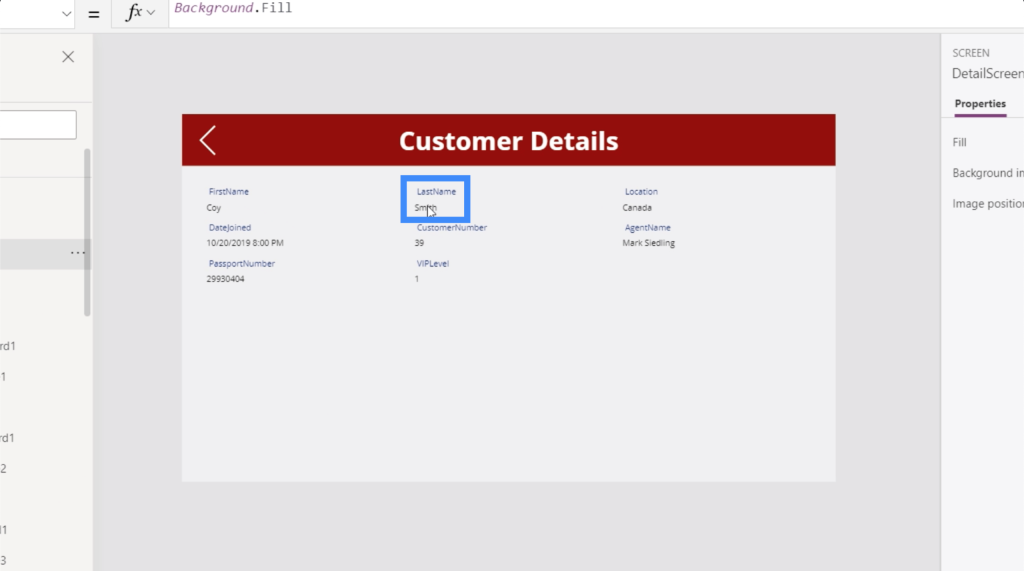
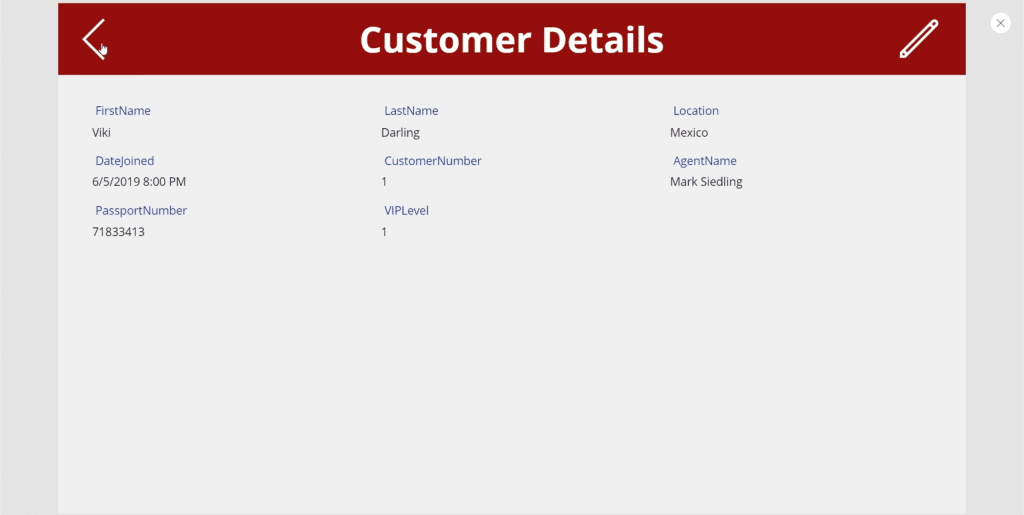
A detail screen contains all the information that comes with each record from your data source.
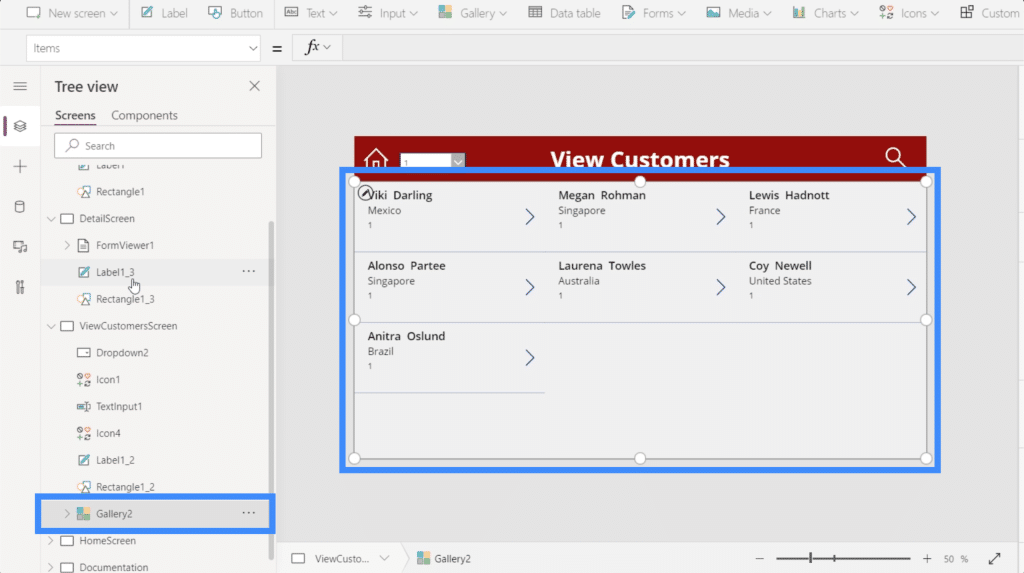
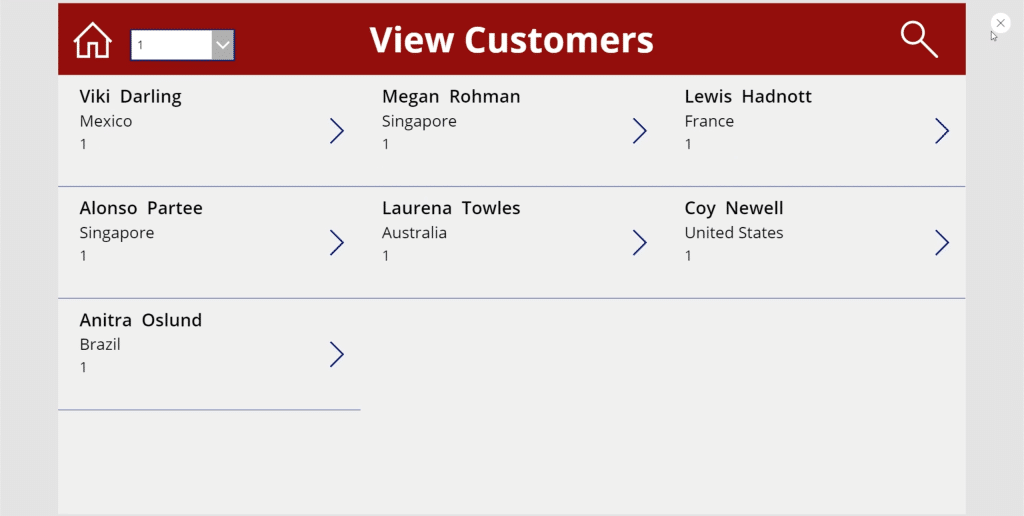
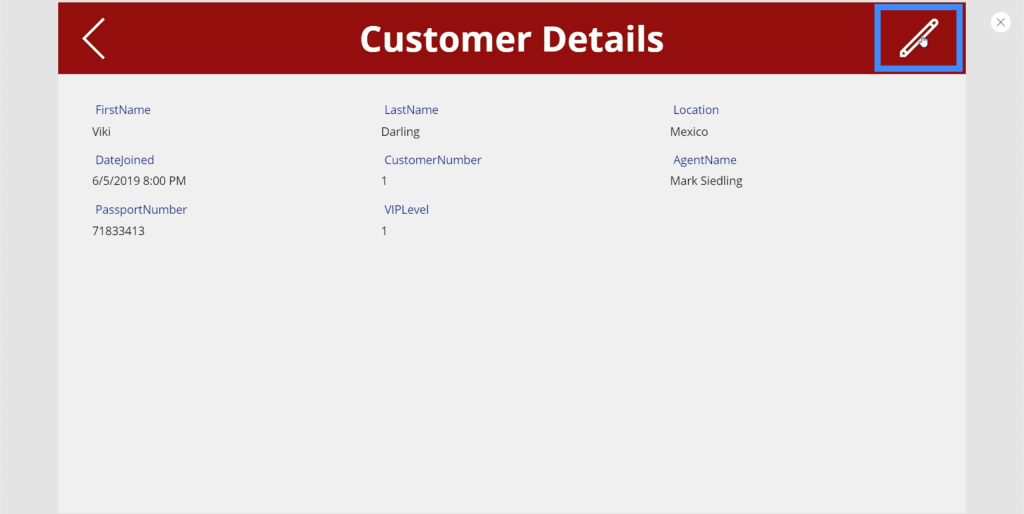
In the example below, you’ll see a gallery displaying different records. The gallery only contains a preview of that record. In this case, you’ll see the first name, last name, location and VIP level if you look at the entry for Viki Darling.
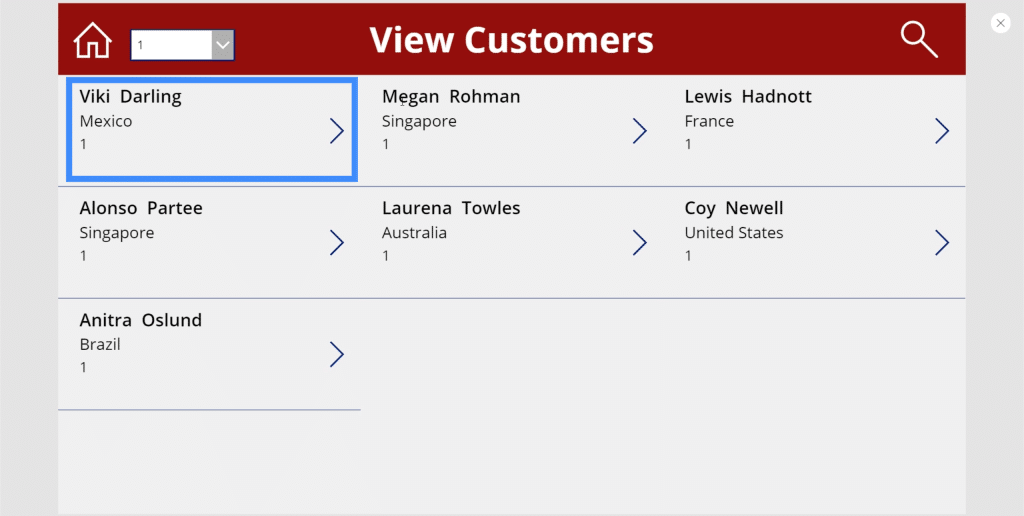
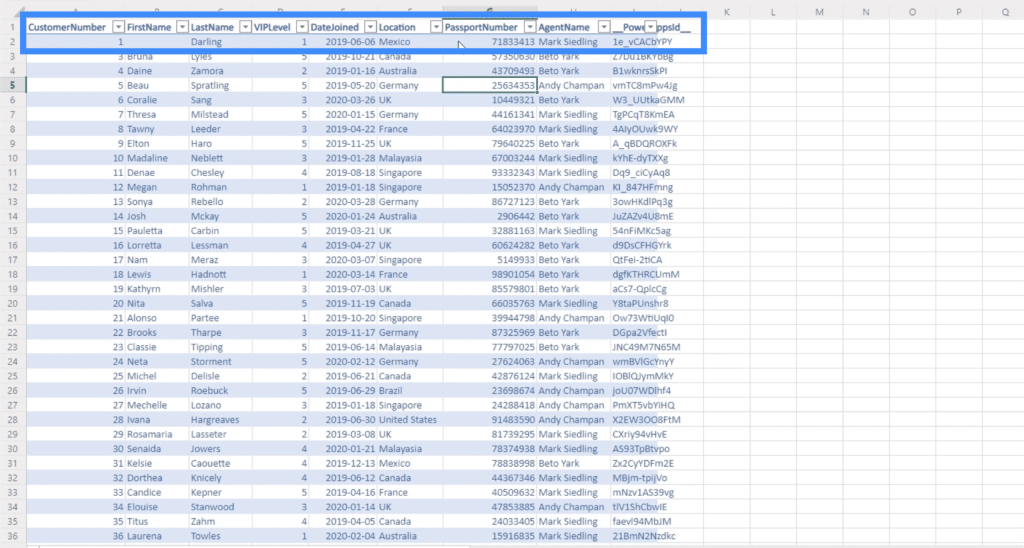
But this entry comes with a lot of other details. If we look at the data source, we’ll see that there’s also a customer number, date joined, passport number and agent name.
That’s what the detail screen is for. It’s a screen users will land on the moment they click any entry point on the gallery. This is where they’ll see all the other details that are not visible in the gallery.
To start creating the detail screen, we’ll go back to the MasterScreen and duplicate it.
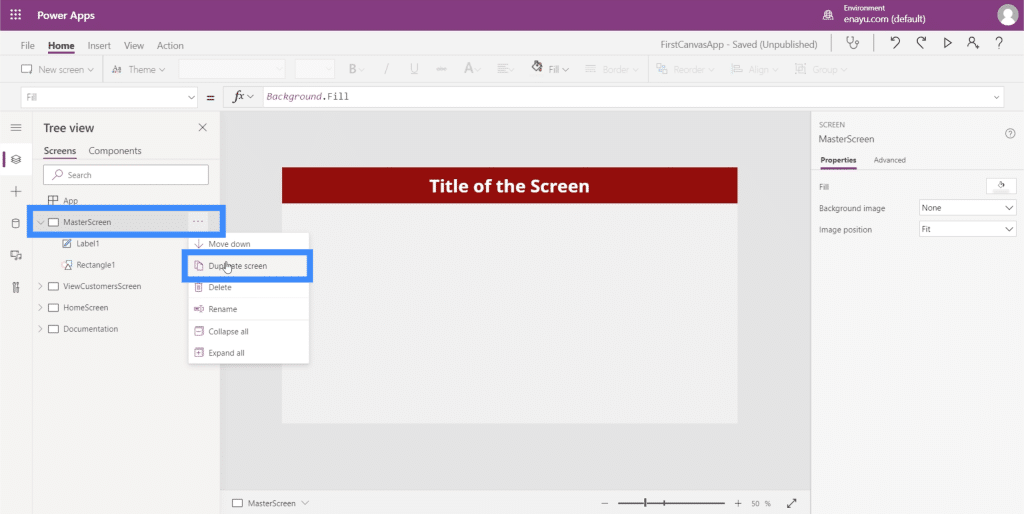
Starting off from a master screen was something we discussed in a tutorial about how to create an app from scratch. Having a master screen that contains the basic elements of your app makes it easy to keep all of your screens uniform in terms of appearance and layout.

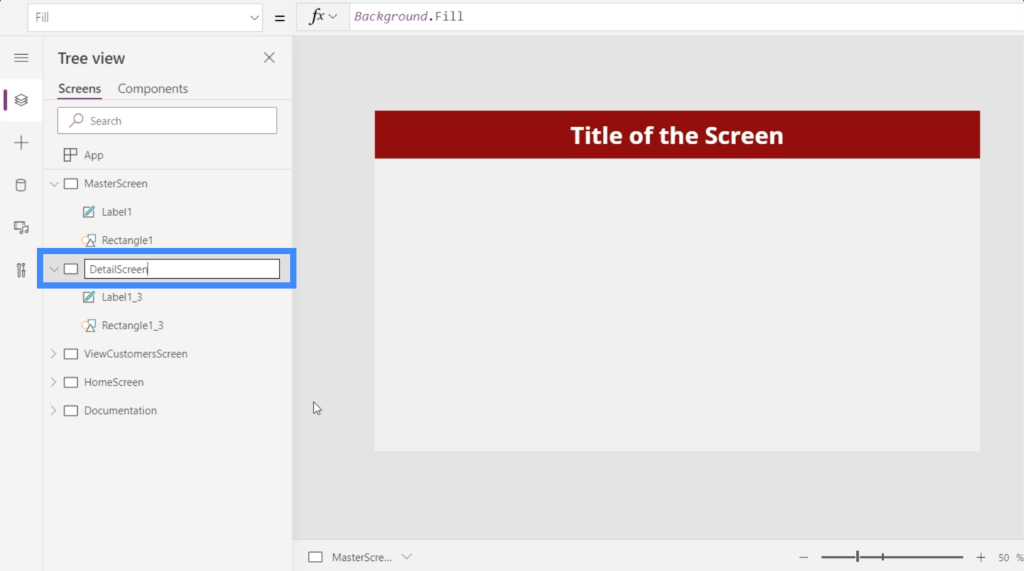
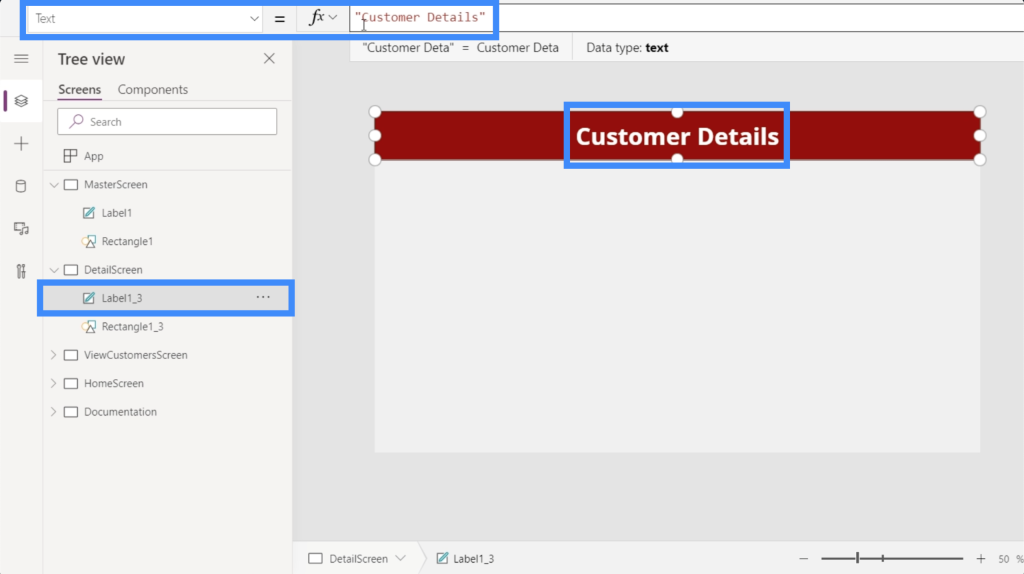
Let’s rename the duplicate screen as DetailScreen.
Let’s also change the label on top and write Customer Details.
Although we’re creating this screen from scratch, there’s no need to manually add every detail. Power Apps has automated that entire process for us.
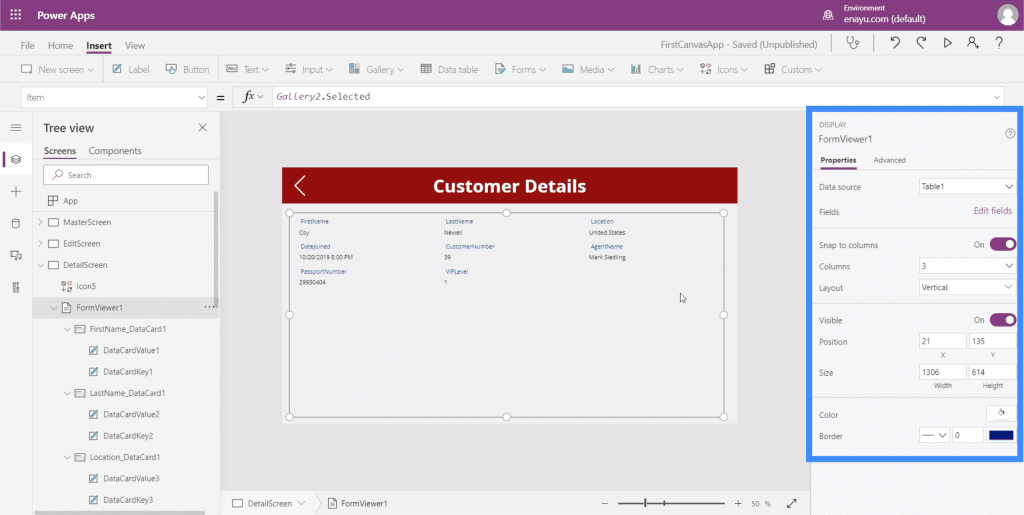
We’ll start off by adding a display form, which can be done under the Insert ribbon.
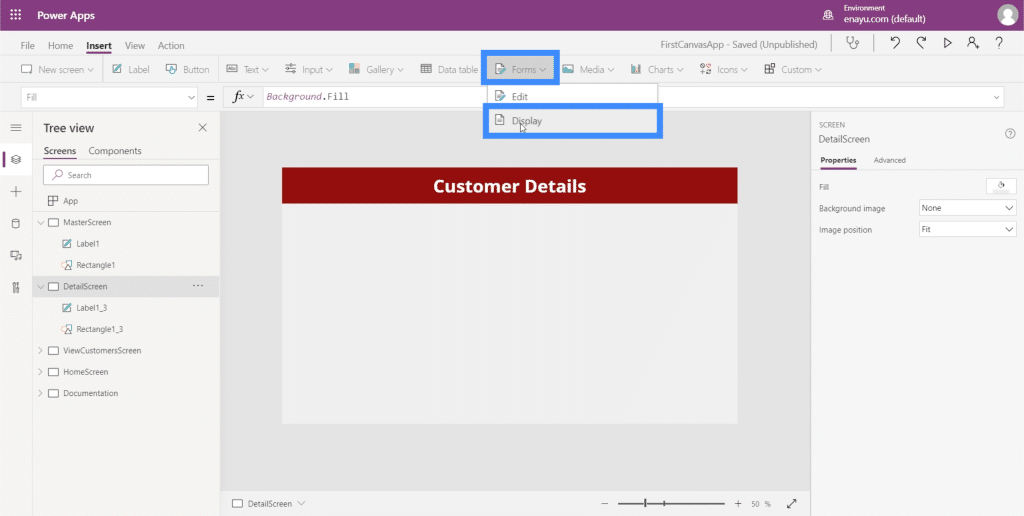
Since this screen won’t really have any other use other than displaying the customer details, we can let the form populate the entire screen by dragging the corners.
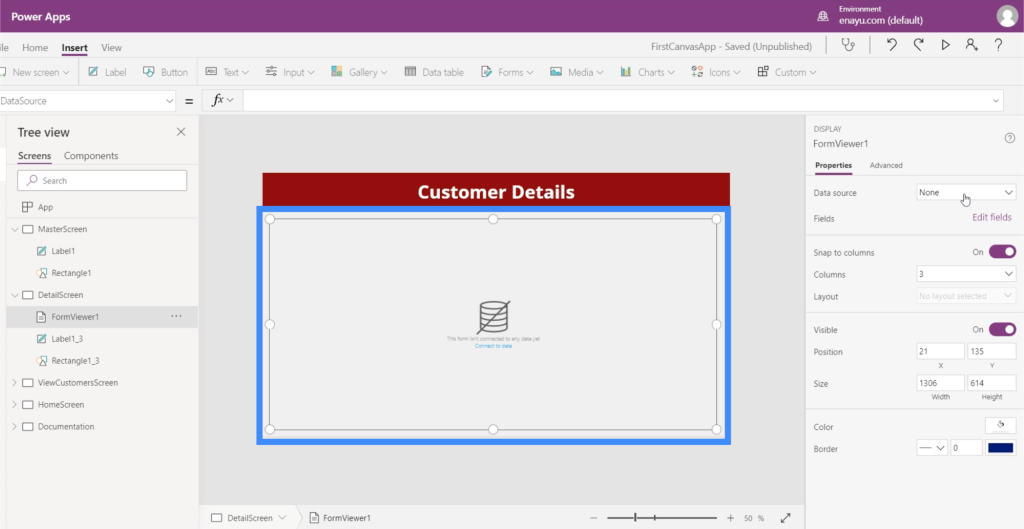
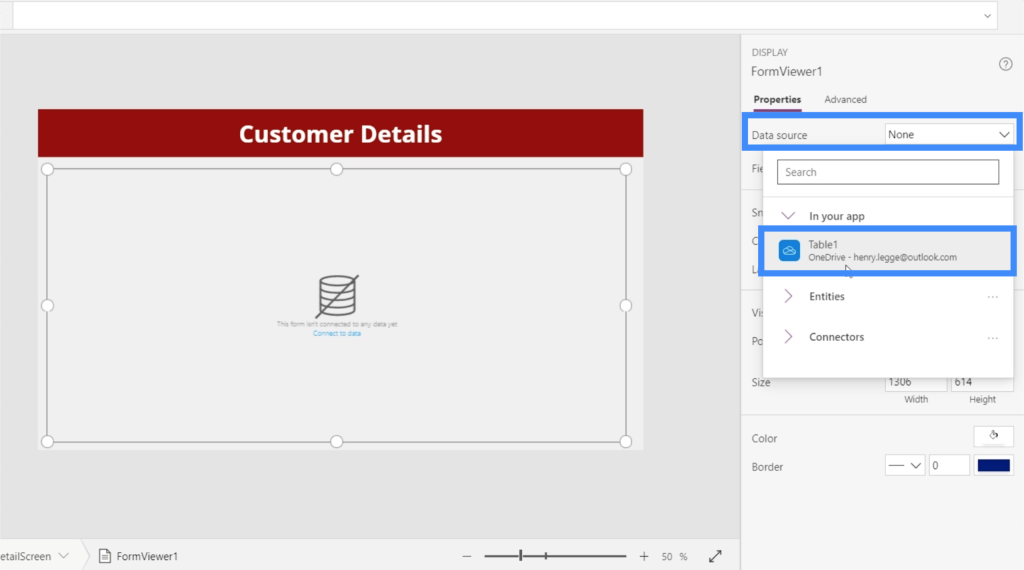
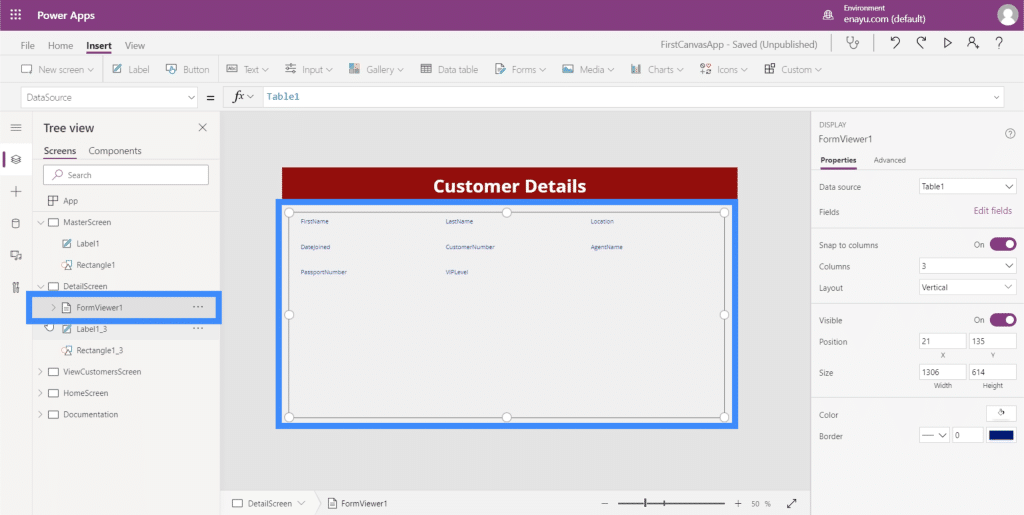
The detail screen needs a data source. We can link a data source here on the right pane under Properties. For this app, we’re using Table1.
Now that we have a data source where we’re pulling the details from, it’s time to decide what details we want to show up on the screen. That can be done by clicking on Edit Fields.
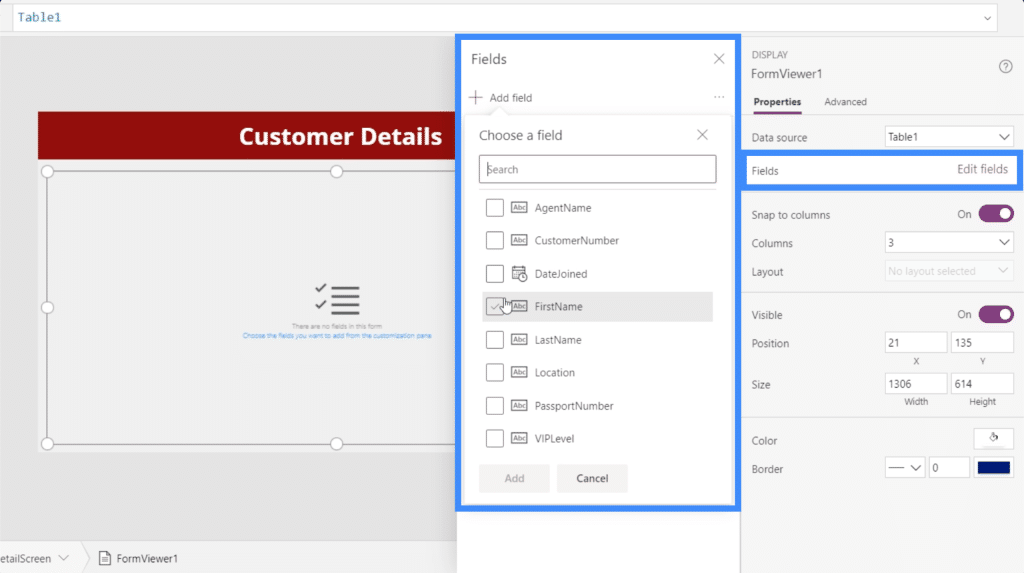
We can add fields by ticking off every field that we feel is applicable for our purpose. In this case, let’s add all of these fields in.

Power Apps will then load all of the fields we chose into the form we just created, which is FormViewer1.
If we click on it, it shows that it has automatically set up data cards for each of the different columns in our data source.
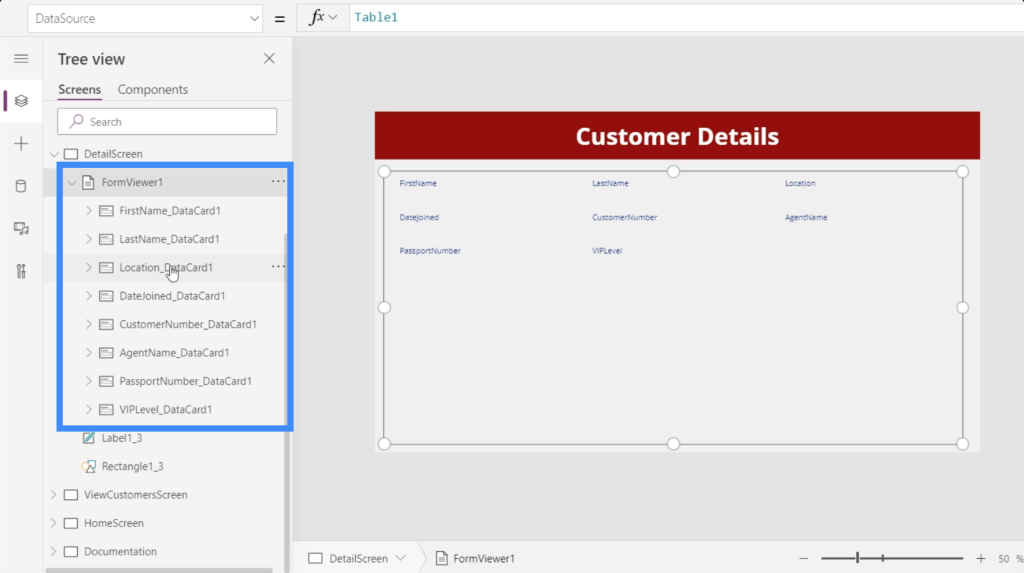
And for each data card, it has actually set up a key, which contains what the data card is called.
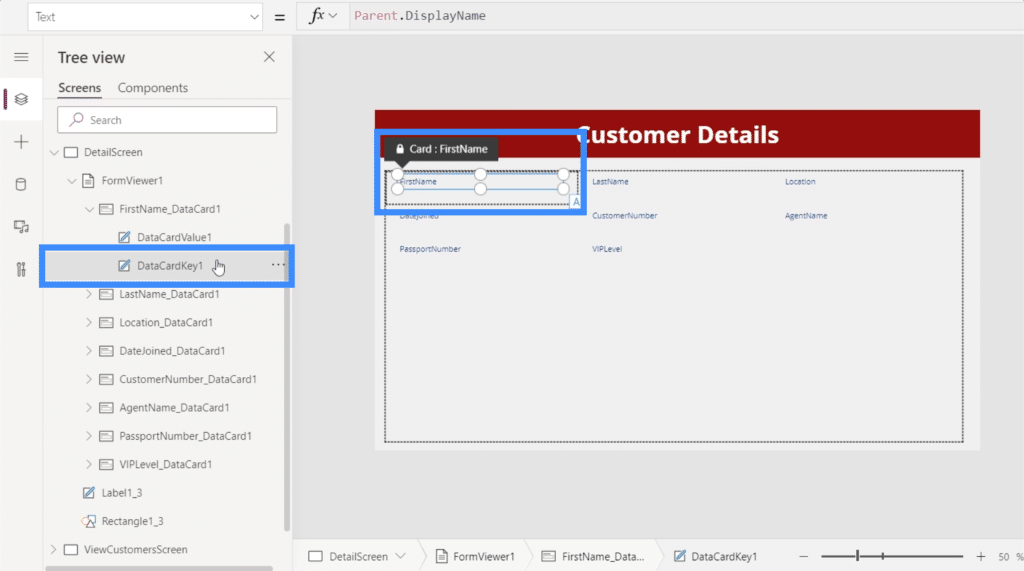
It has also set up a value, which will show the actual value associated with that column.

At the moment, this form does not display any values yet. That’s because we haven’t linked our gallery to the DetailScreen yet. Again, the goal here is for the details to be displayed only after a record has been chosen from our gallery.
Linking The Gallery To The Detail Screen
The great thing about galleries in Power Apps is that it has a property called Selected. It basically links the gallery to the detail screen so that every time we select a record in the gallery, it only displays the details for that specific entry.
To do that, we’ll highlight FormViewer1 and go to the Item property.

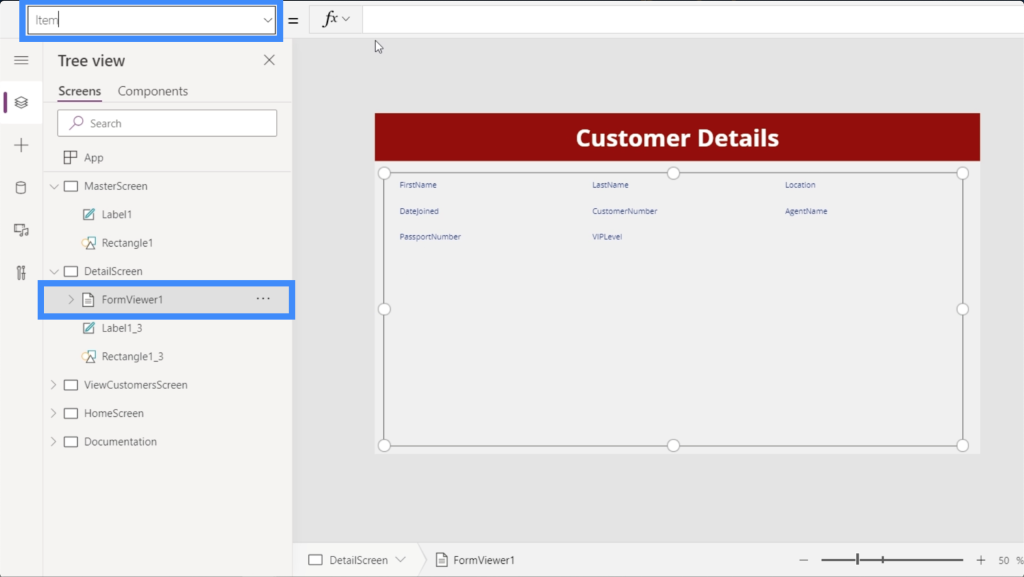
Make sure that you’e referencing the right gallery here, especially if your app uses multiple galleries. In this case, we want to use Gallery2.
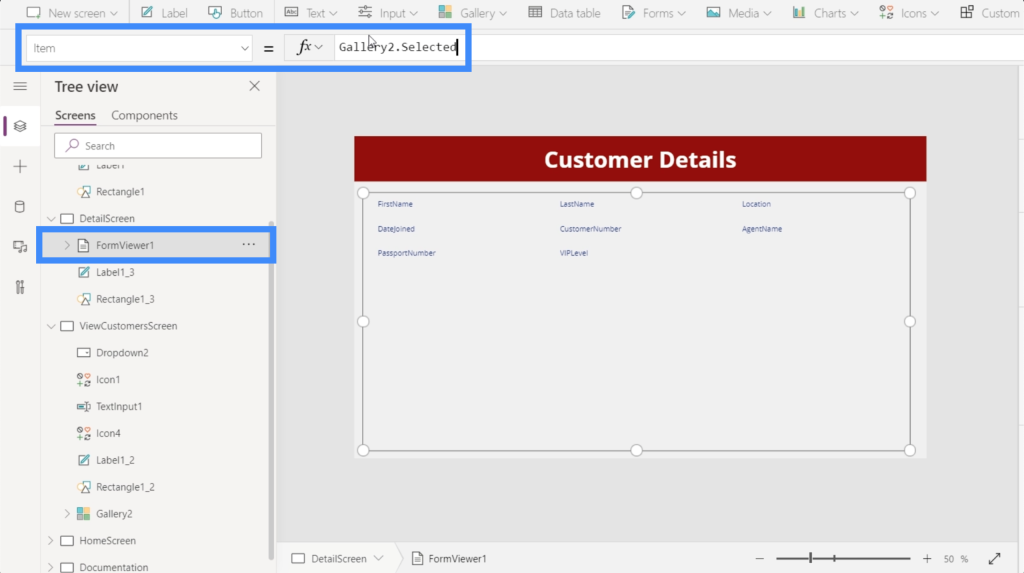
Going back to the detail screen’s formula bar, we’ll type in Gallery2.Selected and hit Enter.
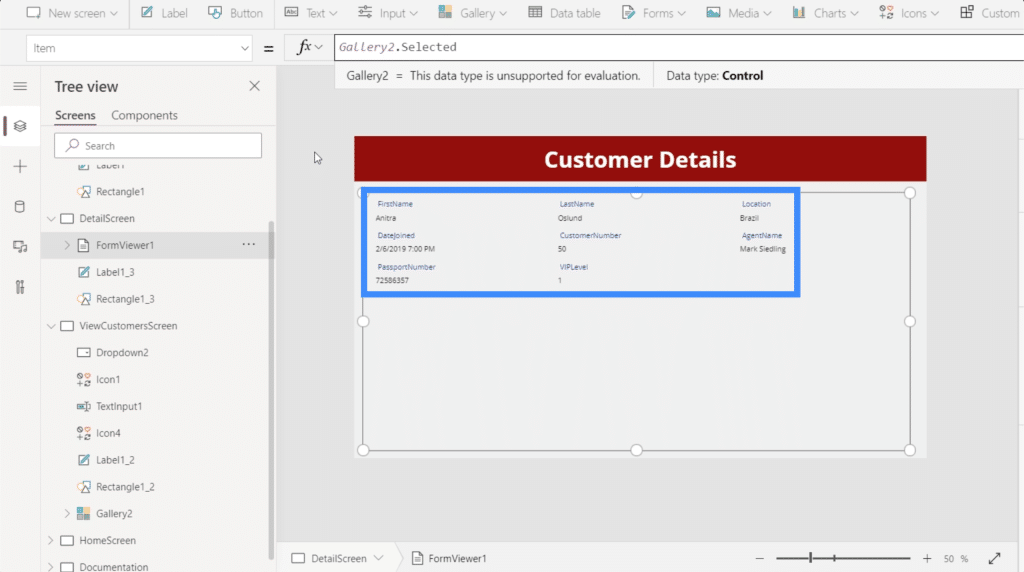
Now, we’re seeing details here coming from whatever was last selected on the gallery.
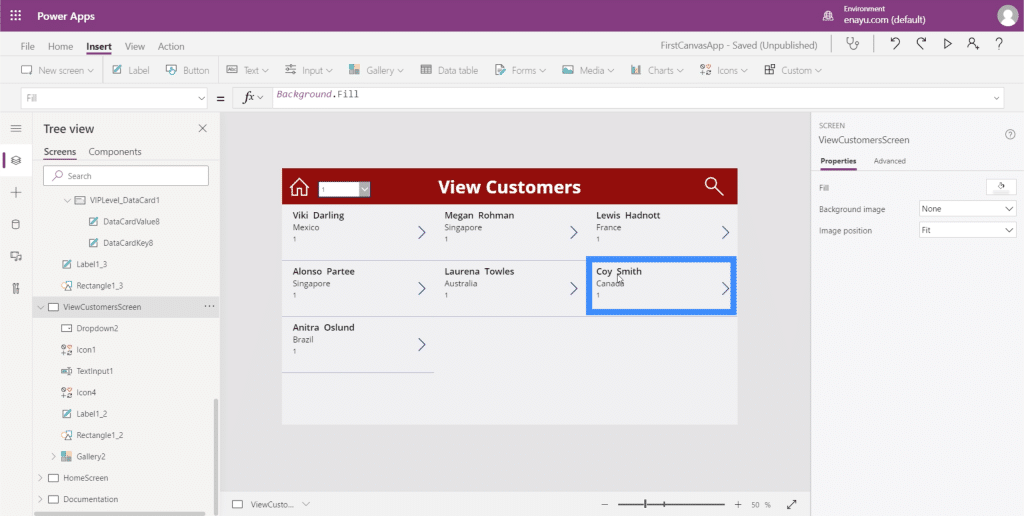
Let’s go back to the View Customers screen and choose Viki Darling from our gallery.

After clicking on that, you’ll see that the details on the detail screen have also changed and are now displaying information for Viki Darling.
This emphasizes the relationship among these screens and the elements in it. The fields in the detail screen are driven by the item property in the form viewer, which, in turn, is driven by the selected record in the gallery.
Navigating Between The Gallery And The Detail Screen
At the moment, we can only see the details if we choose an entry in the gallery and manually go to the detail screen. Ideally, users should automatically be led to the detail screen the moment they click an entry. So we’re going to add some navigation between the screens.
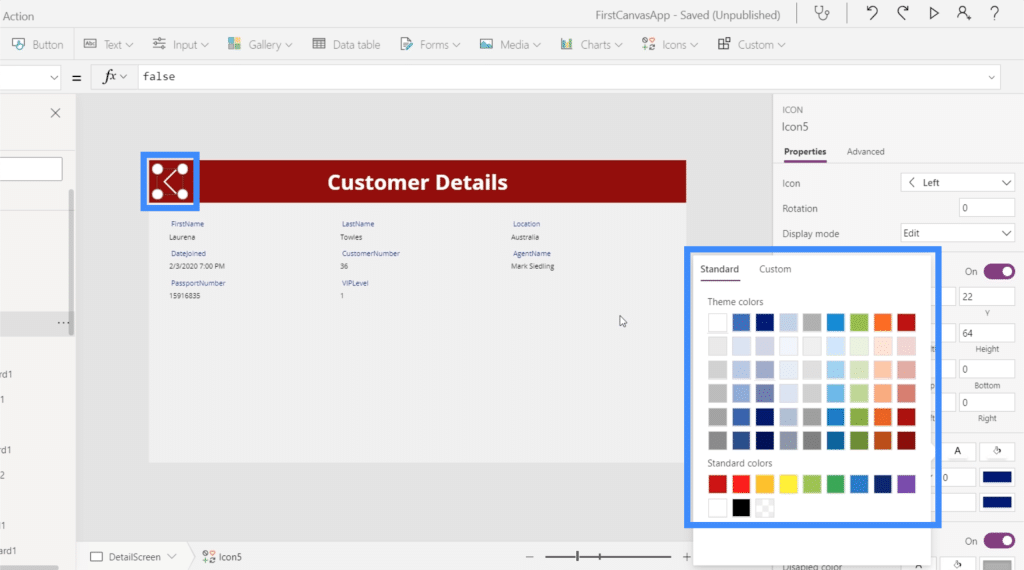
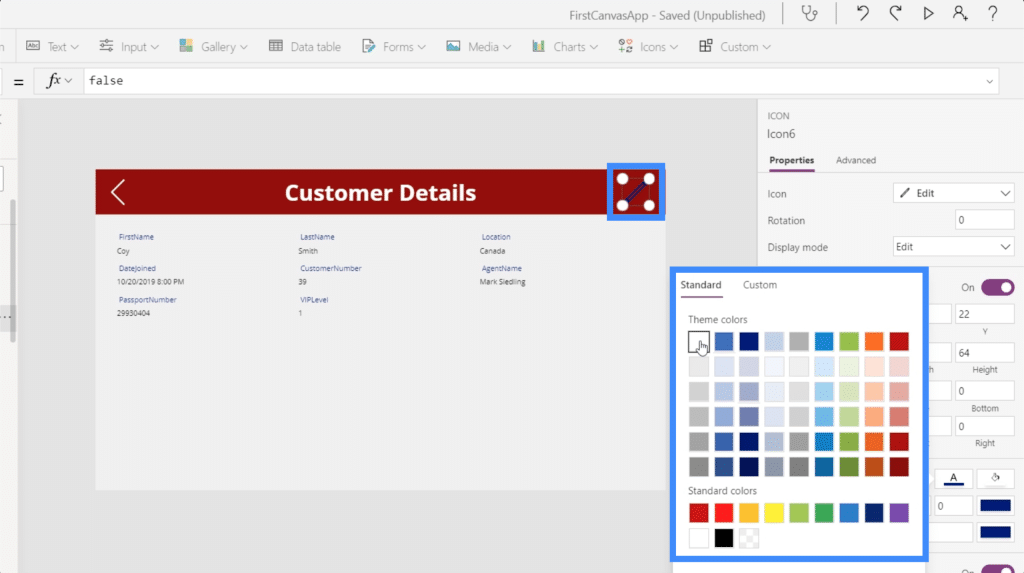
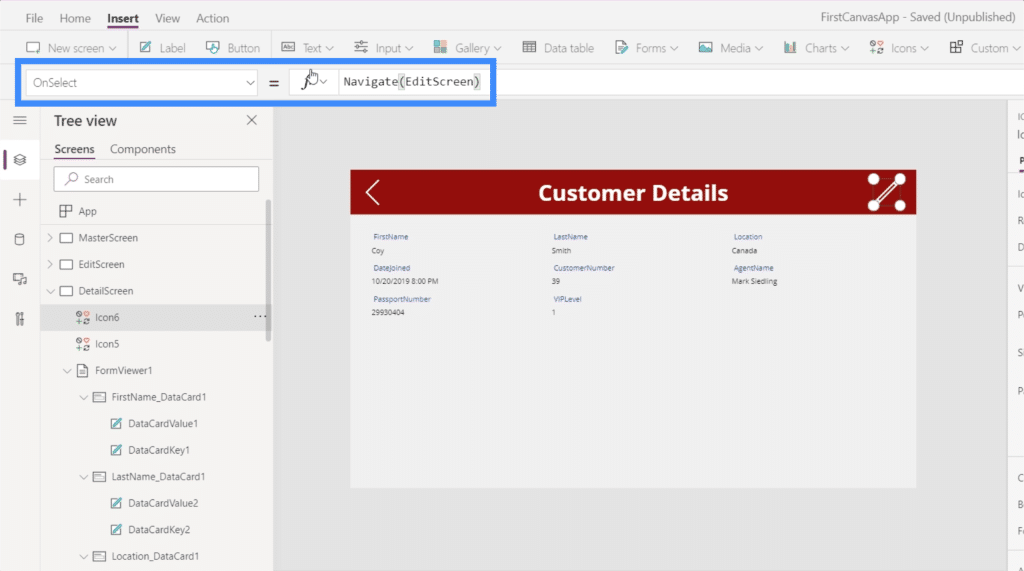
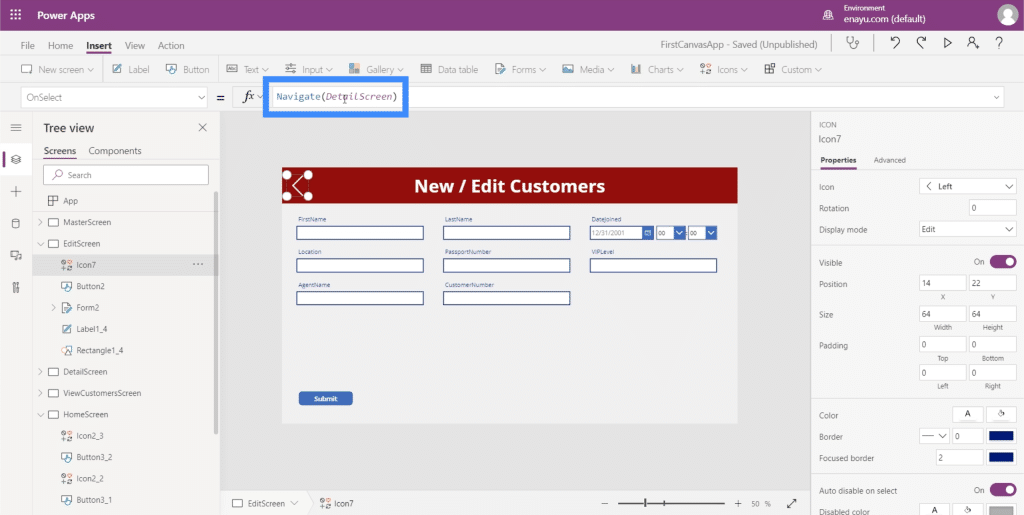
Let’s start with the navigation from the detail screen going back to the gallery. We’ll add a left arrow through the Icons button under the Insert ribbon.
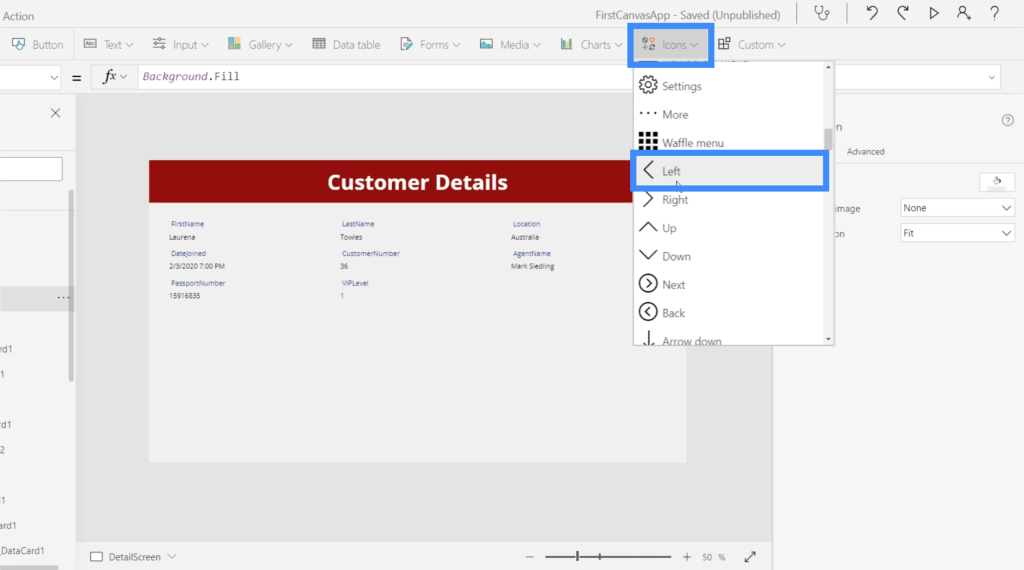
Let’s change the color to white to make sure it matches the other elements on the screen.
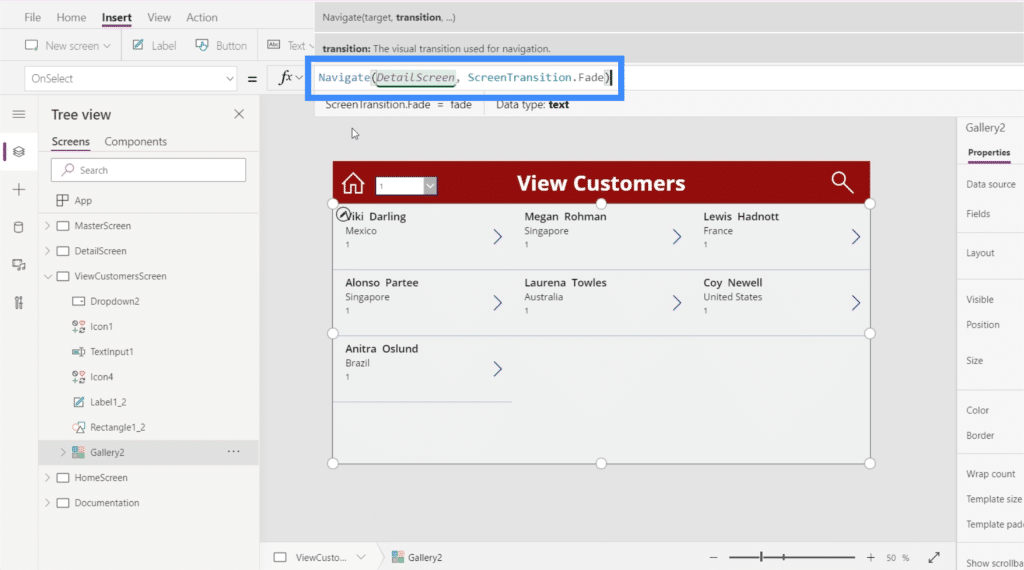
With the icon highlighted, let’s use the Navigate function and reference the screen where we want the icon to land. In this case, it’s the ViewCustomersScreen.
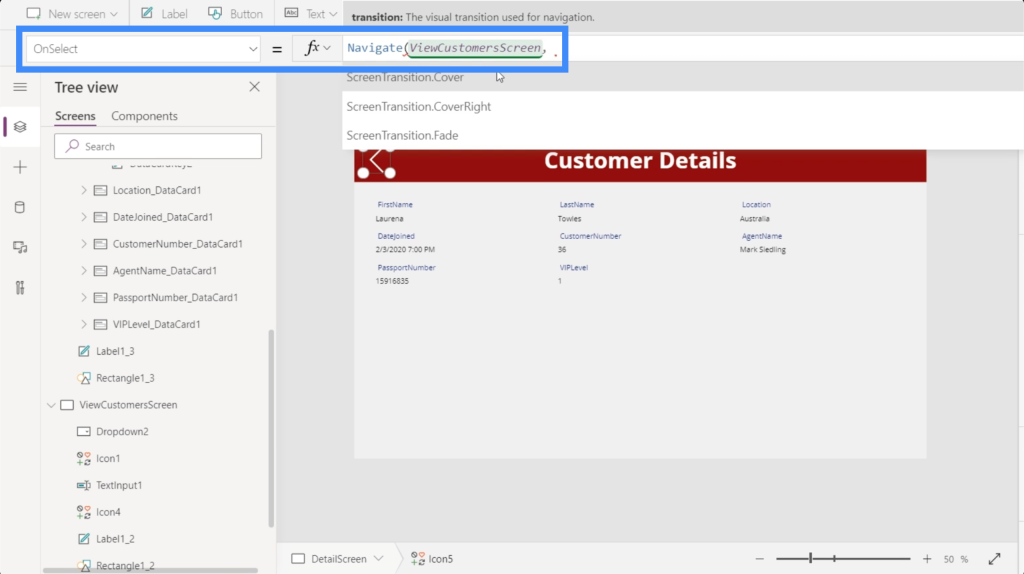
To make it more visually appealing as we move from one screen to another, let’s use the Fade transition.
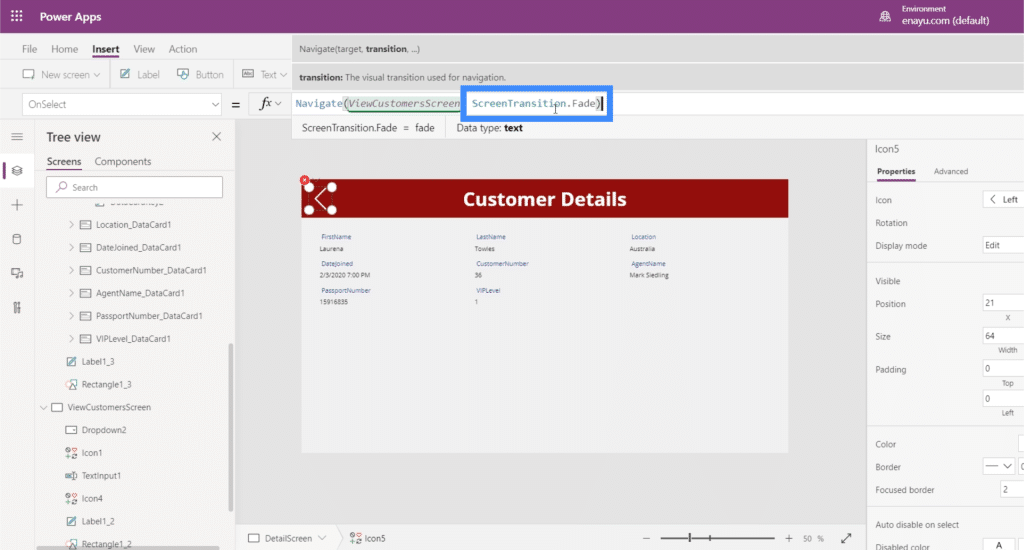
Then, we hit Enter to lock in that formula. Once we do that, all we need to do is click on the icon.
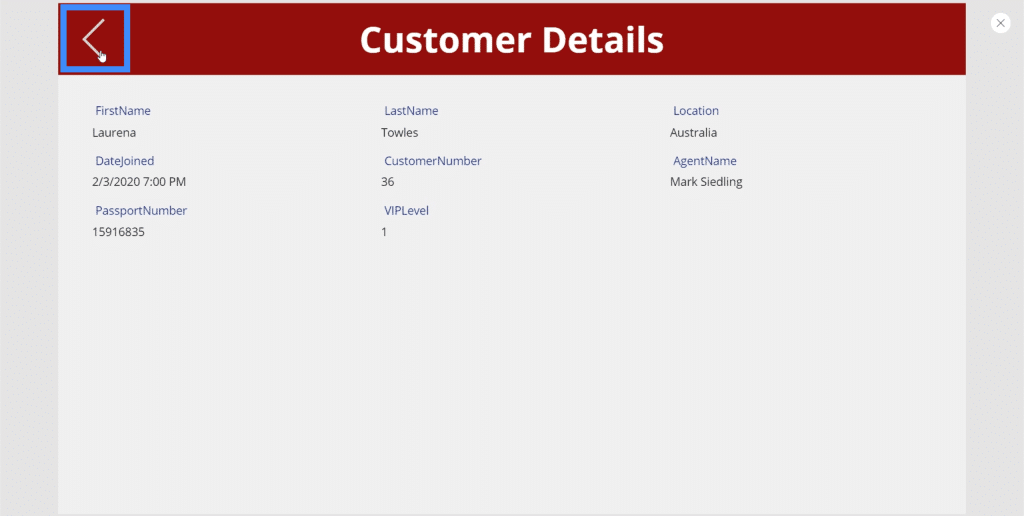
Doing that will lead us to the View Customers screen.
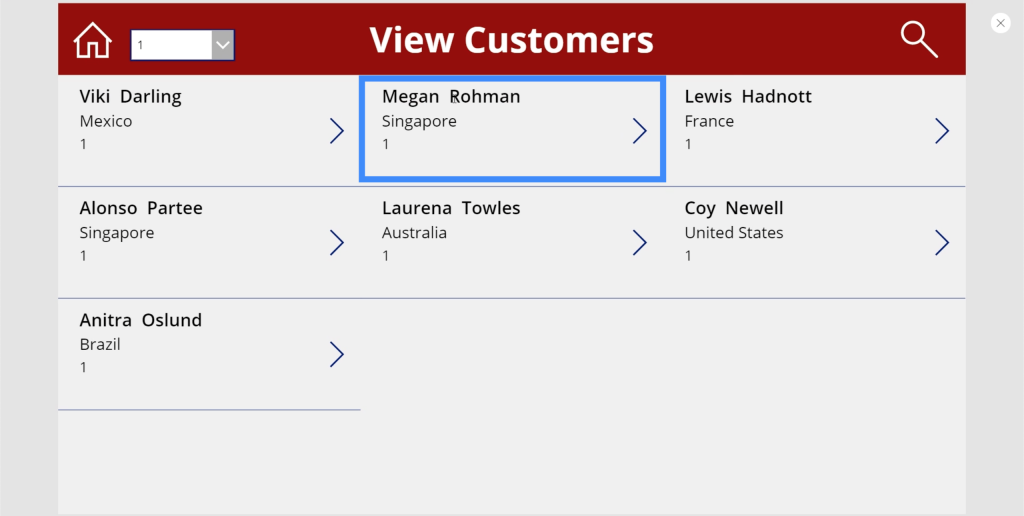
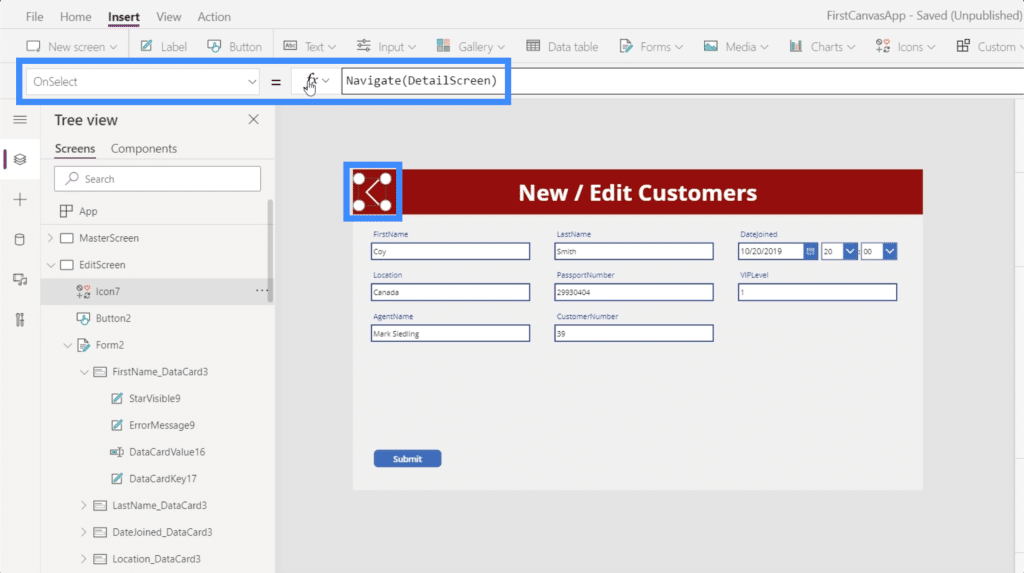
This time, let’s go from the View Customers screen to the detail screen.
This time, we’re dealing with different records within the gallery. But this doesn’t mean that we have to create a different action for each item. We just need to highlight the gallery and choose OnSelect from the properties dropdown.
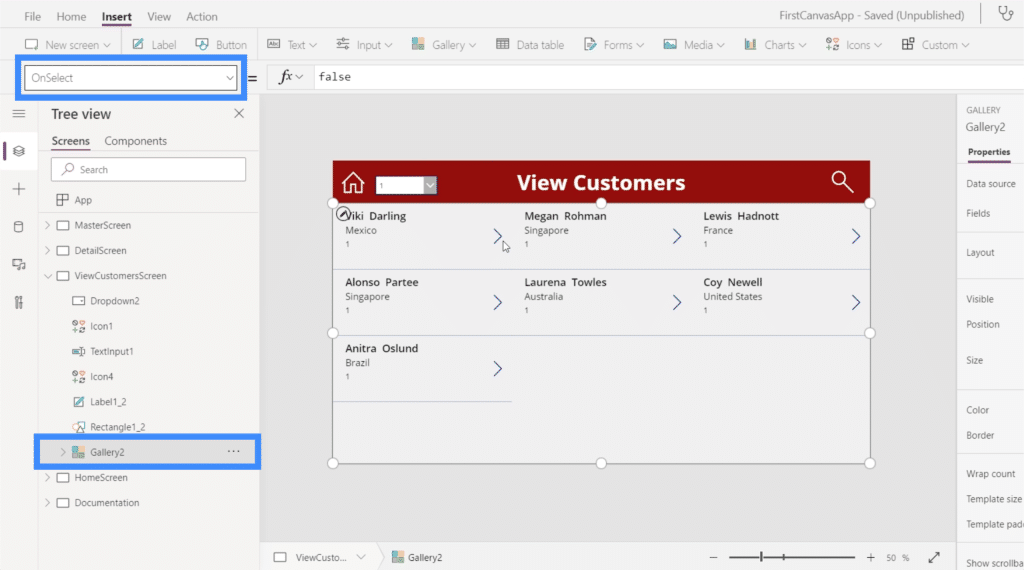
We’ll use the Navigate function again and reference the DetailScreen. We’ll use the same transition we used before. Then, hit Enter to lock that formula in.
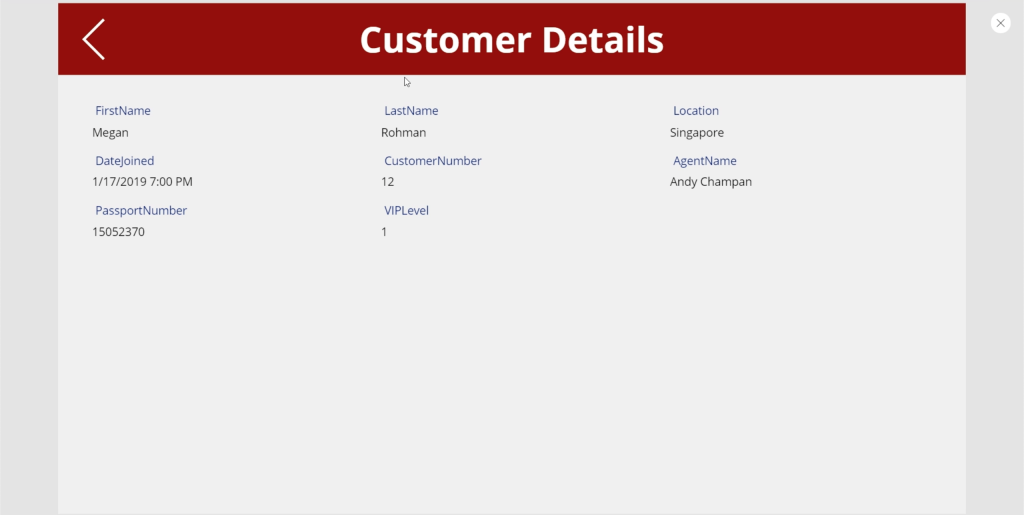
Now that we’ve set the formula, let’s click the record for Megan Rohman.
Now, it takes us straight to the detail screen with Megan Rohman’s details automatically populated into the screen.
And because we’ve set up the navigation from the detail screen to the view customers screen, a simple click on the arrow icon will take you right back to the gallery.
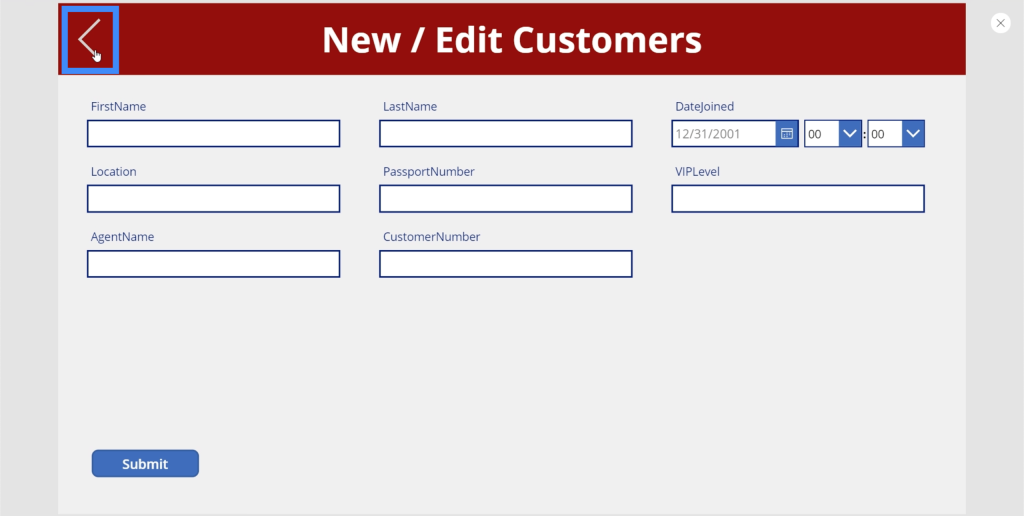
Creating The Edit Form Screen
Although our data source provides all the information for us, there are times when we need to update the customer’s information. This means we’re going to need an edit form screen as well.

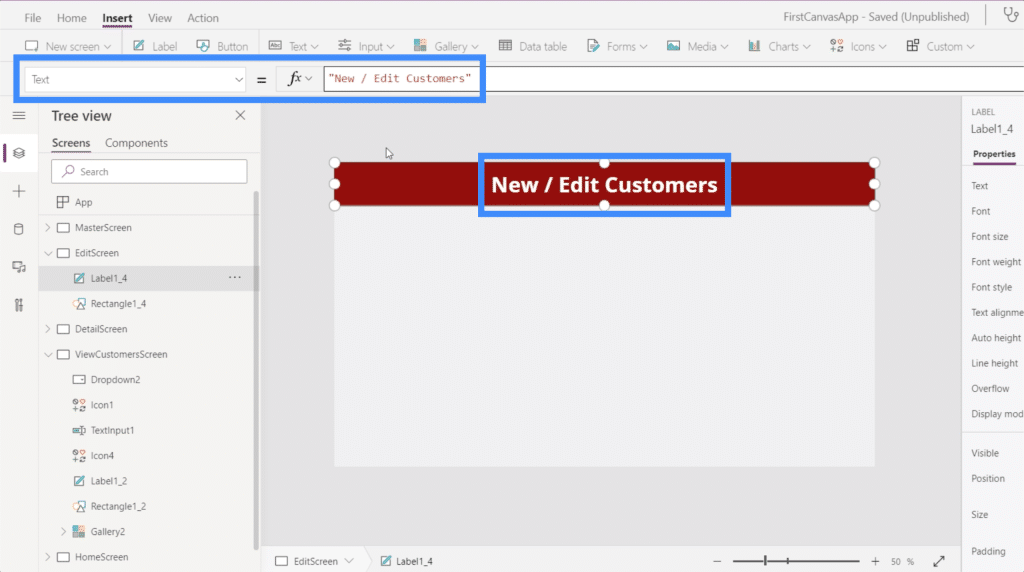
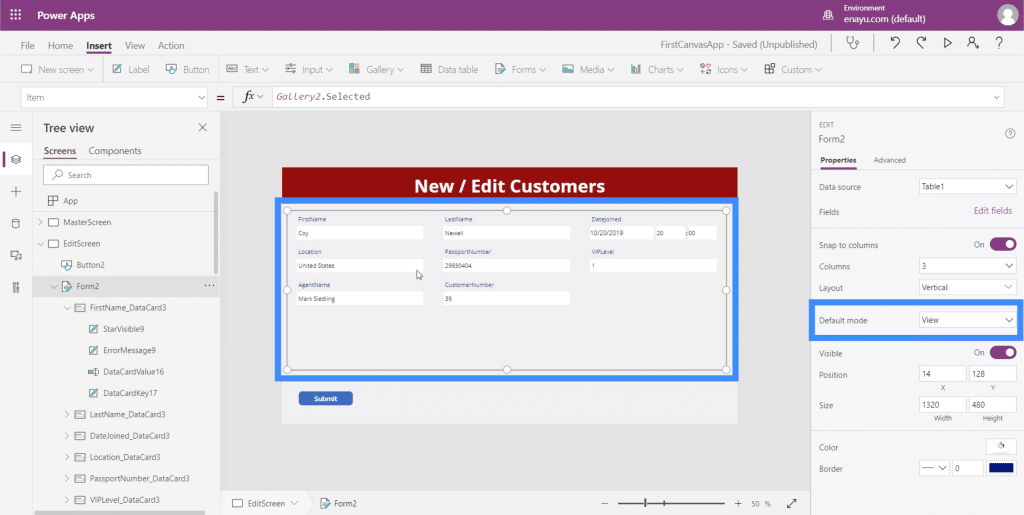
So let’s create another duplicate of the master screen and rename it to EditScreen.
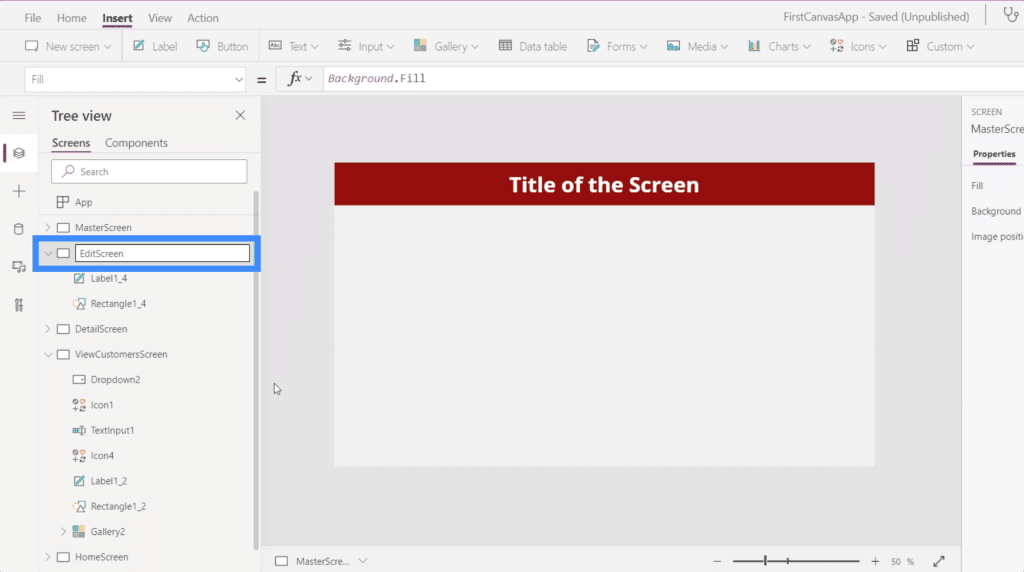
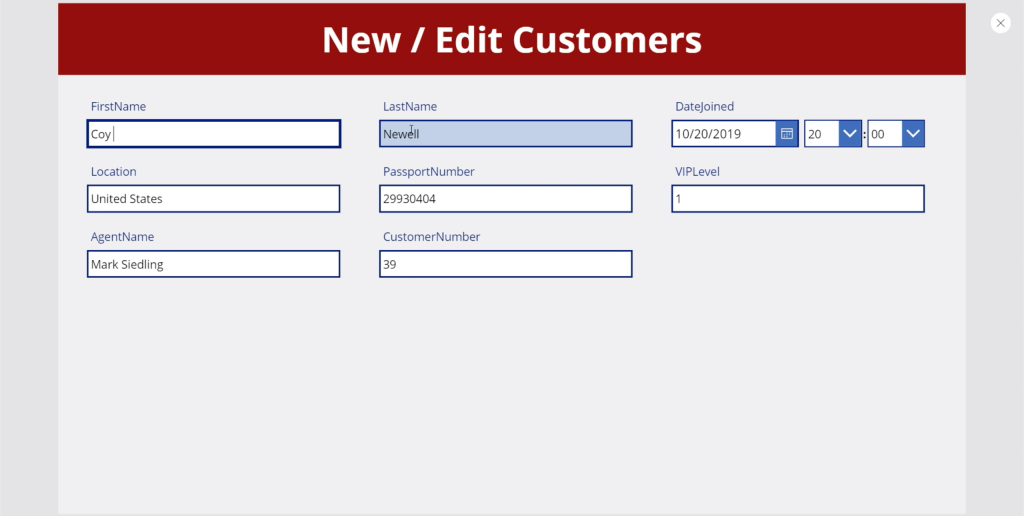
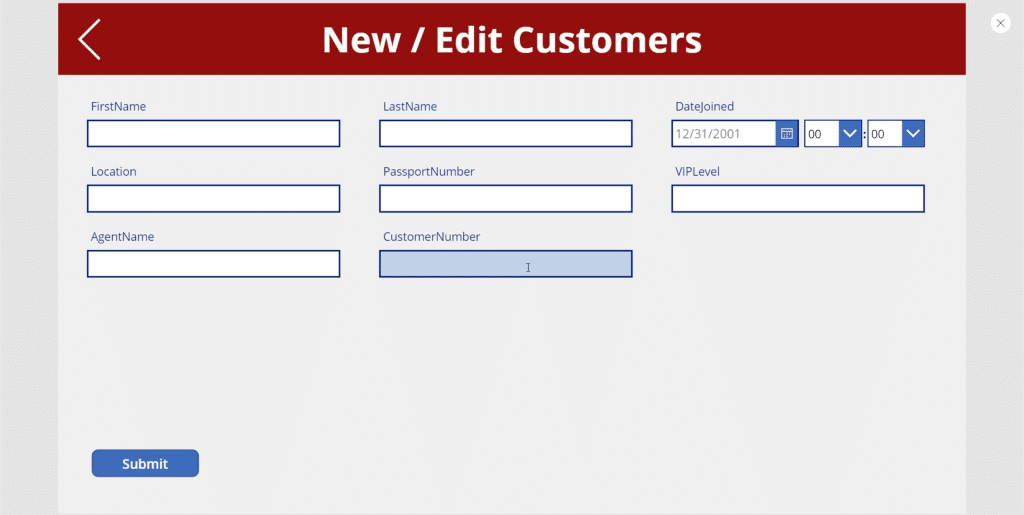
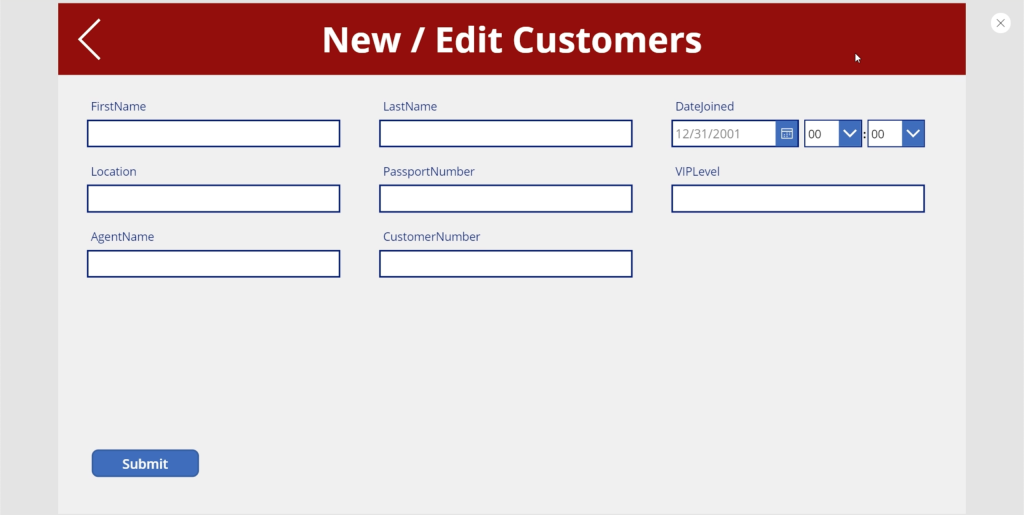
We’re going to use the same screen to add new customers as well, so let’s change the label to New / Edit Customers.
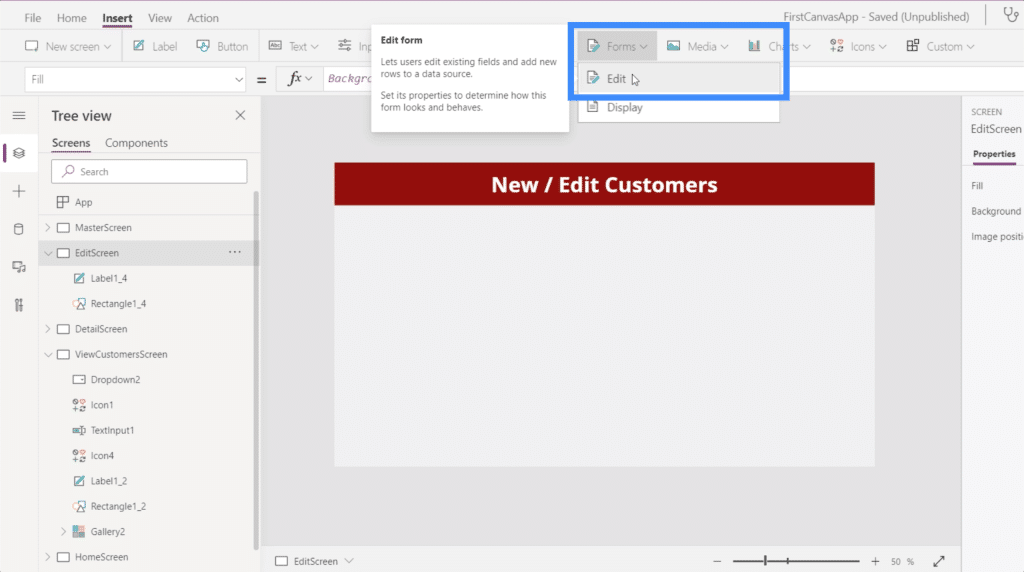
For this screen, we’ll insert an edit form.
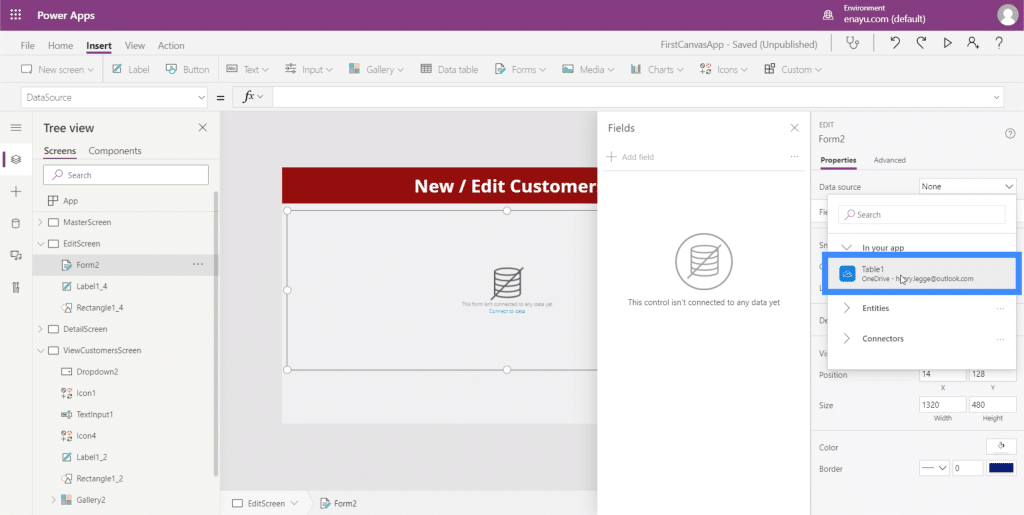
Just like the display form we added earlier, we still need to add a data source. We’ll choose Table1 again.
Adding a field will depend on the data you have and the end user you have in mind. For example, a customer’s passport number won’t really change. So you may want to leave that out of the form.
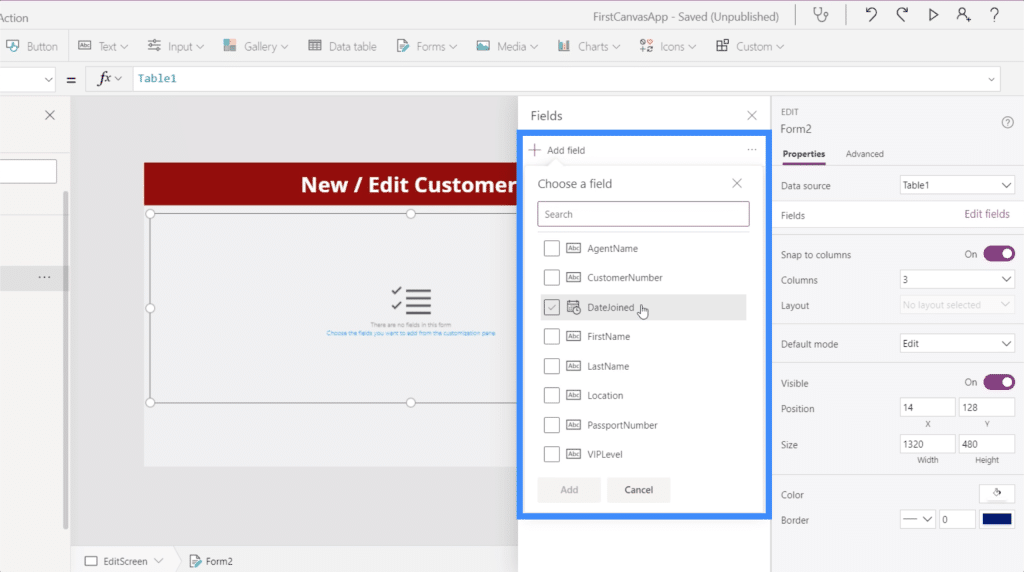
For now, let’s add everything. This time, you’ll see that there are spaces underneath each field.
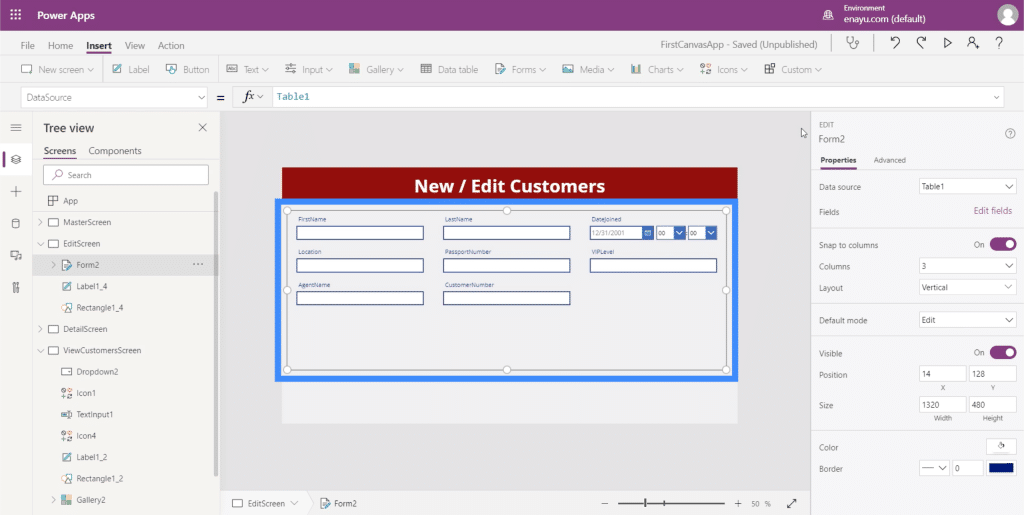
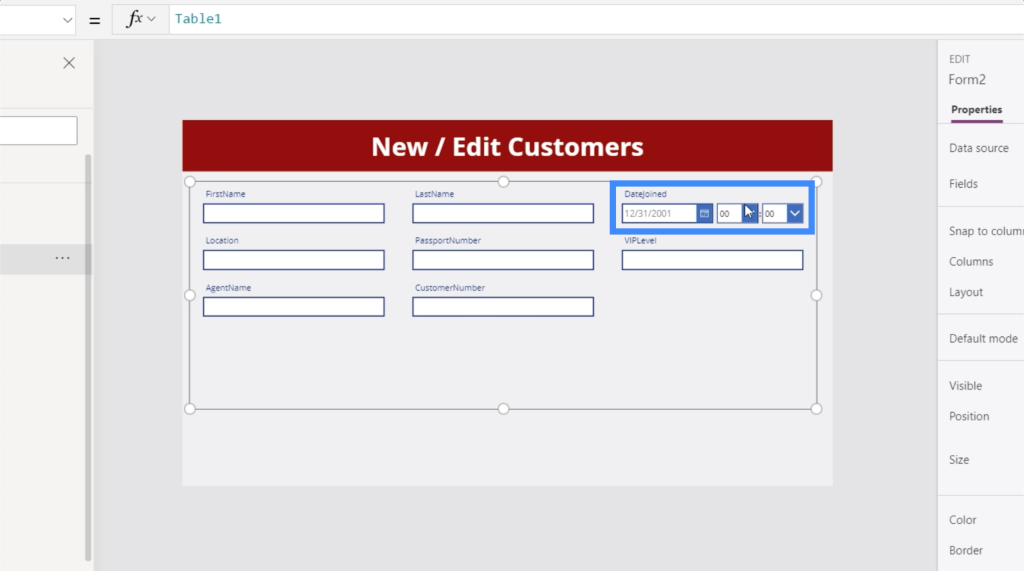
These spaces can be edited, too. For example, under DateJoined, we won’t really need the time. We only need the date.
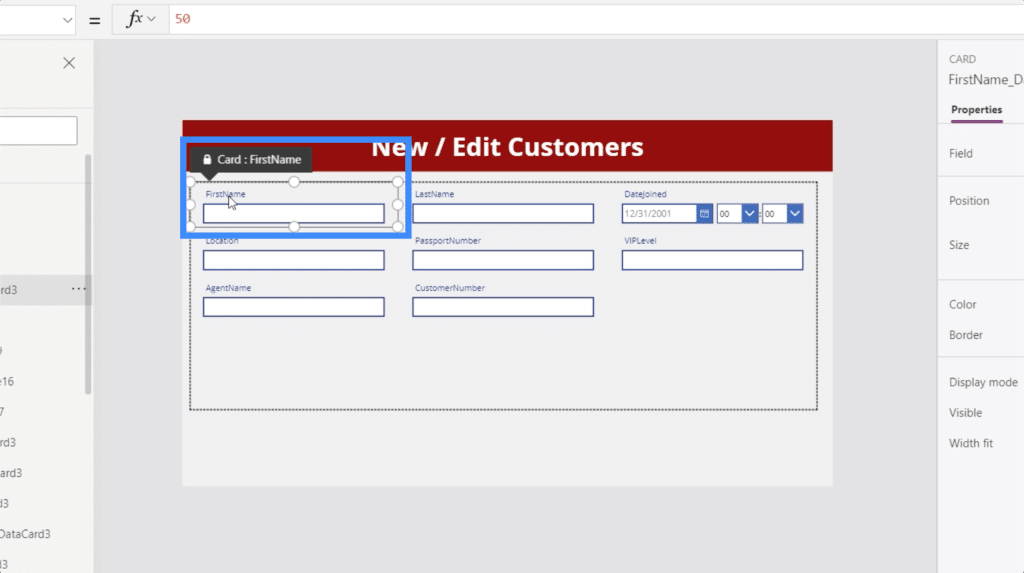
You’ll also notice that the fields have no spaces. That’s one thing we can change, too. We can say First Name instead of FirstName.
We’ll deal with those changes later. For now, we need to make sure that the details of the customer we choose from the View Customers screen show up in this edit form screen.
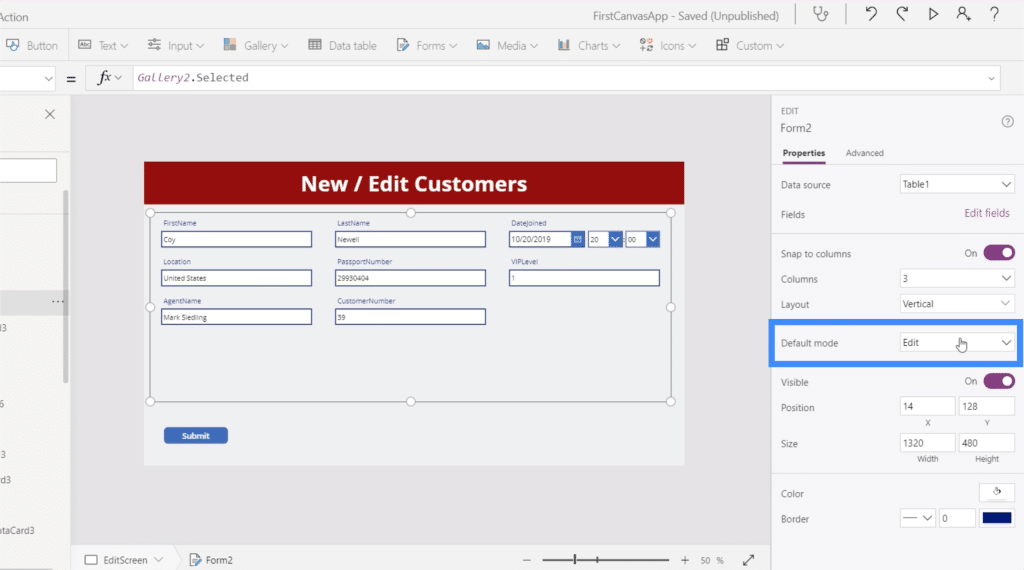
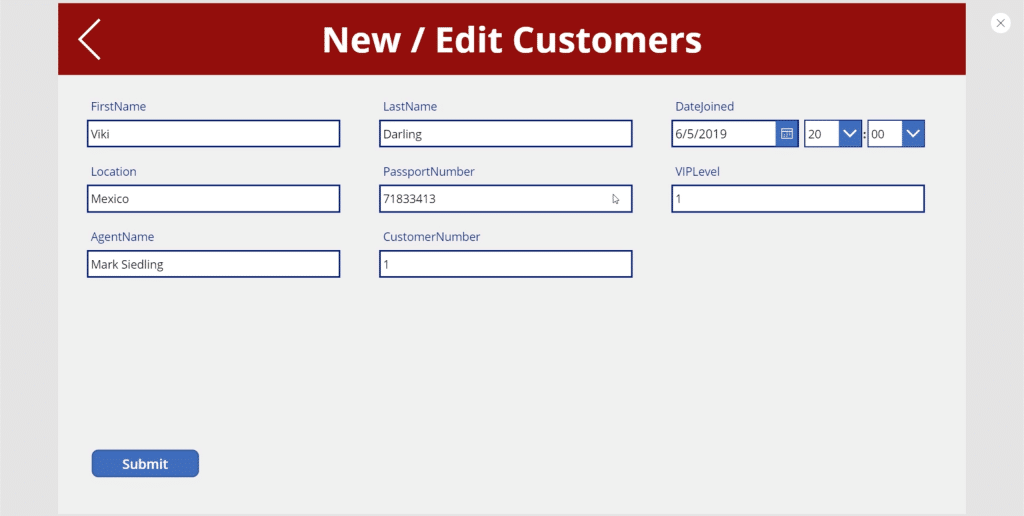
With Form2 highlighted, let’s go to the Items property and equate that with Gallery2.Selected.
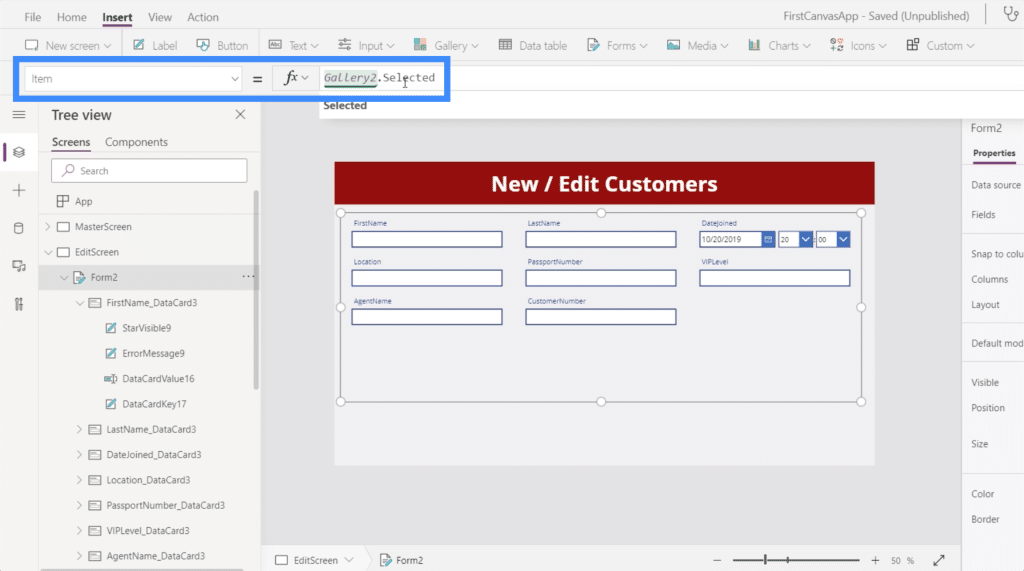
Now, it shows the details of one of our customers on the form.
Once we start editing, we’re going to need a button to click to submit the changes. So let’s add a button through the Insert ribbon.
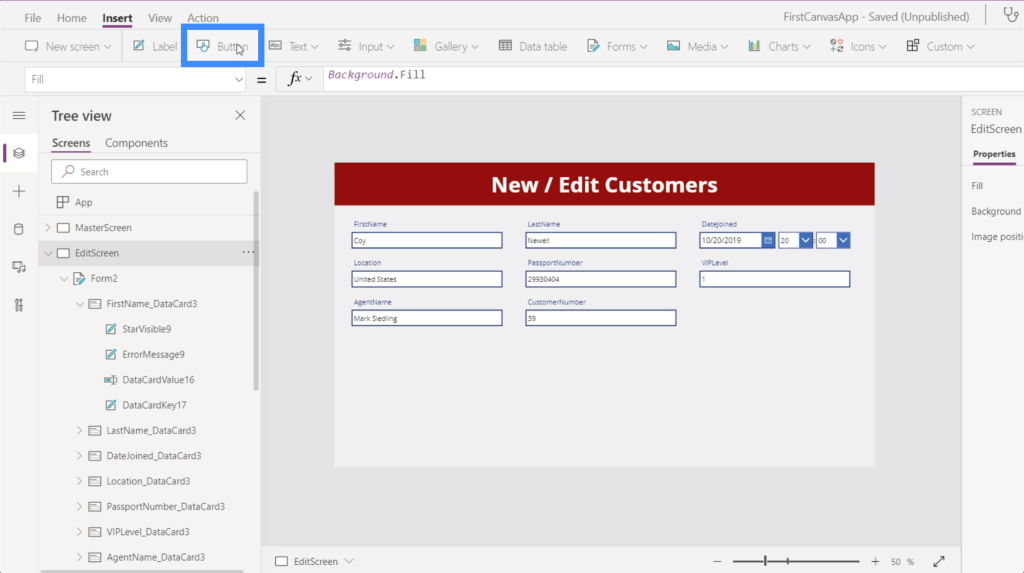
Label the button and write Submit.
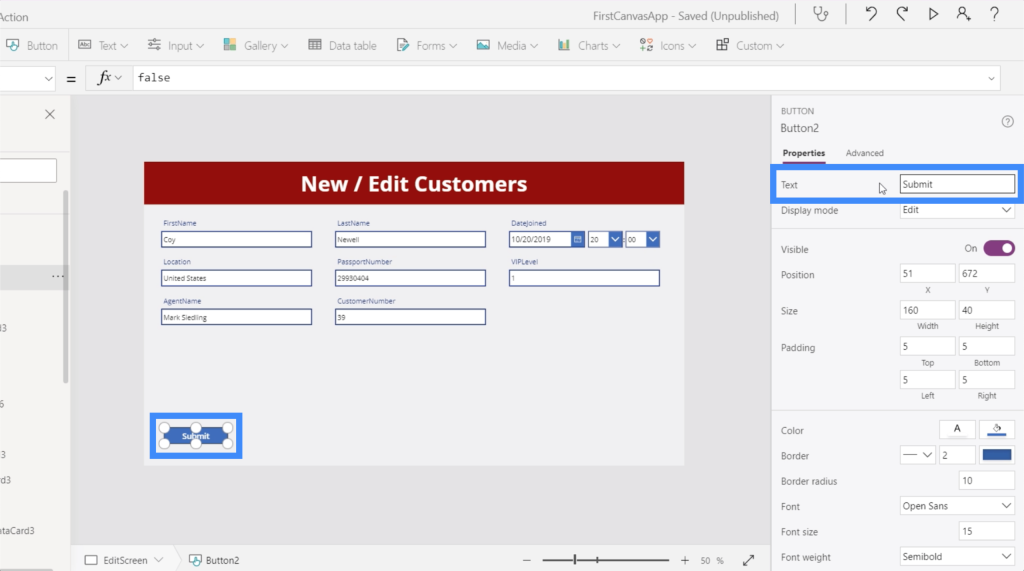
Forms have three modes — edit, new and view. At the moment, this form is in edit mode. This means we’re able to go to any of these fields and change the entries.
In contrast to this, the detail screen is technically a display gallery. That’s why if you look at the properties on the right pane, it does’t give us the option to edit even if this is also a form.
The display form is similar to how this edit screen will work if it’s in view mode. It locks in all the items so that none of them can be edited.
That’s why if we need to change any of the entries in our gallery, we need our form to be in edit mode. We’ll also need the submit button at the bottom to be functional so that it actually submits the form and updates the underlying records.
Making The Submit Button Functional
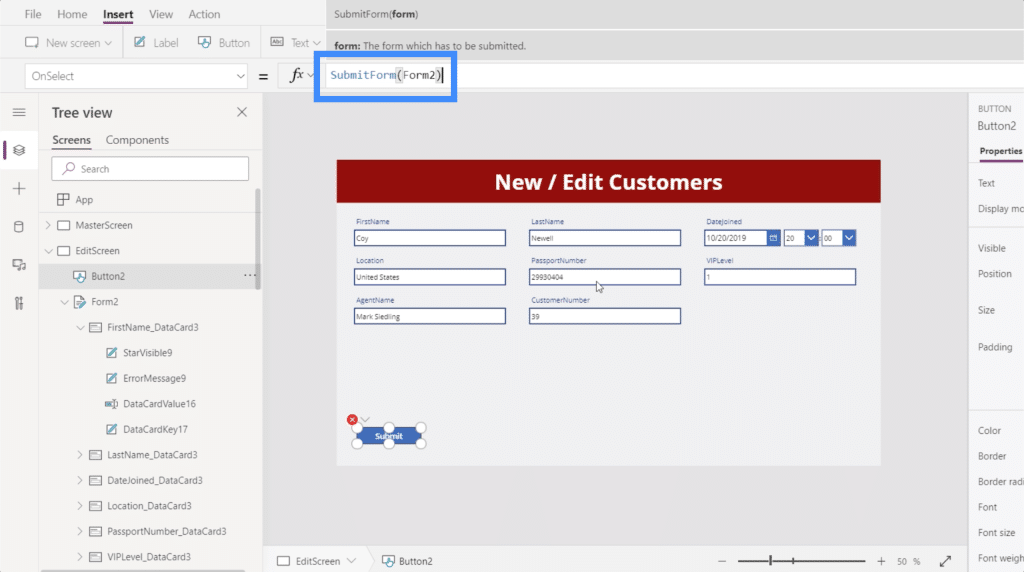
To lock in an action each time we click on the submit button, we need to go to the OnSelect property and write SubmitForm on the formula bar.
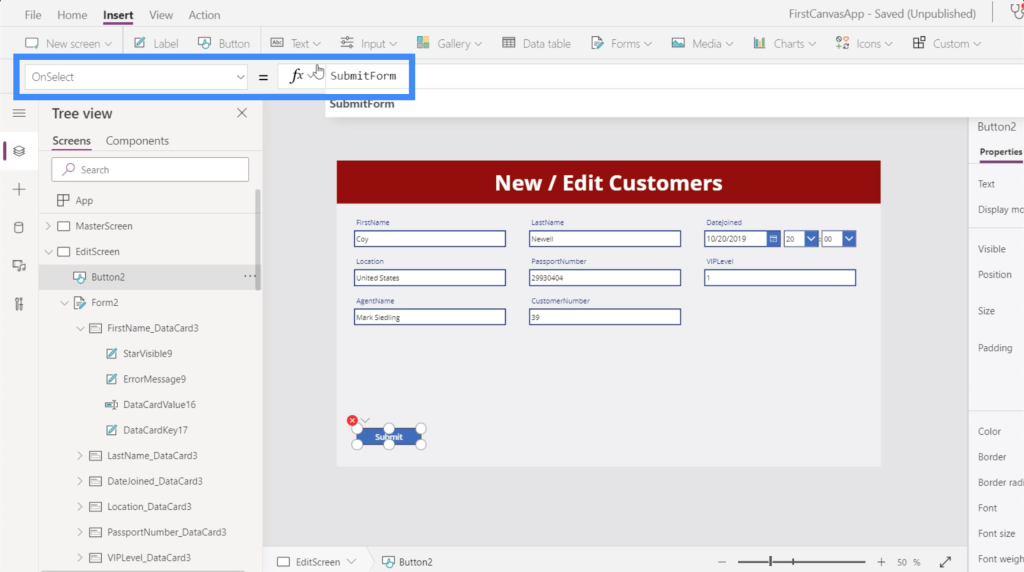
SubmitForm is a function that aggregates all the updates in the form and submits those changes. It also takes the actual form that we want to submit, which in this case is Form2.
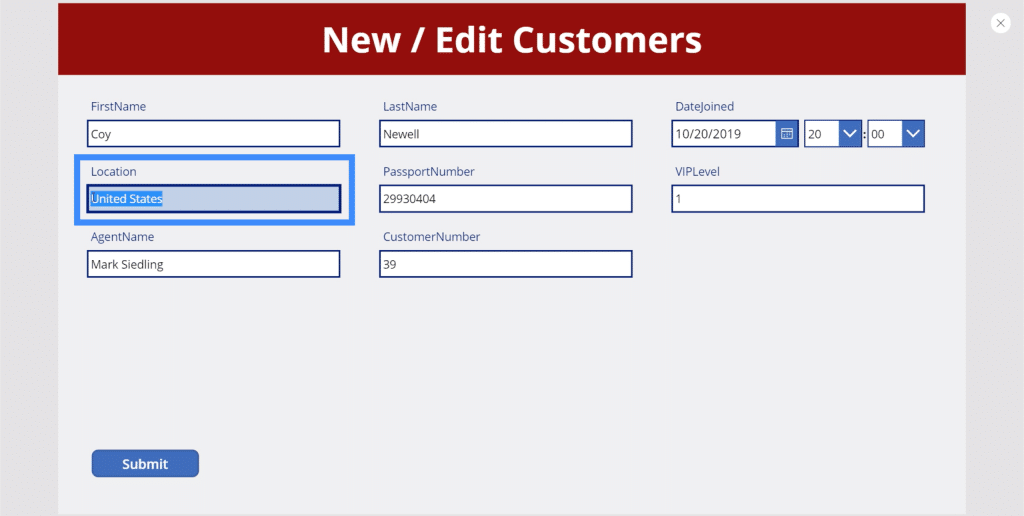
Let’s see what happens now that the formula has been locked in. At the moment, Coy Newell’s location is showing up as United States.
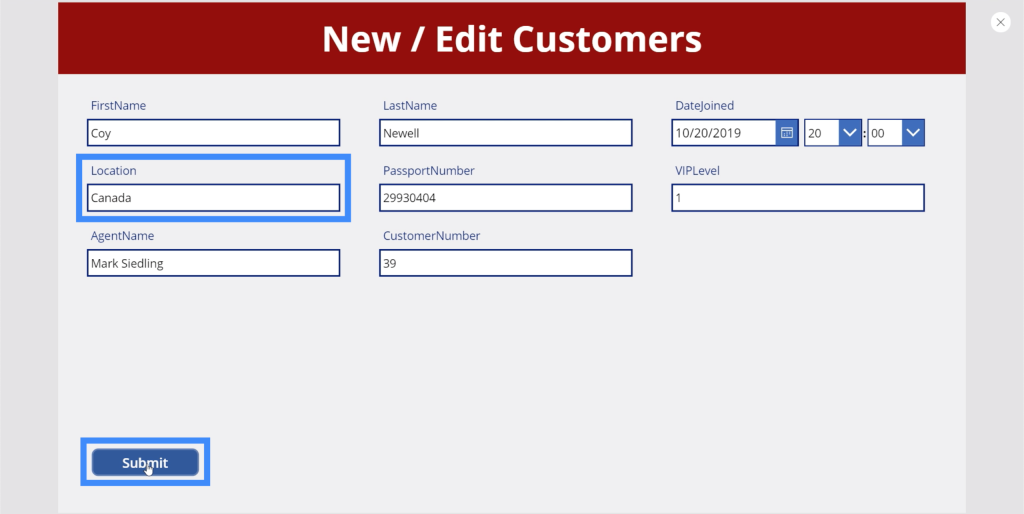
Let’s change it to Canada and click submit.
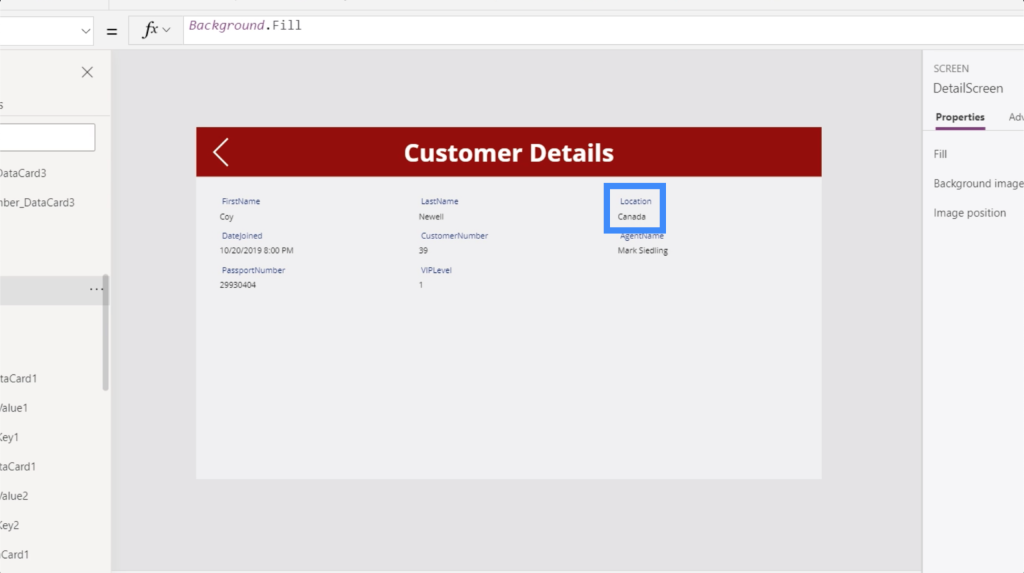
Now, when we go back to the detail screen, it’s showing Canada as the location.
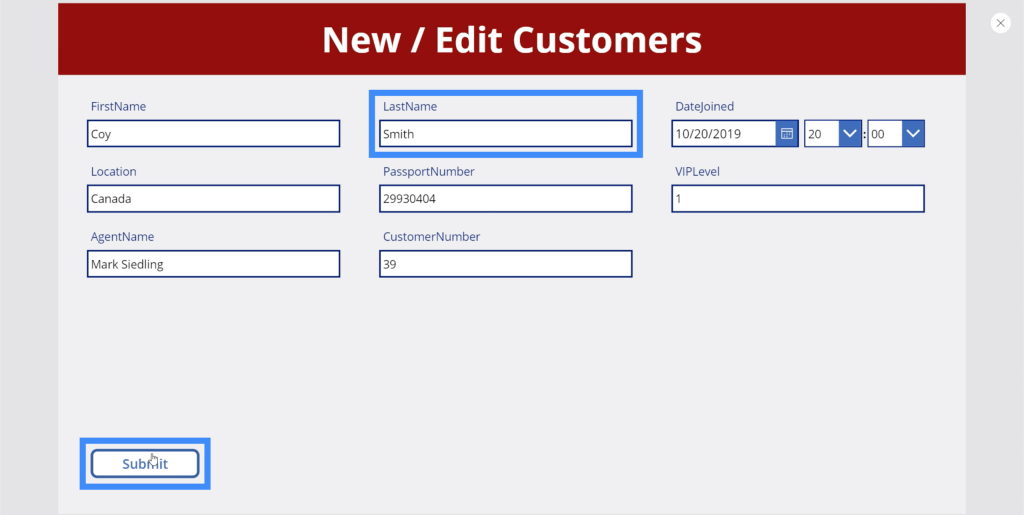
Let’s go back to the edit screen and this time, let’s change the last name. So instead of Newell, let’s change this to Smith and click submit.
Again, if we go to the detail screen, we’re seeing that the changes have also been made here.
If we go to the view customer screen, it also shows that Coy Newell is now Coy Smith, and the location is now Canada instead of United States.
This shows that as we work, things are updating in the background and is changing data on all the screens linked to what we’re currently working on. This makes it a lot easier to change any of the information we have.
Navigation Between The Edit Screen And Detail Screen
Now that we have an edit screen, we want to have the means to land on that page coming from the detail screen. So let’s add the edit icon.
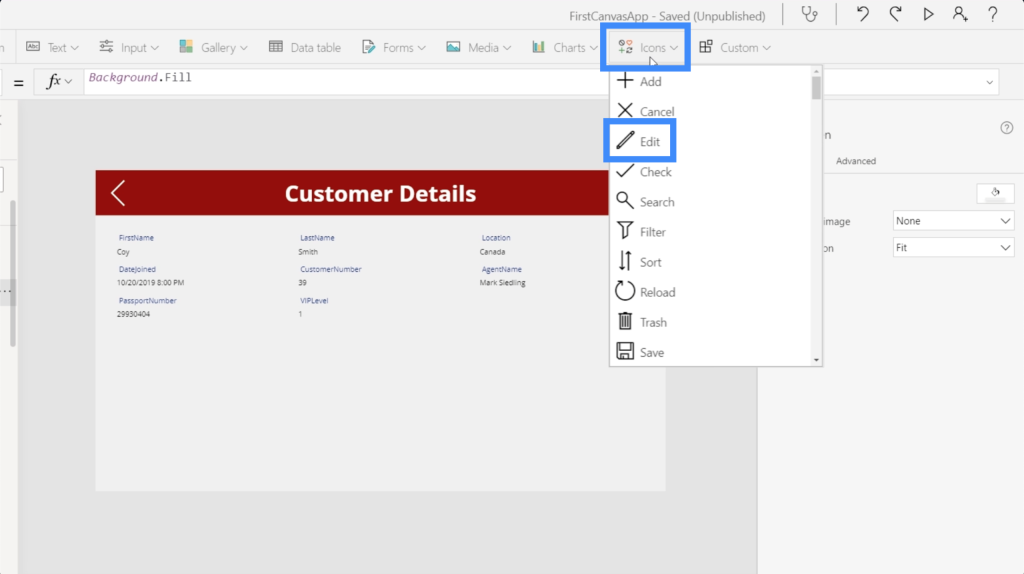
Again, we’re going to change the color so that it’s uniform with all the other elements.
With the icon highlighted, we’re going to choose the OnSelect property, use the Navigate function, and reference the screen where we want this icon to lead, which is the edit screen. Let’s not add a screen transition this time.
Now, we also want to be able to go back to the detail screen once we’re done submitting the changes we’ve done here in the edit screen. So let’s add the back icon and use the same formula, but this time, going back to the DetailScreen.
With the additional navigation, it’s going to be easier for end users to go from one screen to another once our app is published.
Creating A New Form Screen In MS Power Apps
Now that we have the edit form screen, we should also allow users to add records that do not exist in the gallery yet. This time, we’re not going to add a new form. Instead, we’re going to use the existing one since we did label the last screen New / Edit Customers.
We did mention earlier that forms in Power Apps allow you not only to go into edit and view mode, but to go into new mode as well.
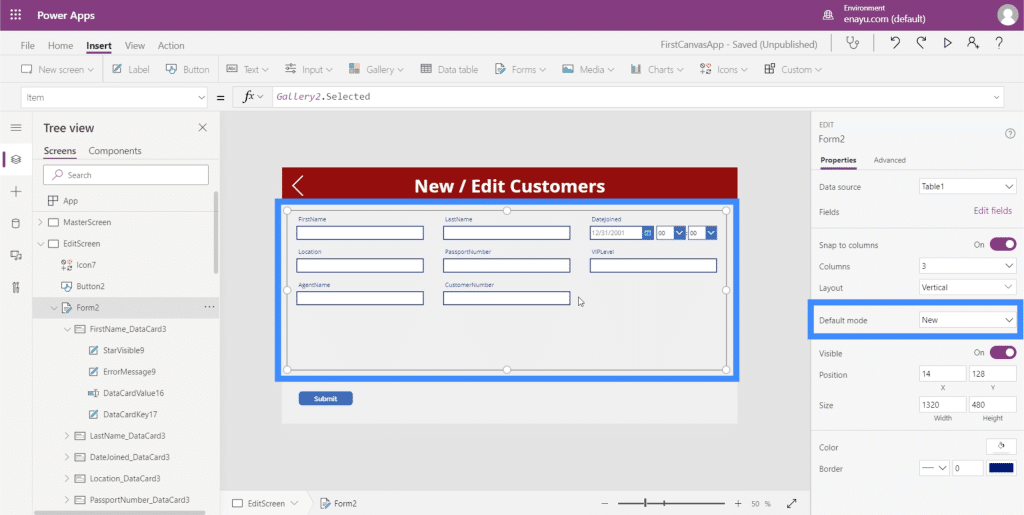
Basically, going into new mode means that all the text boxes are empty. If we write anything into the boxes and hit submit, it adds the record instead of editing an existing entry.
So what we need to be able to do is change the mode of this form from edit to new, then from new to edit depending on the need.
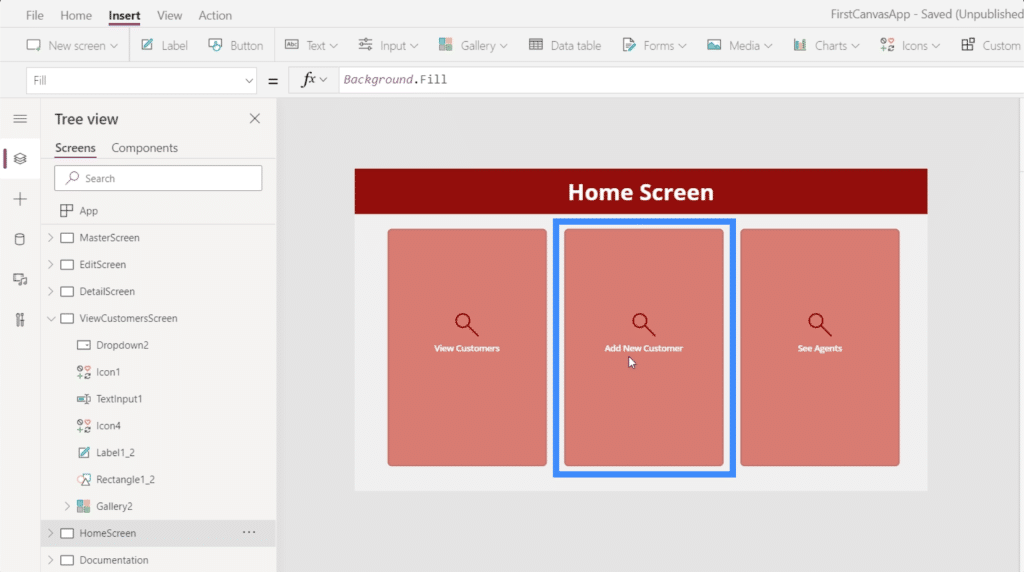
Let’s start off from the home screen, which we created in an earlier tutorial about creating master screens. As you can see, we already have a button here for adding new customers.
At the moment, this button doesn’t lead to any screen just yet. So let’s highlight the button, go to OnSelect and use the Navigate function to make it lead to the EditScreen.
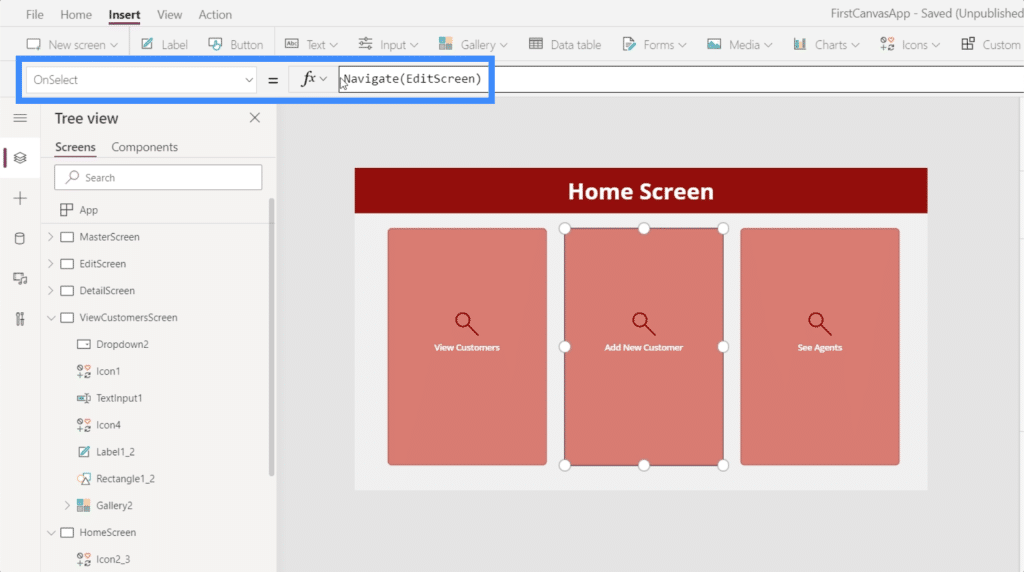
Now, we’re going to land on the edit screen each time we click on that button from the home page.

The problem is, this screen still has all of the details that we were editing before. Since we’re adding a new customer, we’d rather have a blank screen.
So let’s go back to the home screen to add another function called NewForm. NewForm puts the form into new mode first before we land on it.
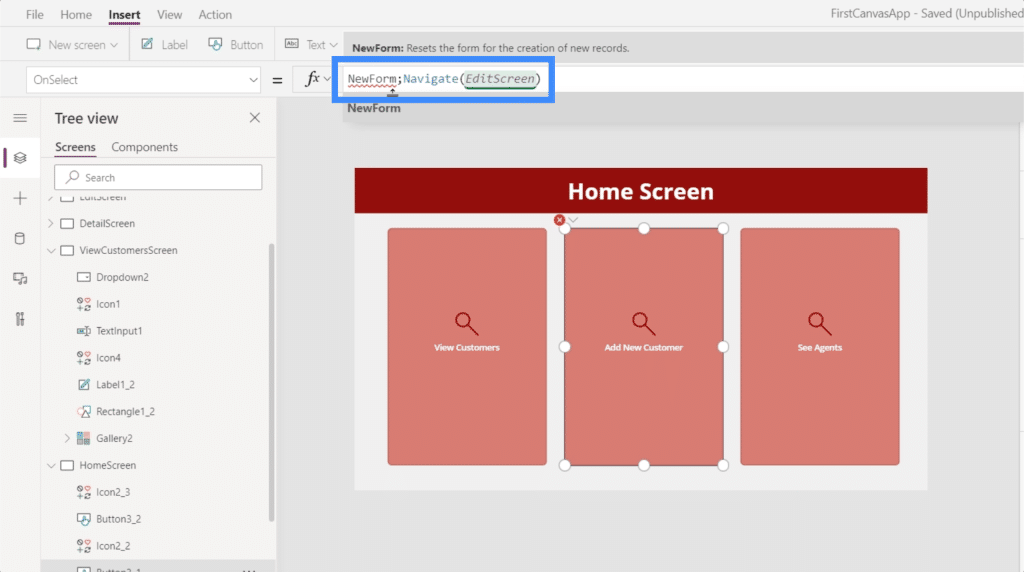
This function needs the actual form that we want to switch into new mode, so we’re referencing Form2.
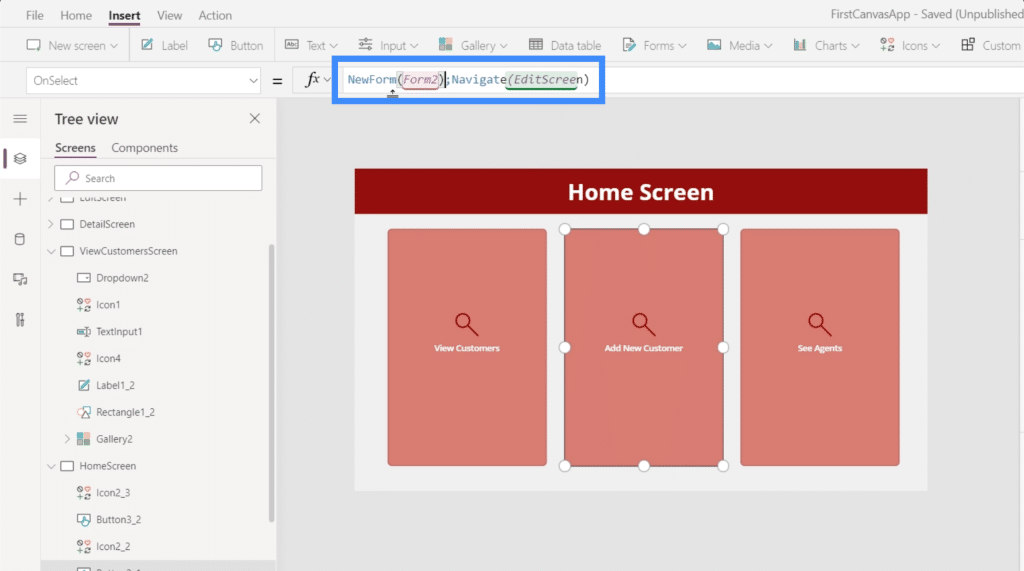
Notice that we used a semi-colon between the two functions. Basically, a semi-colon dictates the order on how these functions run. It runs the NewForm function first, and once that’s done, that’s the only time that it runs the Navigate function.
Now that we’ve fixed the formula, clicking the Add New Customer button will now lead us to a blank form.
Switching Between New Form And Edit Form In MS Power Apps
Let’s go back to our gallery and click on the record for Viki Darling.

Let’s say we want to edit some of the fields here. So we’ll click on the edit icon.
The problem is, we’re landing on a new form, and not an edit form. That’s because we left this in new form when we created the navigation for the Add New Customer button.
So this time, we want the edit icon to switch the form into edit mode before we land on that screen. To make that happen, we’re going to use the same formula we did for the new form, but we’re going to use the EditForm function instead.
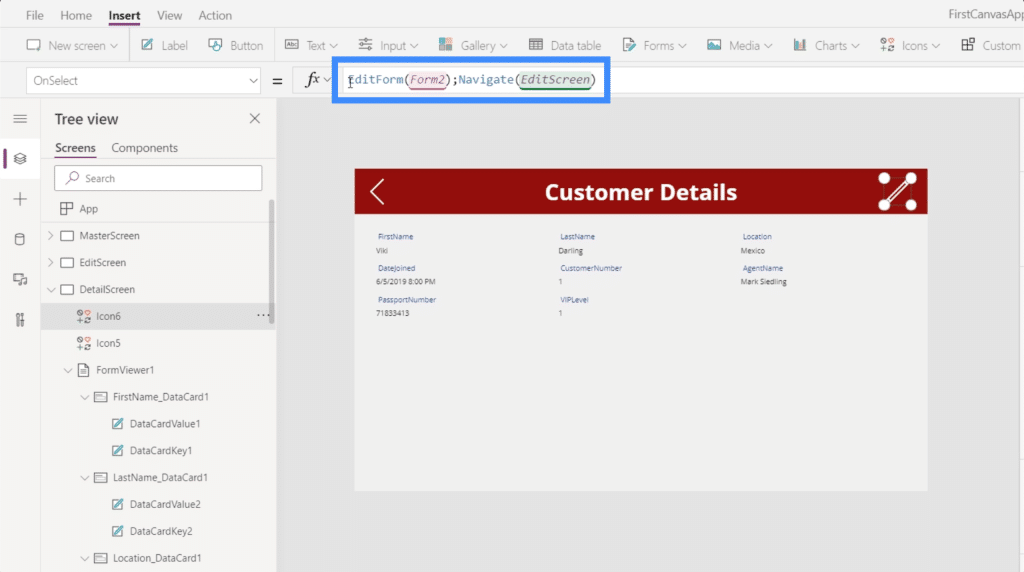
The function EditForm changes the form being referenced from its current mode into edit mode. Once we have that in place, whenever we click on the edit icon from the detail screen, we’re now going to land on the edit screen in edit mode.
This also means that when we submit the Submit button, it’s going to update the existing record instead of adding a new entry.
Using The Back Function
Now that we have the forms we need, let’s double-check on our navigation to make sure our end users land on the right screens.
Let’s say we’re on the home screen and decide to add a new customer. We click on the button that leads us to a blank form. But then we change our mind and click on the back button.
But when we do that, it doesn’t take us back to the home screen. Instead, it takes us to the detail screen.
To find out what happened, let’s go to the back icon and look at the action attached to it. It turns out that we’ve set the back button to navigate to the detail screen by default.
What we want to happen here is for us to land to the previous screen we were on before landing here. This means that instead of using the Navigate function and referencing a specific screen, we need to switch to the Back function.
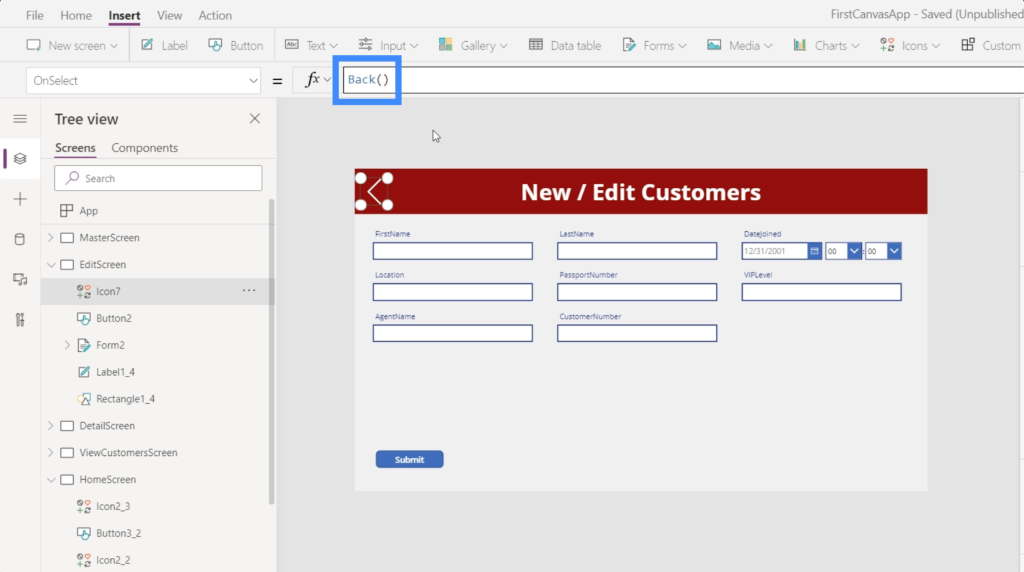
This function doesn’t require us to reference any screen. Its behavior changes depending on what screen we came from. This means that whether we came from the home screen or the detail screen, clicking the back function will now take us to the last screen we visited.
***** Related Links *****
Power Apps Introduction: Definition, Features, Functions And Importance
Power Apps Environments: Setting Up The App Elements Properly
PowerApps Functions and Formulas | An Introduction
Conclusion
With the detail, edit, and new form screens in place, our app is slowly taking shape and is almost ready to be published. This is the great thing about Power Apps. Whether we opt to start off with a template or create an app from scratch, everything is straightforward and easy enough to create.
We also saw how important it is to make sure that the navigation between pages work well. This plays a vital role in making sure our app is intuitive enough for end-users once it goes live.
All the best,
Henry


