
For today’s post, I’ll do a quick review of the customizations you can make by directly editing and applying a JSON theme file. This is not actually a description of what can be done within Power BI itself, but rather as an example of what can be accomplished outside of Power BI when you do custom theming. You can watch the full video of this tutorial at the bottom of this blog.
This topic is not intended for Power BI report consumers or casual Power BI developers, but rather for those familiar and comfortable with editing and creating JSON codes directly.
To implement custom theming you need to be comfortable with the syntax and structure of JSON files and also the development environment tools. I’ll be using Visual Studio code to develop JSON theme files.

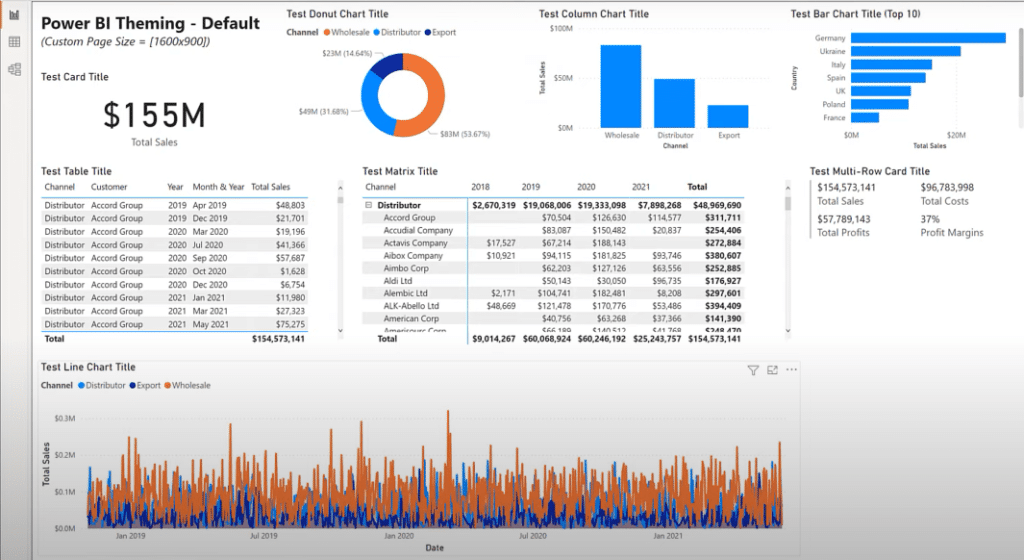
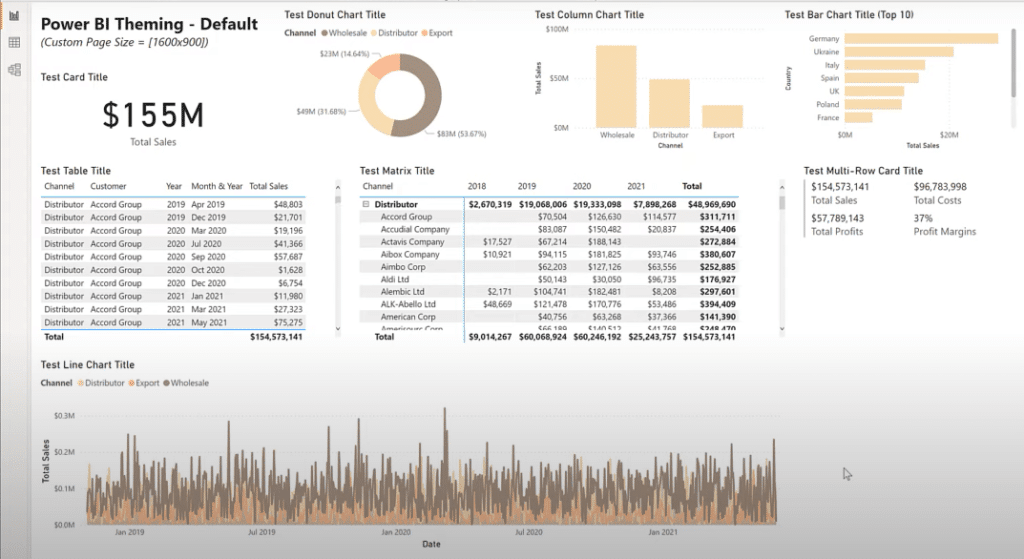
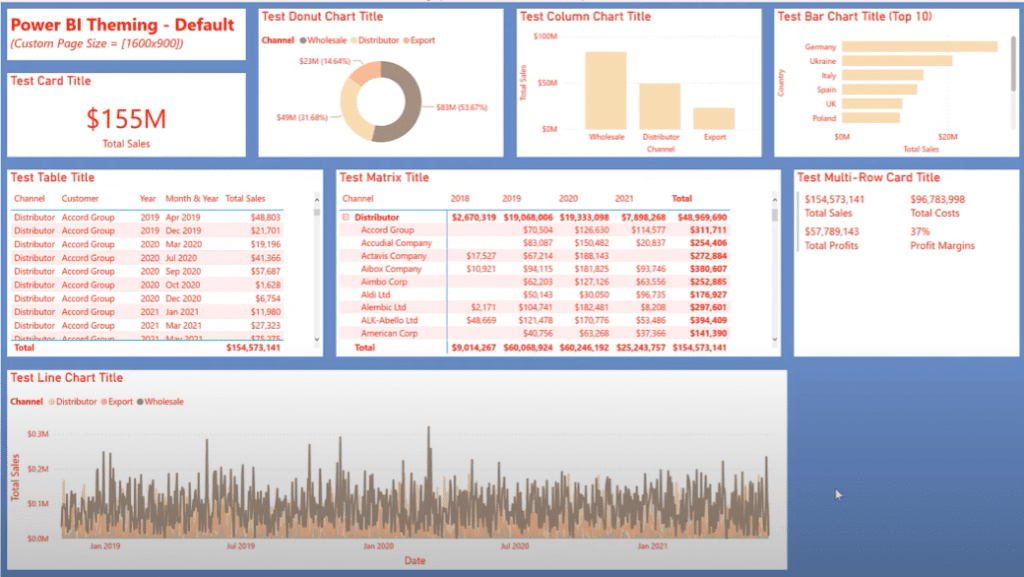
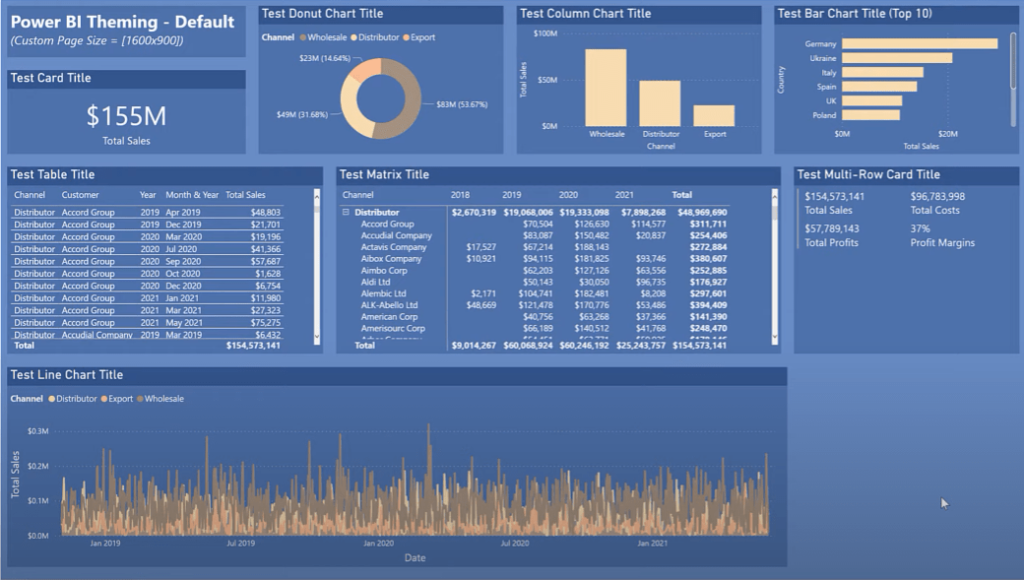
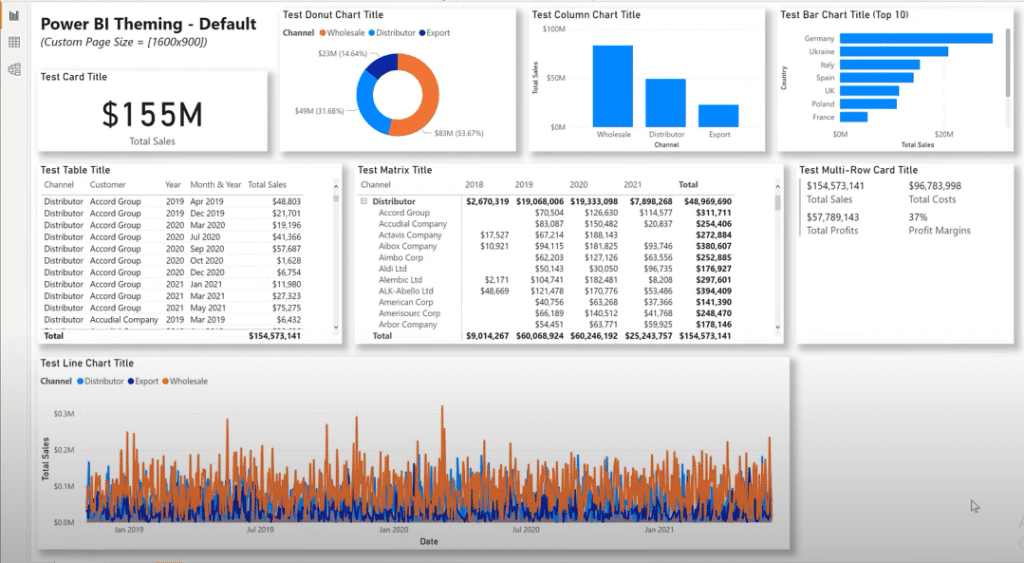
Let’s take a look at the customizations available that are already built into the Power BI desktop application. First, we need a canvas to showcase our work. I have used the Enterprise DNA practice dataset, which is a simple sales dataset where visuals can be easily constructed. A demonstration PBIX file is a single report page and custom dimensions of 1600 x 900 have been used to give a little more space than the standard 1280 x 720 report.
Using The Default Theme
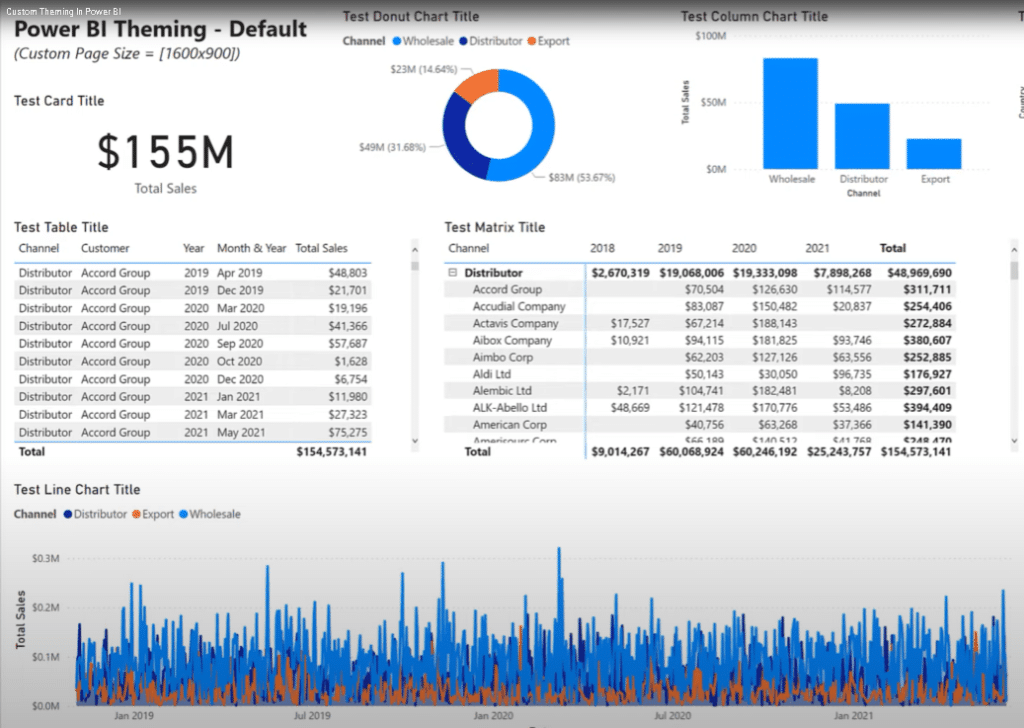
Let’s have a look at our default theme here. If we browse for themes and apply the default theme…

… we can see that it’s just using the standard blue, orange, and purple colors.
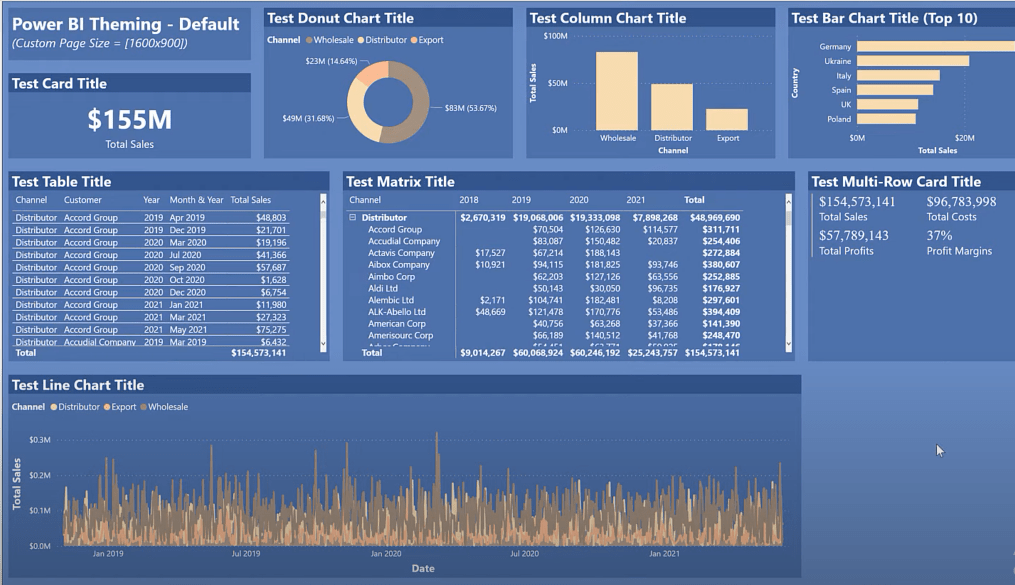
And if I select the theme White Text on Dark Background…
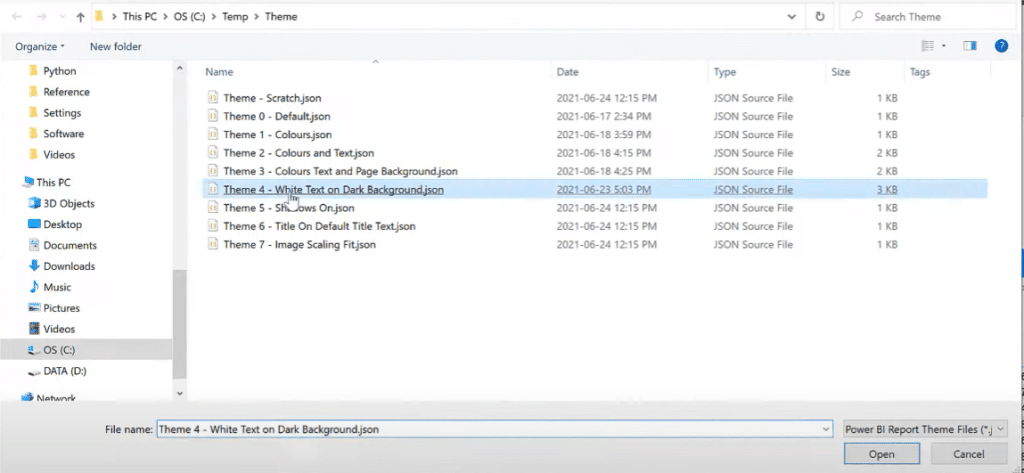
… this is the theme that we’ll see.

A Quick Review Of JSON Basics For Custom Theming
This is definitely not a comprehensive review on how to develop a JSON file for Power BI, but rather a few quick comments on JSON files.
JSON stands for JavaScript Object Notation; this is a clear text format for data files, consisting of nested objects or code blocks. Each of these has its own collection of name-value pairs.
Colons are used to separate name-value pairs. Braces are used to surround an object. List elements are separated by commas and lists can be erased. A list can also be an array, which in this case, it is surrounded by square brackets.
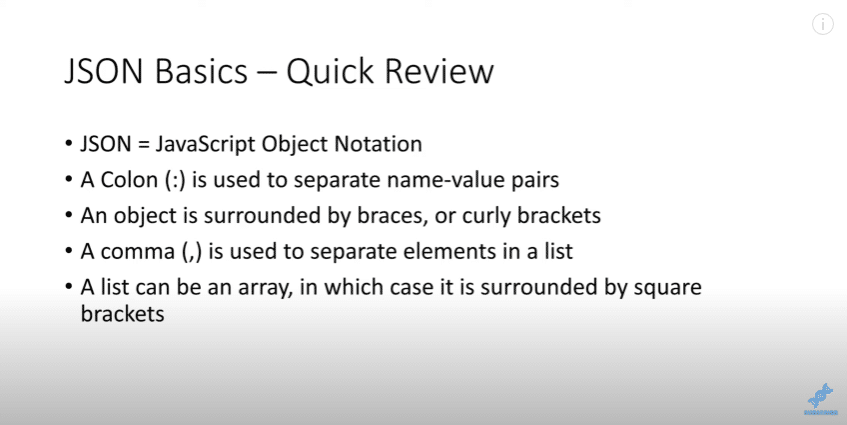
A Power BI JSON file usually consists of three main sections: name, colors, and visuals. The name section is actually the only required section, and as you can see, this is where we’re going to start our investigation today.
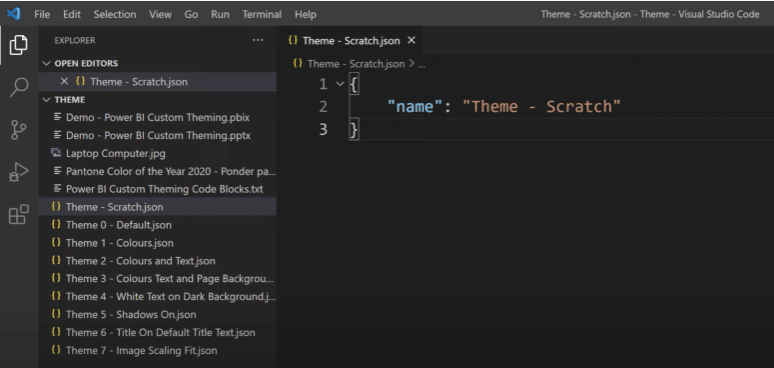
Let’s just apply this theme file by browsing for themes.
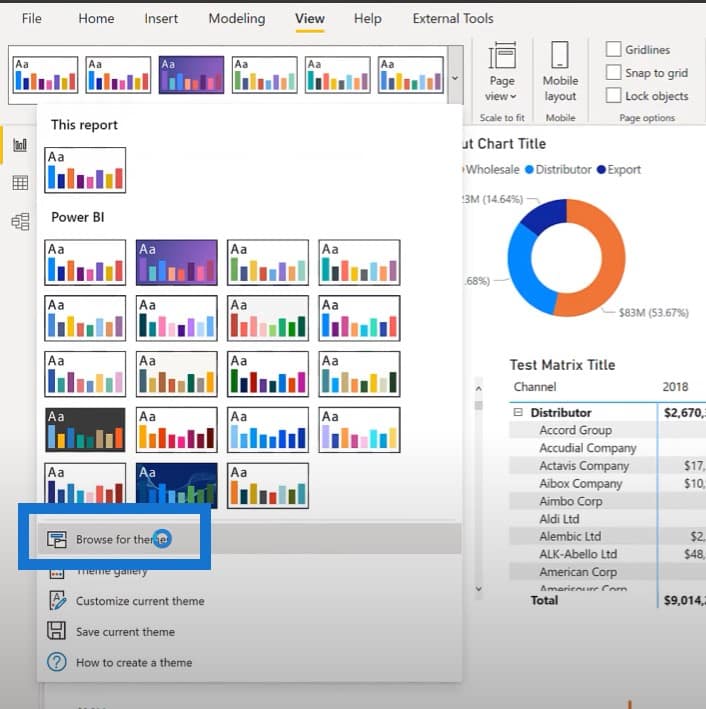
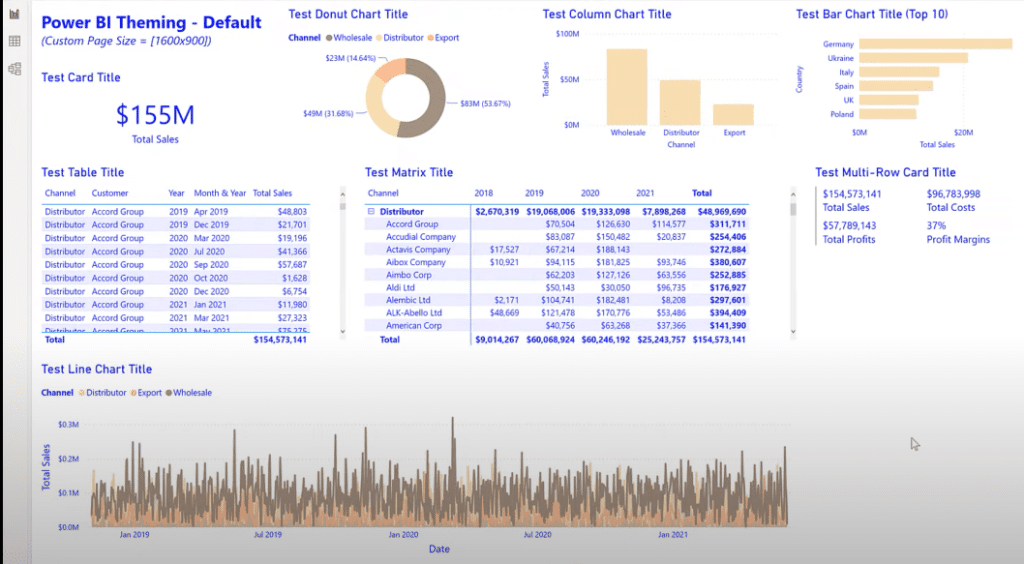
We’ll go for the default theme. You will see that the default colors are used.
Let’s go to the code block section and copy the set of alternate colors.
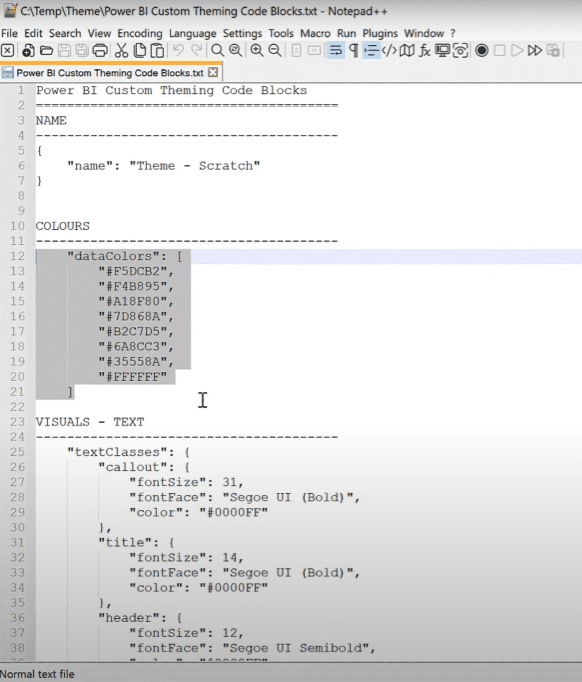
We can paste that into our JSON theme file by adding a comma after the name block and then pasting in the code.
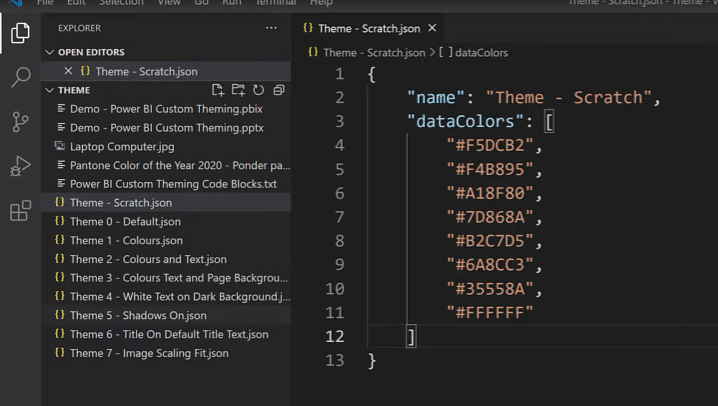
We’ll save the JSON theme file, go back to Power BI, and apply the scratch theme.
Now, we can see that the colors have changed.
The visual section is by far the largest, and this is where we’re doing the rest of our work. You can change the text easily, including the font, family size, and color.
Let’s go over to our notepad to copy the code block for our text classes and fonts set to different sizes.
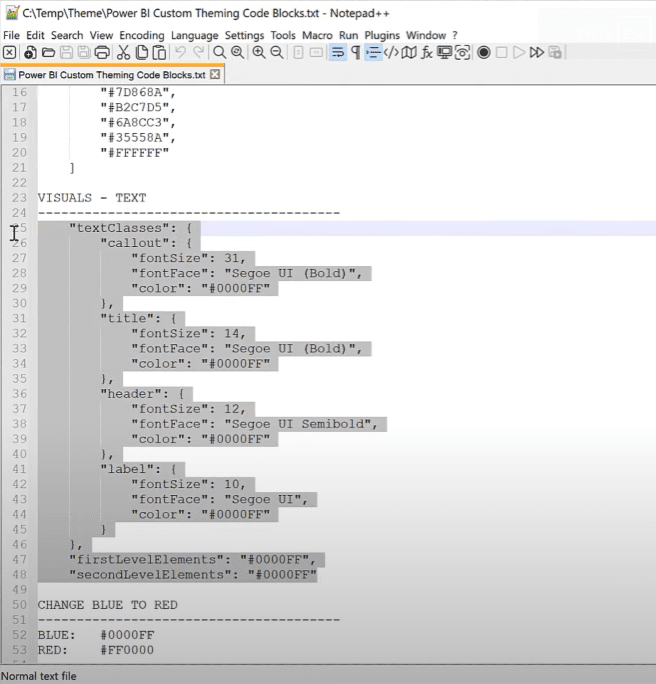
Then we’ll go over to Visual Studio Code, add a column for separating the codes, and then paste the code.
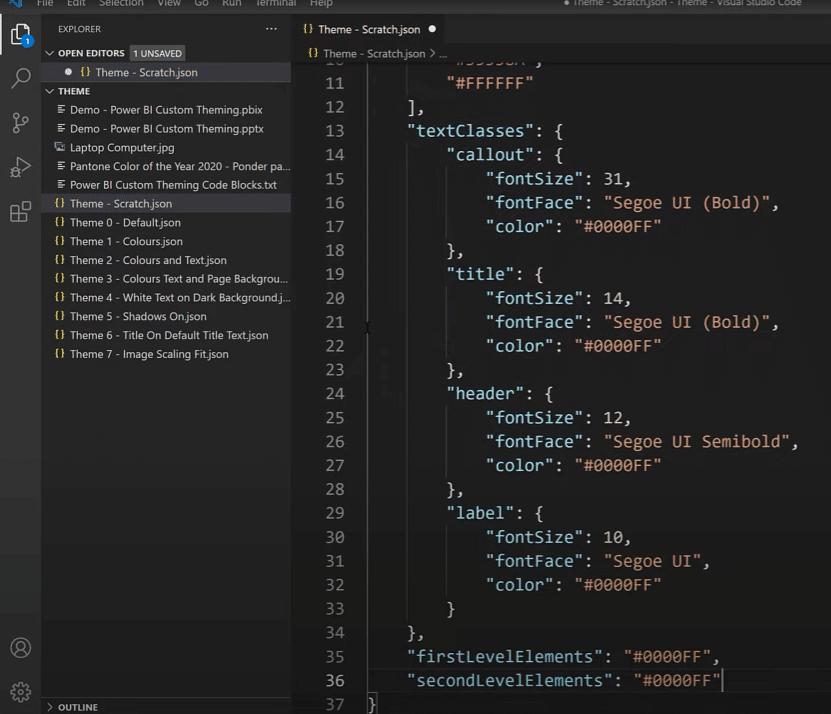
Once again, we’ll save our theme file. Then we’ll go back to Power BI and apply the theme files. We can see that all the texts have now turned blue.
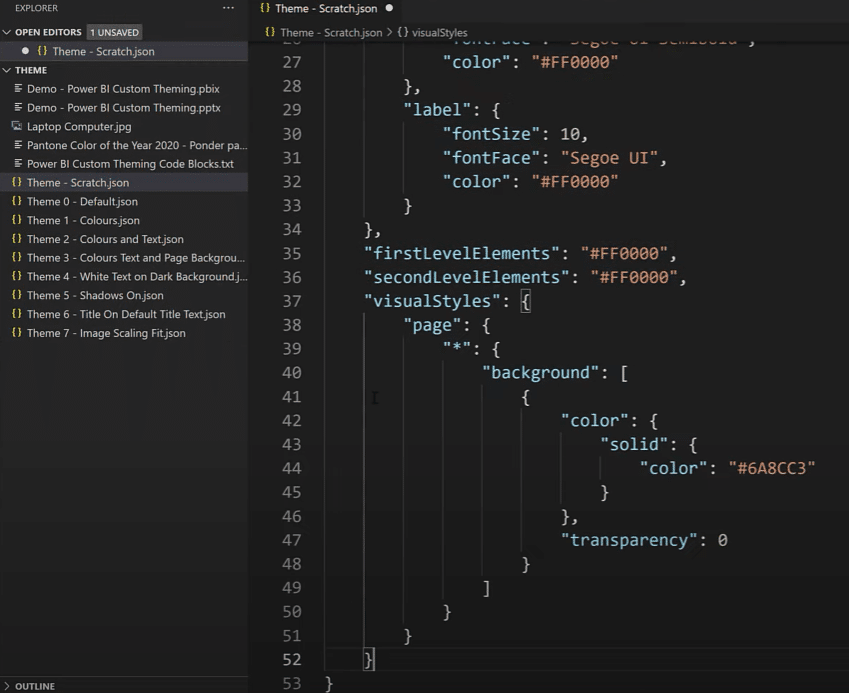
One of the things that we can easily do is change the text color. Let’s go back to the JSON file again, select the blue color, and replace it with red.

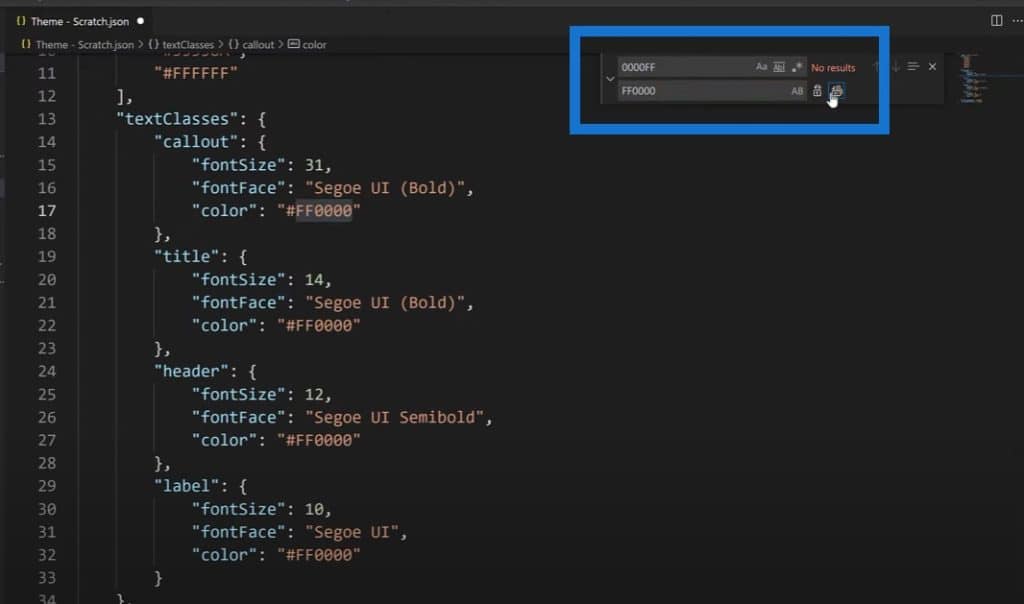
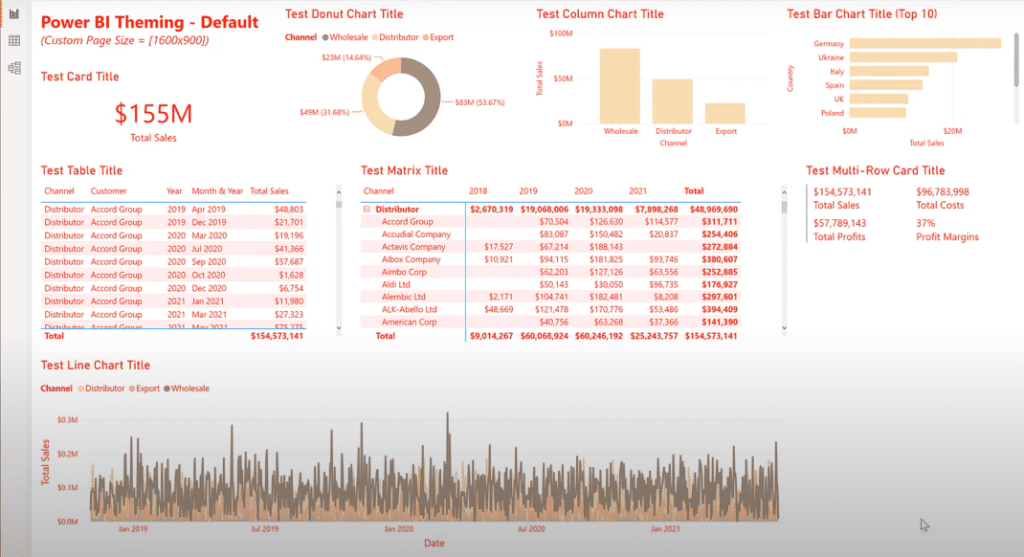
Let’s save that again, go back to Power BI, and import the JSON theme file one more time. Now, we can see all the texts have changed to red.
Changing The Background For Custom Theming
Now let’s look at the page background and set it to the second darkest color in our palette. We’ll go over to Notepad++, grab our page background code block, and copy it.
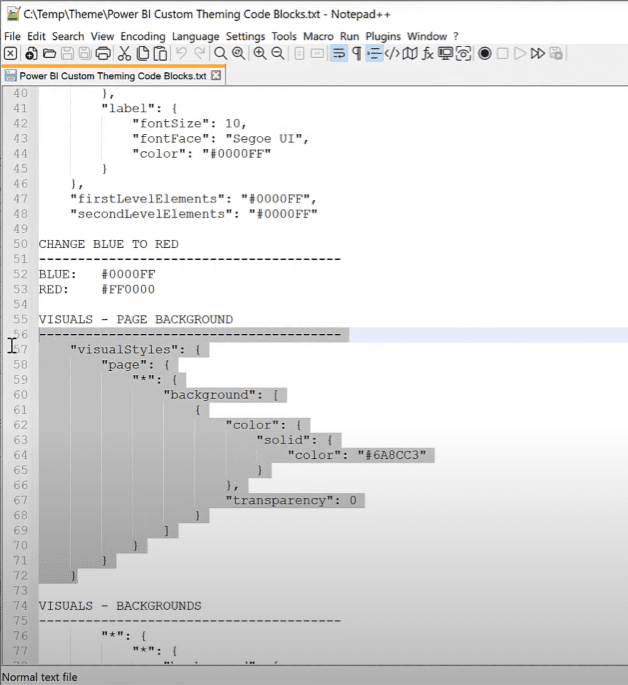
And then we’ll go over to Visual Studio Code and paste the code there.
Then go to Power BI and once again, apply the scratch theme to see the new background.
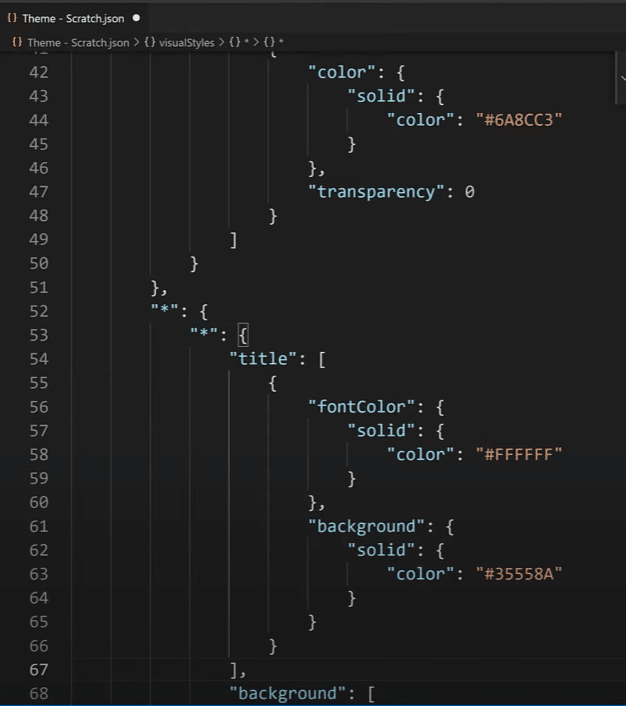
Changing The Title Text Background
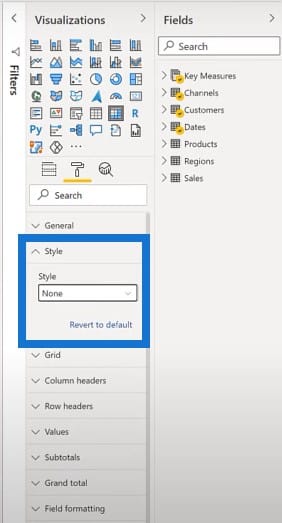
Let’s complete our demo by changing our title text background to the darkest theme color and the text color to white. As you can see, I haven’t figured out the proper syntax for setting the table and matrix style via the JSON theme file. So I used the interface to change the style of both visuals to none.
Let’s go back over to Notepad++ to copy the JSON code block for our title background.
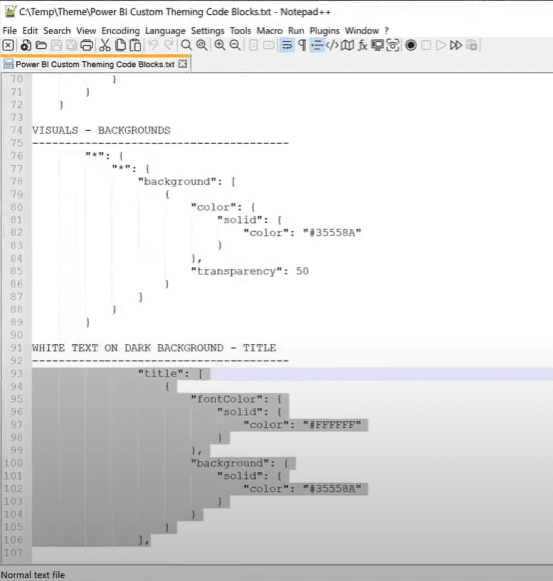
And then we go over to Visual Studio Code to paste the code there.
Again, we will save our theme, go back to Power BI, and apply the theme one more time.
Adding Shadows To Visuals
I also have a few small standalone demos that showcase a few theme options. Let’s reset our theme back to the default option. If we want to add shadows to all our visuals, we can use the visualStyles and dropShadow syntax.
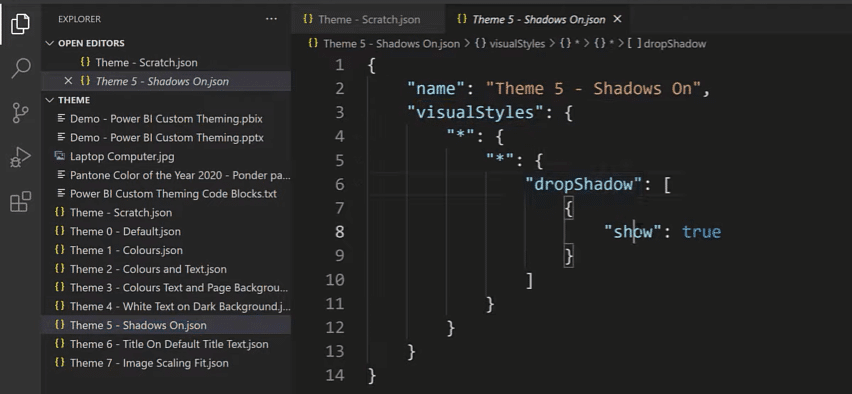
If we go over to Power BI and apply that theme file, you’ll see that all of our visuals have shadows.
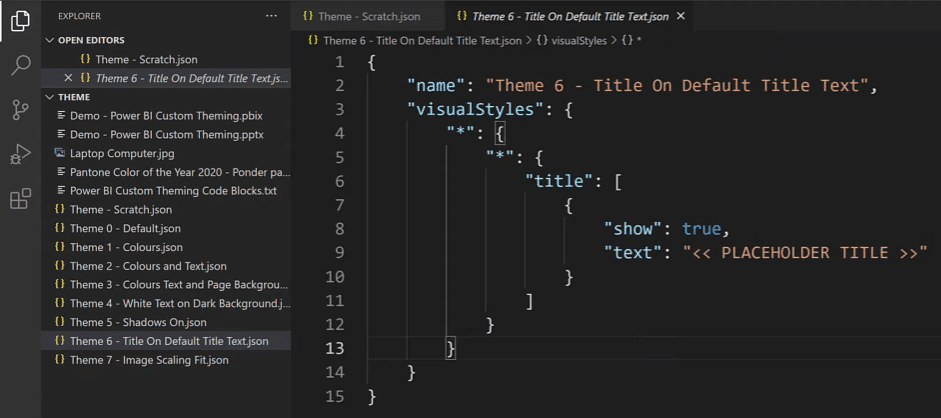
Adding Title Text
If we want to ensure that all of our visuals have title text, we can add some placeholder title text using the visualStyles, title, show, and text syntax in Visual Studio Code.
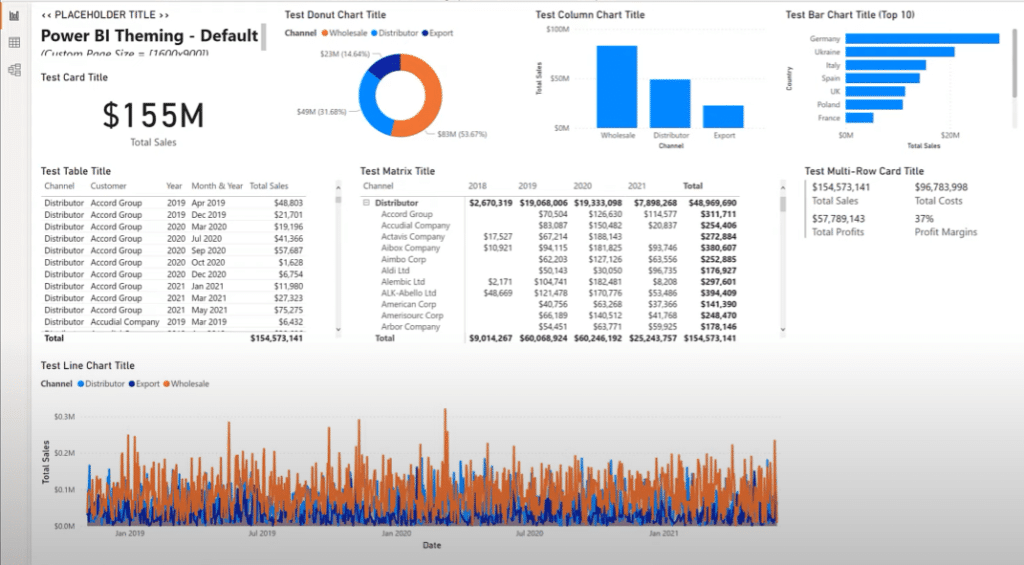
If we go over to Power BI and apply that theme file, we’ll note that only one of our visuals has changed because all the rest of them are modified already with titles.
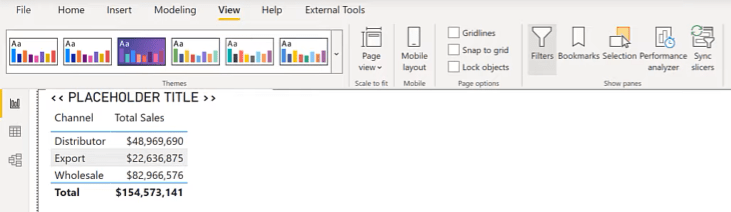
If we are to go to a new page, create a new table, and bring in the channels and measures we want, we have the default title text.
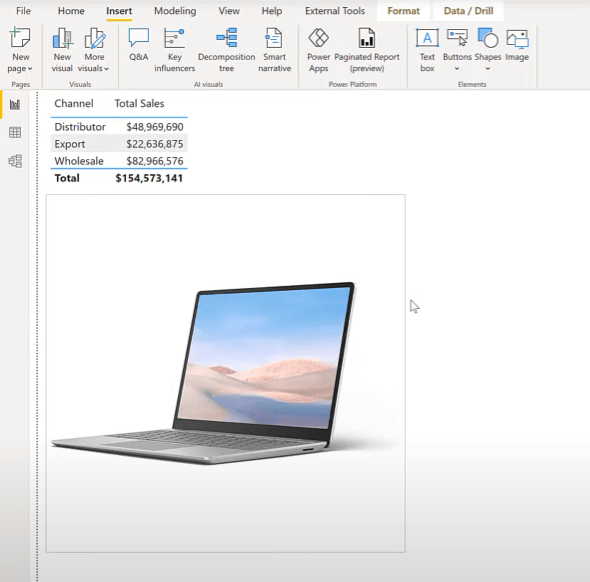
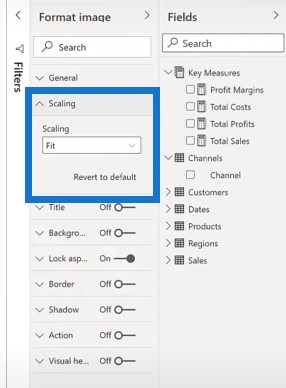
Another thing we can do is affect the way new images scale to their container. If we reset to the default theme and insert an image, we’ll see that it does maintain its aspect ratio.
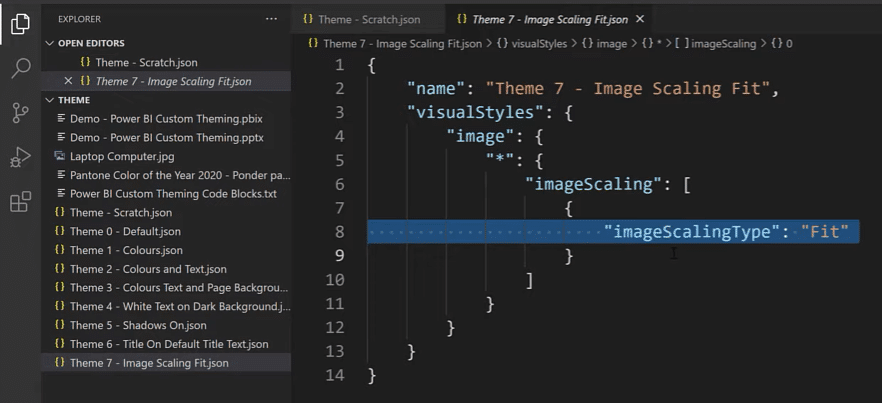
If we want to use a theme file to set the image scaling, we can use the visualStyles, image, imageScaling, and image ScalingType syntax.
If we flip over to Power BI and add that theme, we’ll see that the aspect ratio can now be changed for the existing visual.
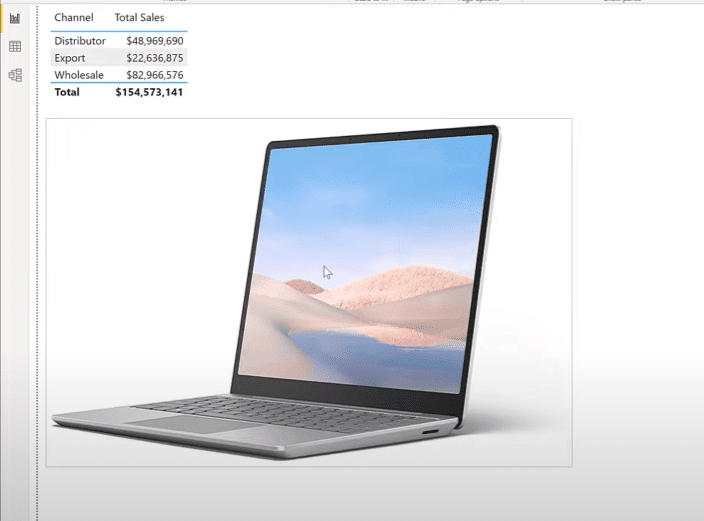
And if we add new visuals, we can see again that the scaling is now set to fit.
Other Things To Remember In Custom Theming
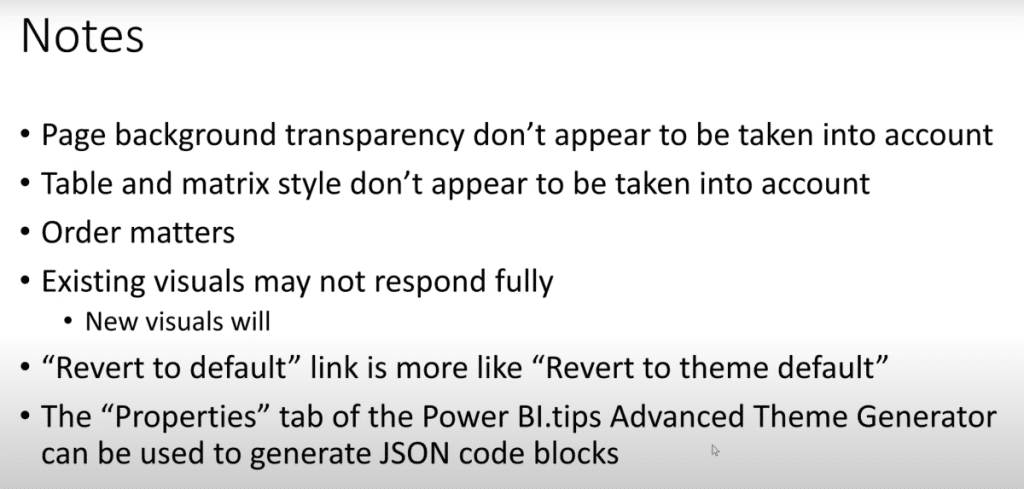
The page background transparency setting in the JSON file doesn’t appear to be taken into account, so I used the interface to set the page background transparency level to 0 before the demo started.
The settings for table and matrix style don’t appear to be taken into account as well. So I used the interface to set the table and matrix style to none.
Order does seem to be important in JSON theme files so if you find that a particular setting is not being taken into account, try reordering the setting of interest higher or earlier in the code.

Existing visuals may not fully respond to theme files, especially if they’ve had any format settings already applied.
***** Related Links *****
Creating Themes, Company Logos, Icons and Backgrounds
How To Select Power BI Color Theme For Your Reports
How To Create Compelling Power BI Color Palette
Conclusion
If you’re a relative neophyte in JSON coding, especially in Power BI, please take all the examples I’ve used with a grain of salt. I expect that those more experienced and familiar with JSON theme coding within Power BI will produce much better and more legible code.
Finally, I just wanted to share some of my initial experiences and showcase a few of the customizations I’ve found in custom theming. There is a multitude of settings available for Power BI JSON theming, and those who are willing to invest the time and effort to research the available online resources can iteratively develop useful theme files.
A great starting point is the properties tab of PowerBI.tips’ advanced theme generator, where you can use their UI to generate JSON themes files for all or specific visual types. Hopefully, you can add custom JSON theme coding to your Power BI toolbox and it can both help to standardize your reports and save yourself some work in the future.
Greg


