
I’m going to show you how to keep your practice dataset updated every time you do a refresh. You may watch the full video of this tutorial at the bottom of this blog.
If you really want to improve your DAX skills, the way way is to use it and put it into practice. And to do that, you’d need a practice dataset that helps you visualize and work on possible real-life scenarios.
The problem with practice datasets is that the data is usually static. For you to practice efficiently, you need to give the impression that the data is live.

Setting Up A File Path For The Practice Dataset
For my sample data, I have an Excel file containing Sales data from 2014, 2015 and 2016.
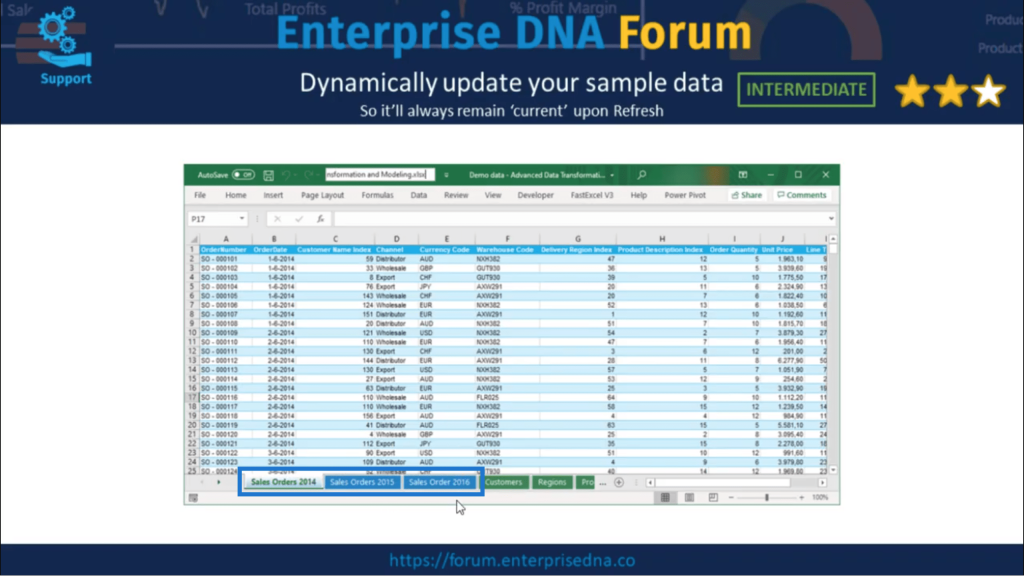
This is the data that I need to update.
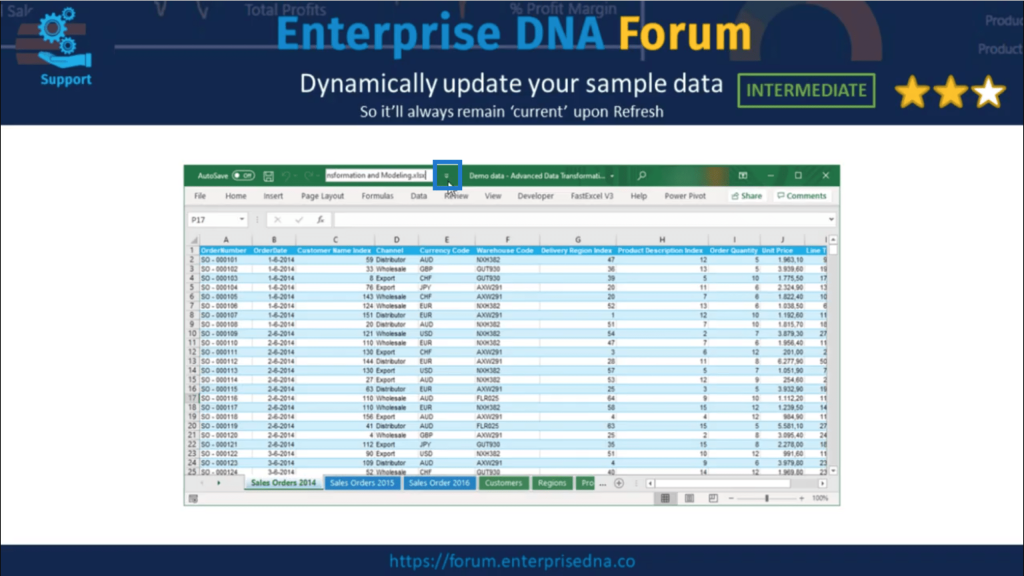
The document location can be found here on my Quick Access Toolbar.

I need that to set up a parameter for my file path. So I’m going to copy that document location.
There’s an access point to the Quick Access Toolbar on the right side of that.
Once I press that, I get this screen.

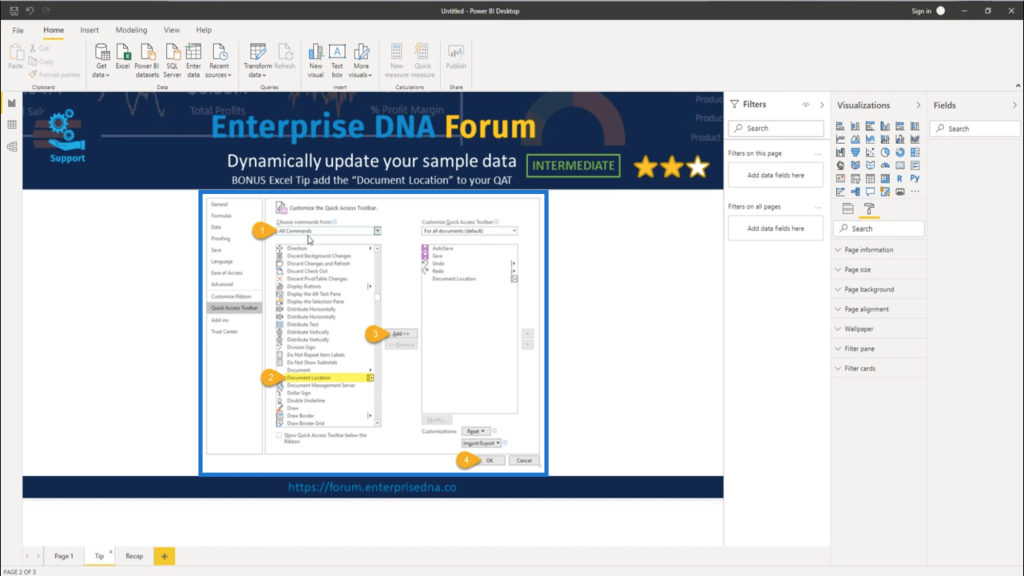
So I’ll go for All Commands and then choose Document Location. Add that to the Quick Access Toolbar and press OK.
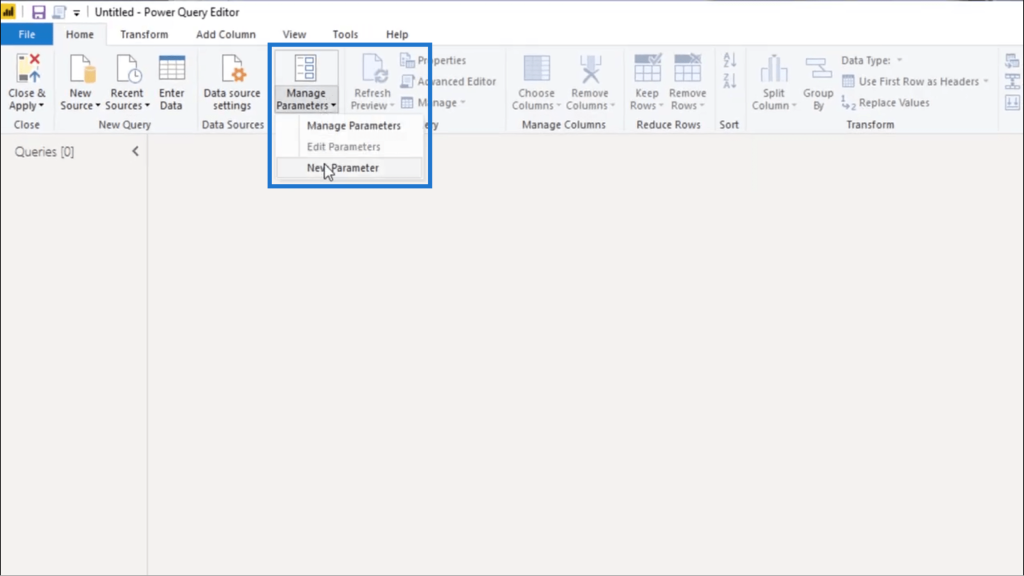
Now, I’ll go into the Power Query to create the parameter that will hold my file path. This step is important because it allows all the queries inside the model to be restored should another user change the file location.
So I’ll create a new parameter.
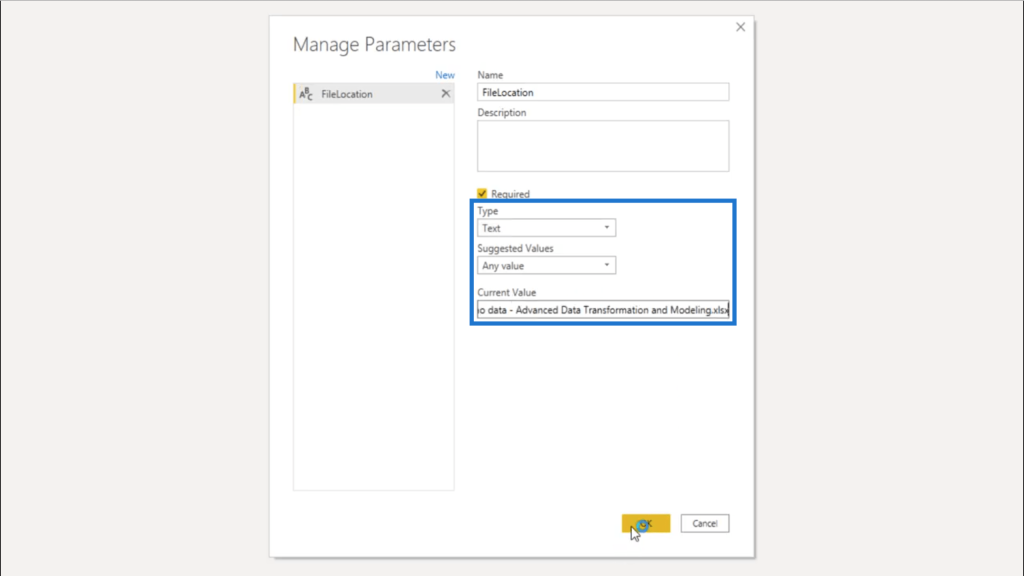
I’m going to call that FileLocation.
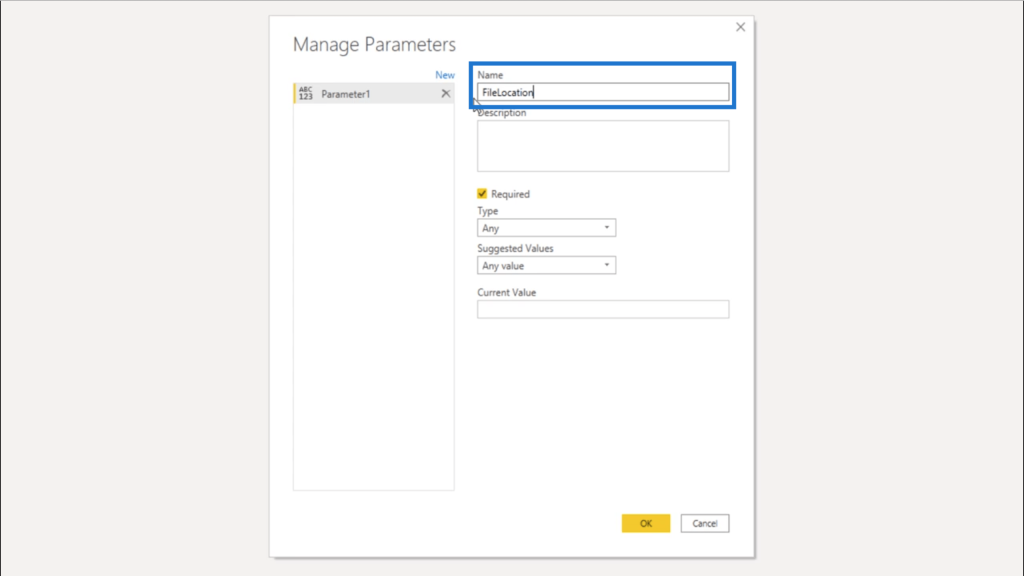
Under type, I’m going to select Text. And for Current Value, I’ll paste in the document location I copied earlier.
I’m going to create a new query.
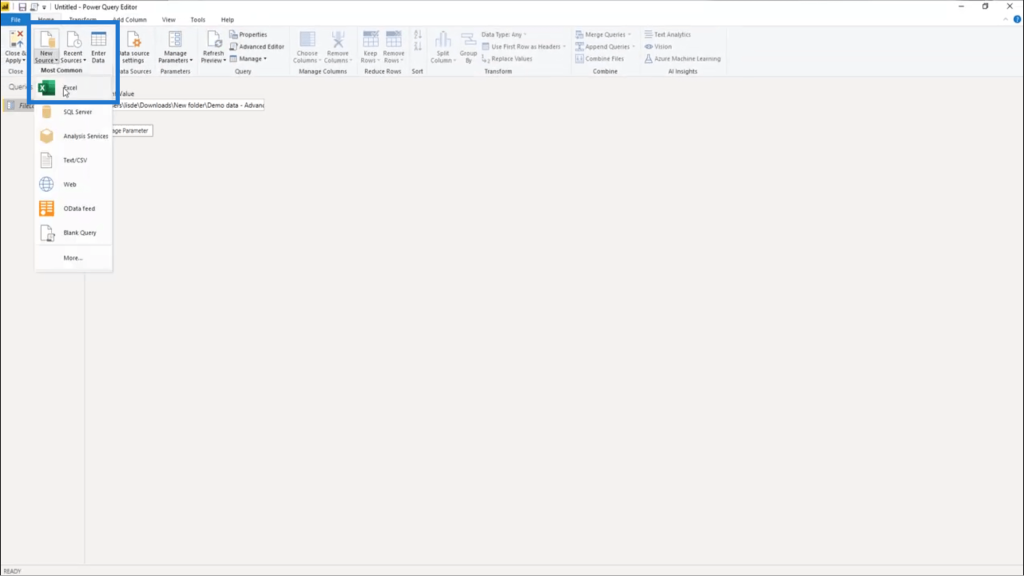
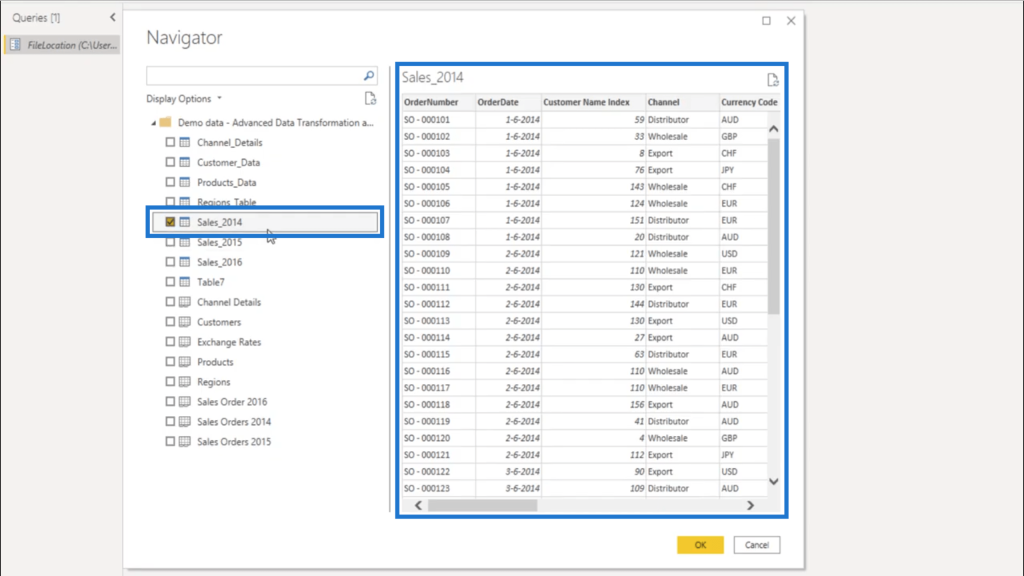
Then I’ll choose the sample data I’ll be using as my practice dataset.

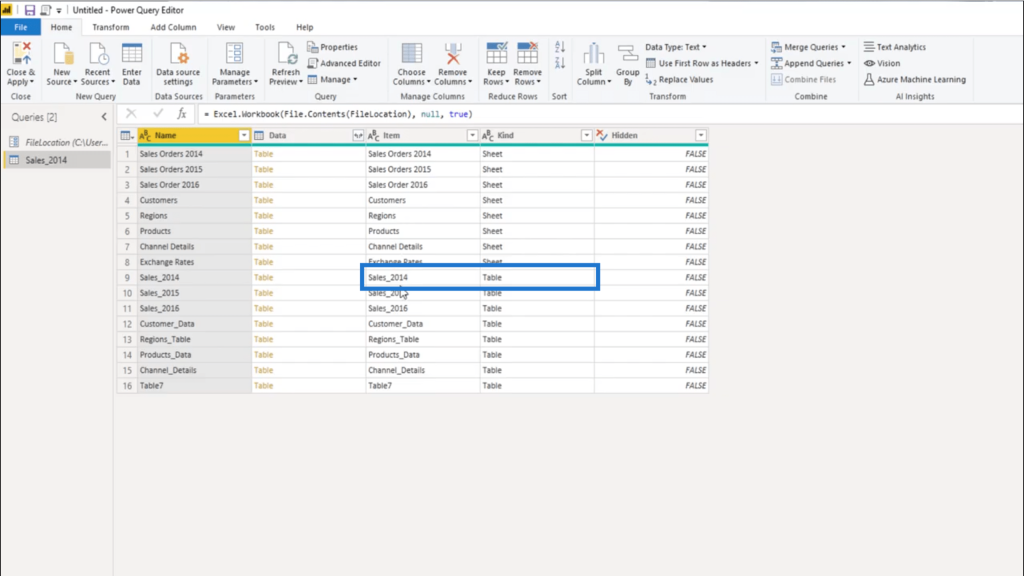
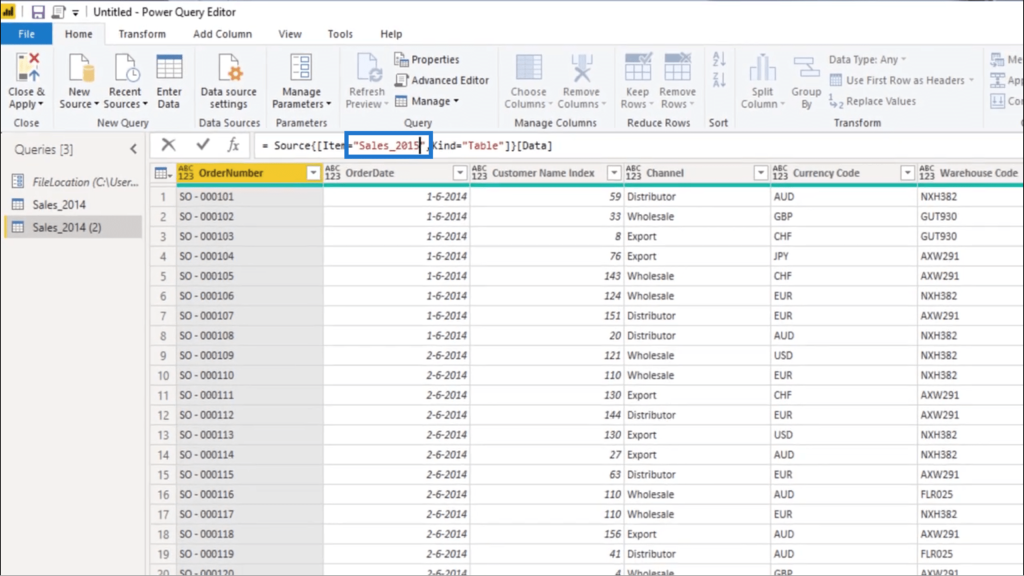
A number of different tables will come up here since I have Sales data from 2014, 2015 and 2016. I just need to choose the first one, which is Sales_2014.
Now that I’ve chosen the Sales_2014 data, it’s time to change that hard-coded file location into a dynamic file location.
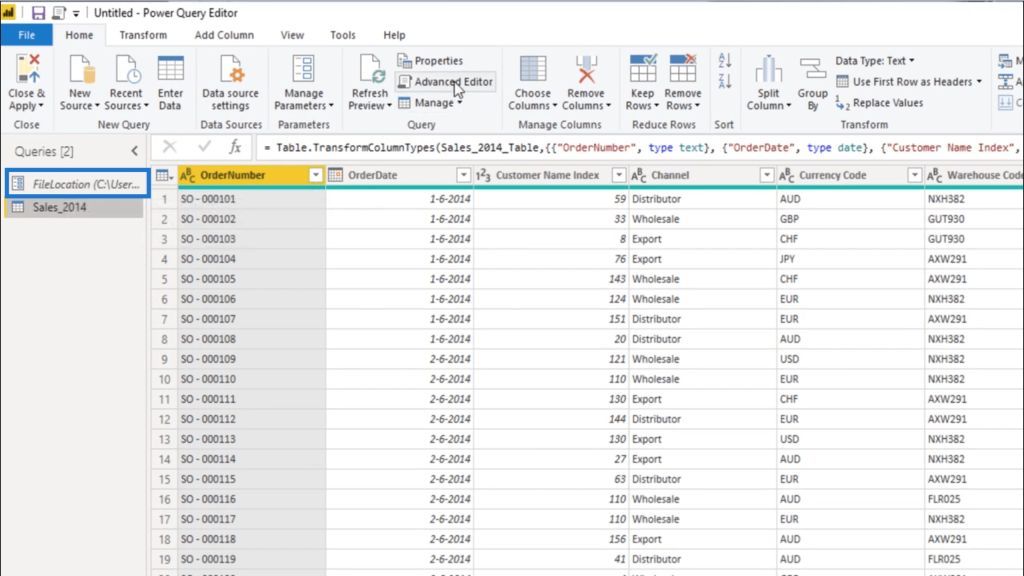
I’ll go into the Advanced Editor and select everything that’s related to the file location.

Then, I’ll change that into the FileLocation parameter I created earlier.
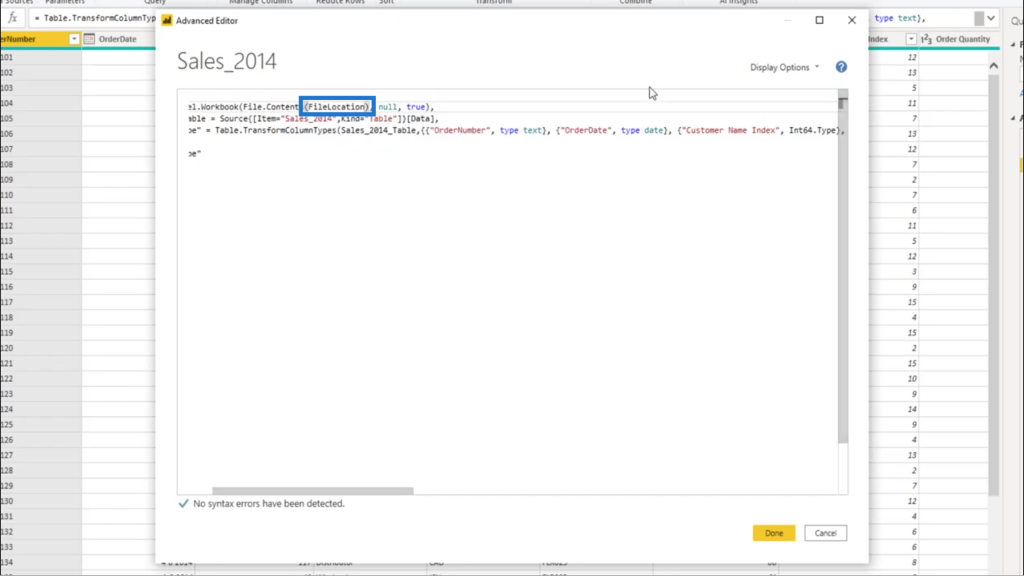
Then I’ll press Done to lock those changes into the Sales_2014 query.
Creating The Data Prep Folder
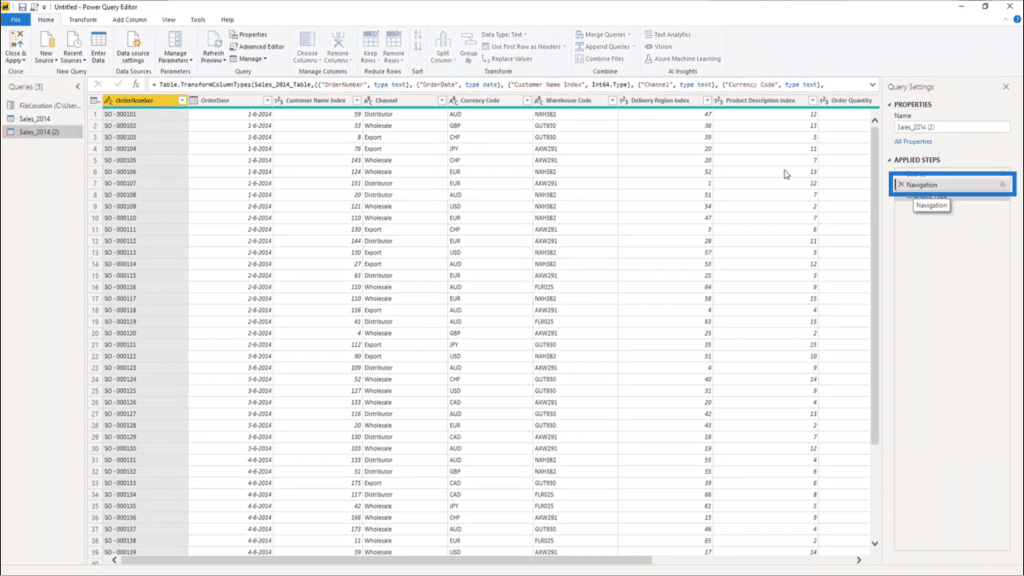
Looking at the Applied Steps for the Sales_2014 query, I’ll click on the Navigation step. This shows me that it references the Source step.
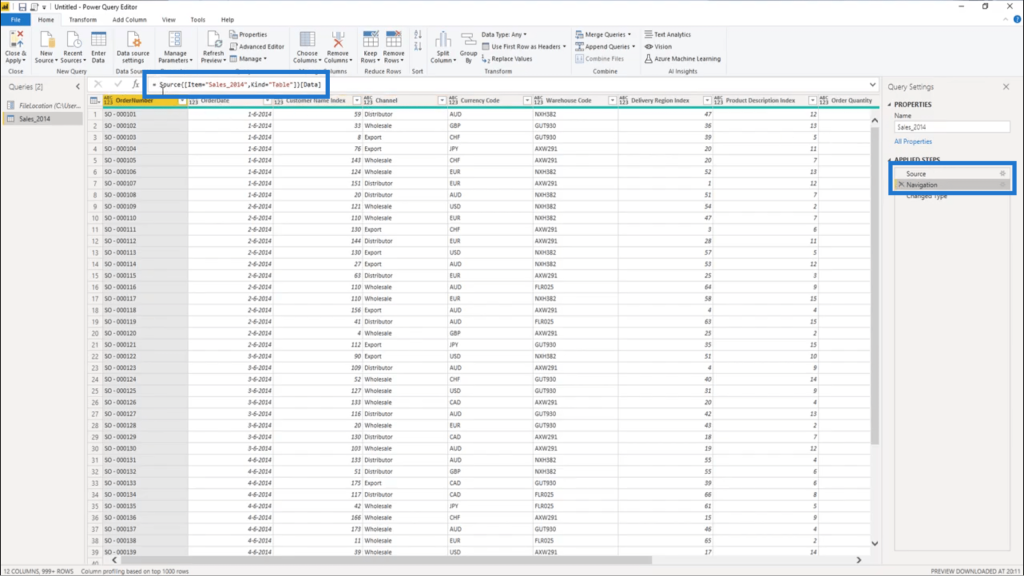
It also references Sales_2014 which is shown as a Table. It also shows that it’s extracting data from the Data column.
Now, let me look at the Source step next.

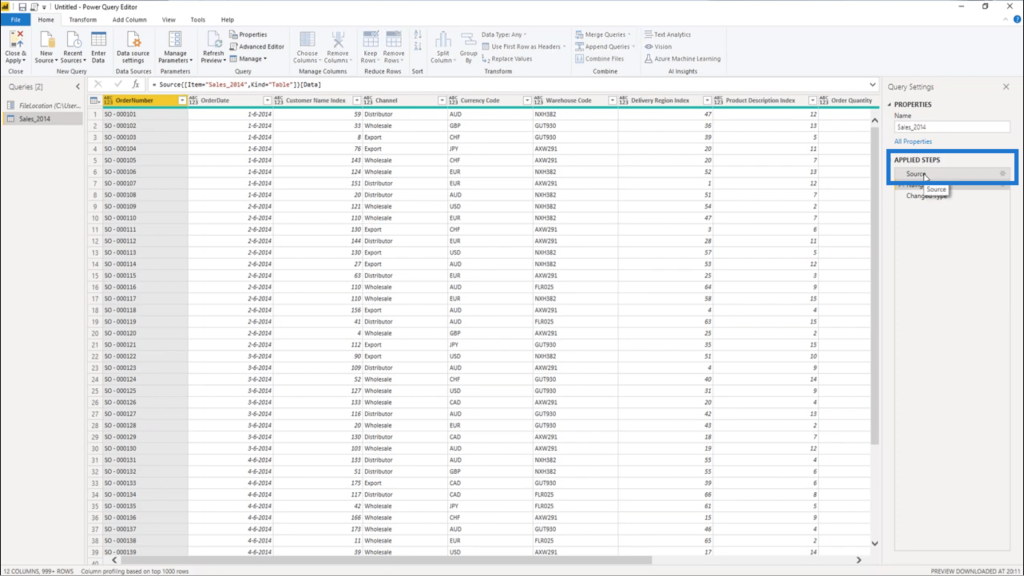
The Source step shows me everything that resides in my Excel file. If I check those coordinates, I see Sales_2014, and under Kind, it says Table.
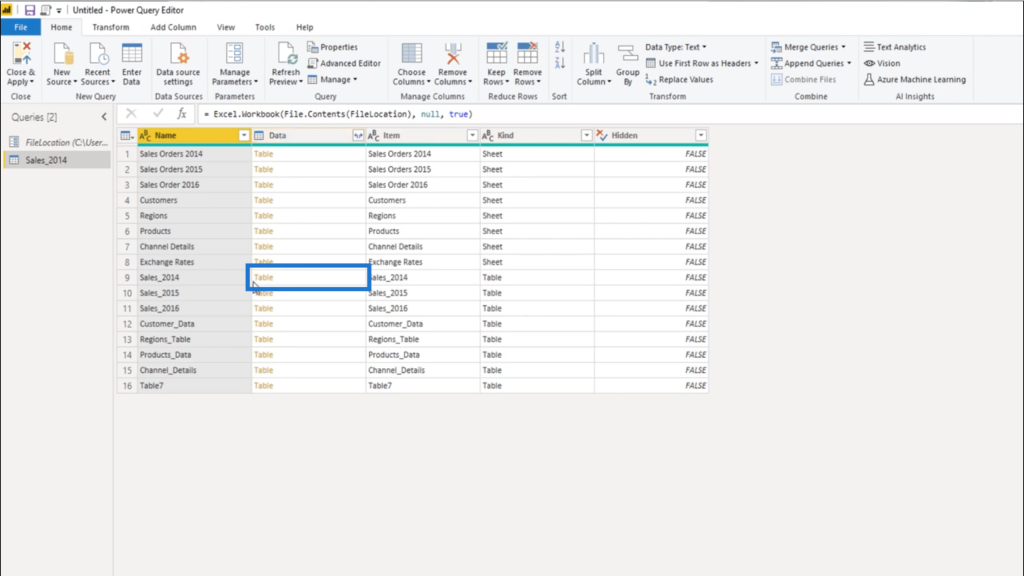
When I look up the data column, it shows the Table object that was extracted.
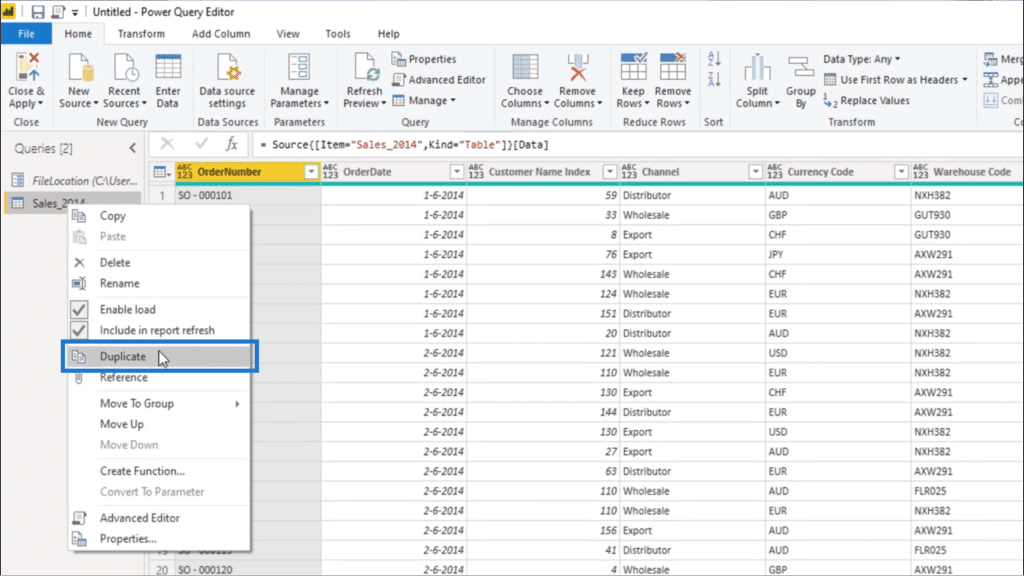
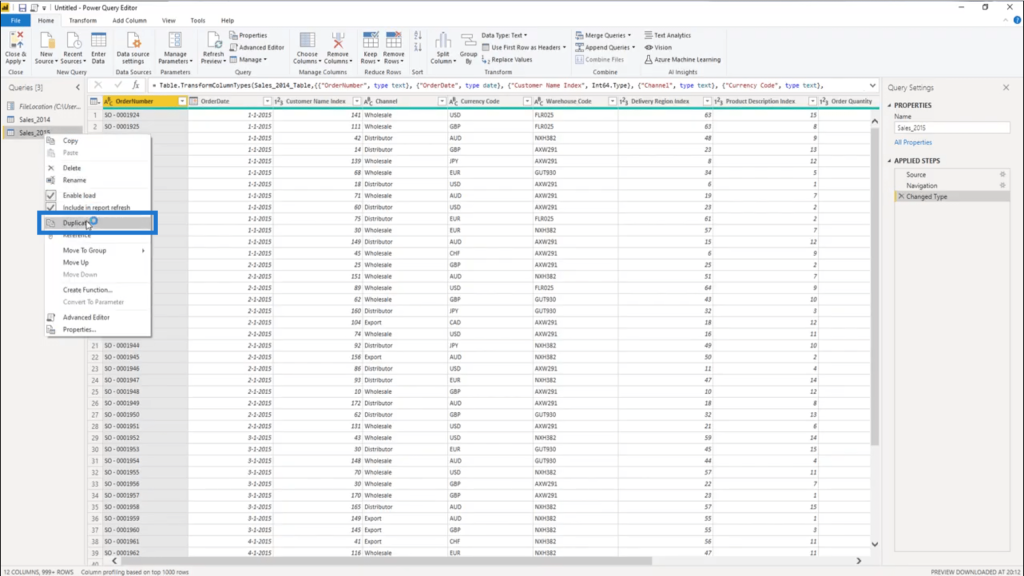
So I can duplicate this query to come up with the 2015 data. To do that, I just need to right click on Sales_2014 then choose Duplicate.
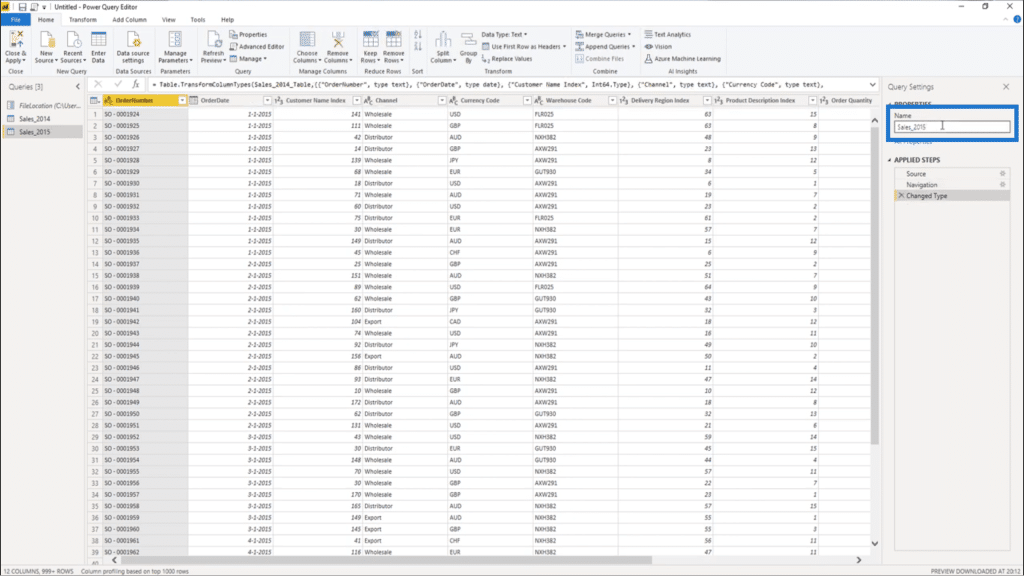
Then, I”ll step back into the Navigation step.
I’ll change that year from 2014 to 2015.
I’ll also also rename that here under Properties. I’ll call it Sales_2015.
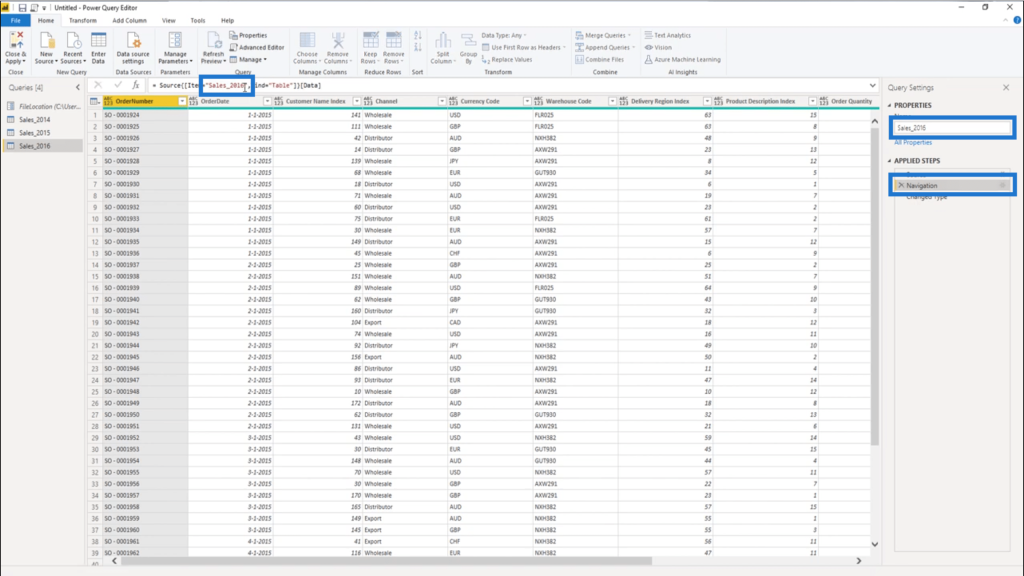
This time, I’ll duplicate Sales_2015.
Then I’ll step back into the Navigation step and change the year to 2016.
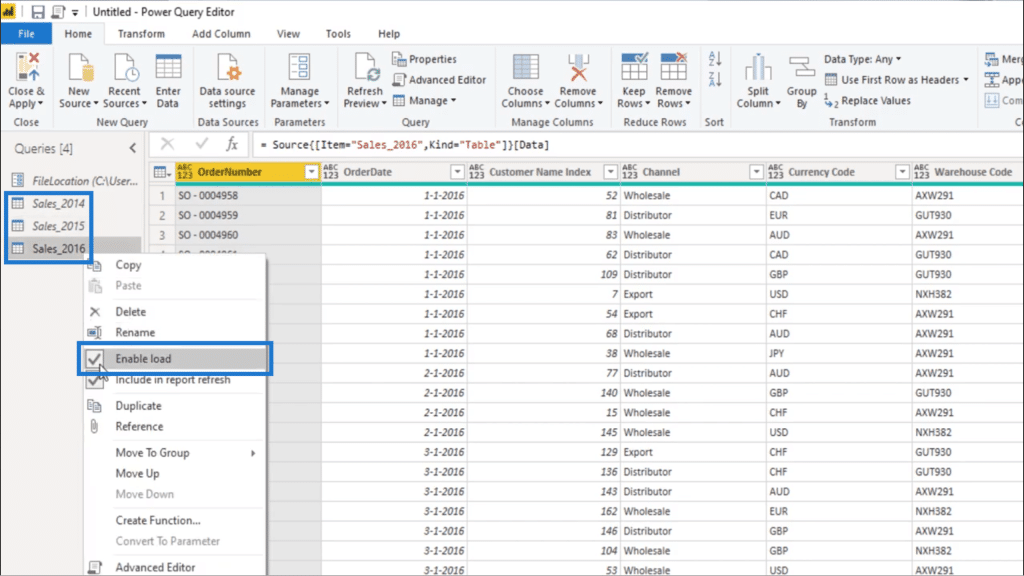
I now have my complete Sales data. But these queries should not be loaded into my model. I just need to right click on each one of them and deselect Enable load.
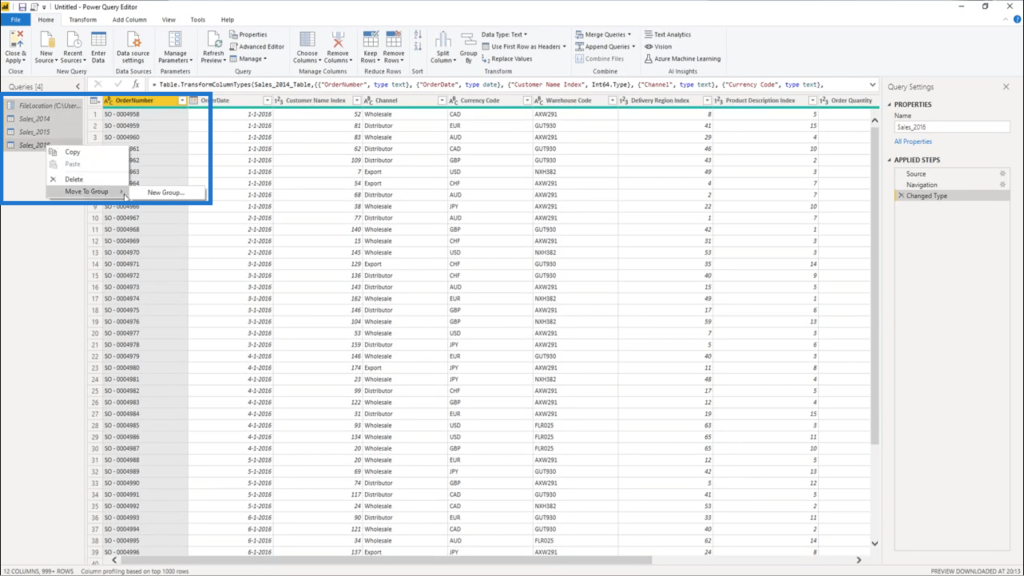
Now, I’m going to select all the queries and place them in a single folder to make things more organized.
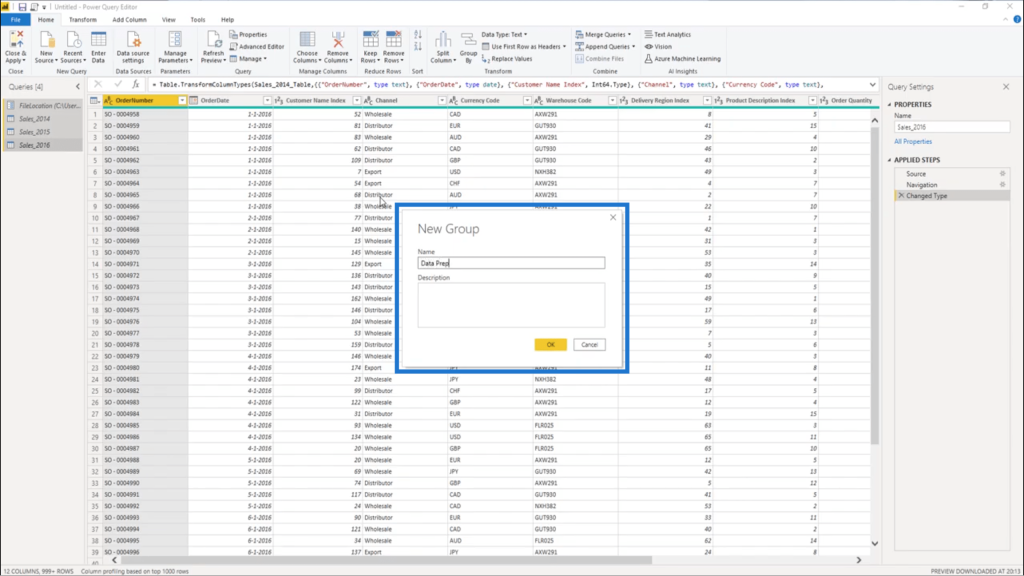
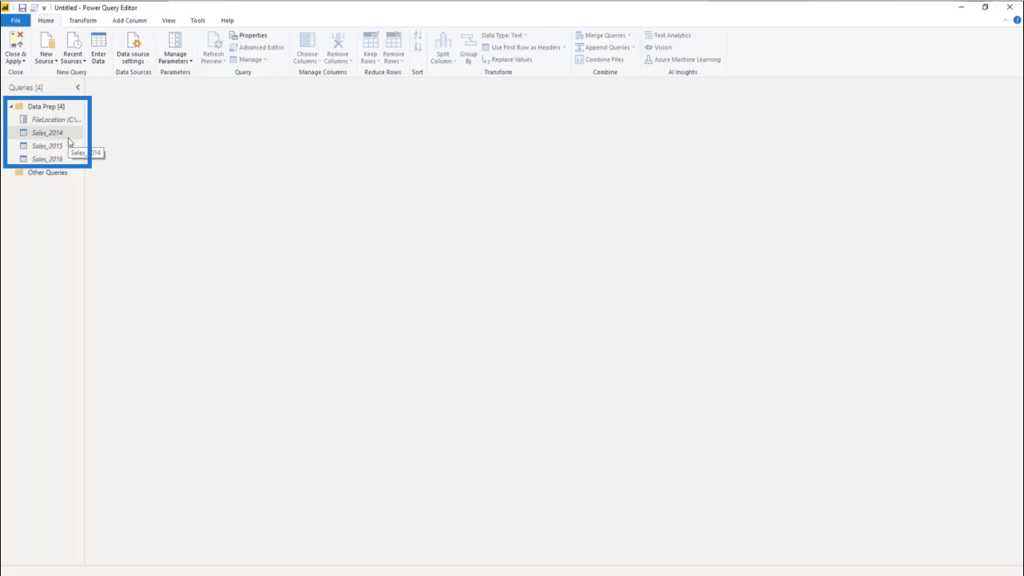
I’ll call this folder Data Prep.
Getting The Day Offset
The sample data here under Data Prep is going to be static. This means that the 1st and the last dates will never change.
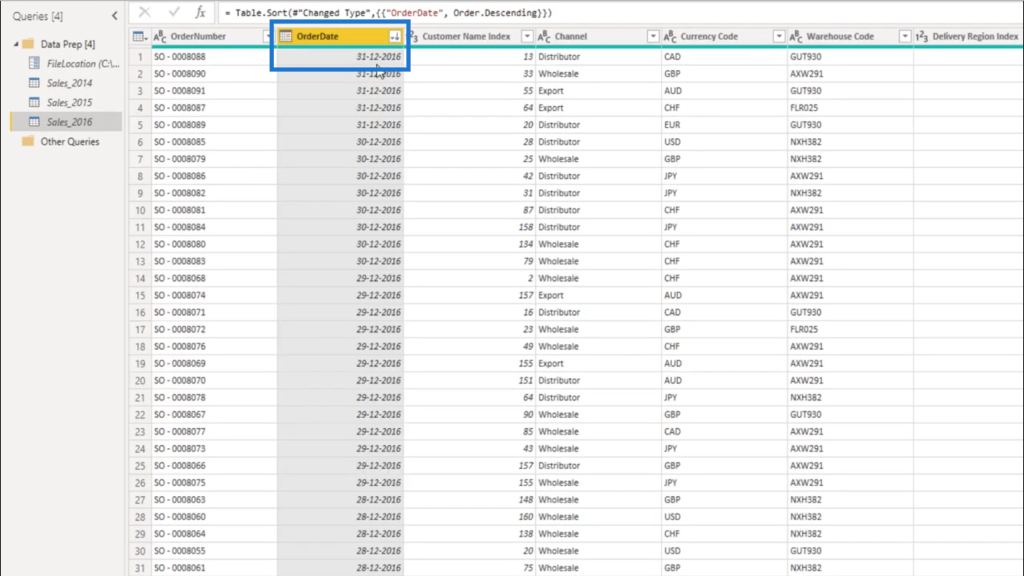
So I’ll go into Sales_2016 and I’m going to sort the Order Date column in descending order to get the last date from this data set.
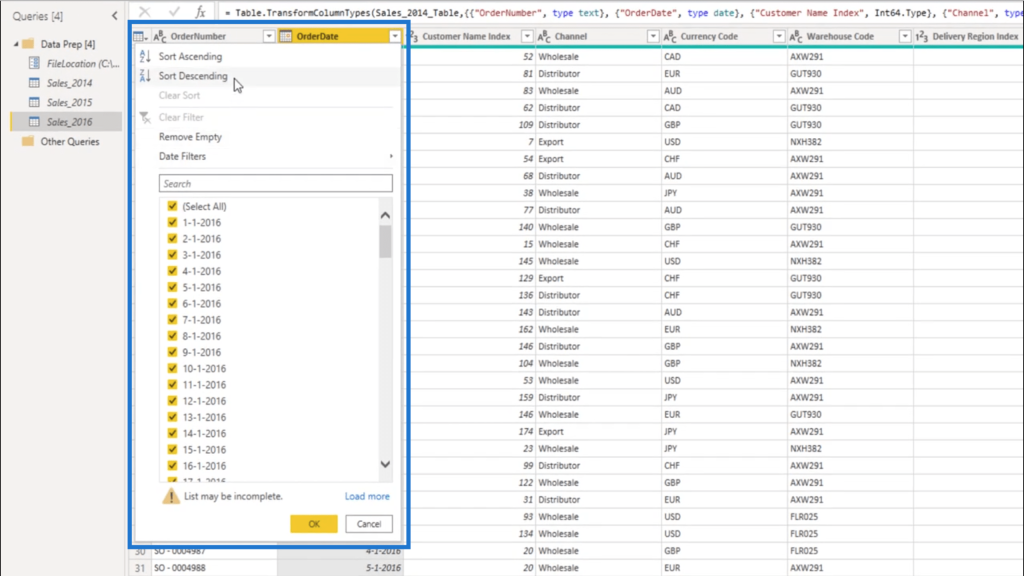
The last date in this data set is December 31st 2016.
Now, I’ll create a new query.

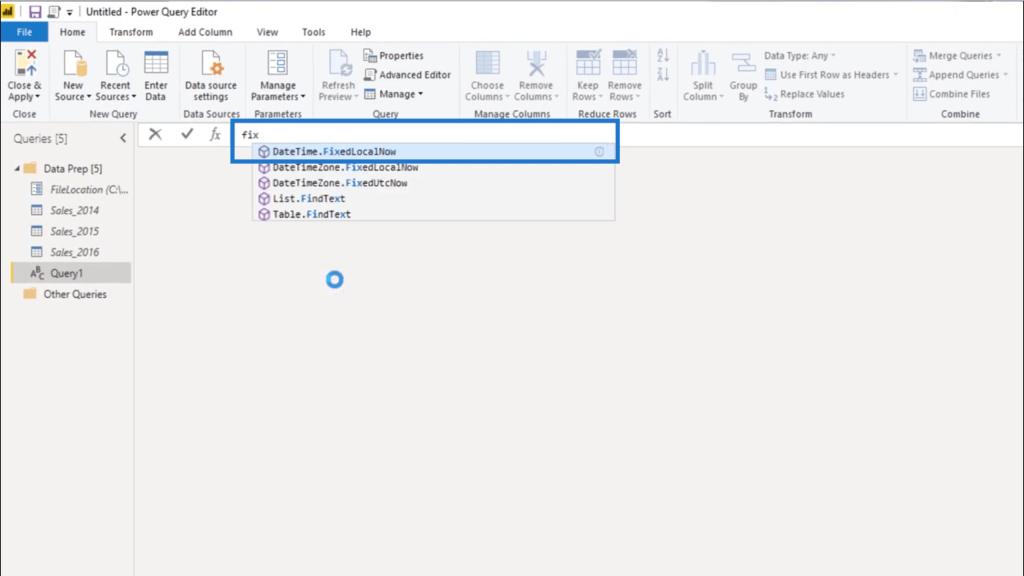
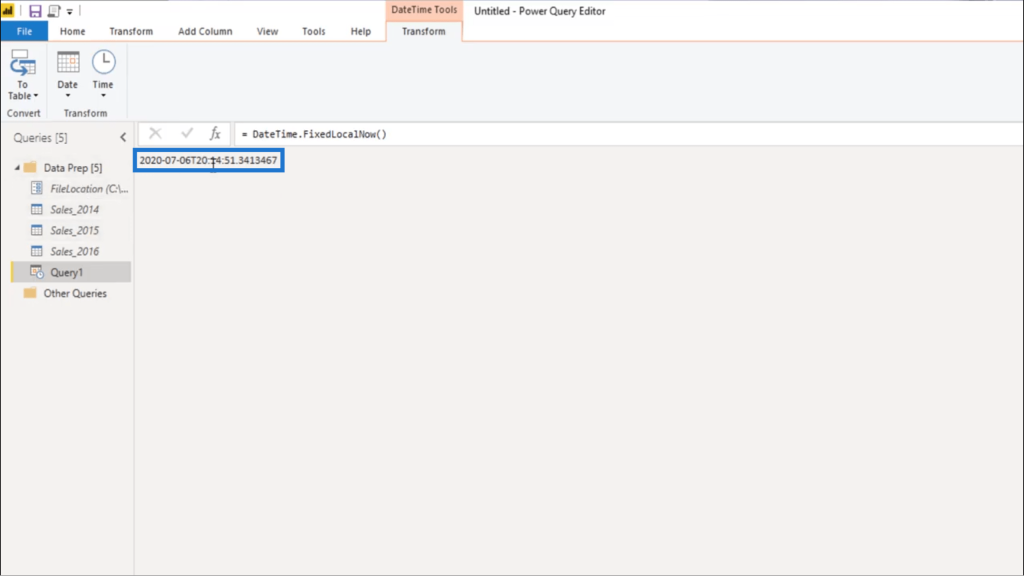
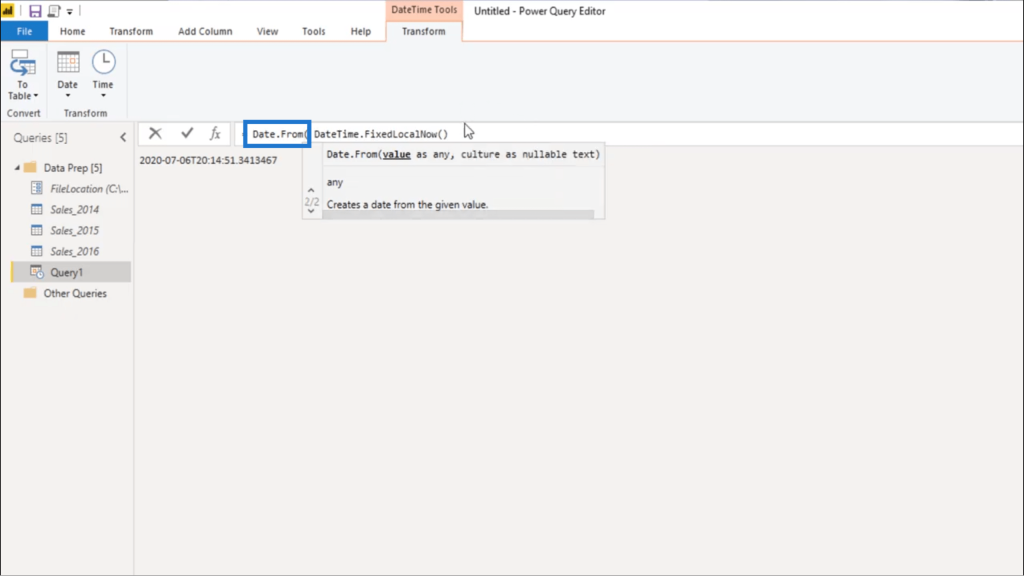
Then, I’ll check what the Day Offset is from the last date in the data set to today. This means I need to find out what today is. To do that, I’ll use the function DateTime.FixedLocalNow. This will give me the date and time from the machine that I’m working on.
But I don’t really need the time portion here. I only need the date portion of this value.
So, I’m going to extract the date using Date.From.
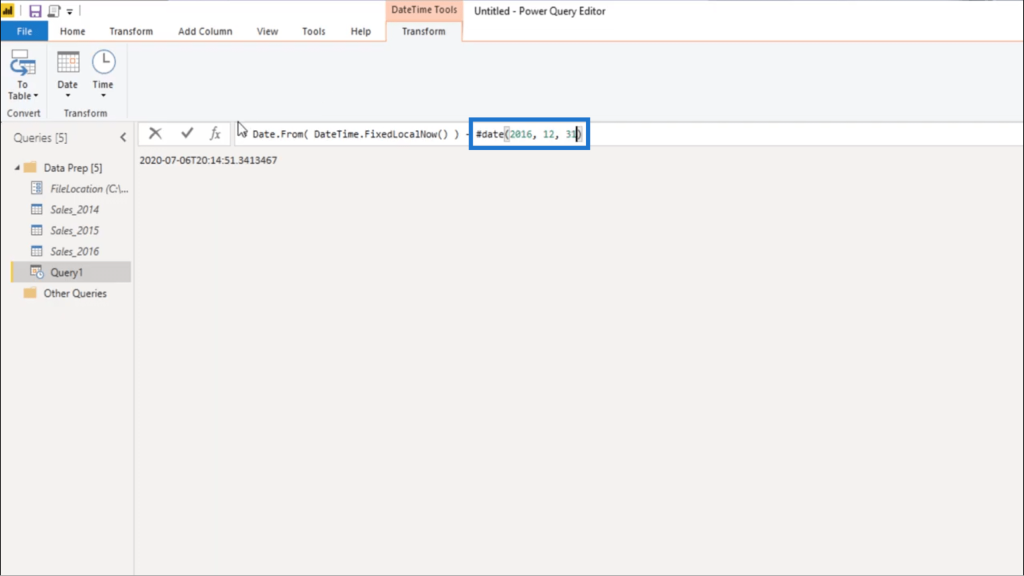
Then from that value, I’m going to subtract the last date in my data set. Since the data is static, I can use the intrinsic date value. So that’s #date and then reference December 31st, 2016.
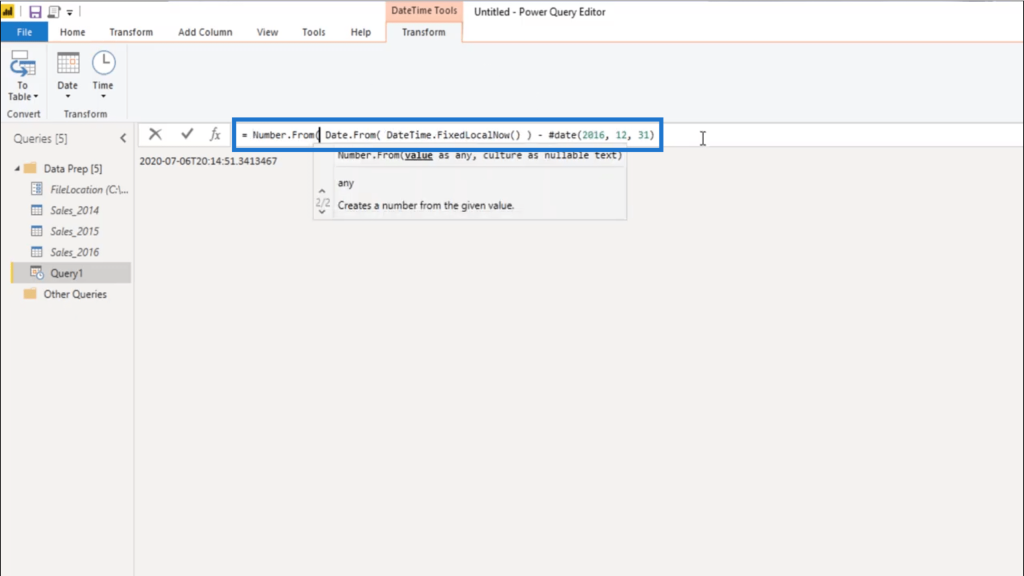
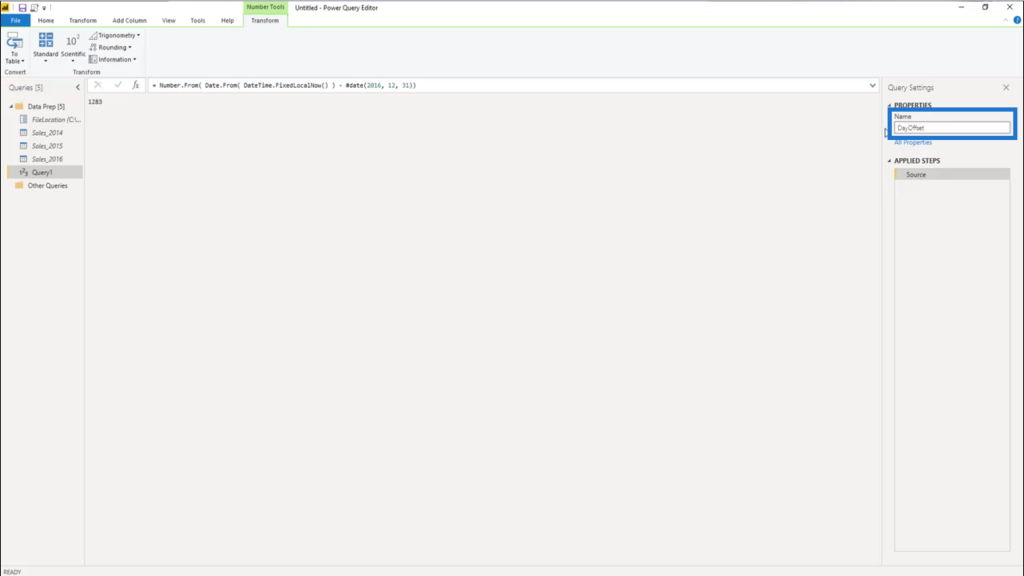
Now, I need to extract the number from this difference. So I’ll add Number.From and close it off with a parenthesis. Then, press enter.

I’ll rename this as DayOffset.
Setting Up Dynamic Date Ranges
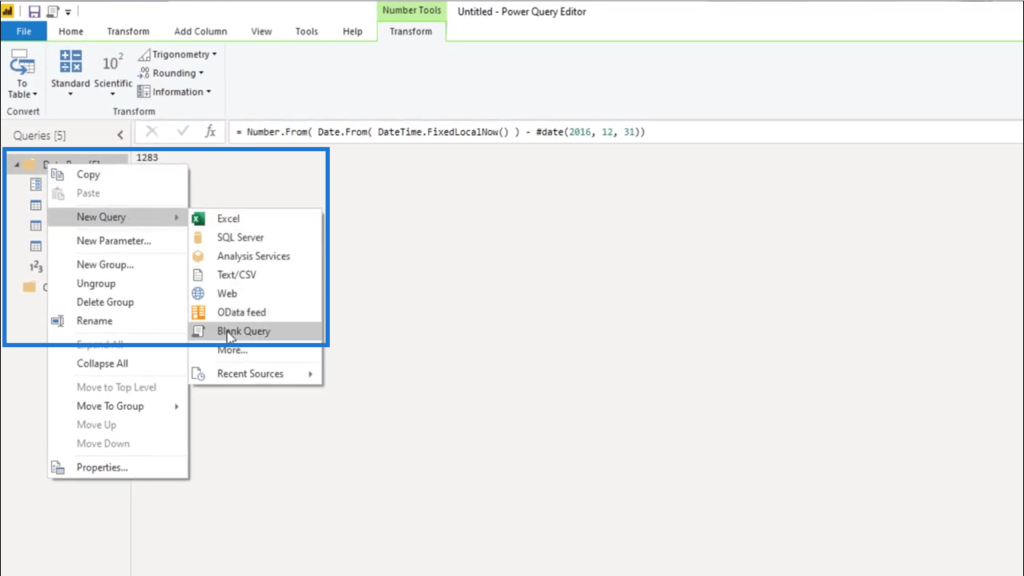
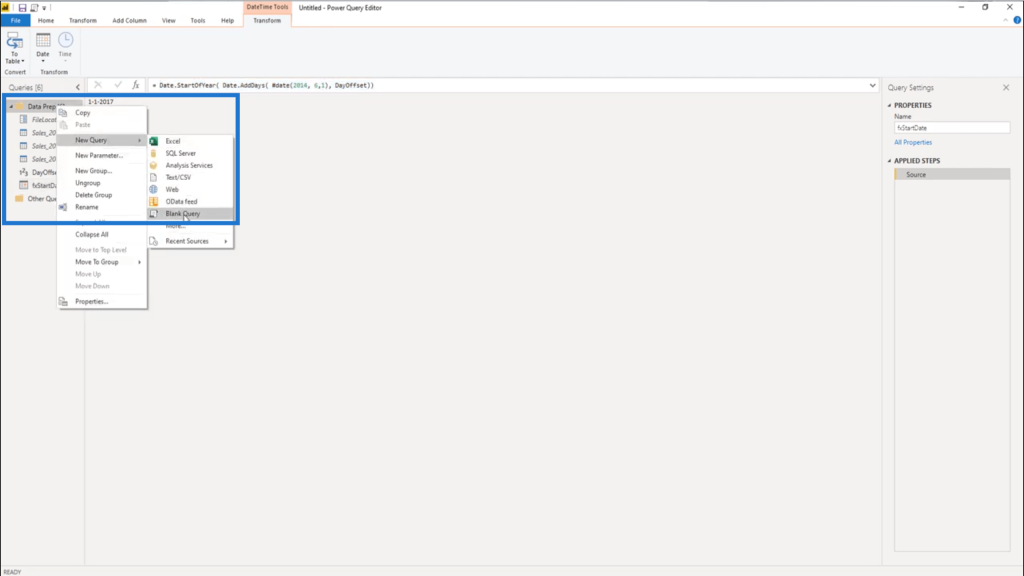
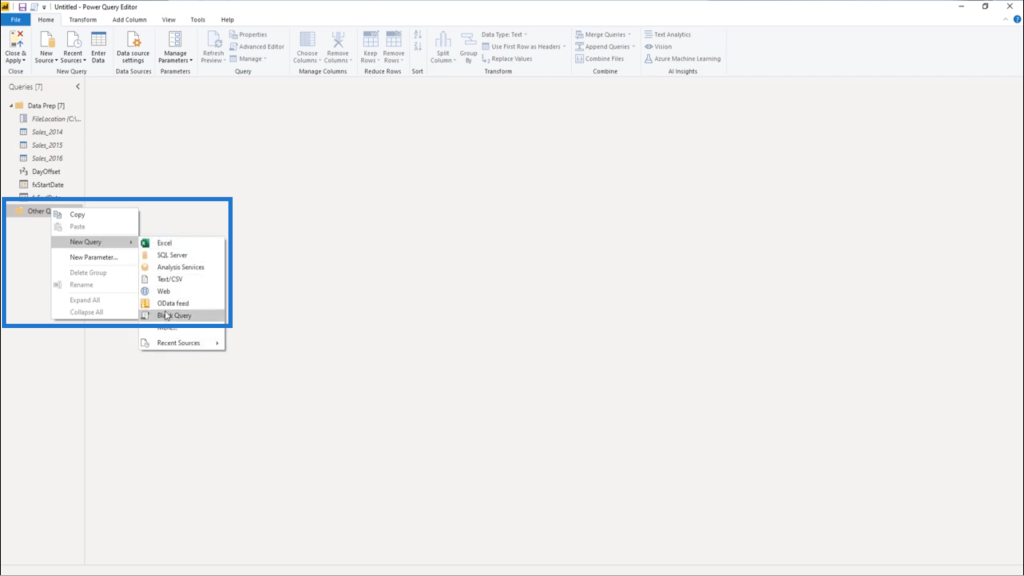
I also need dynamic date ranges for my date table. I’ll start off by doing a right click on the Data Prep folder and creating a new Blank Query.
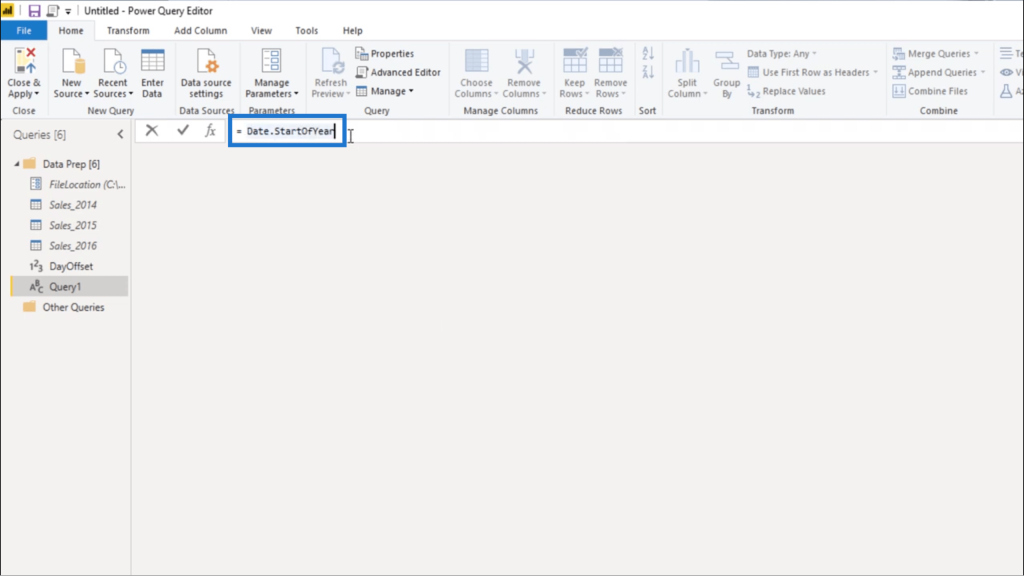
Then, I’ll work on the Start Date of my Date table.
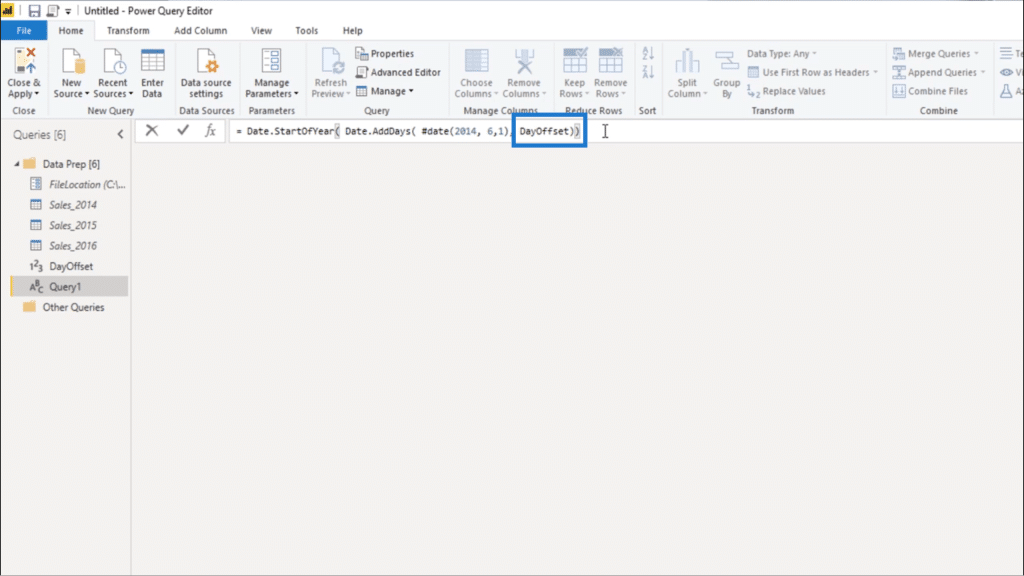
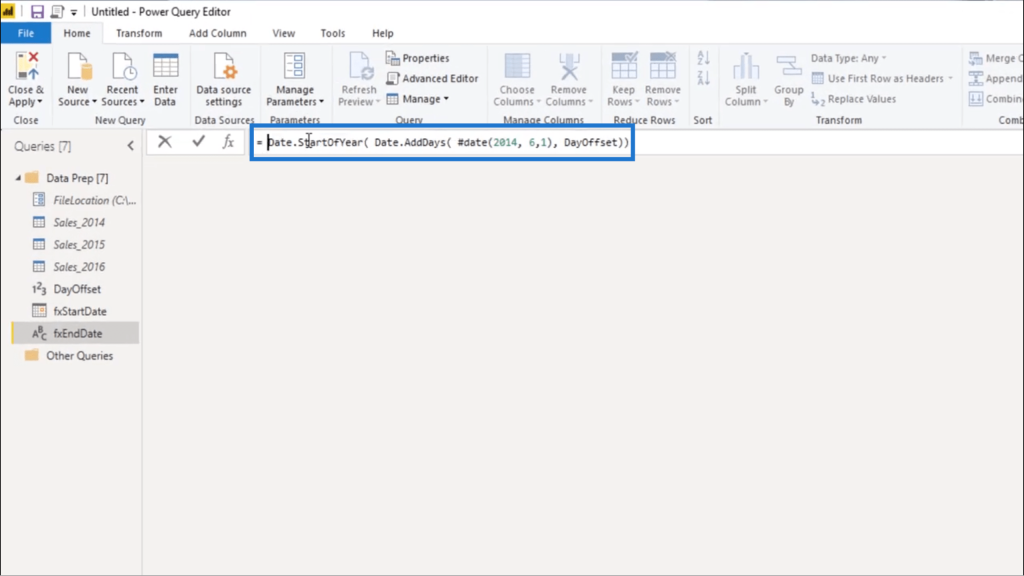
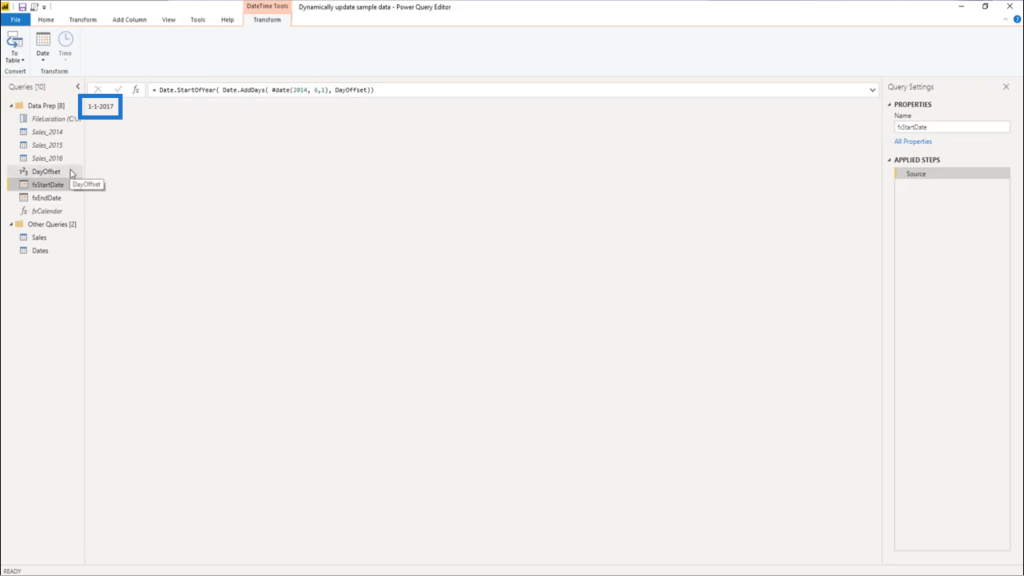
I always want the 1st day of the year as my Start Date. So I’ll put the equal sign and use the function Date.StartOfYear.
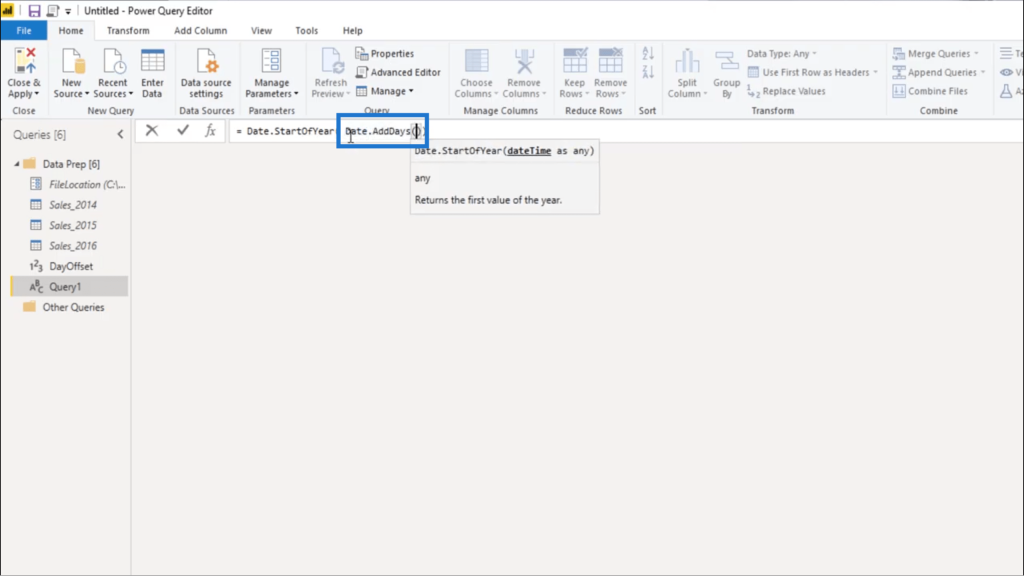
Since I need to give that a value, I’m going to offset that by using Date.AddDays.
Then I’ll use the intrinsic date value again and use the 1st date on my data set, which is June 1, 2014.
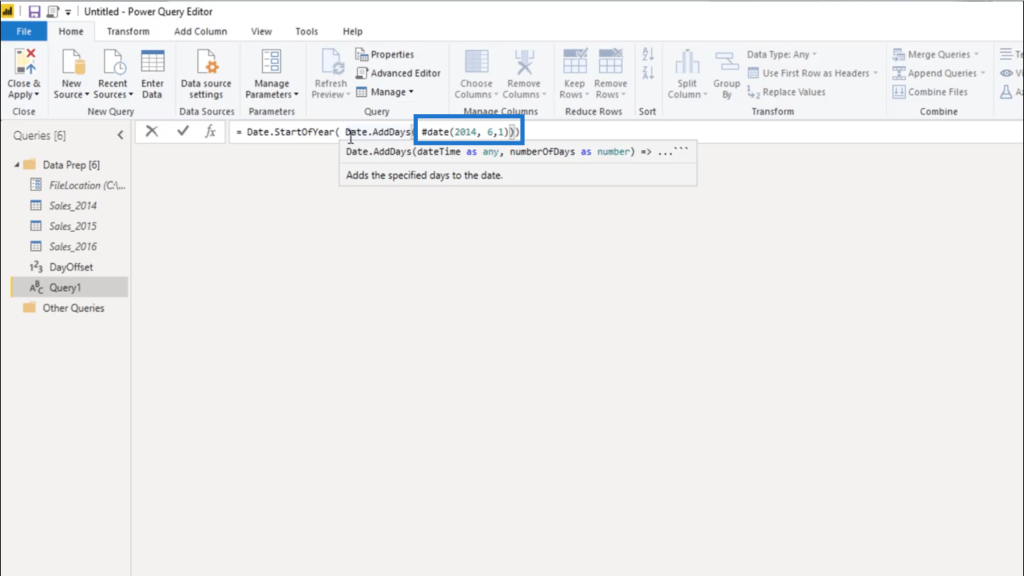
I also need the number of days that I calculated in my DayOffset, so I’m going to add that.
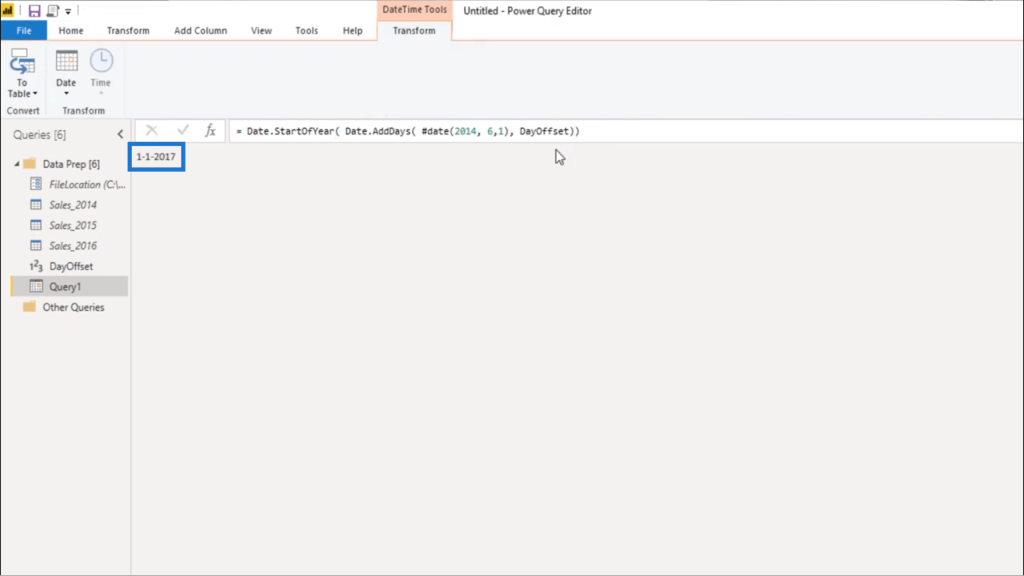
Once I press enter, it gives me January 1, 2017. This is going to be the 1st date in my date table.
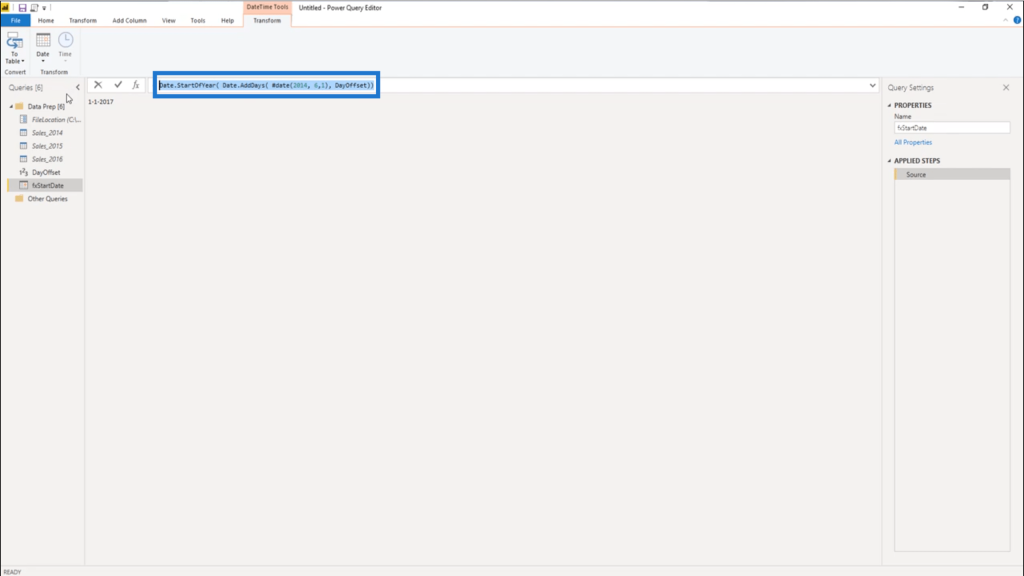
I’ll rename that to fxStartDate.

Now, I can set up my End Date. I’m going to copy this syntax I used on my Start Date.
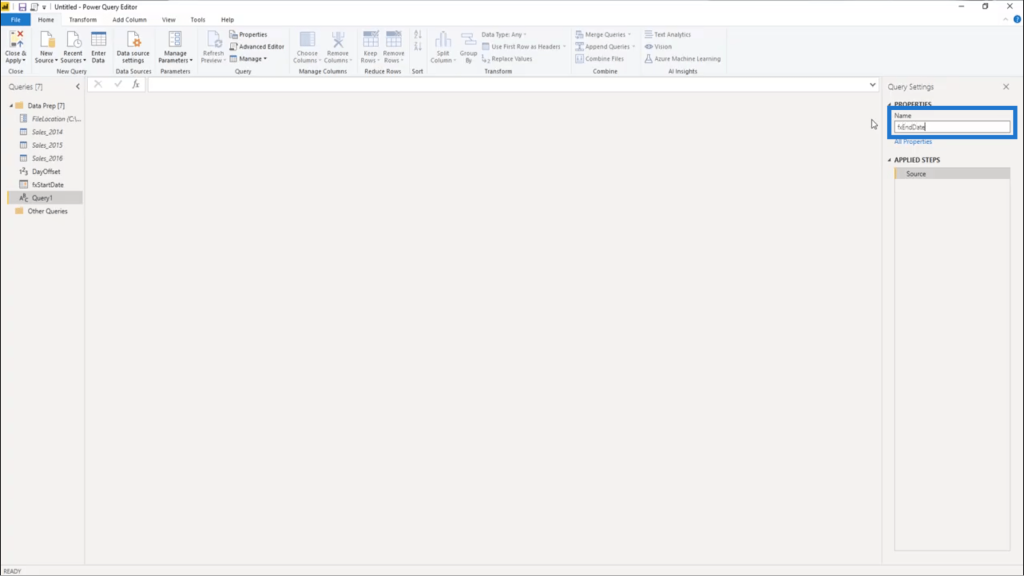
I’ll create a new blank query.
Then rename it to fxEndDate.
Then I’m going to paste the syntax from my Start Date.
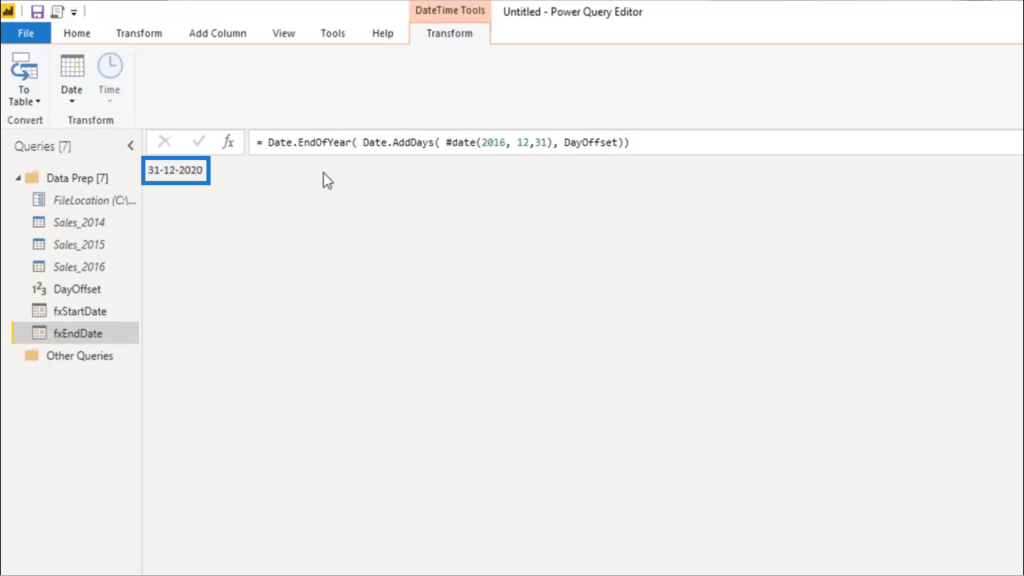
Instead of StartOfYear, I’ll change this to EndOfYear.
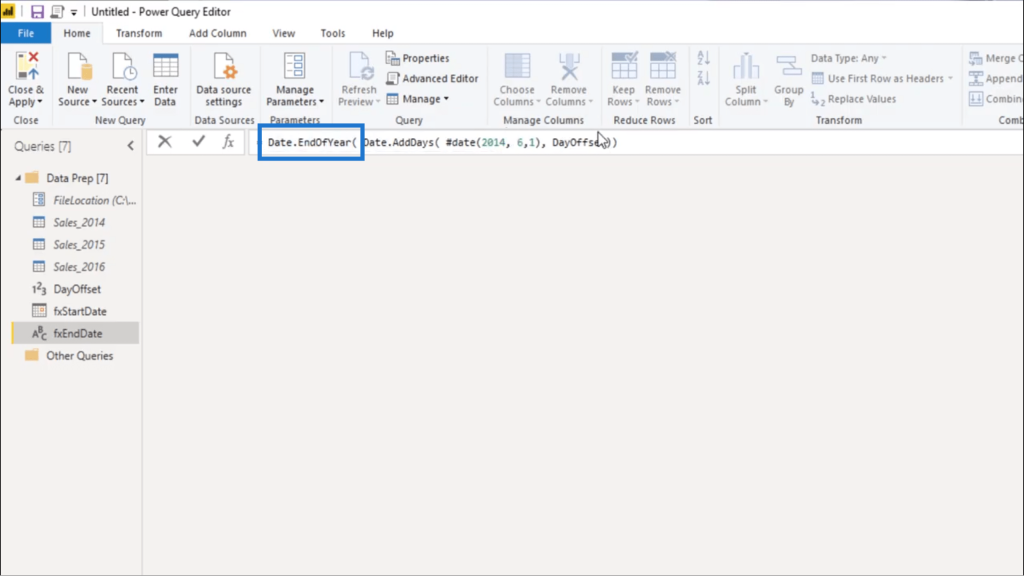
I’m also going to use the last date of my data set, which is the 31st of December.
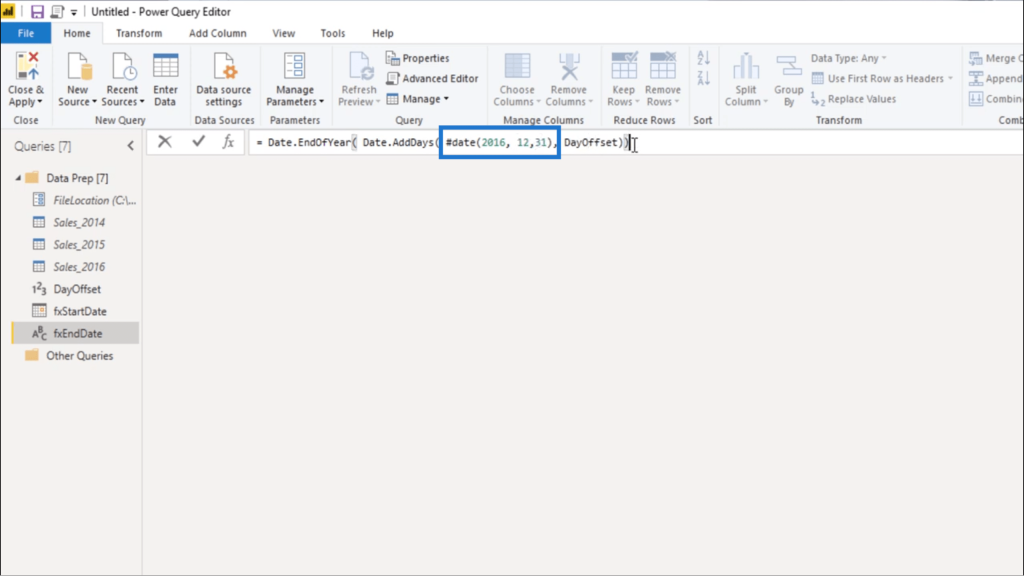
When I press enter, it returns December 31st, 2020.
Creating A Single Sales Table
I’m going to combine the 3 tables into a single Sales table. To do that, I’m going to create a new query.
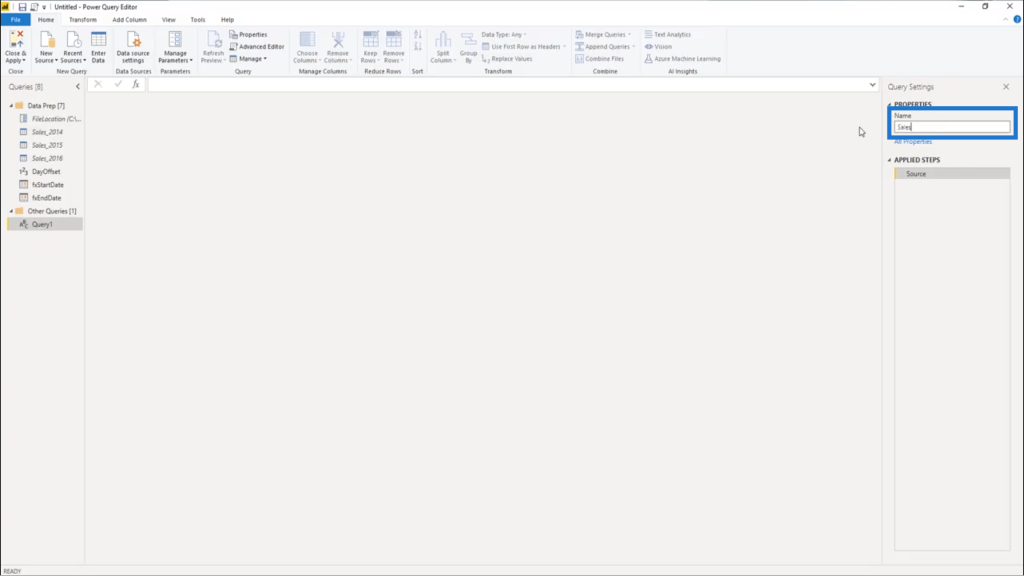
I’ll call this my Sales table.
Then I’ll combine Sales_2014, Sales_2015 and Sales_2016 into a single table.
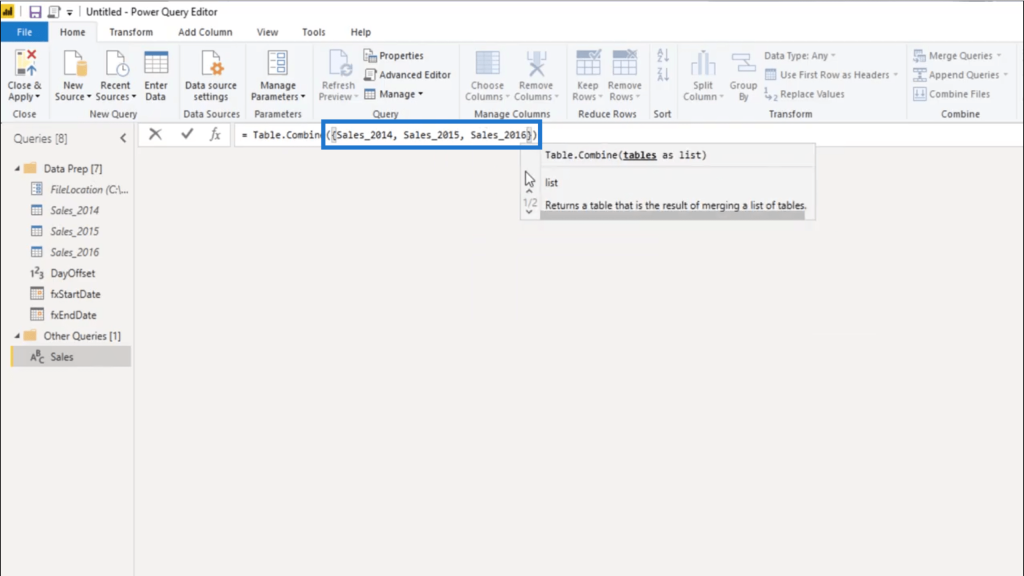
I know that you can do that through the ribbon, but there’s also an option to do it directly in the formula bar. I’ll choose that 2nd option.
I’ll start with Table.Combine.
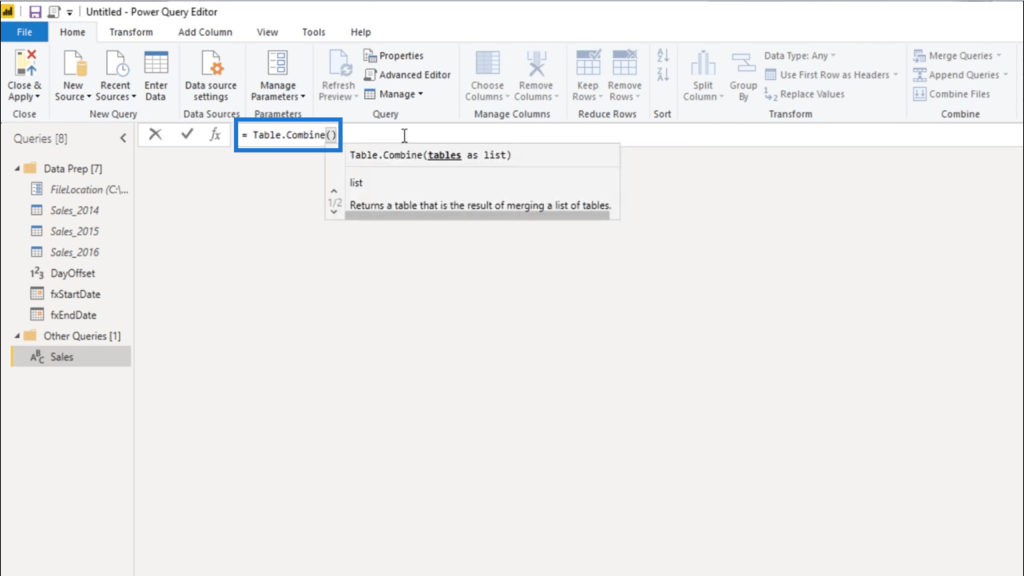
Table.Combine requires a list of tables. So I’ll add a list initializer, which is those curly brackets, then I’m going to name the 3 queries. Press enter after that.
Transforming The Order Date Column
Now that I have most of the elements I need, I’m going to generate a key part of the syntax that I’m going to use later on to complete my dynamic practice dataset.
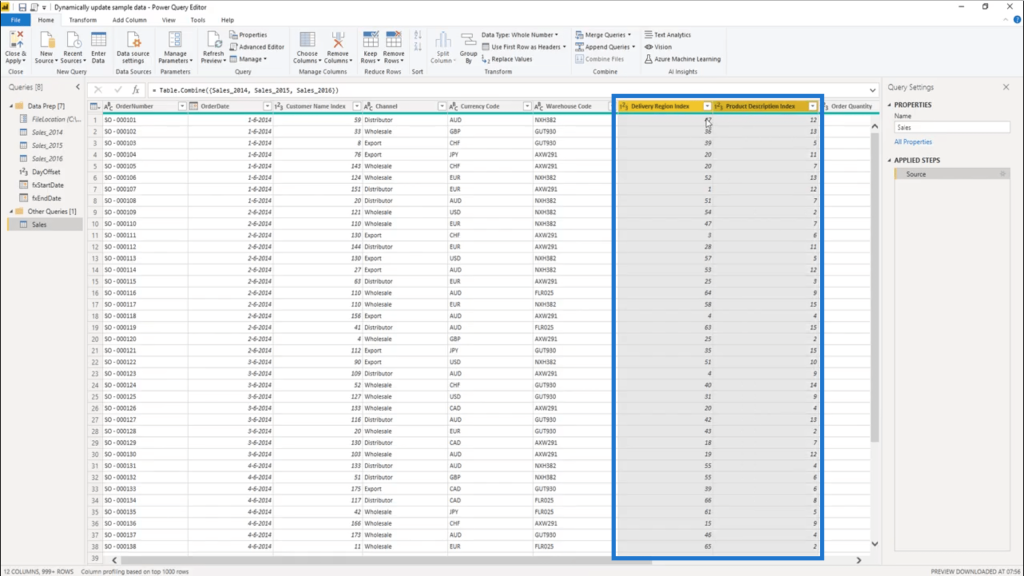
I’ll start by selecting two number columns. I can use the Delivery Region Index and the Product Description Index. On your end, you can press down either Shift or Ctrl to select both columns.
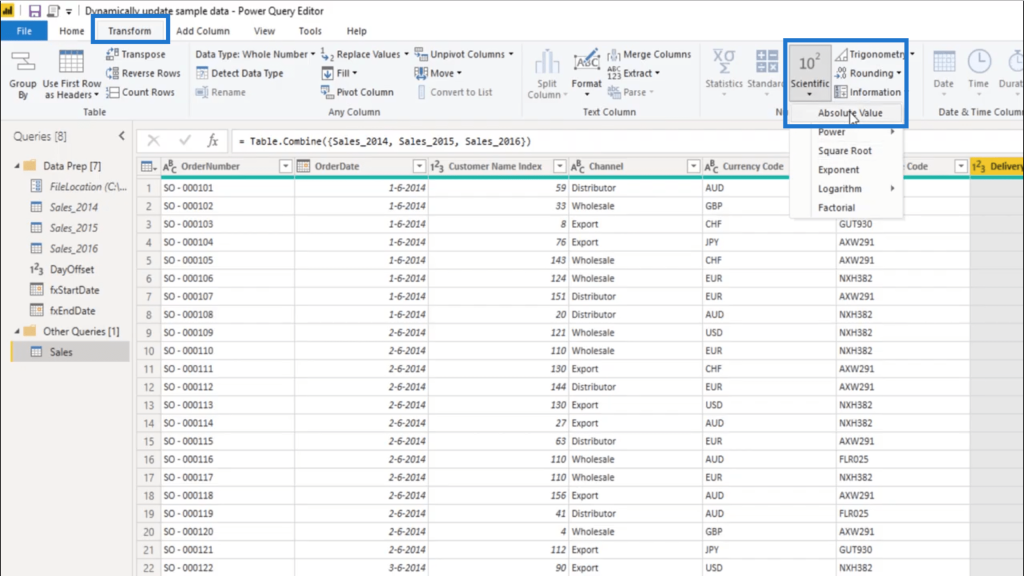
Under the Transform tab, I’ll select Absolute Value.
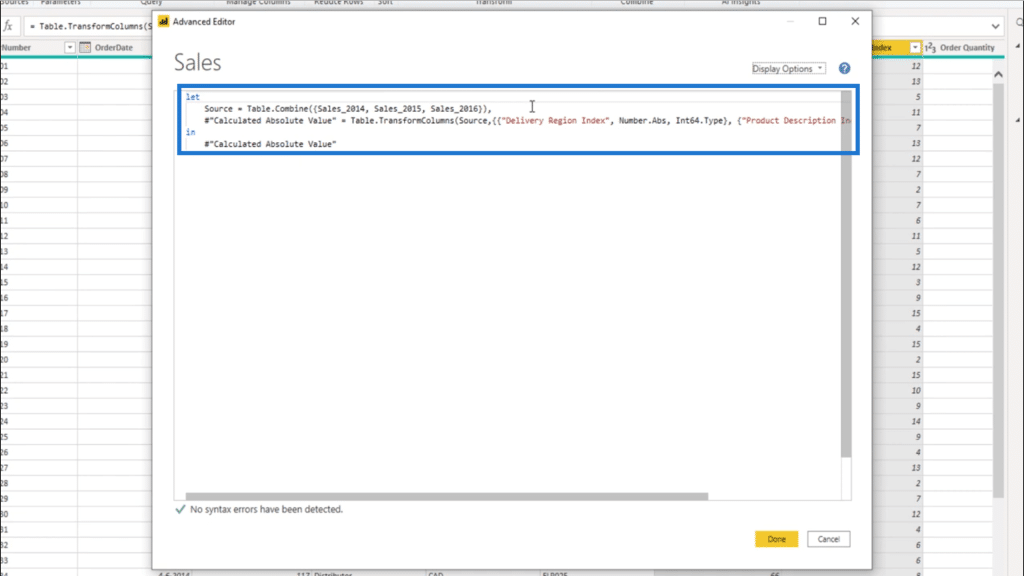
If I look at the formula bar, it will show the Table.TransformColumns function. This is the key to the final solution.
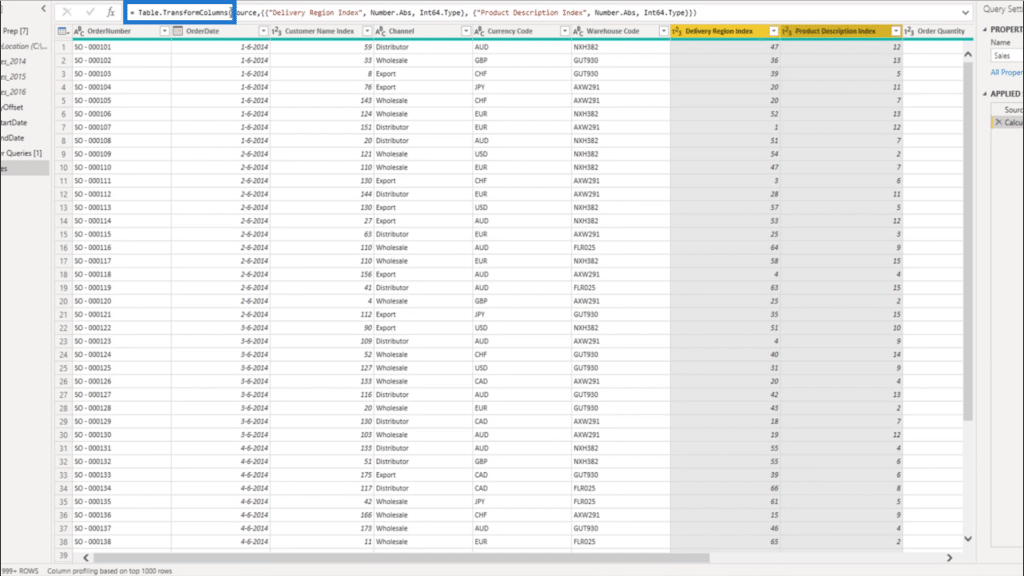
The function takes a list of transformation lists. As you can see, there are 2 lists here nested inside each other.
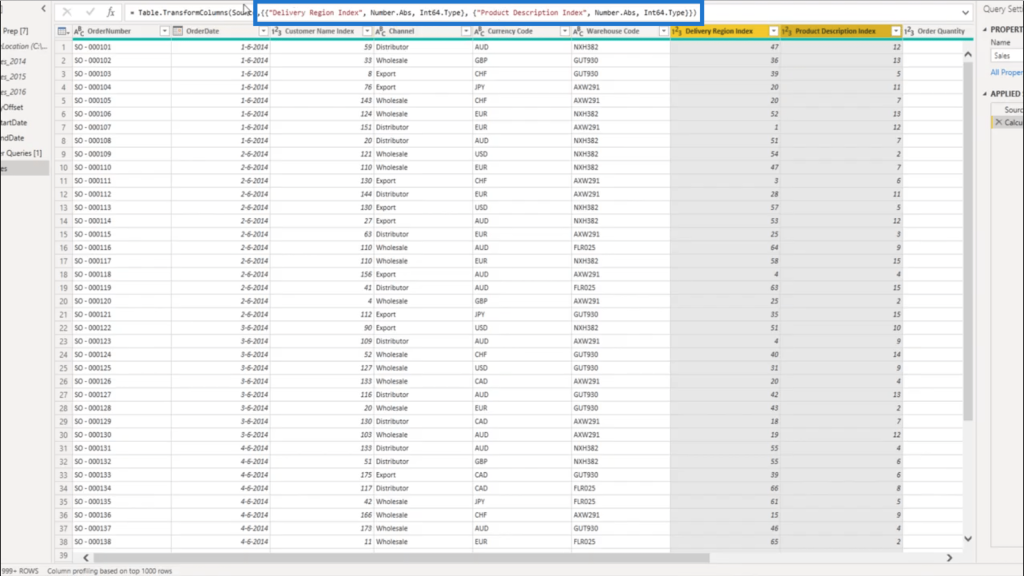
It references the column name as text. That’s why Delivery Region Index was referenced here on the 1st set.
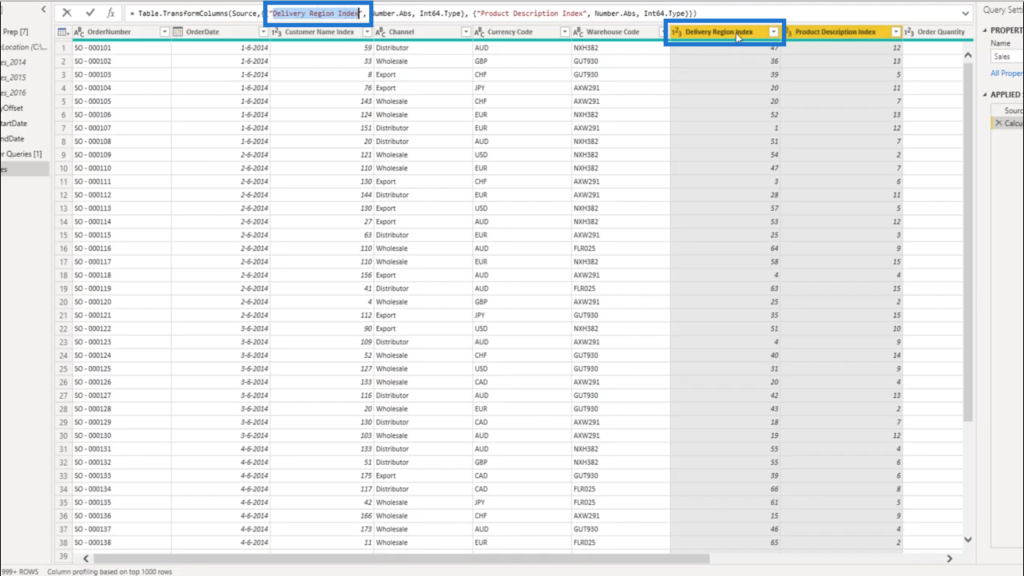
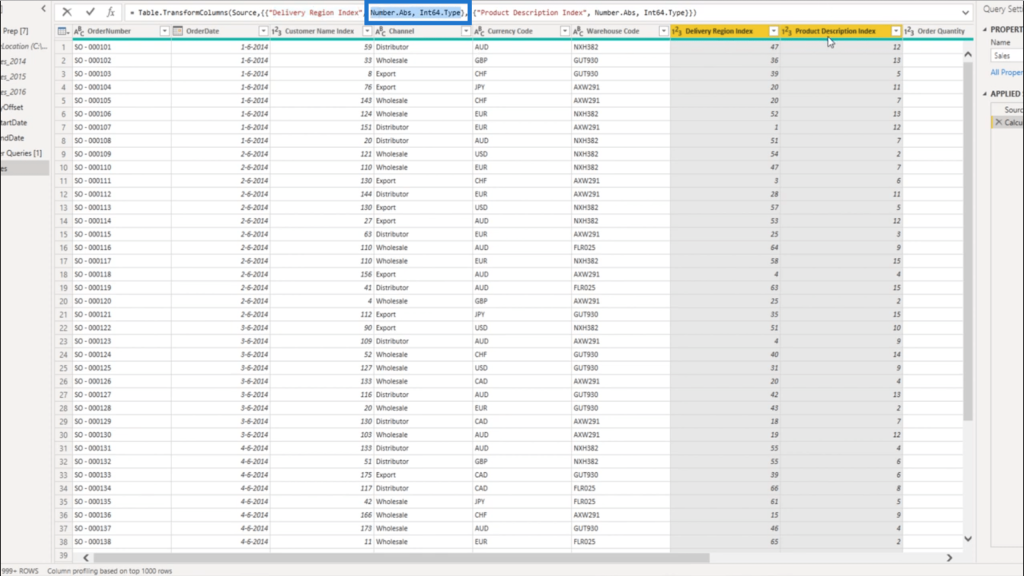
Then it adds a transformation step.
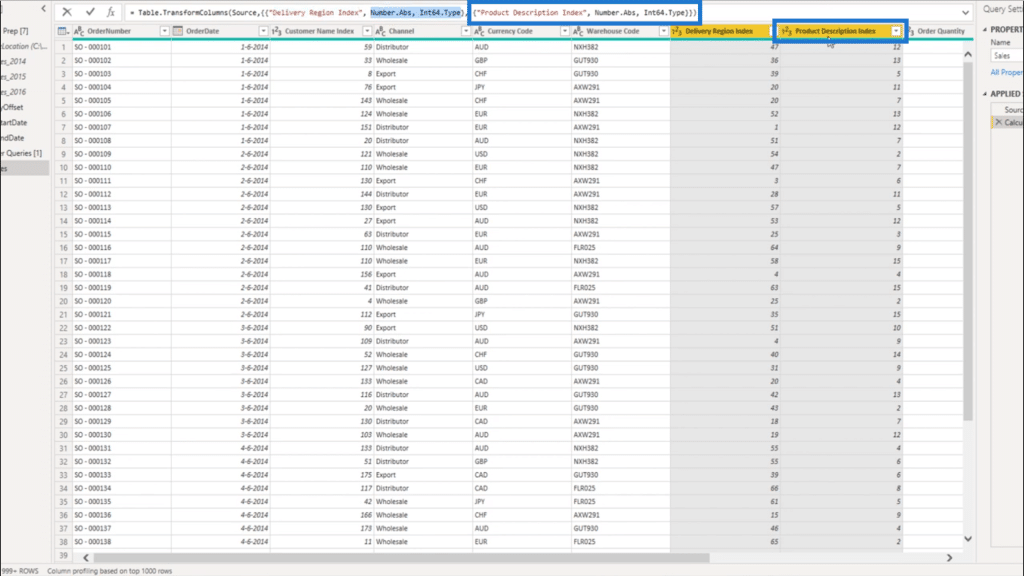
It does the same in a separate list for the Product Description Index column.
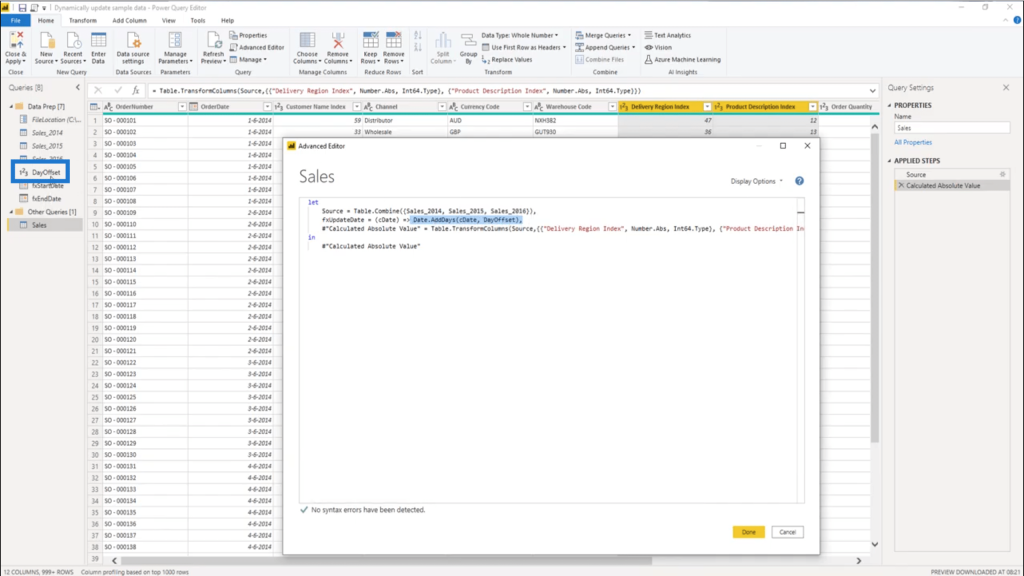
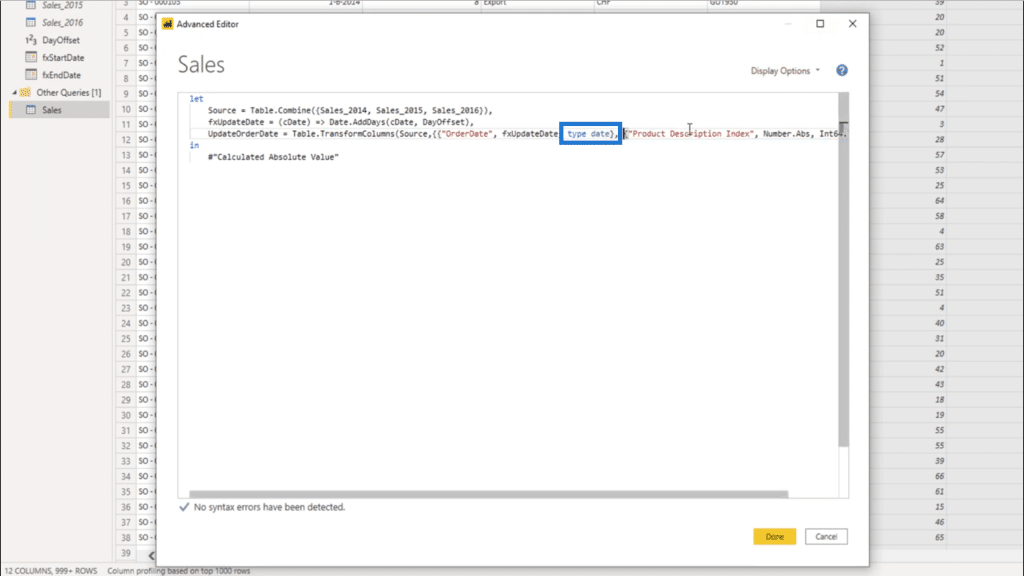
Now, I’ll head to the Advanced Editor.
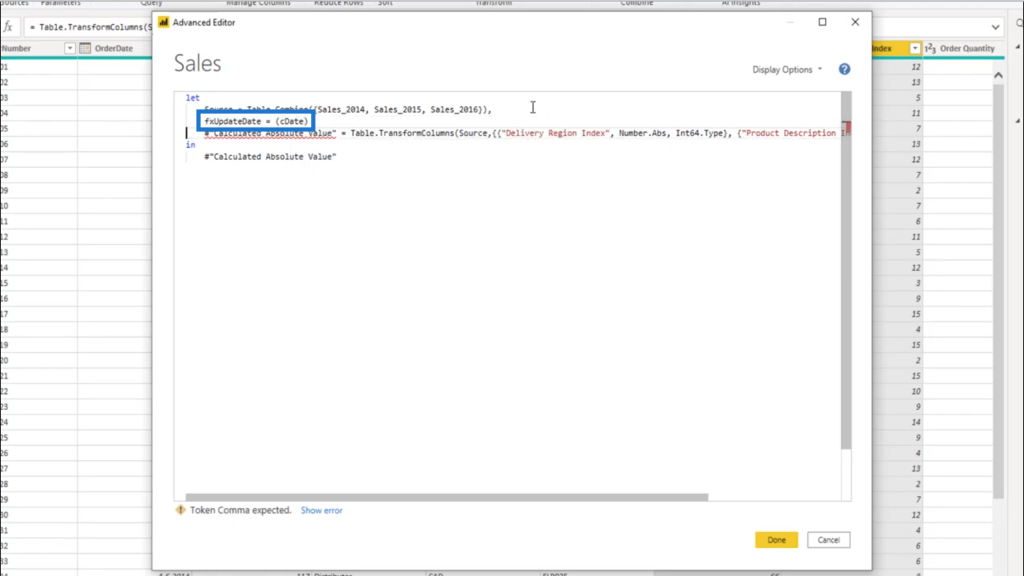
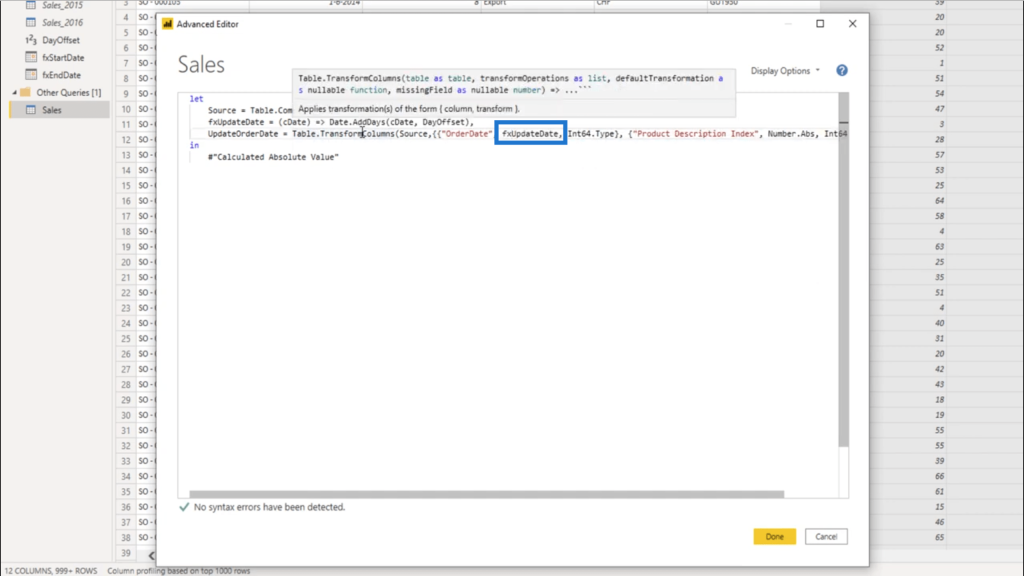
I don’t want absolute values. So the first thing I’m going to do is offset my date. I’ll create a function called fxUpdateDate to do that. It’s going to use the current date, which I’ll type in as cDate.
Then, I’m going to use the Date.AddDays function again, which also uses the cDate. I’ll also use the DayOffset I created earlier.
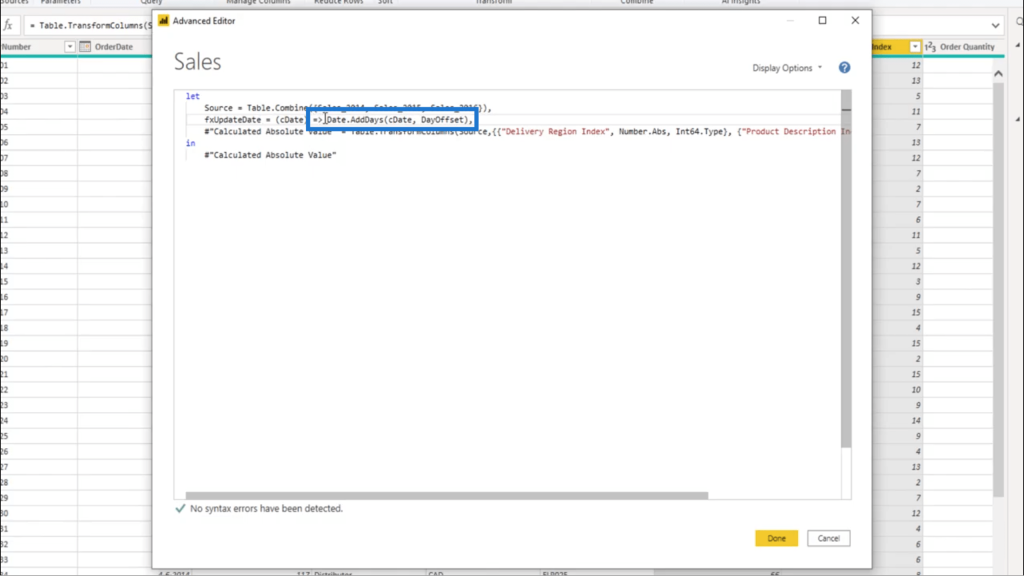
All that the fxUpdateDate does is take the date. So if I pass that onto the Table.TransformColumns function, it’s going to start checking for each recorded date.
So, if I’m working on the 1st row here, for example, it’s going to consider June 1, 2014, as the cDate.
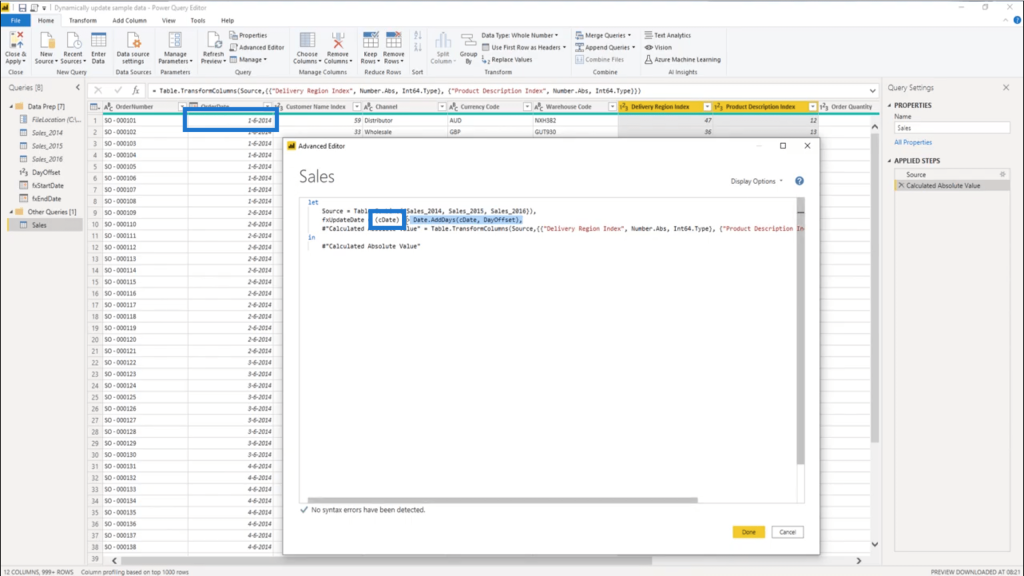
And every time the function gets called, it’s going to add that DayOffset that I created.
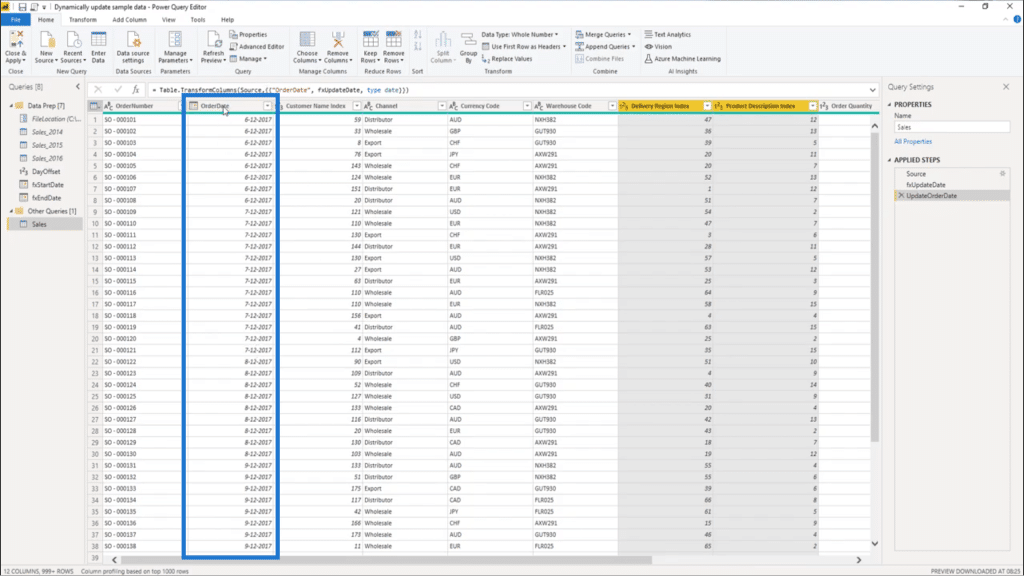
Now, the Table.Transform step shows up in Calculated Absolute Value.
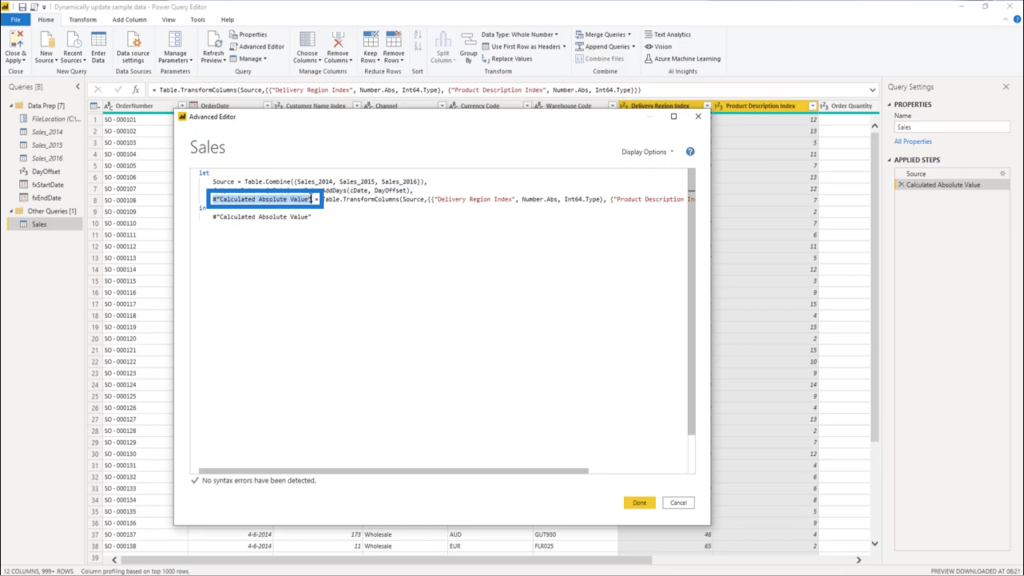
I’m going to rename that first and call it the UpdateOrderDate.
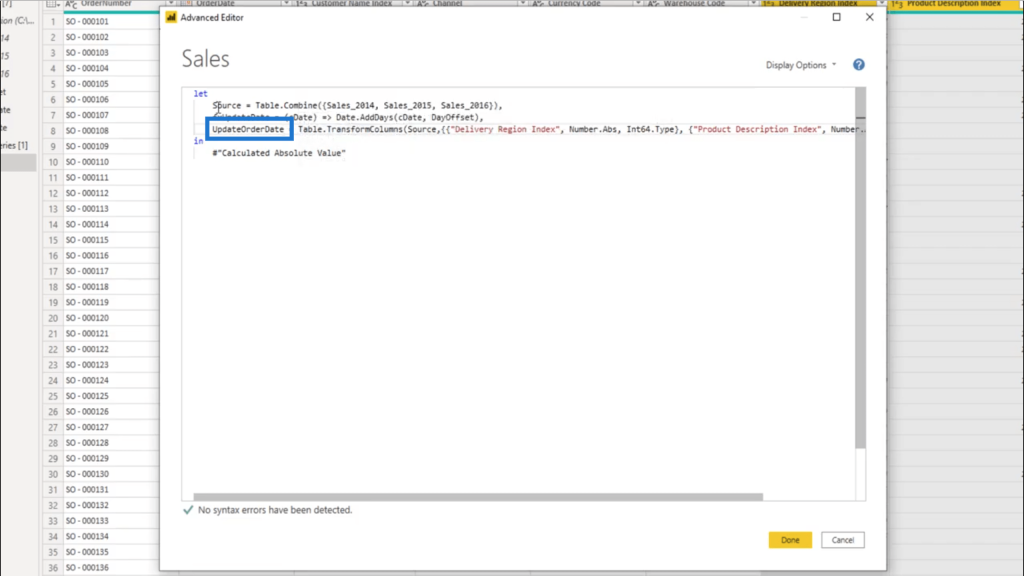
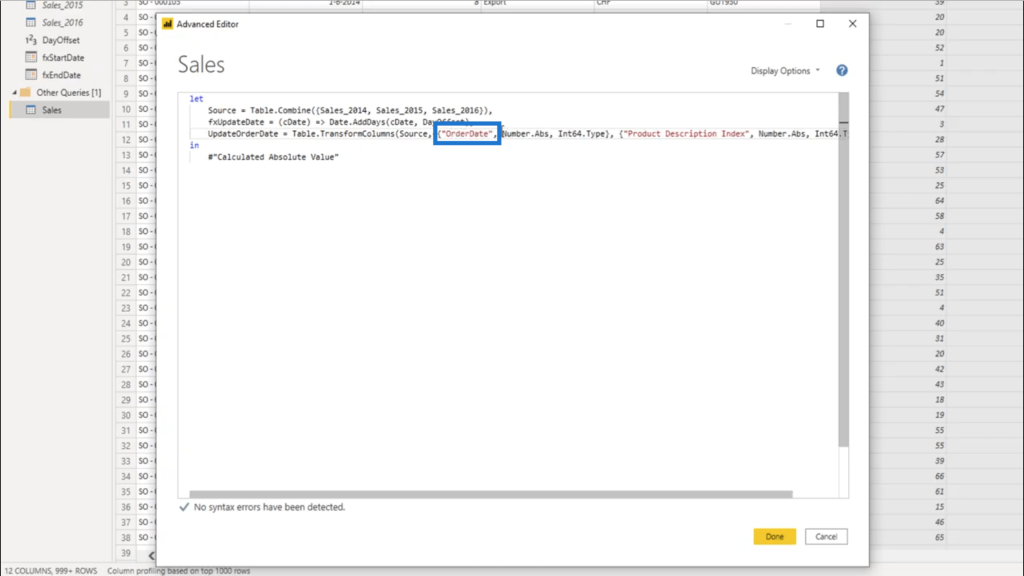
This UpdateOrderDate step involves my Table.TransformColumns which equals the Source.
The initial table listed is the Delivery Region Index. But there’s no need to transform that. So I’m going to change that 1st column referenced into the OrderDate column.
It also says here that the transformation is going to be in absolute values.
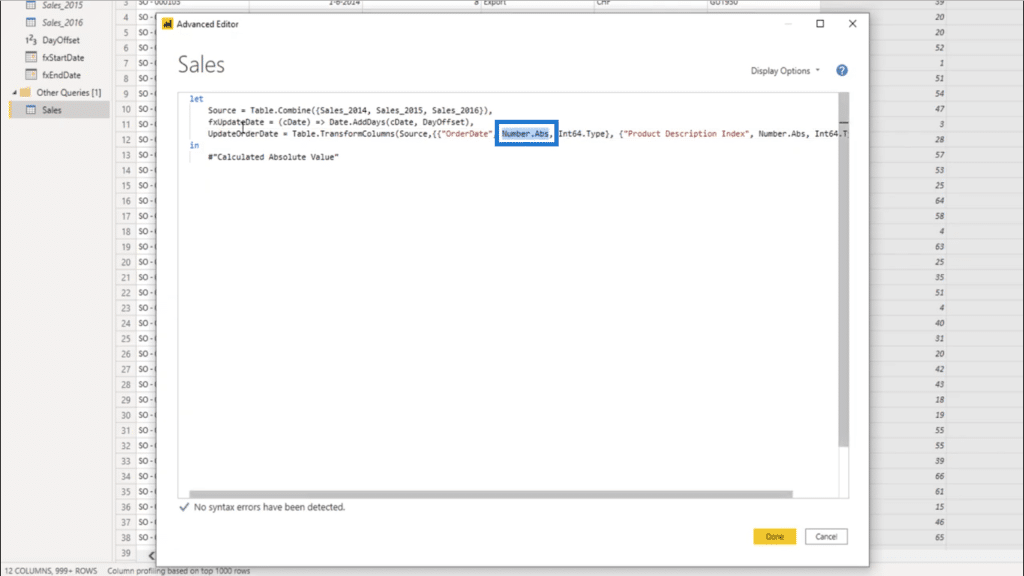
Since I don’t want that, I’m going to change that into fxUpdateDate.
The type is not going to be an absolute value either, so I also need to change this part.
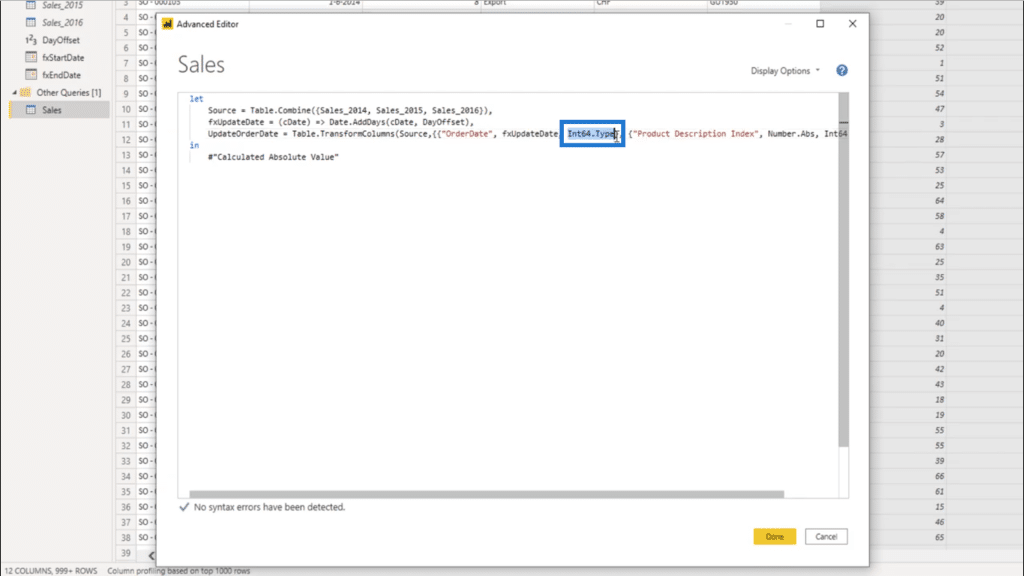
I’ll change that into a date.
I only need one transformation, so I’ll delete the 2nd list along with the transformation step that comes with that set…
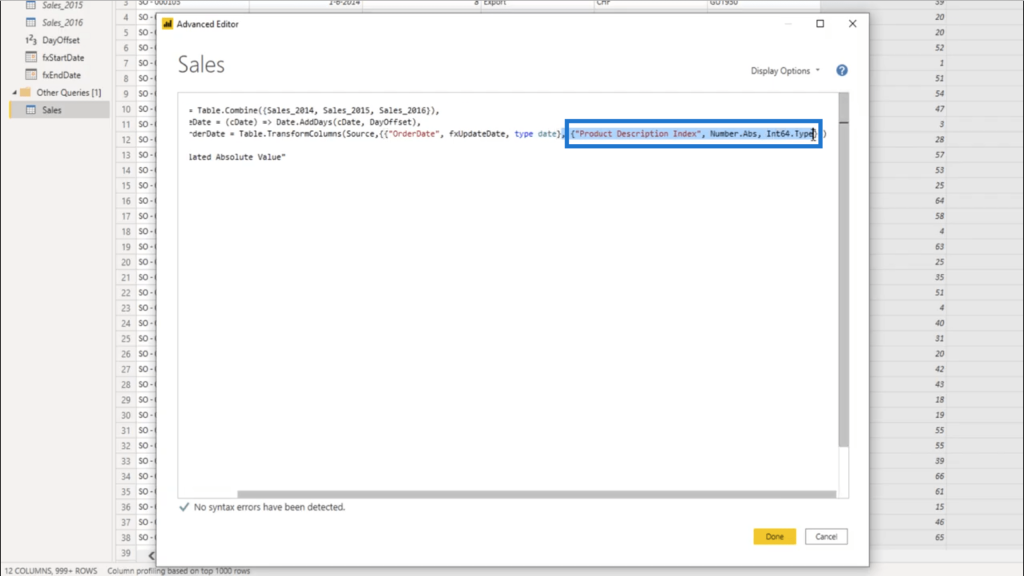
…so it’s just one transformation for the OrderDate column.
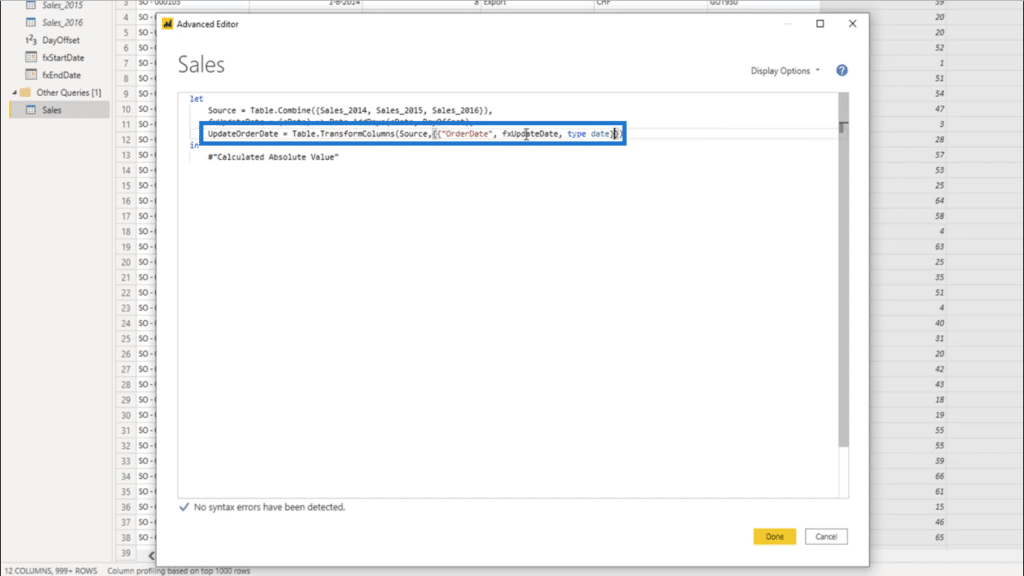
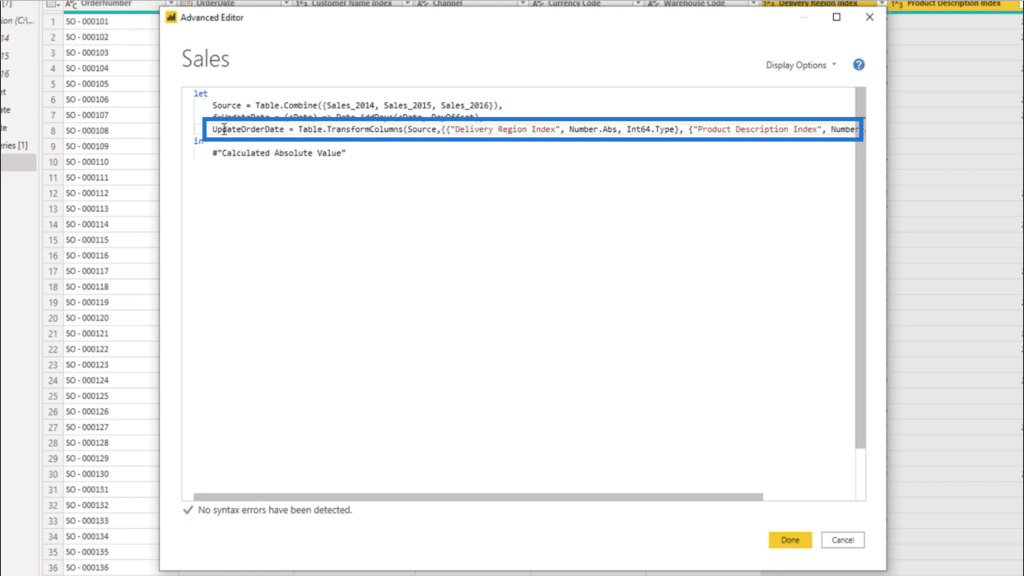
Because I renamed the step for Calculated Absolute Value, I need to change that in my in statement as well.

Now it shows UpdateOrderDate as well.
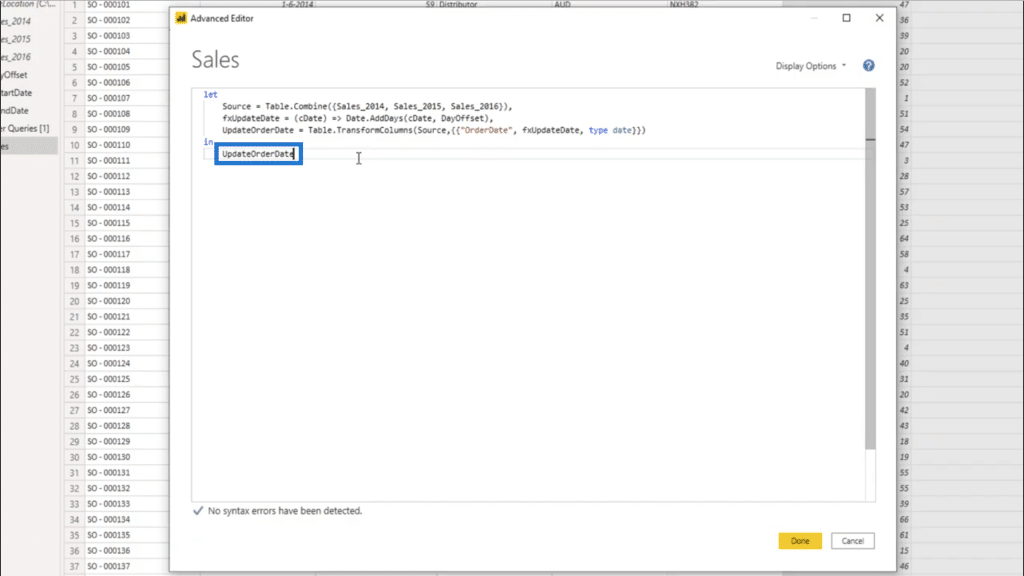
So the OrderDate column will now call this function for each record in Table.TransformColumns.
Looking into the Order Date column, I can see that this has been updated.
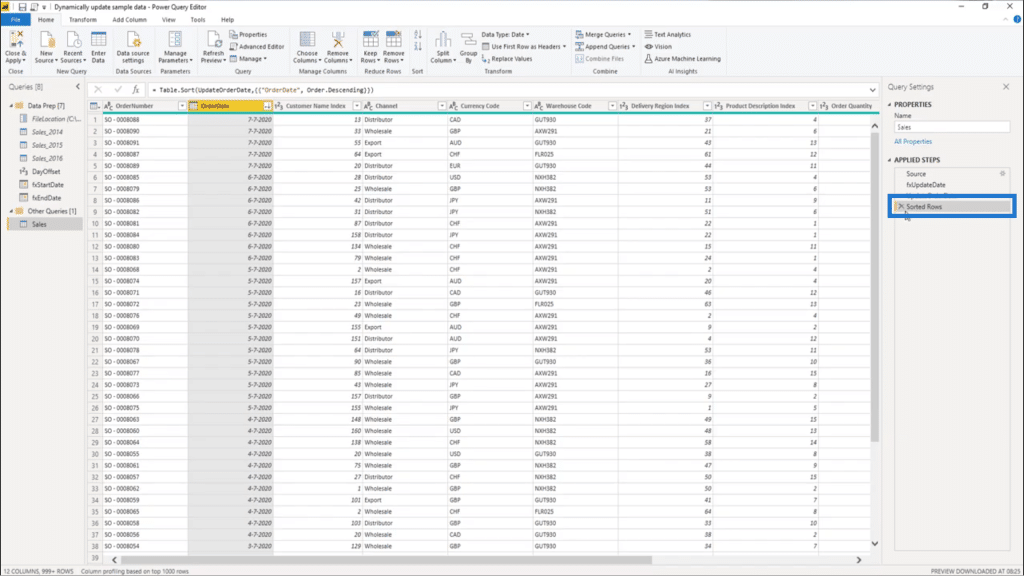
And if I sort that in descending order, it shows July 7, 2020 as the current date.
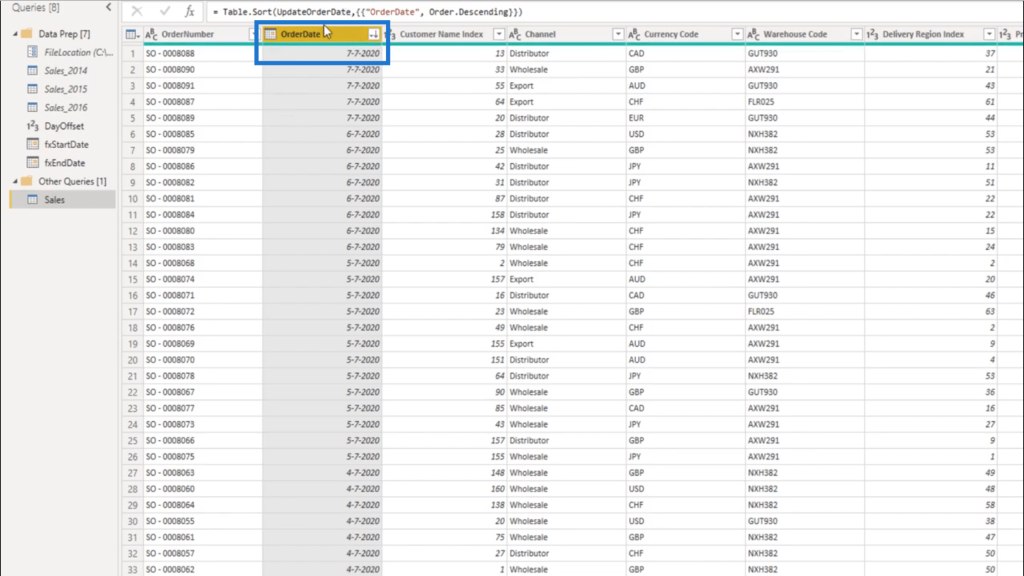
So I’m going to remove that Sort step because I don’t really need that. I only did that to check if the current date had also been updated.
Applying Time Intelligence Using M Code
My model is all about Sales data. Since I’m going to do some time intelligence, I would need a Date table.
So I’ll go to the Enterprise DNA Forum. In the M-code Showcase, I’m going into the Extended Date Table topic.
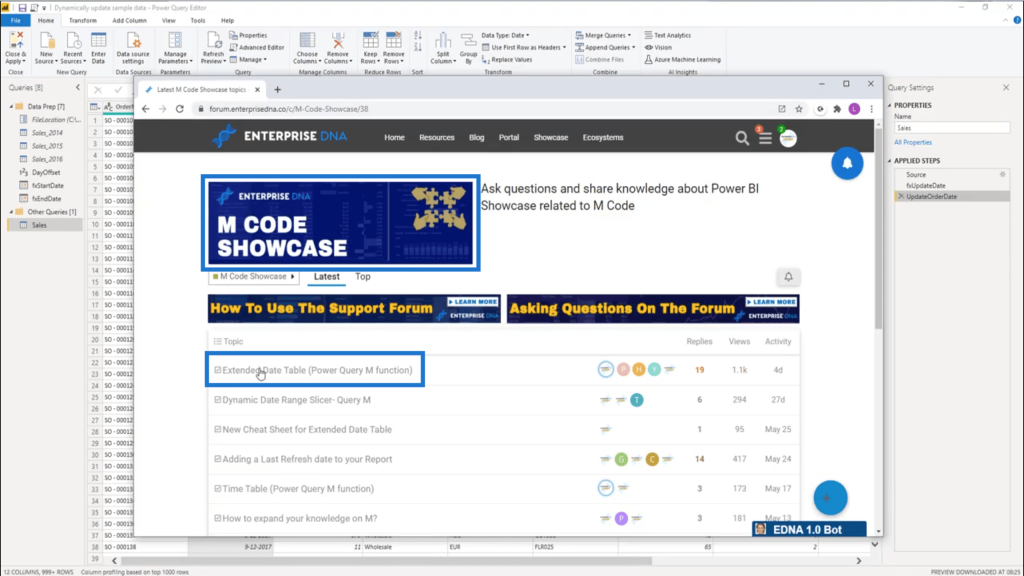
Scroll up to the very top of the page and copy the entire code.
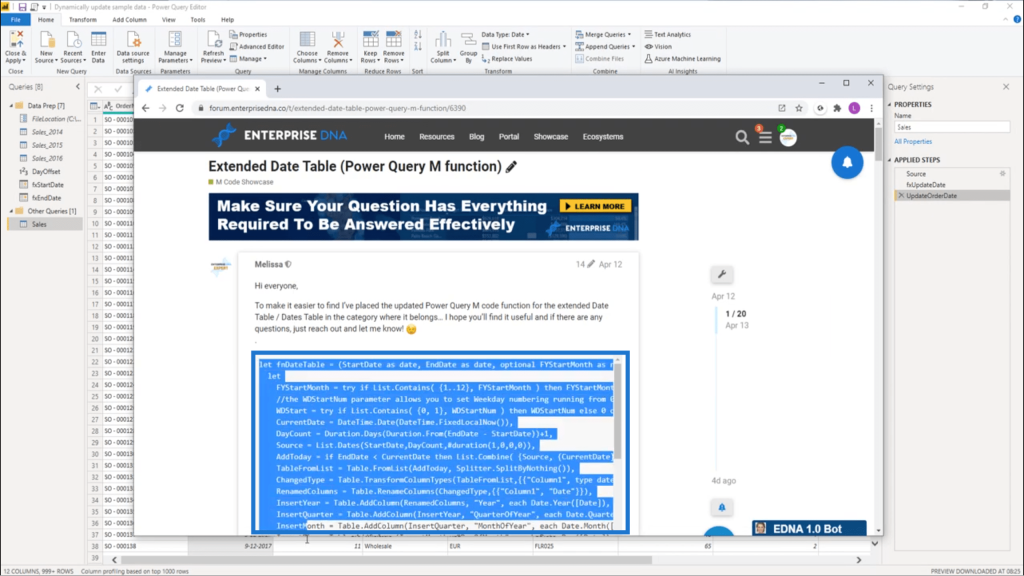
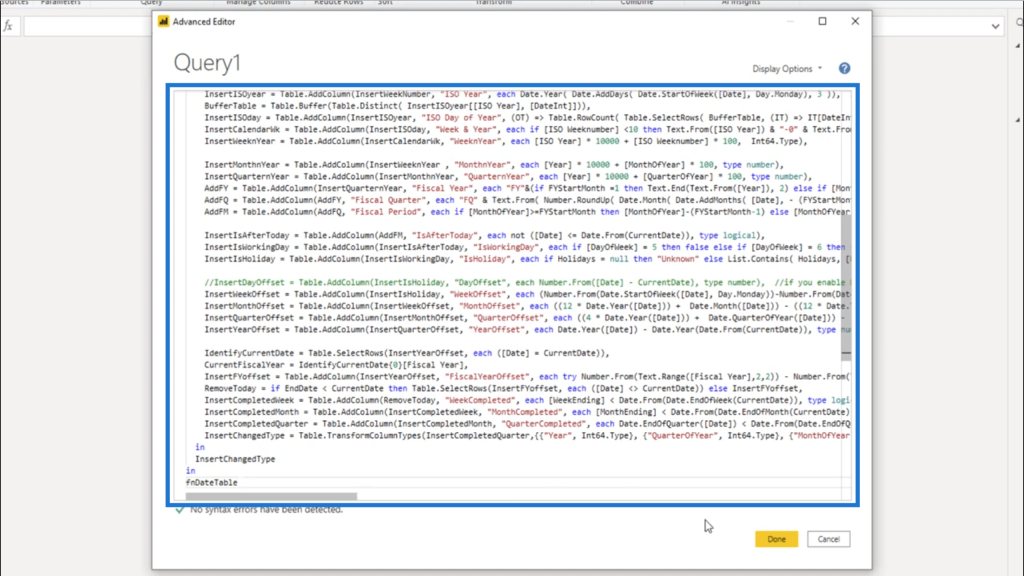
Going back into my model, I’m going to create a new blank query and paste that M code in. Press Done.
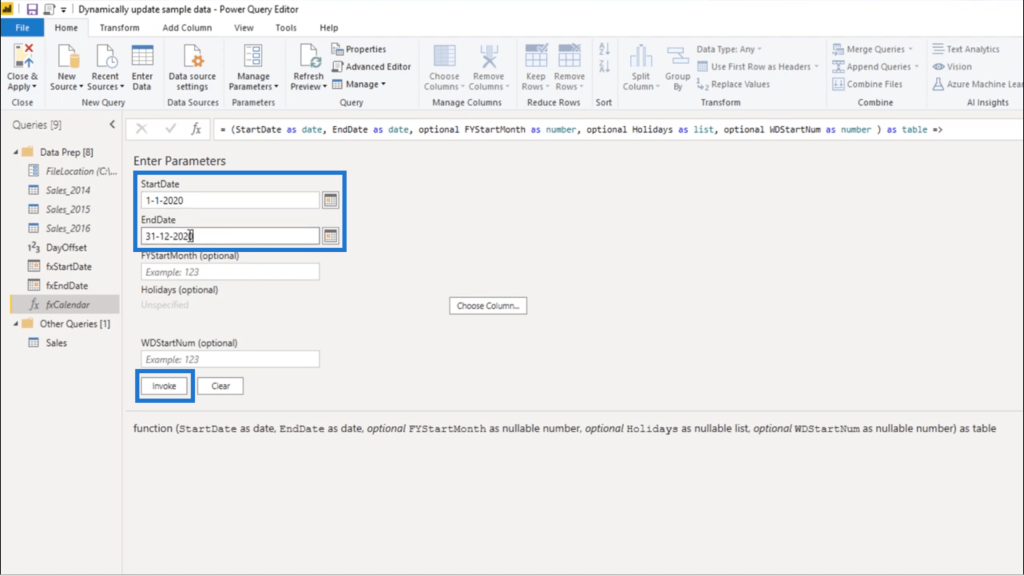
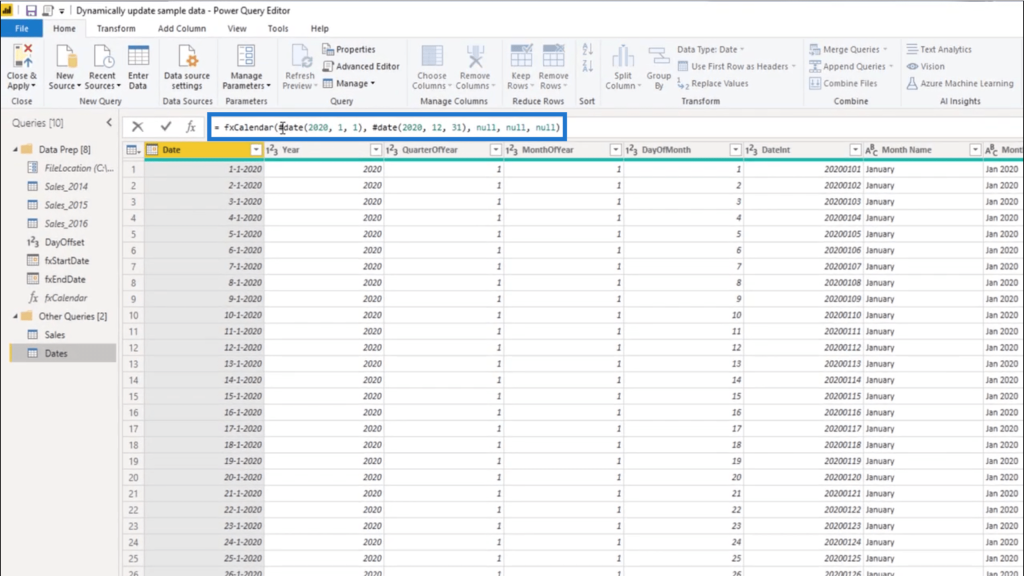
I’ll rename that query into fxCalendar.
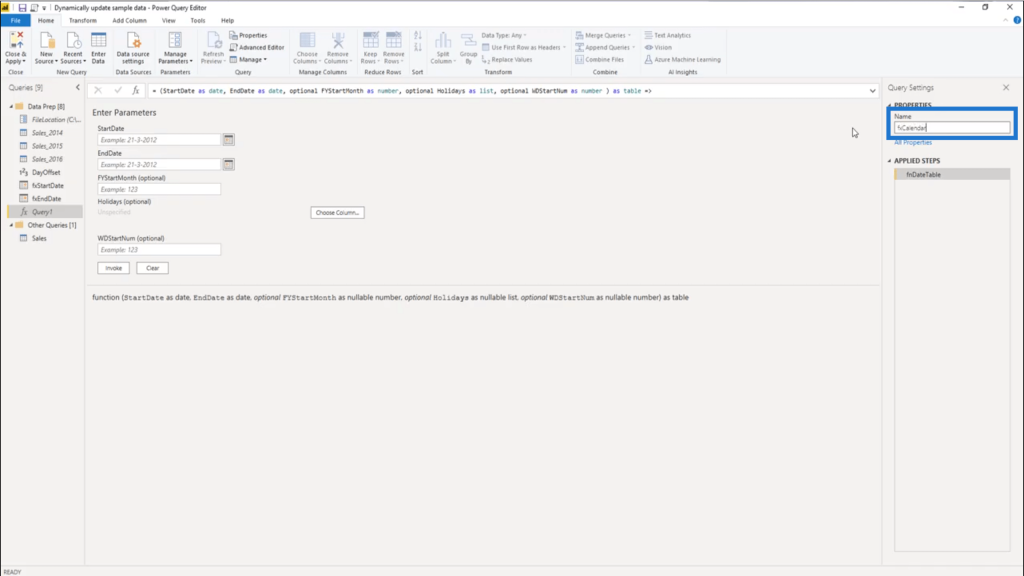
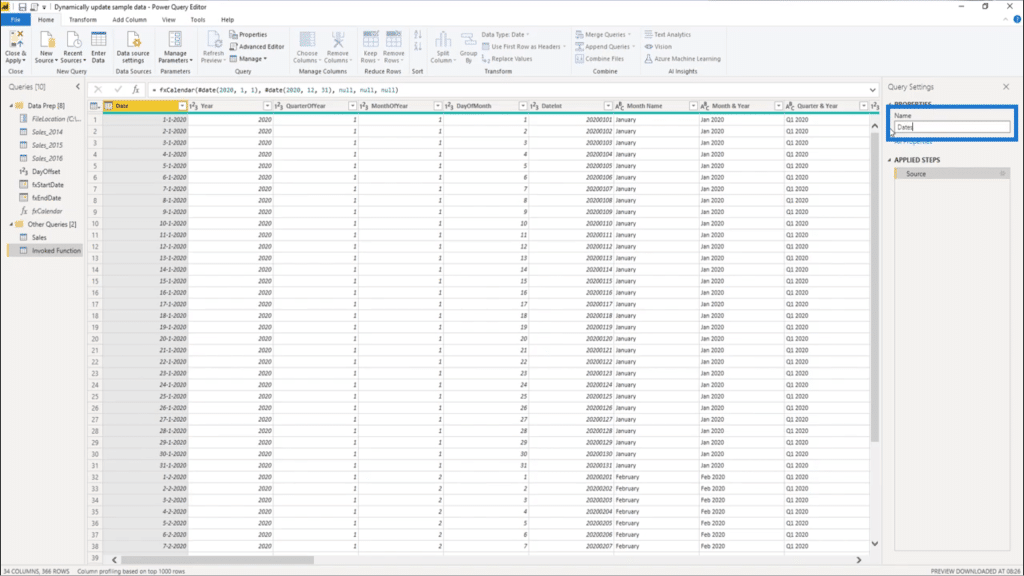
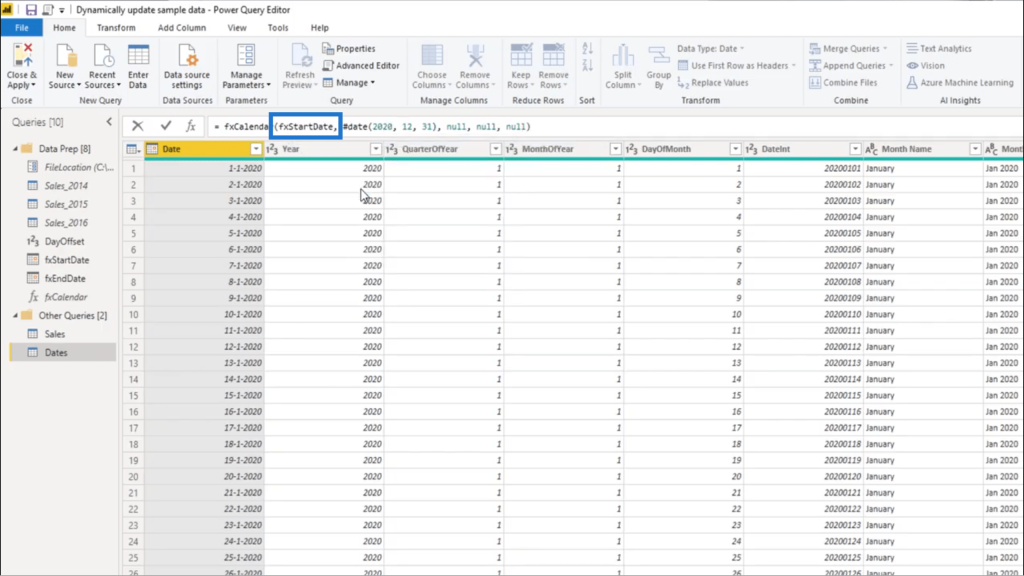
For my parameters, I’ll use the 1st of January for the StartDate and the 31st of January for the EndDate. Then press Invoke.
Once the table comes up, I’m going to rename it as Dates.
Remember that I already created the start and end dates by looking at the 1st date on the sample dataset and offsetting that by my DayOffset. So the fxStartDate here shows up as January 1st, 2017.
As for the fxEndDate, it returns the 31st of December, 2020.

I can go back to the Dates table and update that Source step there as well.
It lists the parameters in the order that they were called. The first parameter should show the start date.
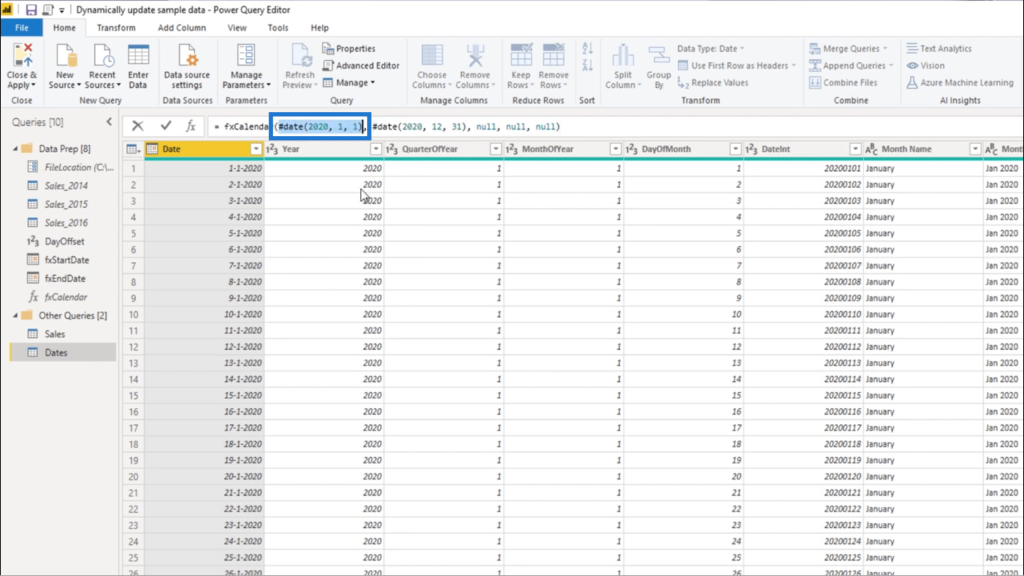
I’m going to change that into fxStartDate.
I’m also going to replace the second parameter.
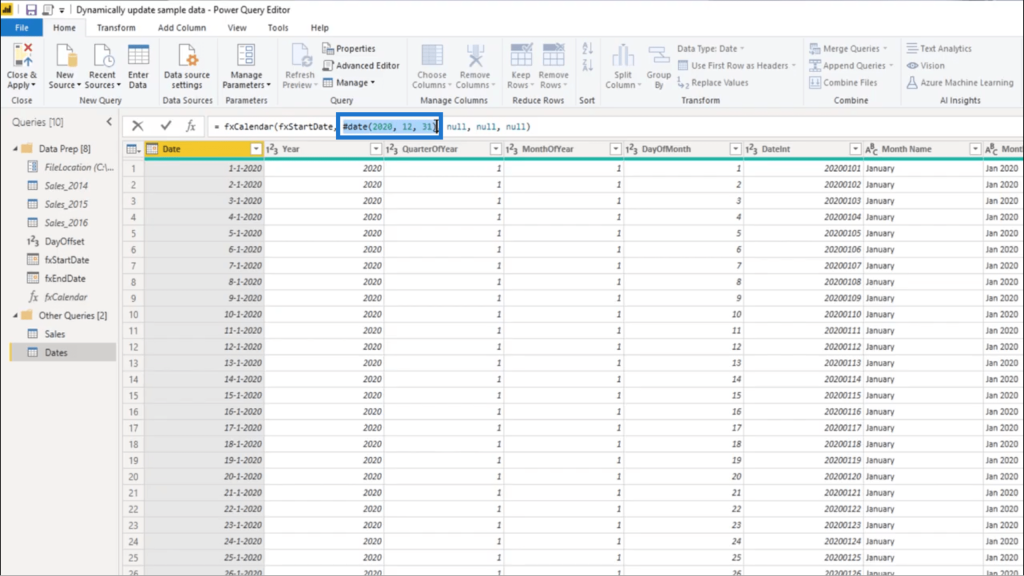
I’ll put in the fxEndDate.
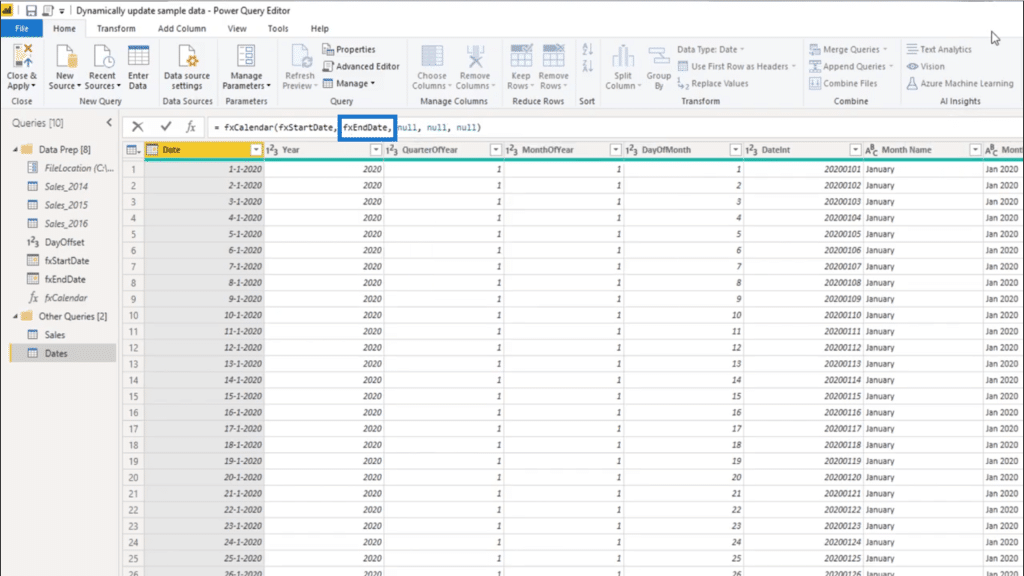
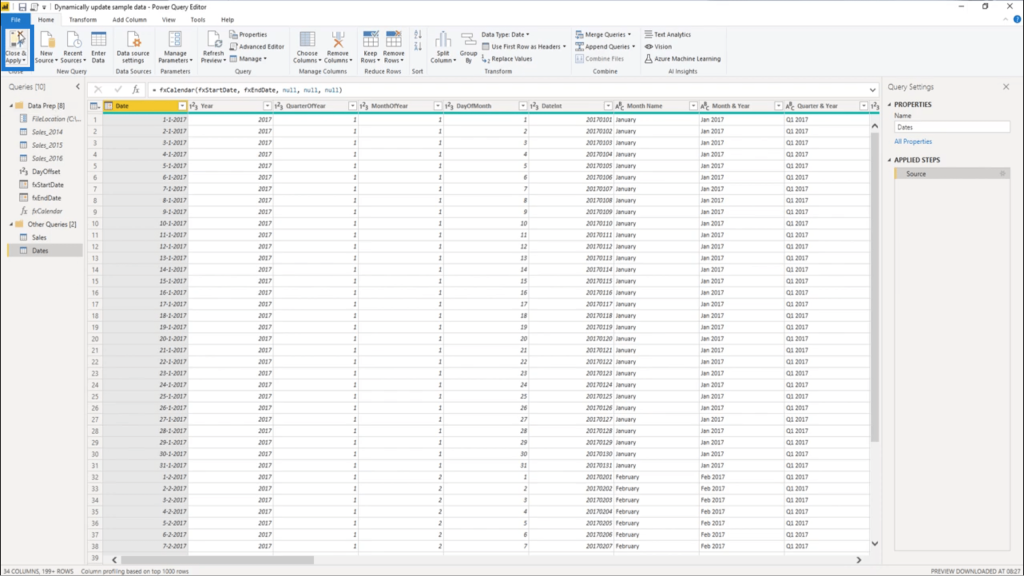
Once I press Enter, the transformation is complete. I now have a fully up-to-date practice dataset that will always remain current.

I’ll just click on Close & Apply to lock all of those steps in.
***** Related Links *****
Creating a Dynamic Date Query Table in Power BI: A Query Editor Tutorial
Setting Up A Dynamic StartDate And EndDate For Power Query Date Tables
Using The Offset Function In Extended Date Tables
Conclusion
As I mentioned earlier, having your own dynamic practice dataset will definitely level up your game when it comes to Power BI. It allows you to practice your skills and knowledge while pretending that you’re working on a real-life scenario.
If you want to learn more about making your start and end dates dynamic especially for a practice dataset you’re using, you can check out the Enterprise DNA Forum. There are a lot of conversations there about this as well as other relevant topics. You may even find other approaches that would work for you.
All the best,
Melissa


