
In this tutorial, we’ll revisit a topic I covered earlier about how to unpivot multiple columns in Power Query using List.Zip. An Enterprise DNA member asked on the forum on how to make that method dynamic. You may watch the full video of this tutorial at the bottom of this blog.
I’ve labeled this advanced because we’ll be writing a number of M functions and some of those might even be new to you.
With that said, let’s go over to Power Query.

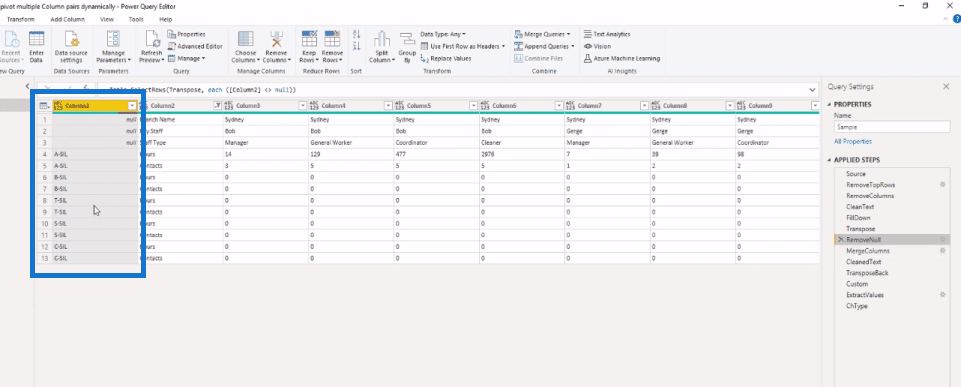
Data In Tabular Format
As you can see, this data has already been transformed into a proper tablet format suited for analysis. That process, although very important, won’t be covered here, but we’ll briefly go over each step.
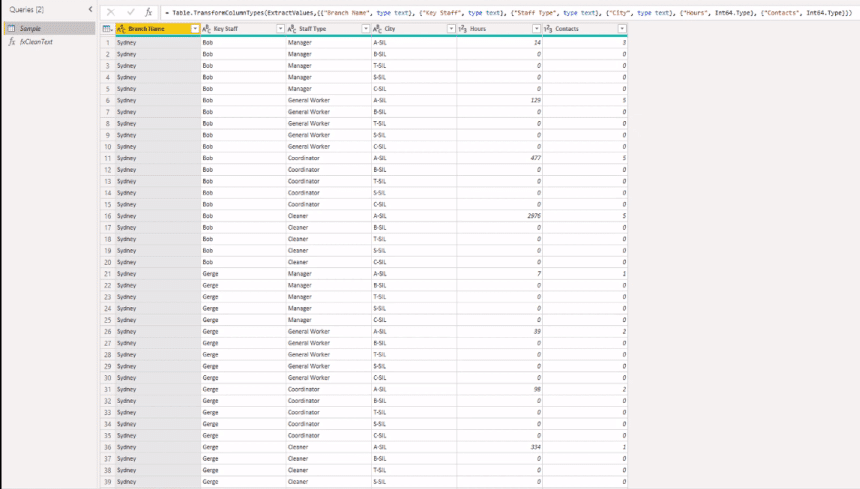
In the source step, we see a constant repetition of the value pairs, which are the hours and contacts for each of the attributes listed above.
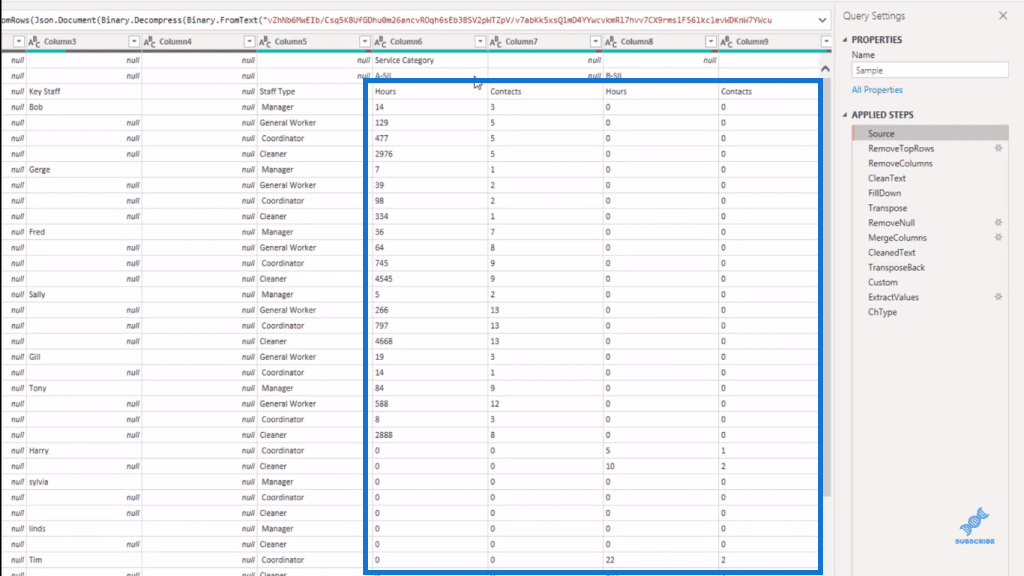
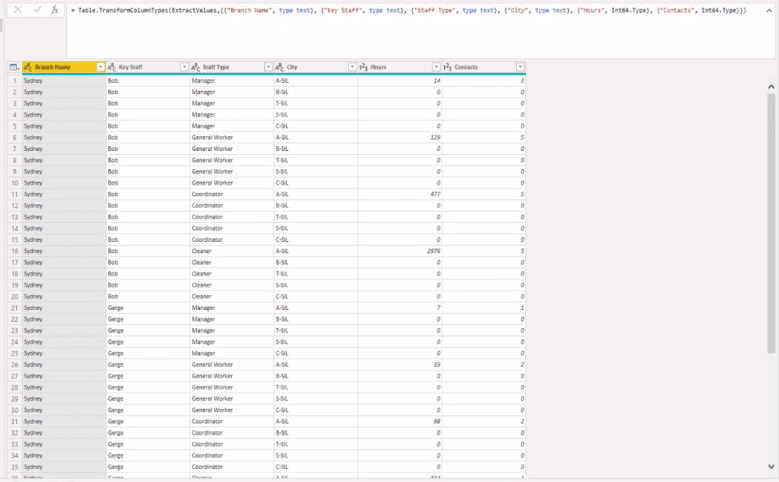
In the Applied Steps, you can see the rest of the steps. We removed some top rows, removed the empty columns, cleaned up our text values and filled them down. Then, we transposed our data, removed the empty record, merged columns one and two, cleaned our text values again, and transposed our data back.
We created a custom step, which we’ll examine in more detail later, extracted values from our list, and then finally changed the type.
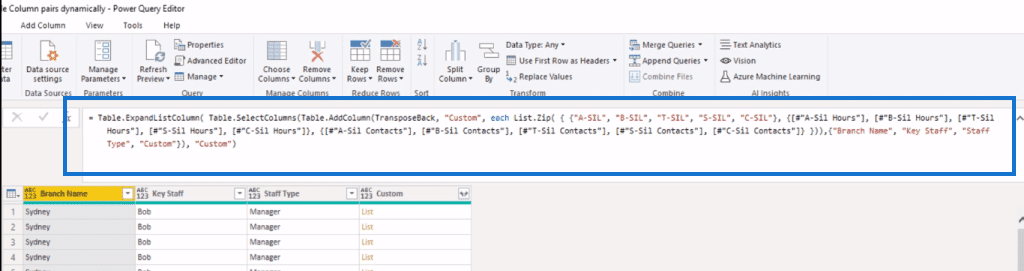
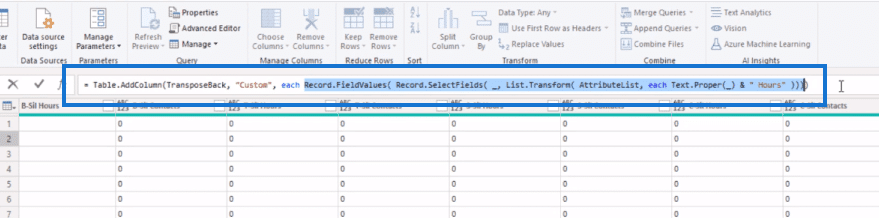
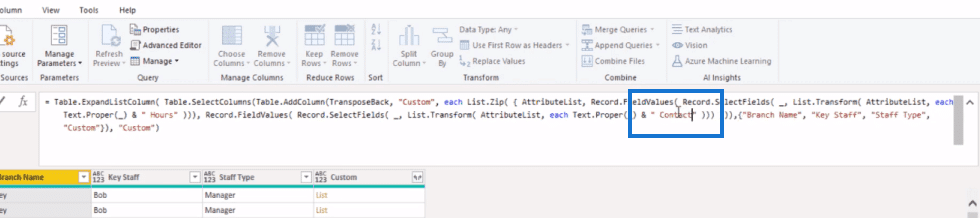
Let’s look at the entire code. The thing we’re interested here is the List.Zip function. Brief recap, it takes a single list as a parameter and then returns a list. As a result, we see that this single list in this instance contains three separate lists.
If we examine the first list, it contains hard-coded attribute names, just text values that were typed in. The second list contains hard-coded column references for the hour values. The final list contains hard-coded column references for the contact values.

List.Zip then takes an element from each of these three lists and combines them based on their position in a new list. For example, each first element from those lists gets combined into a new list. The same happens for all values listed second in that list, and so on.
Hard-coded values can be concerned if the attributes are unlikely to change over time. So if next time, not all items are present or new items exist, you can get into trouble.
Altering Code To Unpivot Multiple Columns Dynamically
So how do we make this dynamic?
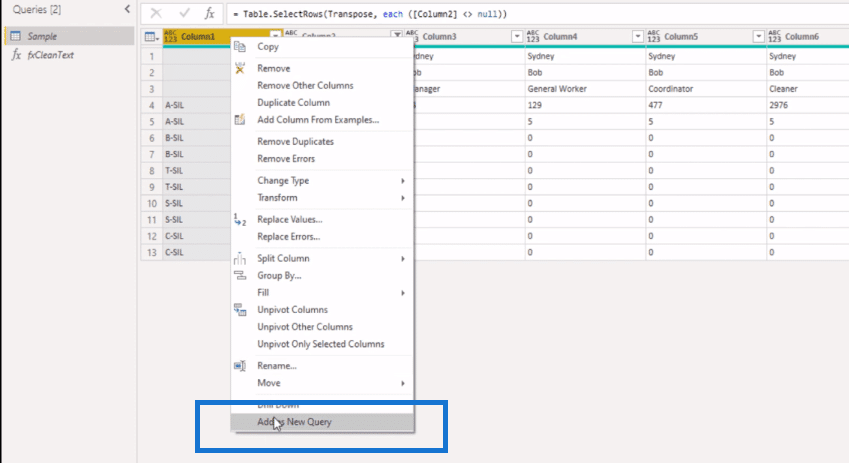
The first thing I do is step through the code to see if there’s a place where we can pick up those attribute values without having to design a separate step to accomplish that. So we’re going to step back through the code, and this RemoveNull step is perfect.
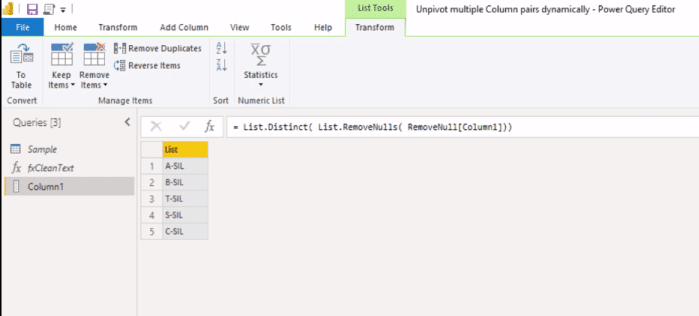
You can see that it lists all the attribute values here in column one. We can use the user interface to extract them.
So right-click that header, and down below select Add as new query.
We get this list and that’s good news because we want to replace that hard-coded list we saw earlier with the dynamic one. All we need to do is tidy up the values.
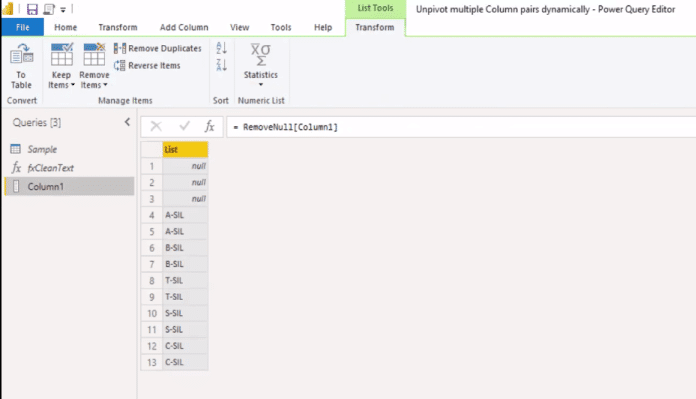
Let’s start by removing those nulls. So inside the formula bar, we’ll add a List.RemoveNulls. As you can see now, all items are repeated and that’s because of the value pairs. It’s listed once for the hours.
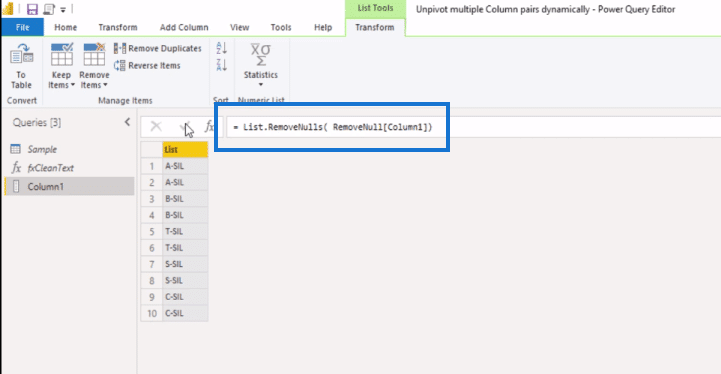
And then again, for the contacts, to remove those duplicates, we can add a List.Distinct. Now we’ve created this logic and all we have to do is copy it and paste it back to our sample query.
In the Sample query, open the Advanced Editor and create a new variable name. Let’s call it, AttributeList. Then we paste in the code and put a comma.
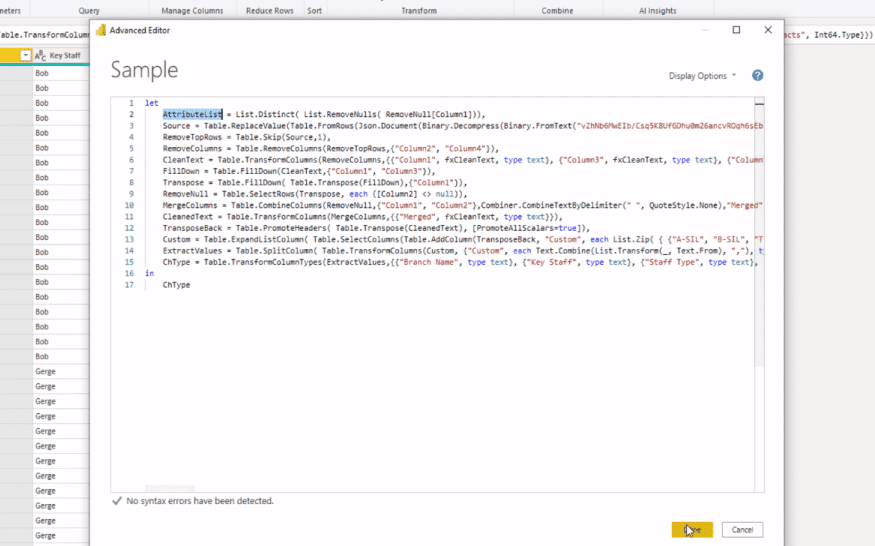
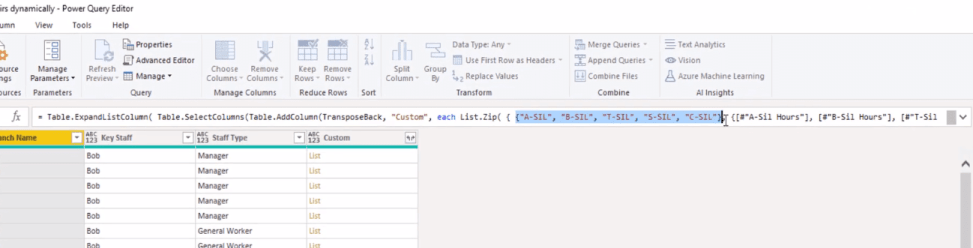
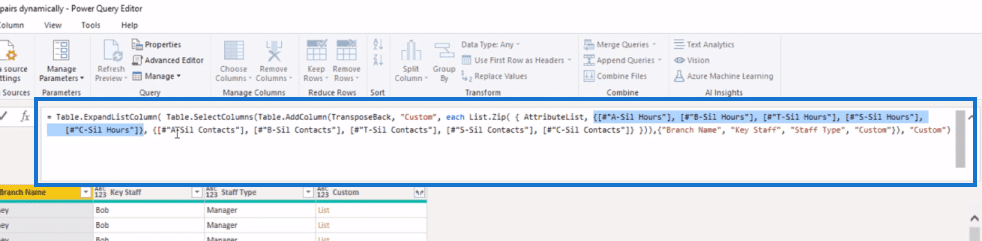
Now let’s step back to our Custom step. Inside List.Zip, we can replace that first list by our variable name (AttributeList).
Now let’s take a closer look at the second list. We know it references column names, and each of those column names start with the same attribute that we already have in that list followed by a space and a text “hours”.
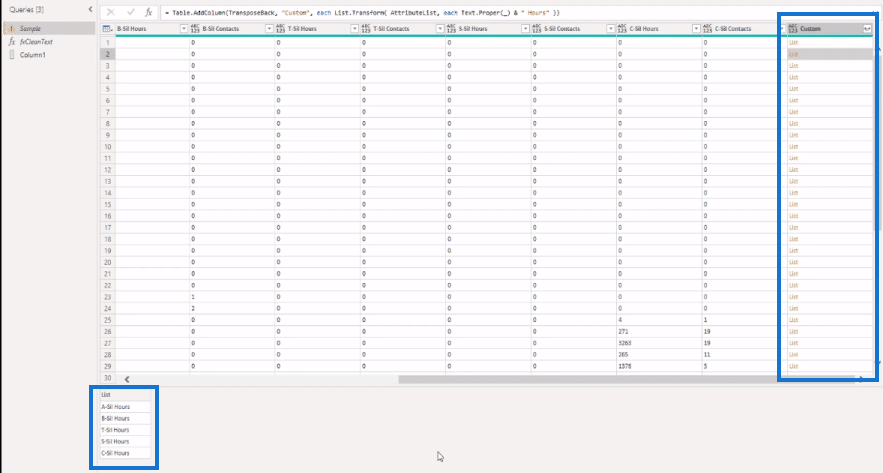
We just need to add a suffix to each item. So let’s move back a step, and add a custom column to create some logic.
Unpivot Multiple Columns Dynamically: Adding Custom Column Logic
It’s just a temporary column, so we don’t need to give it a proper name. We’ll remove it once we’re done.
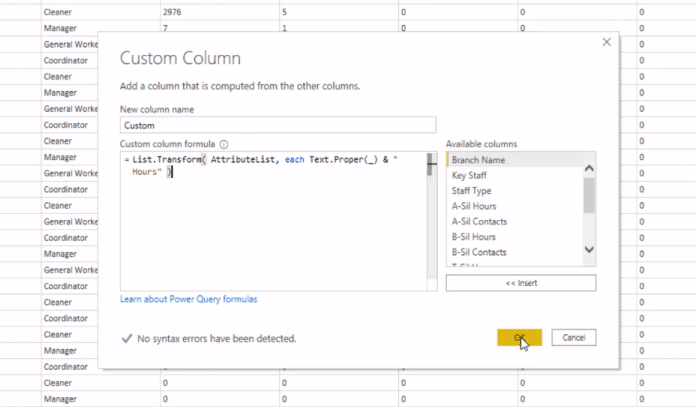
To change the values in a list, we can use the List.Transform function. We need to transform the values in our AttributeList, so I’m going to paste that in.

Here in the headers, we see that the text values start with a capital letter, and then the rest is lowercase. Our attribute contains only a capitalized word, so we have to transform that text value as well. And we can use the underscore to access each item of the list and we’ll add that suffix.
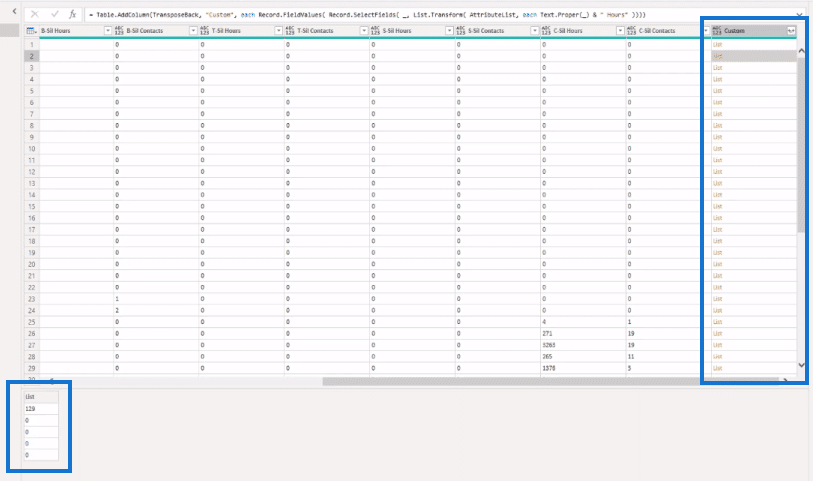
With that, we get a list value in our column. It doesn’t matter which one you select, but just click off to the side in the white space in any of them here.
Below the page, we see a preview of that list that we’ve created. So you see that we have those column headers are now properly cased so that matches the column headers we see here with this list.
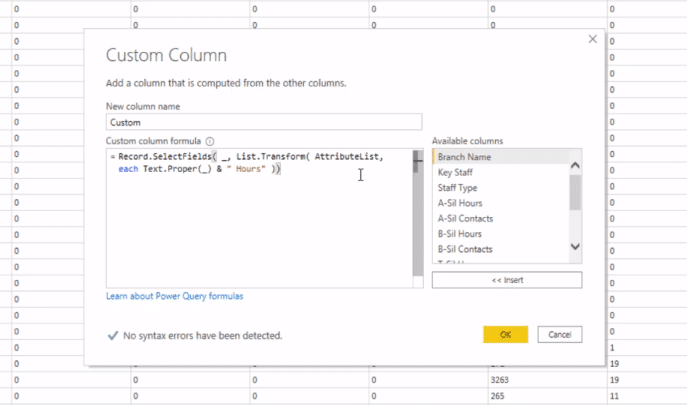
We now have the means to identify the fields from our record that we want to access. So let’s open our custom column dialog box again and add Record.SelectFields. It wants a record as a record, so we can use that underscore to access the current record that we’re on. And then we’ve given it a list with all those field names, so add a closing parenthesis and press OK.
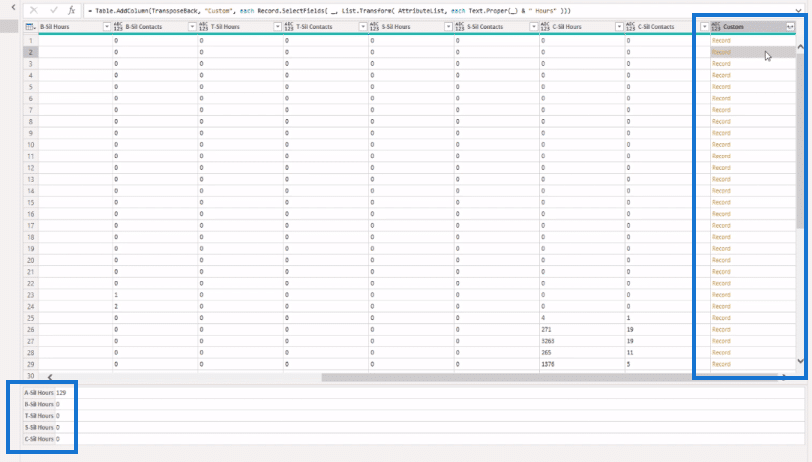
So we no longer have a list, but we now get a record. Let’s click off to the side in the white space again to view the contents of that record. Here we see that it lists the record field names and the record field values.
But we’re only interested in the record field values, so we need to extract that. Let’s move back to our custom column dialog box and add Record.FieldsValues.
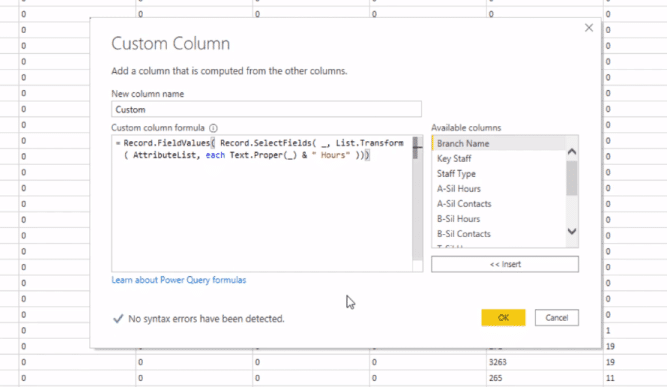
We now get a list again and no longer a record. We click off to the side in the white space again, and you see that we now have a list with just those values. So that’s looking good.
Let’s copy the full logic that we’ve created, except for that last closing parentheses. And now we can remove our temporary column because we no longer need it.
On our formula bar, we select our second list and replace it with our logic.
To create a list with the record fields values for the contacts, all we need to change is the suffix. So we can select that last list as well, and paste in our logic.
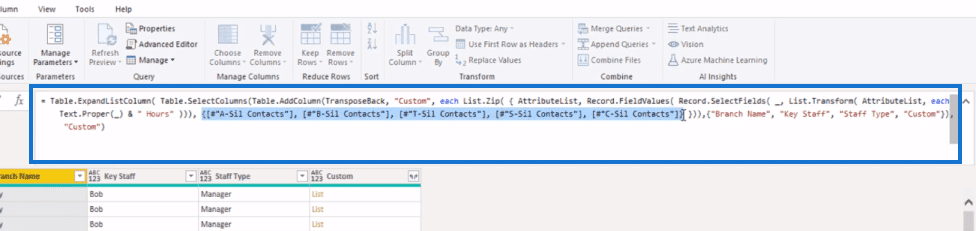
Then, instead of hours, let’s change this to contacts.
No errors and it’s looking good. This is now a dynamic solution to unpivot multiple columns.
***** Related Links *****
Power BI Unpivot Columns – Power Query Tutorial
How To Unpivot Columns In Power BI
Unpivot And Pivot Basics In Power BI – Query Editor Review
Conclusion
That’s how you unpivot multiple columns dynamically in Power BI using List.Zip.
If a new attribute comes in, it will automatically be picked up by the AttributeList. And when an item no longer exists, it won’t be present on that list.
I hope you’ve enjoyed this one. Watch the full video below for more details on this tutorial and check out the links below for more content around unpivot multiple columns in Power BI.
All the best
Melissa


