After successfully connecting DAX Studio to Power BI and learning about its user interface, the next step is learning about the different keywords and how to use them. In this tutorial, we’ll discuss about the DAX Studio EVALUATE keyword. Basic examples are also provided to further understand how and when it’s used.
Introduction
EVALUATE is a keyword automatically included by Power BI in every query. It’s used to answer and create your visuals in Power BI. It’s also used to contain table expressions in a DAX query.
To use EVALUATE in a query, you can input EVALUATE and then provide a table expression.
Take note that you can’t pair EVALUATE with a scalar value such as a measure or a number. So if you try to Run EVALUATE 1, an error will appear in the Output pane.
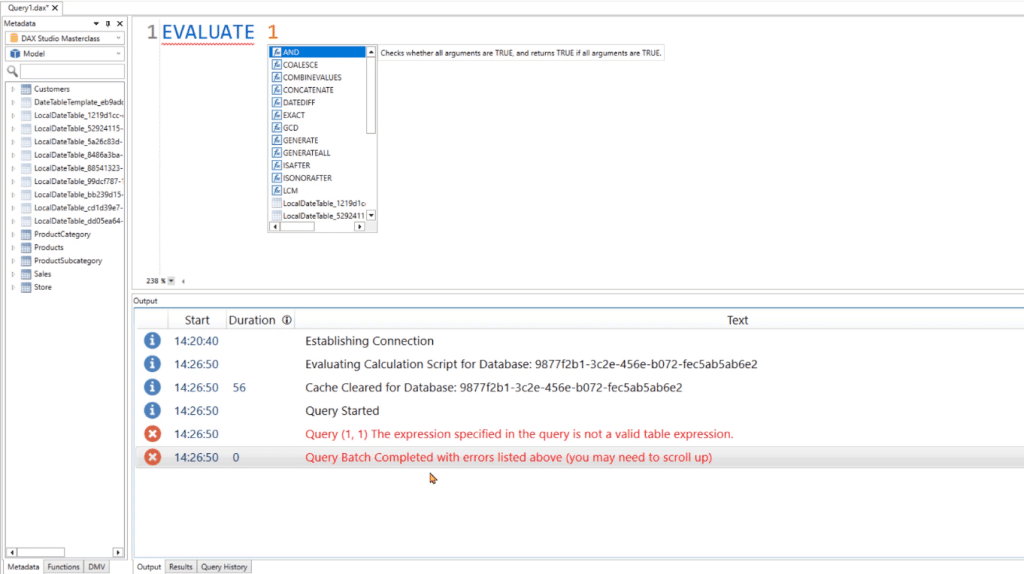
You can only use EVALUATE with table expressions.
Creating Tables In DAX Studio Using EVALUATE
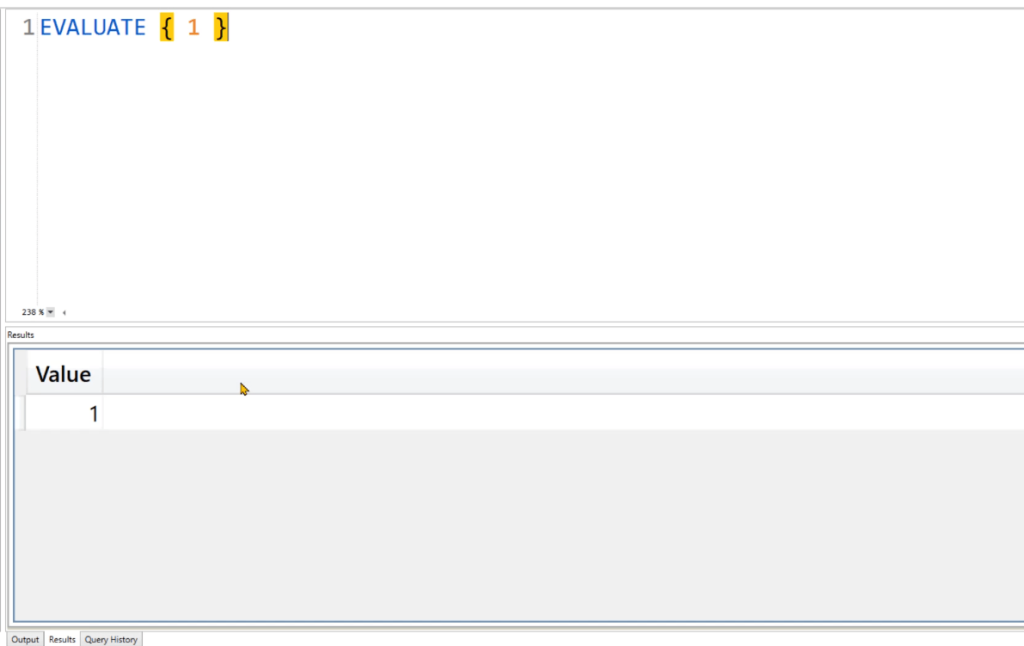
To convert numbers or measures into a table, you need to place it between curly brackets ( { } ). Doing so will give you a table with one row and one column containing the value of 1.
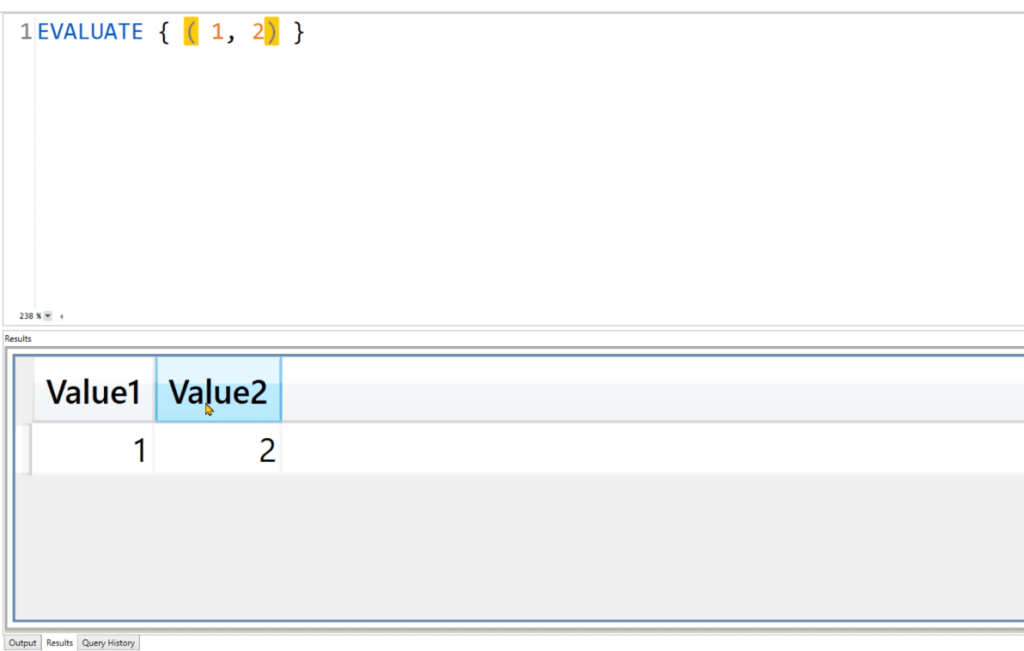
To create a table with two columns, use parenthesis ( ( ) ) and write another value separated by a comma. When that’s run, you’ll now have a table with two columns and one row.
To add another row, you need to place another expression within a parenthesis inside the curly bracket. If you execute that, you’ll get a table with two columns and two rows.
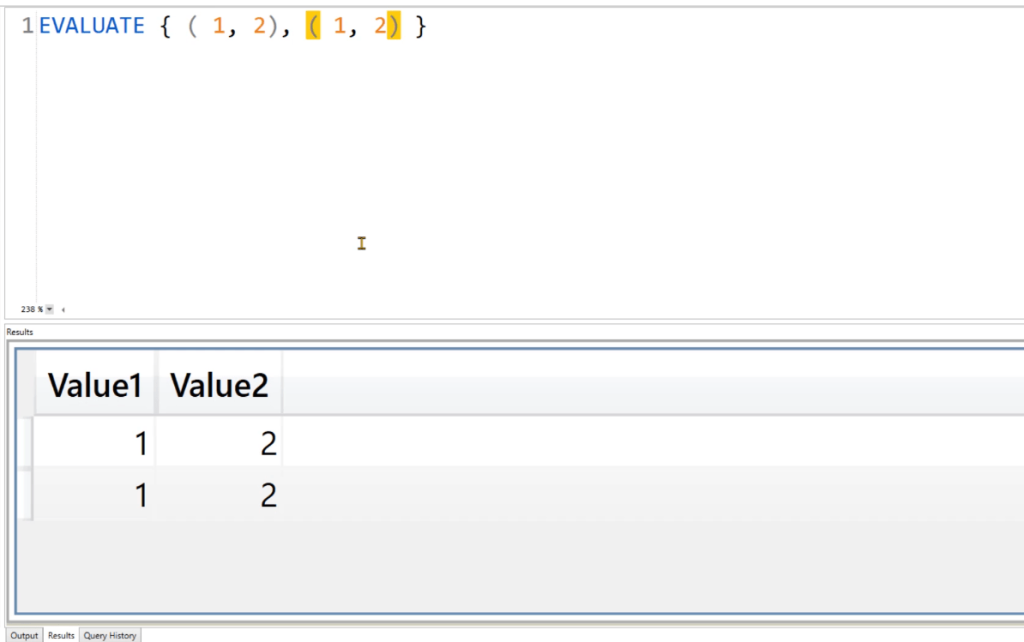
Referencing Tables Using EVALUATE
Other than table construction, you can also reference entire tables using EVALUATE.
For example, if you want to return the Products Table, execute EVALUATE Products.
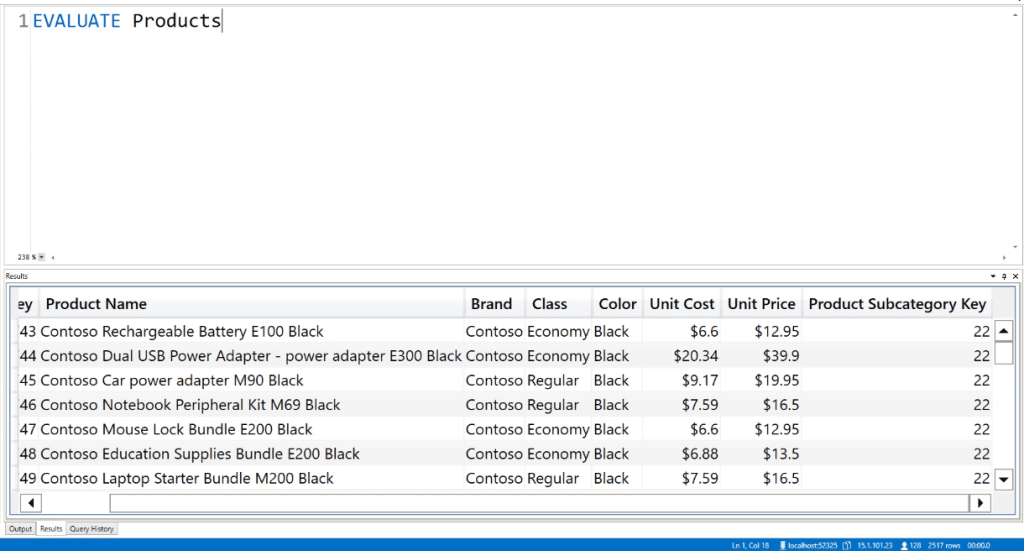
You’ll then get all the columns and rows inside the Product Table. Also, if you look at the bottom-right side, you’ll see the number of rows the Product Table contains. In this instance, it has 2,517 rows.
Pairing EVALUATE With Other Functions
EVALUATE can also be paired with other DAX functions.
One option is to use EVALUATE along with FILTER. This will filter the rows inside the Product Table depending on what you’ve specified.
For instance, you only want results where the Product Color is Red. If you execute the query below, the results will only show rows with those specifications. You can also see that instead of 2,517 rows, the Product Table now only has 99 rows.
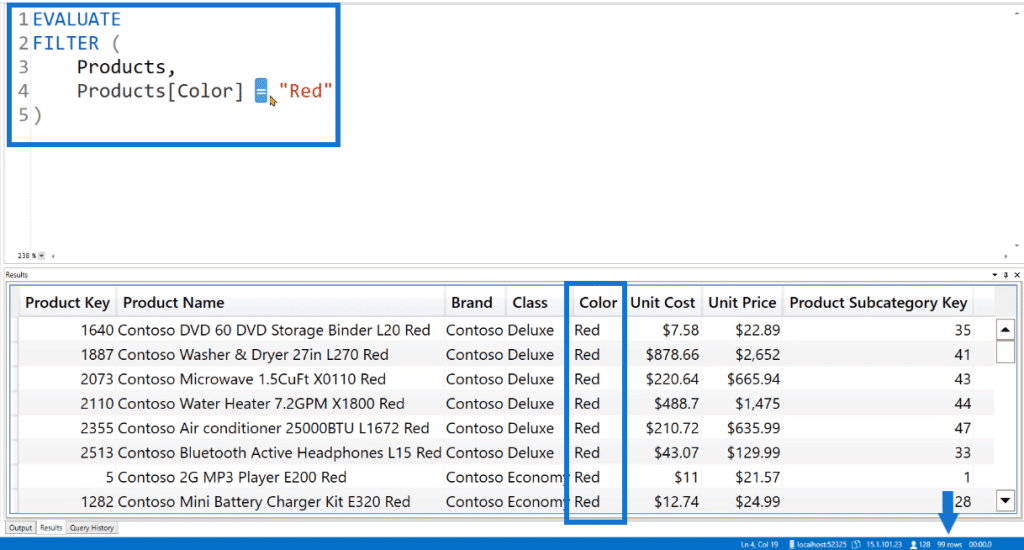
If you want to compare more than one column, you can use IN to add another condition to the filter.
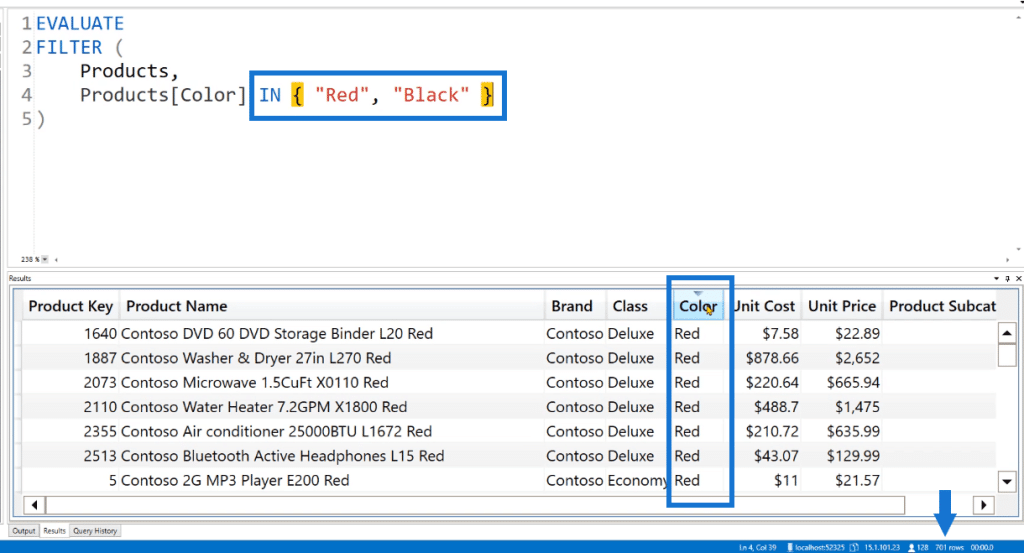
This query now returns 701 rows.
Another option you can try is using VALUES. This will return a distinct list of all the colors available in the Products Table.
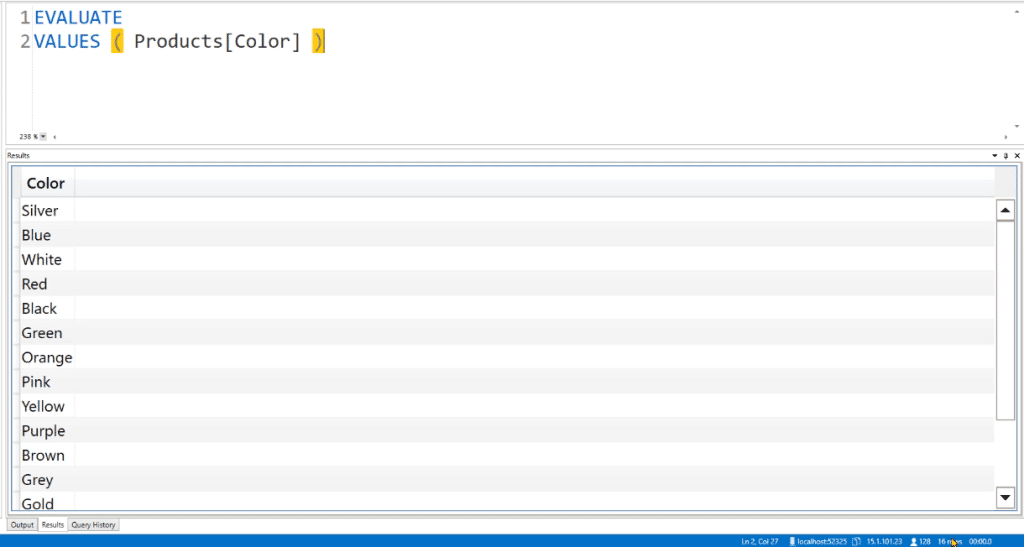
You can also use ALL and ALLNOBLANKROW.
Moreover, other than using curly brackets, you can also use the ROW function to retrieve data from specific rows in a table.

The difference is that with this function, you have the option to change the column name.

Using Complex Expressions In DAX Studio With EVALUATE
For this example, let’s first go back to Power BI and create a new measure for Total Sales.

Once done, go back to DAX Studio and run the code below:
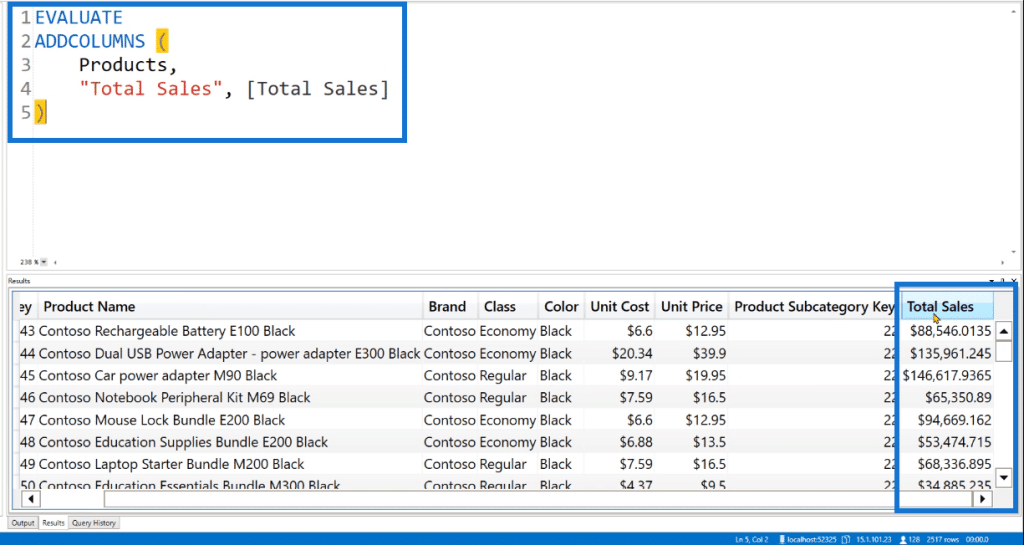
This code means that you’re calling the Total Sales Measure to initiate context transition and assign a Sales value to each line in the Products Table. Once you run it, you’ll have the Total Sales at the right-most column of this table.
Now, you’ll notice that some rows in this table don’t have a value for the Total Sales.

This means that there aren’t any matching line items for that row in the Sales table.
To remove rows with blank values, you can use the FILTER function. Also, a best practice to differentiate columns from measures is by using the @ symbol. This will treat it as a virtual column.
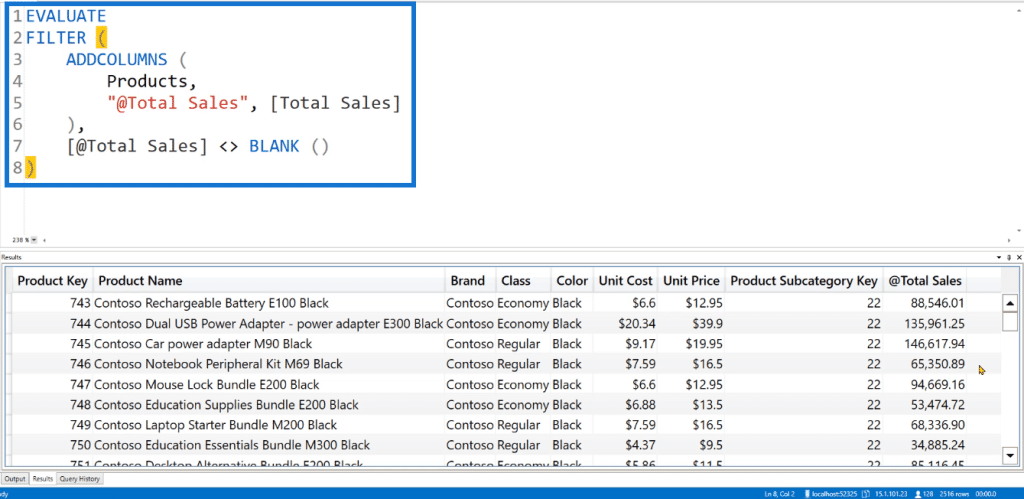
Once you’re satisfied with the results, copy the code and then go back to Power BI. Create a new table and paste the code.
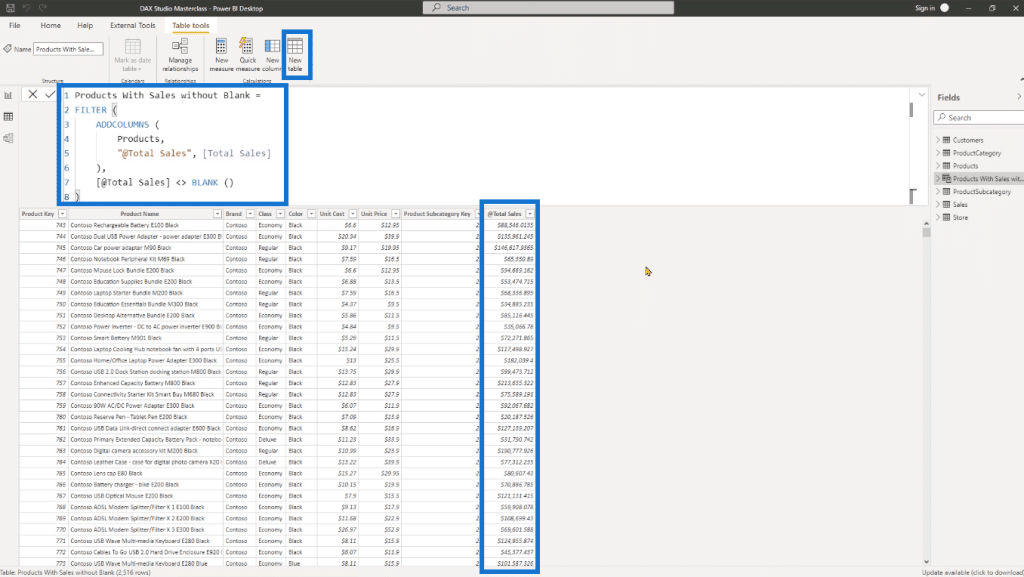
You’ll now get a Products Table with a column for the Sales amount.
***** Related Links *****
Power Query Functions, Keywords, And Identifiers
Connect DAX Studio To Power BI And SSAS
Row Context And Filter Context In A Power BI DAX Code
Conclusion
The EVALUATE keyword is used when building queries in DAX Studio. So it’s important to understand what it is and how it is used. Learning the basics is crucial to building confidence and skill when dealing with complex expressions in the future.
There are other ways to use and apply the EVALUATE keyword. There’s also an option to automate the process of querying with the use of EVALUATE. As you explore more DAX Studio keywords, you’ll discover a plethora of possibilities that will improve your coding experience.
Enterprise DNA Experts

