In this tutorial, we’ll learn about extracting data from databases and different tables. The SQL statement that we’re going to use is the SQL SELECT statement.
The SELECT statement is used for fetching data from our database.
Syntax For The SQL SELECT Statement
To select all columns or fields from a table, we need to use the syntax Select * FROM TableName. The asterisk means that we want to get all the data from a certain table.


In Power BI or any other reporting tool, we only need to bring data that is required. If we don’t need all the columns, we’ll just bring 2 columns or 3 columns that we need.
If we don’t want to get all the data, then we need to specify the column name (Select col1, col2, col3 FROM TableName). We can specify one or multiple columns if we want to.

For example, on our employee table, we only want to get the data from the ID, Name, and Address column. Therefore, we only specified those 3 columns.

Understanding The Alias Keyword
Alias is used to set a temporary name for our columns or tables to make them more readable or understandable. Note that using Alias only exists on the specific query where we’re using it. Moreover, it won’t change the actual column or table name on our database.
To use Alias, we need to use the AS keyword. For example, if we have columns named Column1 and Column2, we can set their temporary name to Col1 and Col2 by using AS or using the syntax Column1 AS col1 and Column2 AS col2.

This will make more sense when working on a more complex database where column names are too long and too general.
For the table name, we can use the same syntax like TableName AS t.


Another reason to use Alias for table names is when we are selecting a column from multiple tables with the same columns. You’ll learn more about this when using the JOIN clause.
Let’s say, for example, we want to extract the employee ID column but our query is extracting on multiple tables like Employee and Product table. So, to extract the ID column for the Employee, we can use the Employee table ALIAS that we’ve set. For this example, we used “e”.

We can also use the full table name instead. However, using Alias will make our code shorter, especially when working on a complex database with complex table names.
Understanding The SELECT TOP Clause And ORDER BY Keyword
The Select TOP clause is used to limit or specify the number of rows that we want the query to return. So, we can specify it to be TOP 10, TOP 20, or TOP 100, or however we want to limit our SELECT query. We also use this if we only want to see the structure of a certain table so we don’t need to see all of the rows or data inside it.
For example, if we have 2 million rows on our Employee table, using TOP 100 will only return 100 rows instead of the 2 million rows in our table.

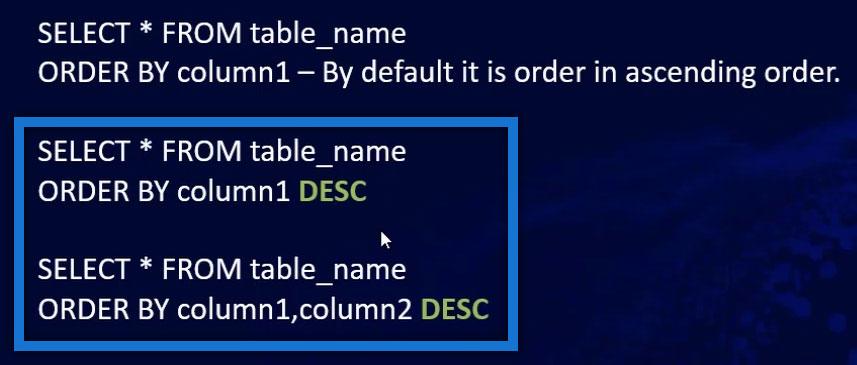
On the other hand, the ORDER BY keyword is used for sorting the rows order of our query result. We can order by one or multiple columns if we want to. By default, the sort order will be in ascending order.

If we want to sort our results in descending order, then we just need to use the DESC command.
Using SELECT statement On SSMS (SQL Server Management Studio)
You may learn how to download and install SQL Server and SSMS in this tutorial.
For this example, I’m connected to AdventureWorks2012 database which is a sample database from Microsoft.

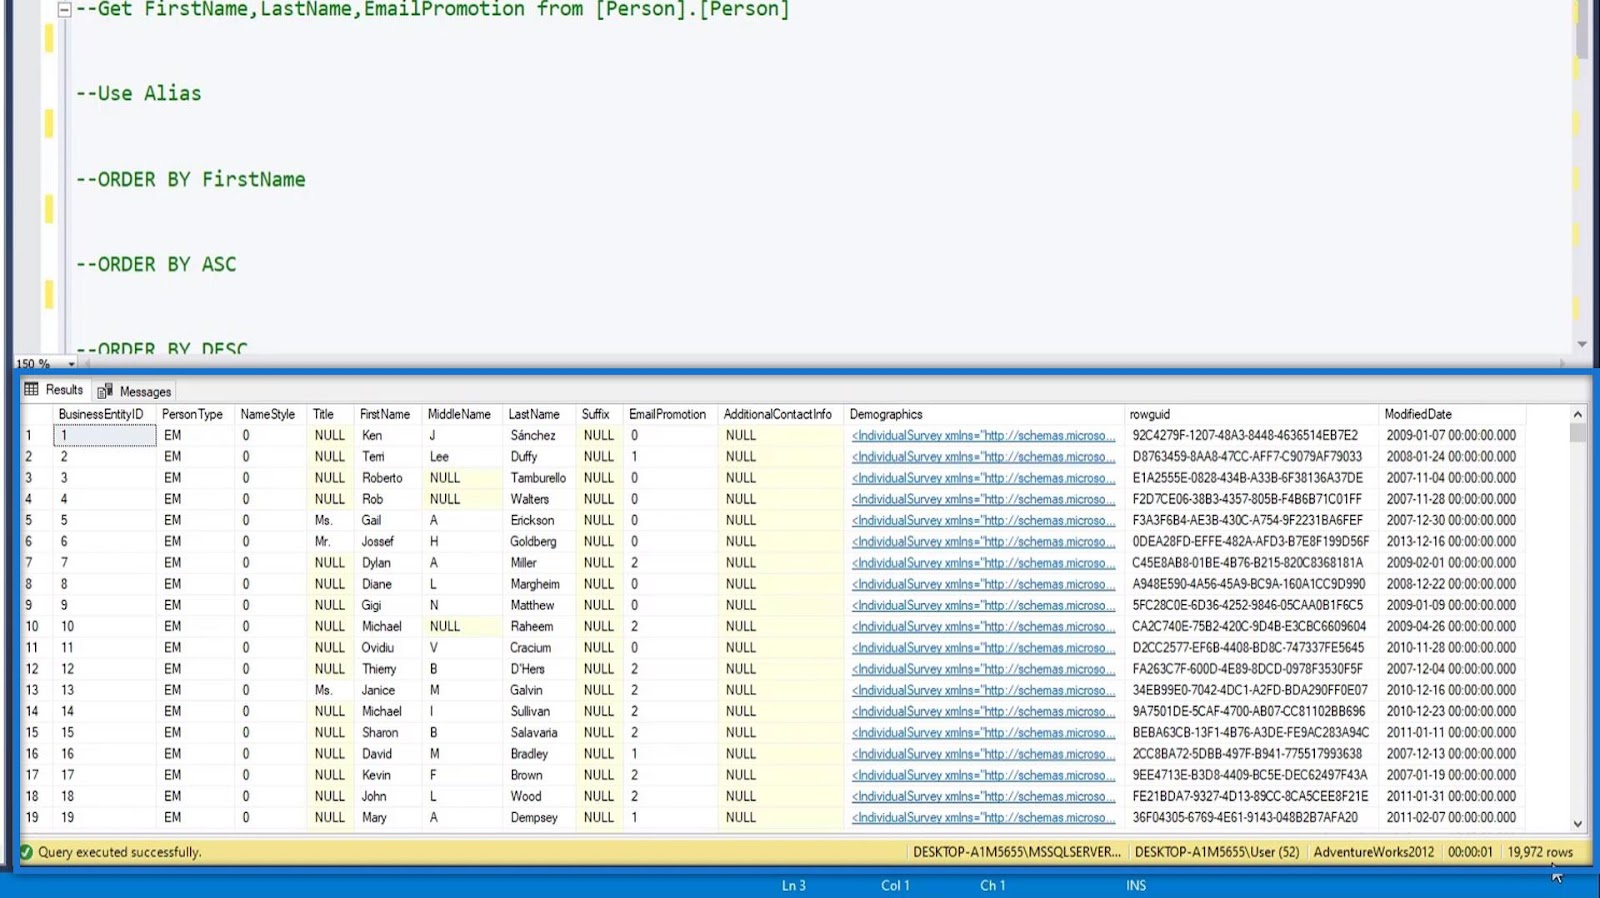
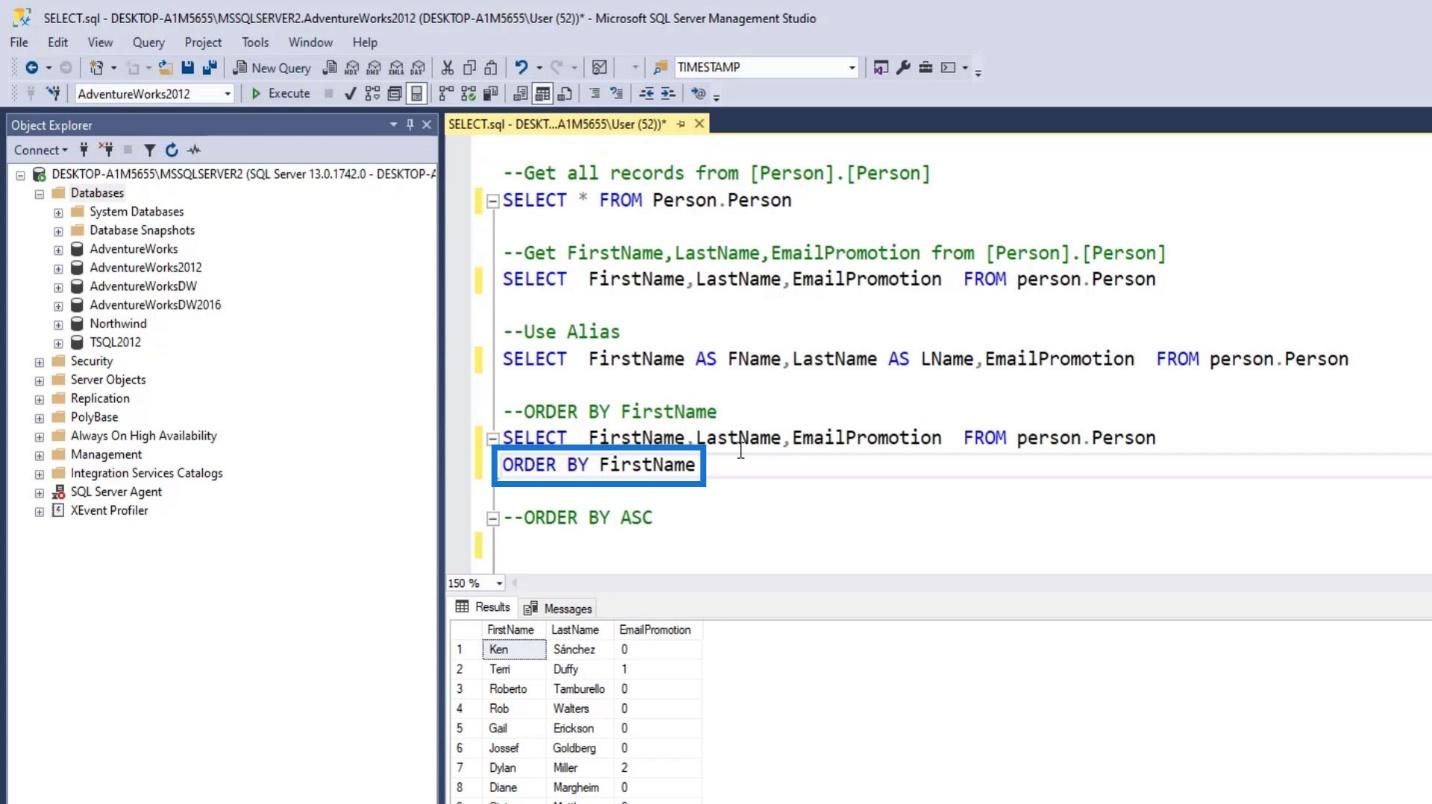
Let’s first select all the records from the Person table. So, we just need to type SELECT * FROM Person.Person.

To execute this query command, highlight it and click the Execute button.

It’ll then display our query result at the bottom. For this example, we’ll see that we’ve extracted 19,1972 rows from the Person table.
This part is just a comment or note. So, even if we highlight this and execute our query, it won’t affect our execution or result.

Selecting Specific Columns Via SQL SELECT Statement
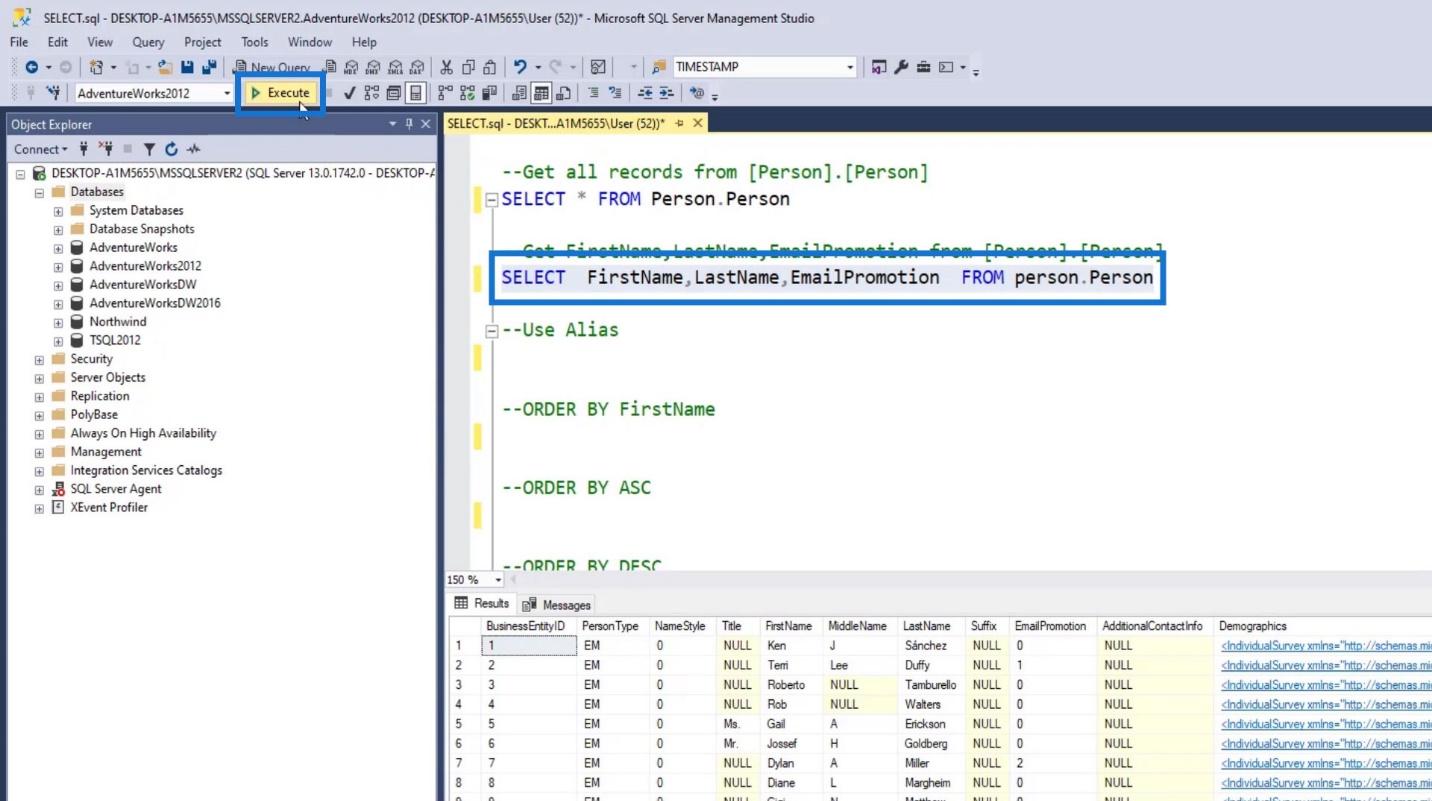
Next is for specifying certain columns instead of selecting all columns from our table. Let’s replace the * with FirstName, LastName, and EmailPromotion. Again, this is for selecting specific columns from the Person table.

To execute, just highlight it and click the Execute button again.

Now, the result is just showing the three columns that I’ve selected.

Using An Alias
For Alias, let’s use the same command, and set the alias for the FirstName and LastName column to FName and LName using the AS keyword.

After executing our changes, the result will now display the FirstName column as FName and LastName as LName.

Using The ORDER BY Keyword
For instance, we want to sort our results earlier on ascending order by the FirstName column. As we can see from our results earlier, it’s not yet sorted by default.
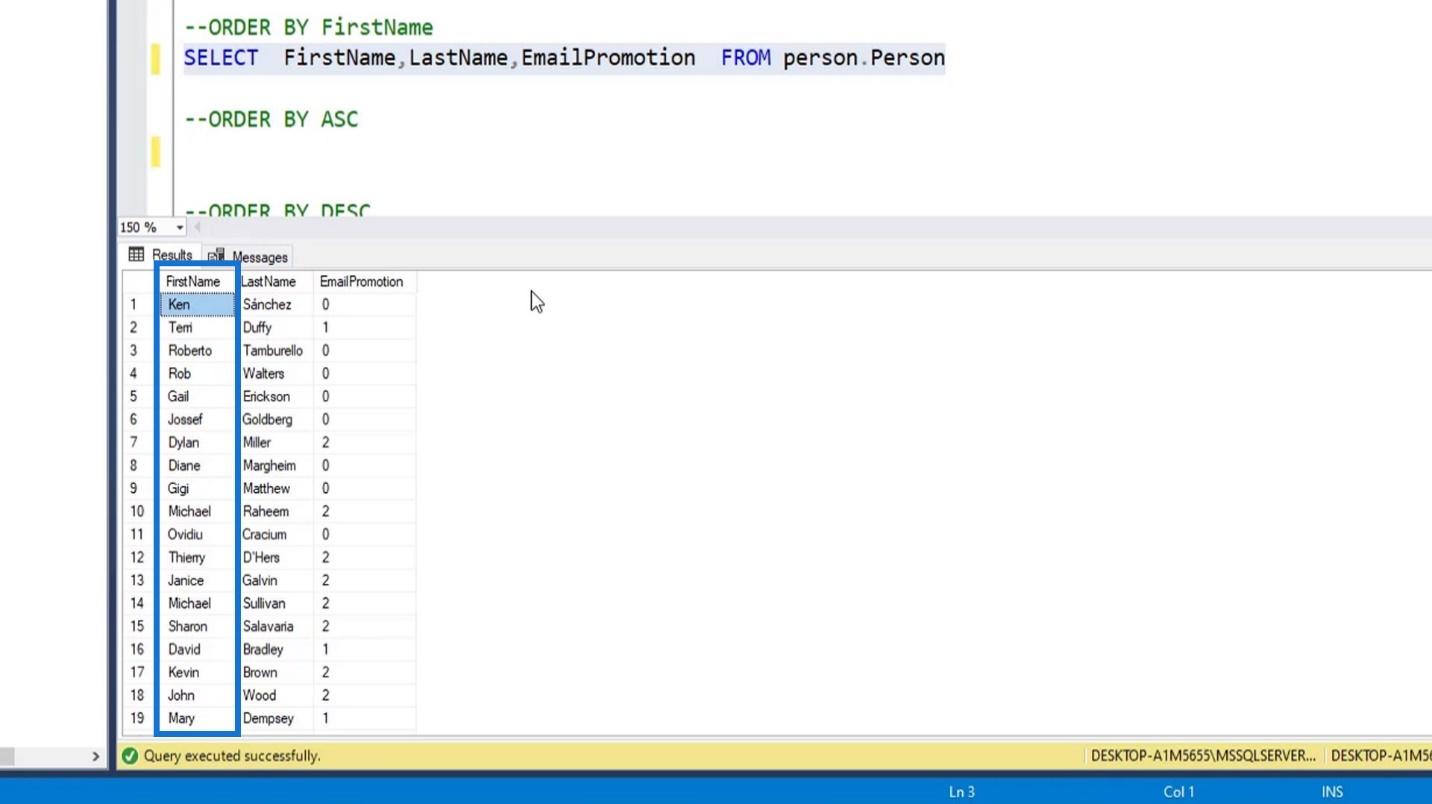
To do that, let’s just add ‘ORDER BY FirstName’ on our query command.
Let’s now execute this query and we’ll see that our result is now sorted in ascending order by the FirstName column. Again, by default, the order will be in ascending order if we won’t specify the sort order.
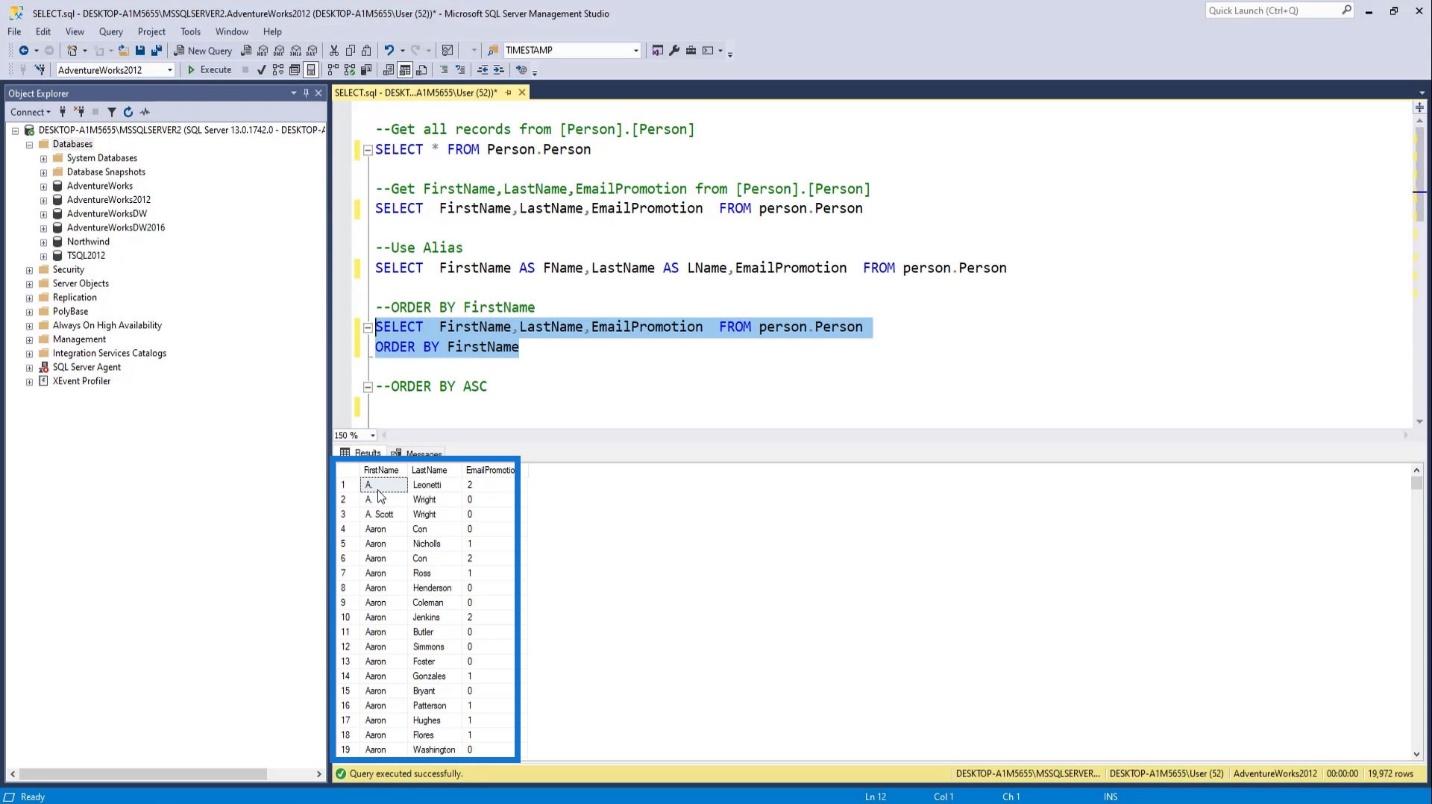
So, even if we specify the sort order to ASC or ascending order, it won’t change the result.

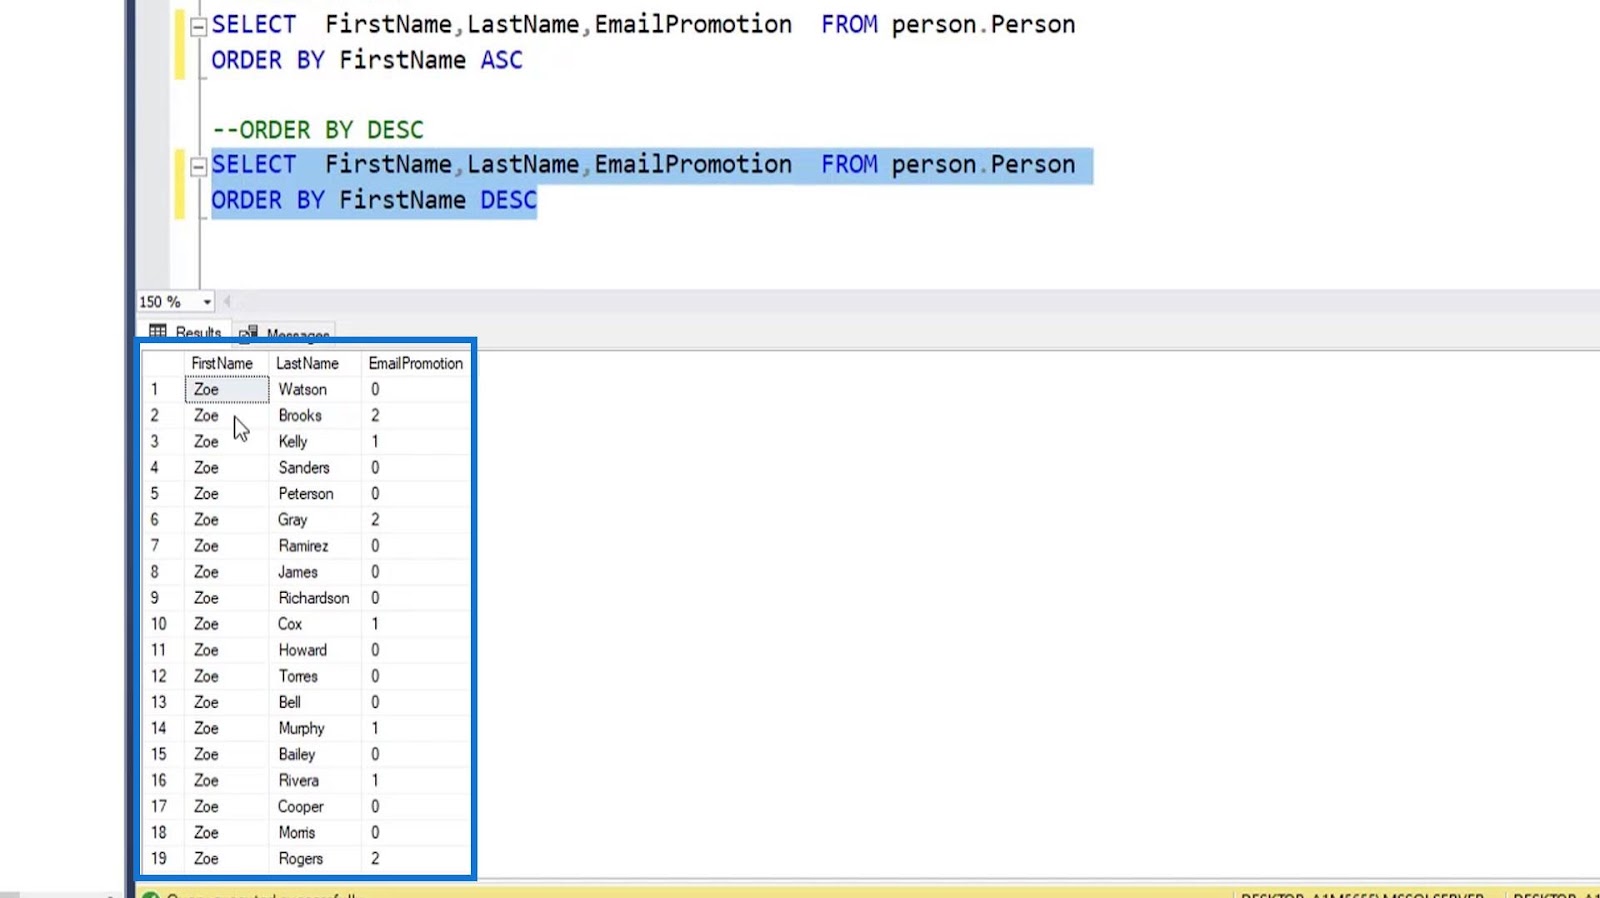
Let’s now try the DESC or descending order. Just add or change the ASC to DESC.

Now, it’ll sort our result by descending order. As you can see, the result started with names that start with Z.
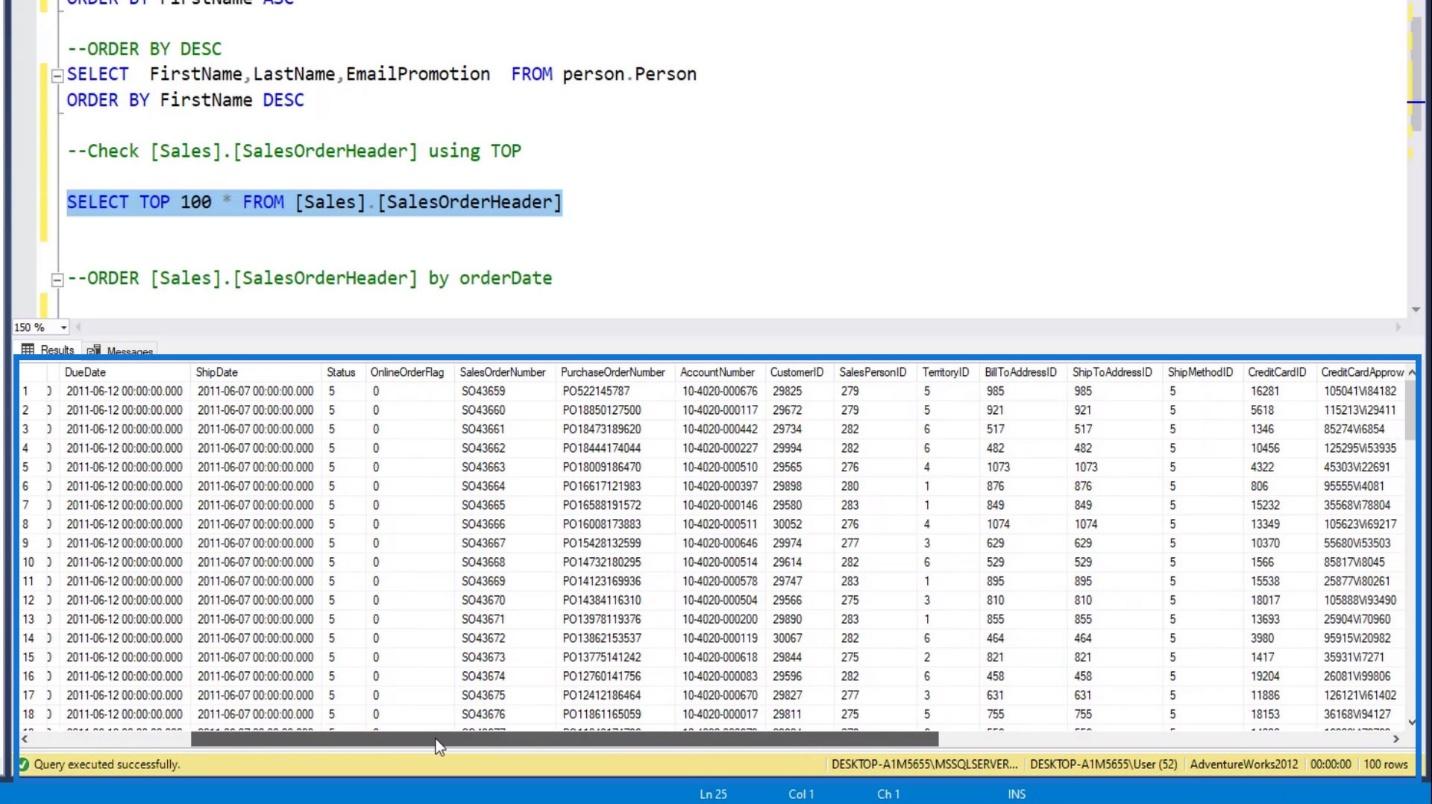
Using The Select TOP Clause
For this example, let’s extract all of the data from the SalesOrderHeader table.

After executing our query command, we’ll see that it will give us 31,465 rows. This is fine. However, we might encounter a table where it has millions of rows. As a result, the execution might take a long time to finish and might cause some issues.

Limiting the results for those instances are ideal. This is where the Select TOP clause becomes useful as well. For example, let’s limit the rows returned from this query command to 100 by adding TOP 100.
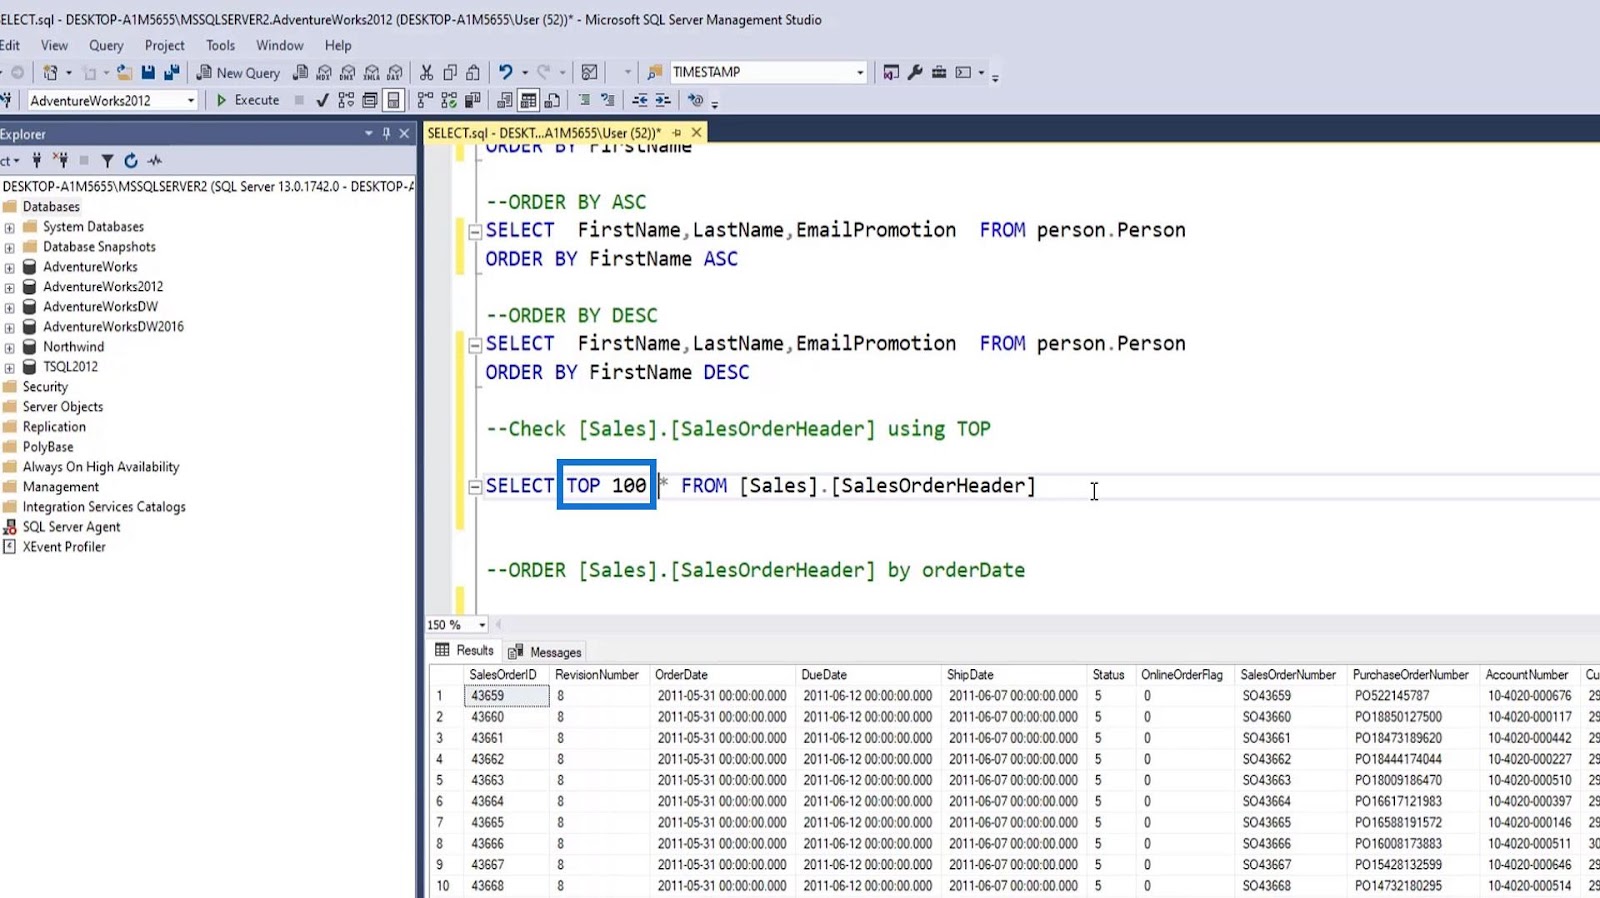
After executing our command, the result will show us that only 100 rows are returned or fetched. With this, we can easily see the structure of a certain table if that’s what we want to do.
Let’s say, for instance, that aside from seeing the Top 100 results, we also want to see the earliest record from this table.
To do that, we just need to sort it by the OrderDate column. So, we just need to add ORDER BY OrderDate.
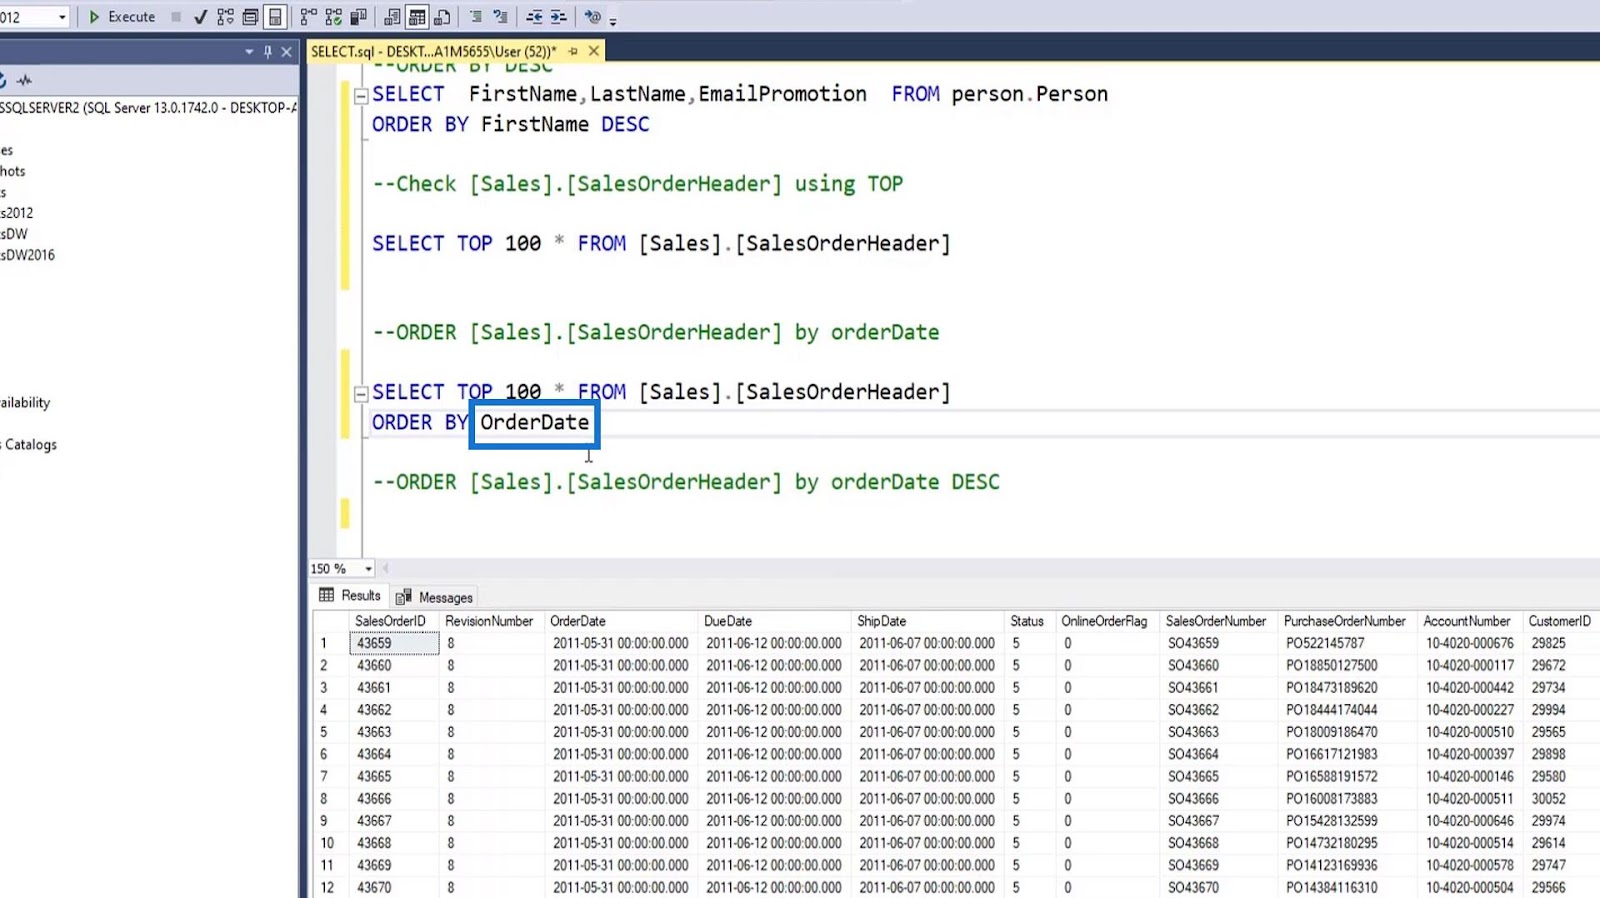
As a result, we’ll see that the earliest date is 2011-05-31.
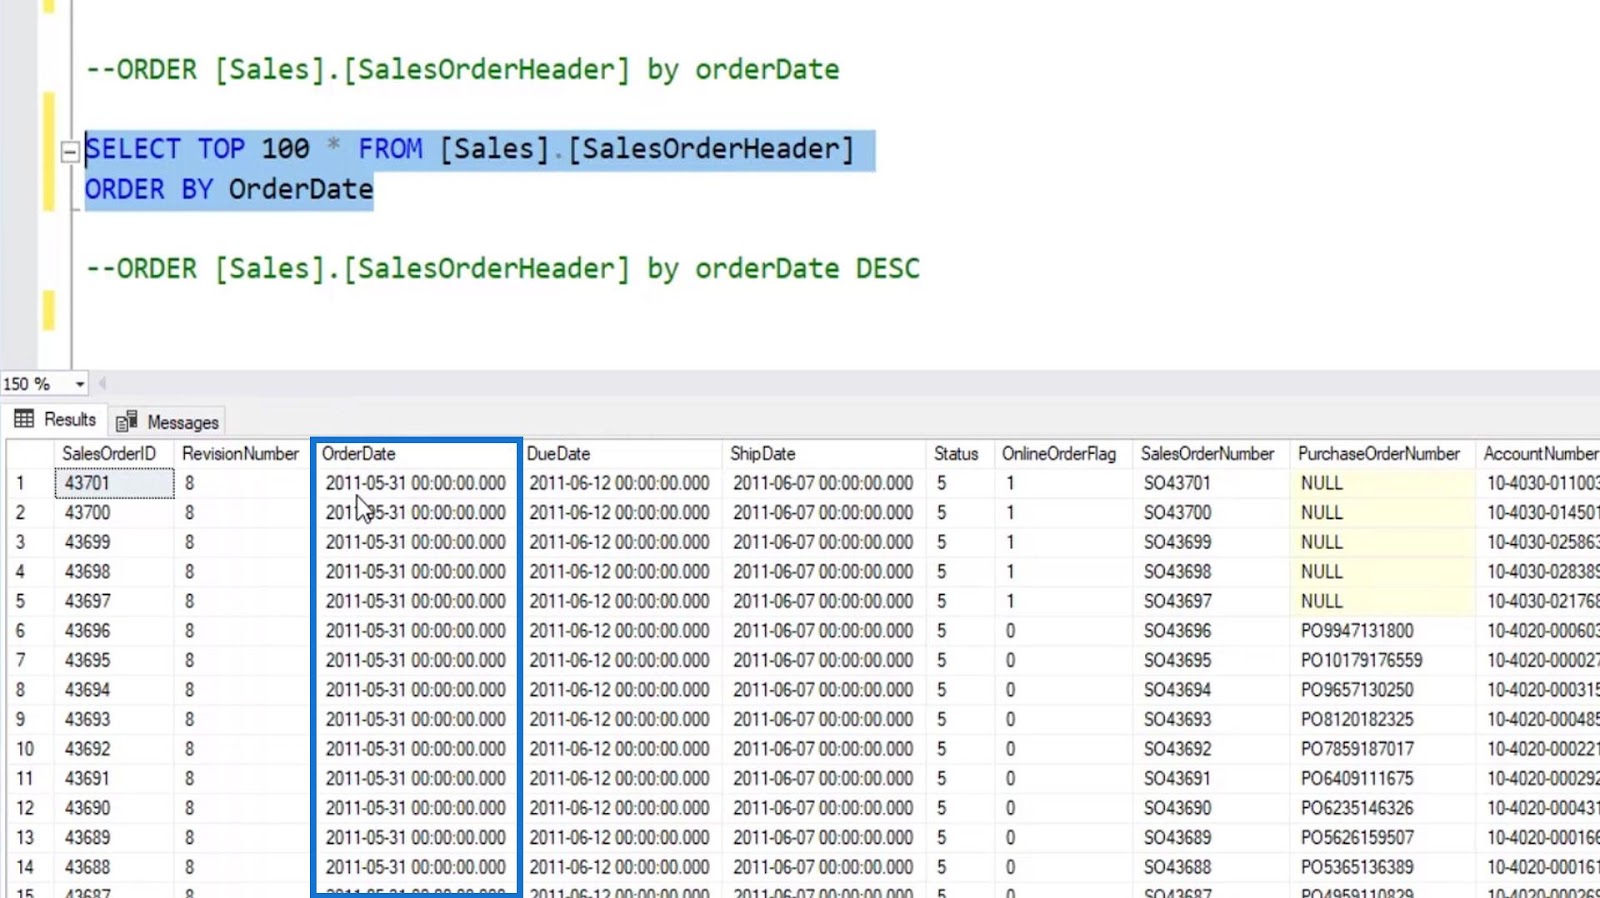
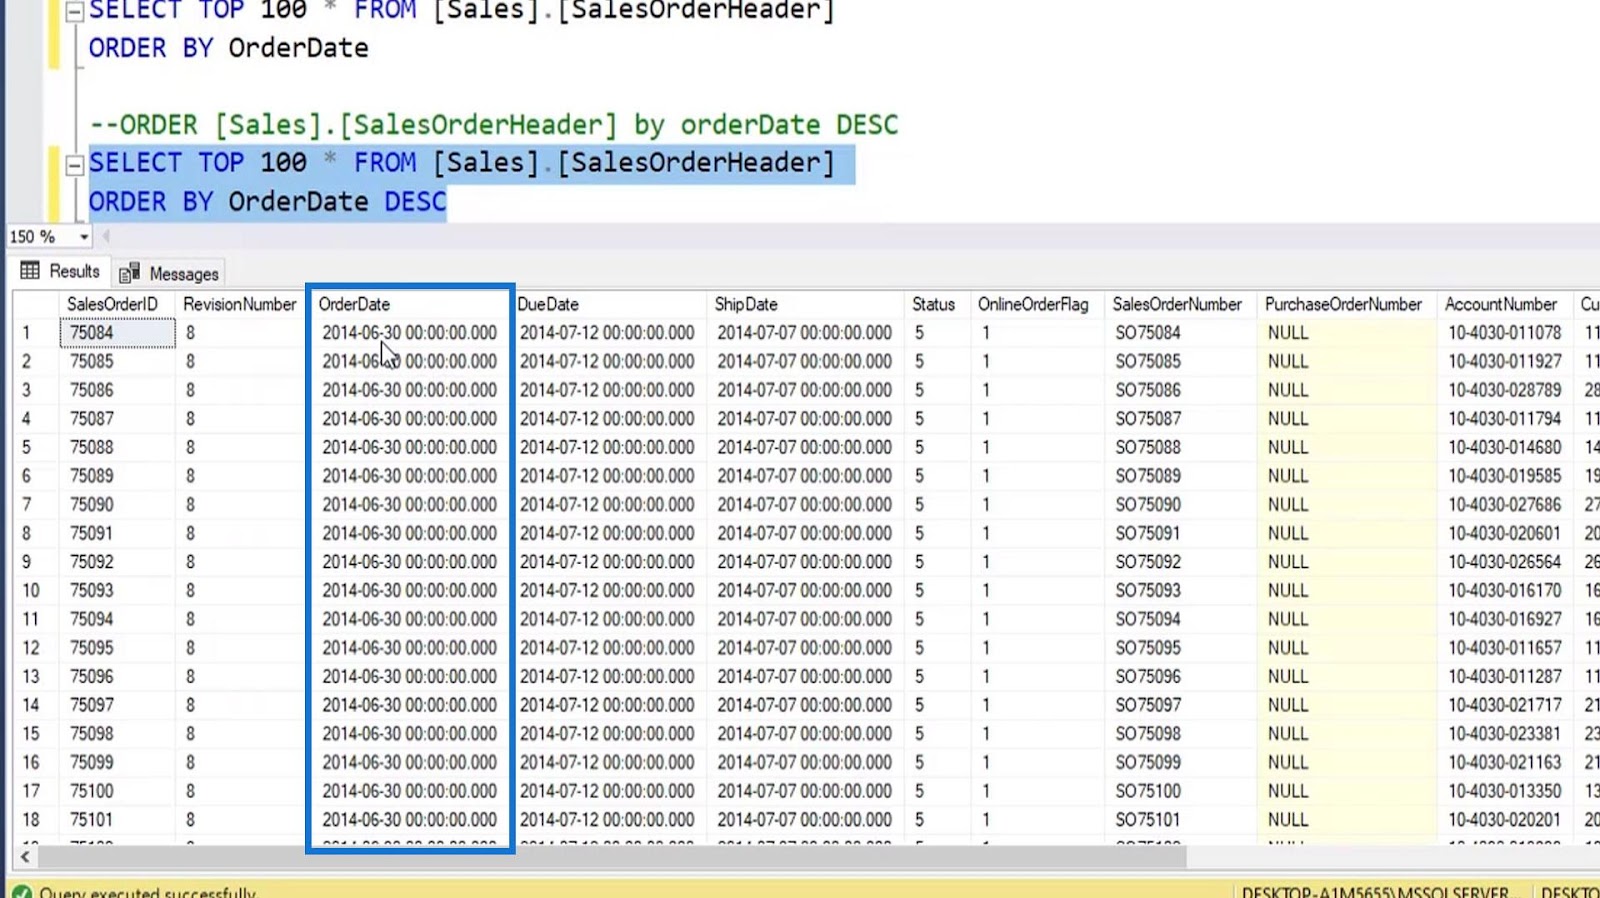
To see the latest record, we just need to use DESC.
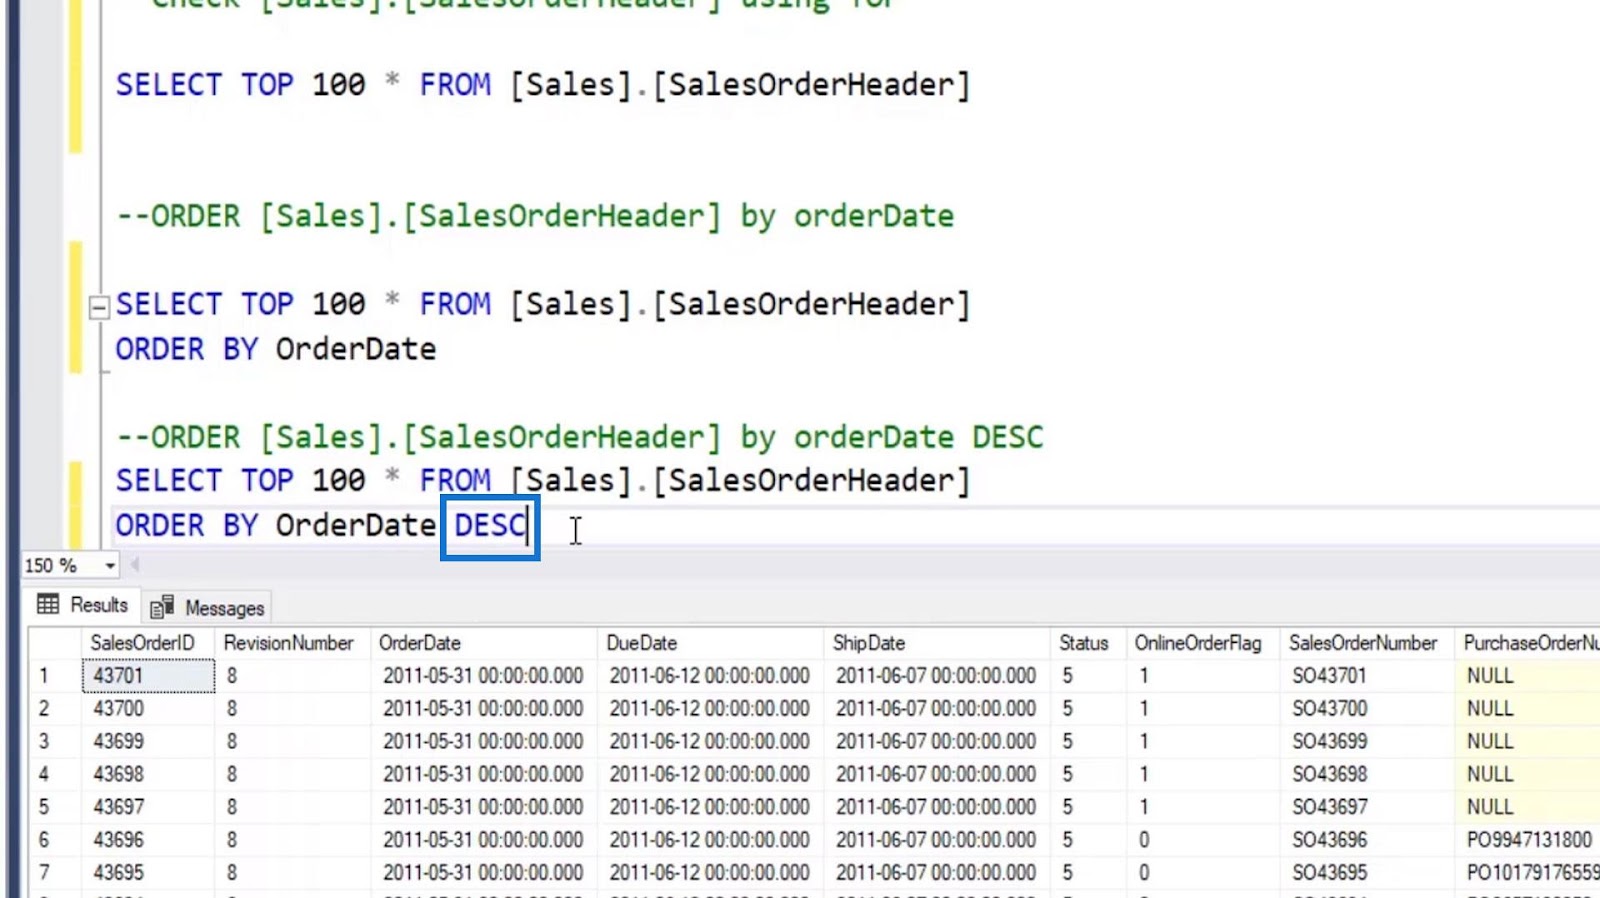
And the result will show us that the latest record was on 2014-06-30.
***** Related Links *****
SQL Server Download And Installation
SQL For Power BI Users – New Enterprise DNA Course
Query Folding And Connecting To SQL Server
Conclusion
To wrap it up, we discussed the SQL SELECT Statement and the basic commands, clauses, and keywords that are associated with it. We’ve learned how to extract all the records from a table, or extract specific columns from a table using the SELECT Top clause and ORDER BY keyword.

We’ve also learned how to create column and table alias using the AS keyword. Hopefully, you were able to fully understand the usage of this SQL statement not just for selecting data, but also for limiting the extracted data or rows, and sorting results by a certain column through ascending and descending order.
All the best,
Hafiz