For this tutorial, I want to showcase a couple of methods on how you can create new records based on date fields using Power Query Power BI. You can watch the full video of this tutorial at the bottom of this blog.
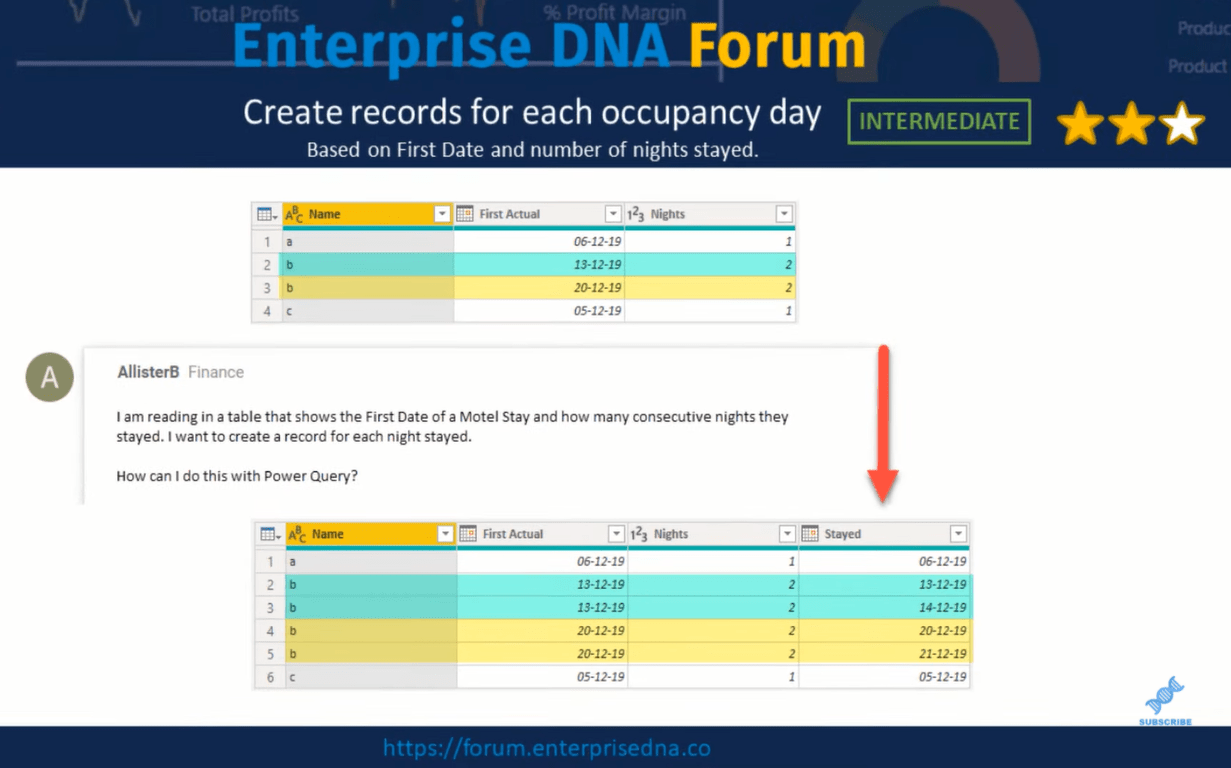
I’m going to showcase two methods on how to achieve this. This example came from a member of the Enterprise DNA forum, who posted a question with a date and a number of nights stayed. The member wanted to know how to create new records for each night a person stayed at a motel using Power Query.
Method 1: Using Number.From Function In Power Query Power BI
If you’re familiar with date calculations in Excel, you’ll probably know that each day can be translated to a whole number, and you can do that here as well to get the numeric equivalent for each date. We can use the Number.From function.

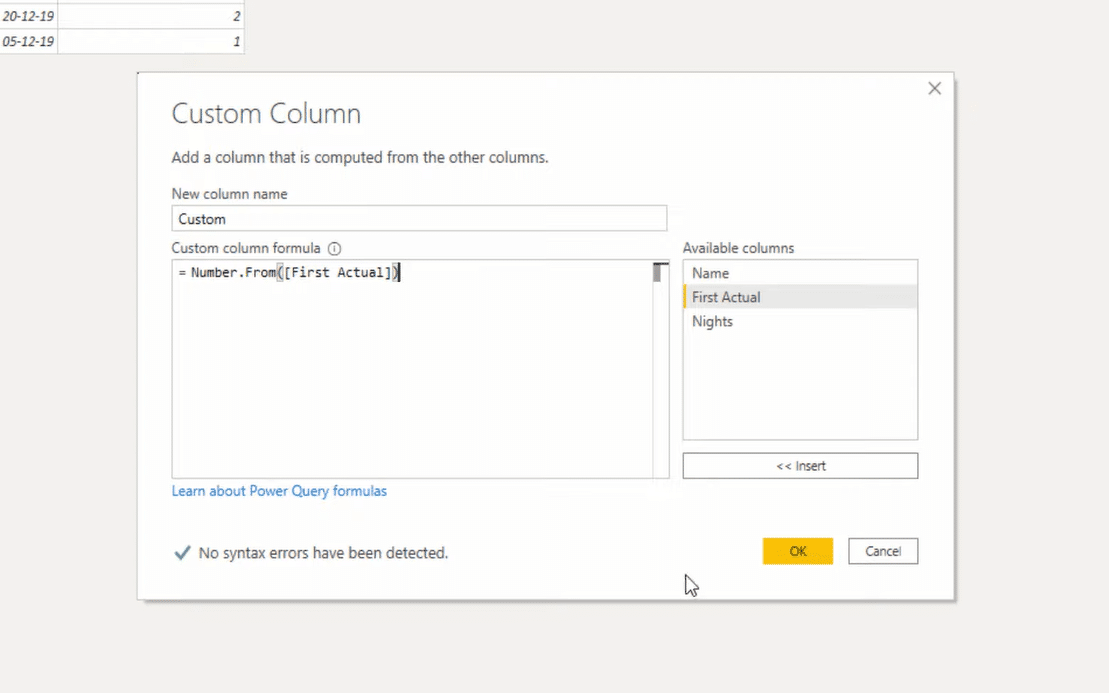
I’ll reference my source query by right-clicking on it and select Reference. Then via that mini table, go Add Custom Column. Now let’s enter the function Number.From and point to the first actual column that contains our dates. Don’t forget the closing parenthesis and press OK.
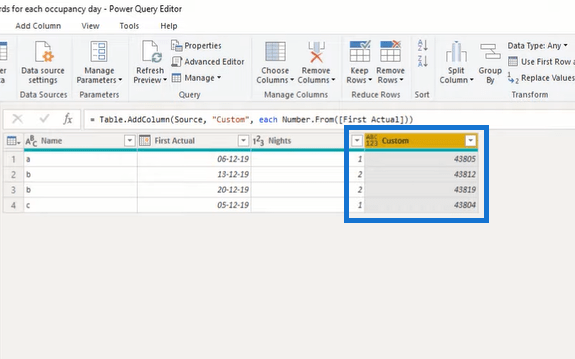
So here we see an integer representation for the date value. And because it’s a number, we can add and subtract days. The goal is to create a date for each consecutive night stayed.
If we examine the first record, that person stayed for just a single night, so we only have to return that first actual date value. Then for the second record, that person stayed for two consecutive nights. We have to return both a value for the 13th and the 14th of December. We can achieve that if we add the value that’s in the Nights column to the value that we have in our Custom column, and then subtract one because we already passed that initial value.
So, let’s go to the formula bar and expand on the logic we’ve created so far. We have to use that numeric value for the date twice, so I’ll store that in a variable. I’ll add the let expression, then add a name for my variable. I’ll call that FirstNight. And then, we can add the in clause.
Lists can be expanded to new rows with a set of list initializers, which are the curly brackets. We can create a list with dates. We’re going to start from our FirstNight variable up to the FirstNight variable, plus whatever is in our number of nights. With a set of square brackets, point to the Nights column, and then subtract one. I’ll press OK, and we now have a list.

When I click off to the side in the white space, we can see the contents of that nested list down below in the second preview pane.
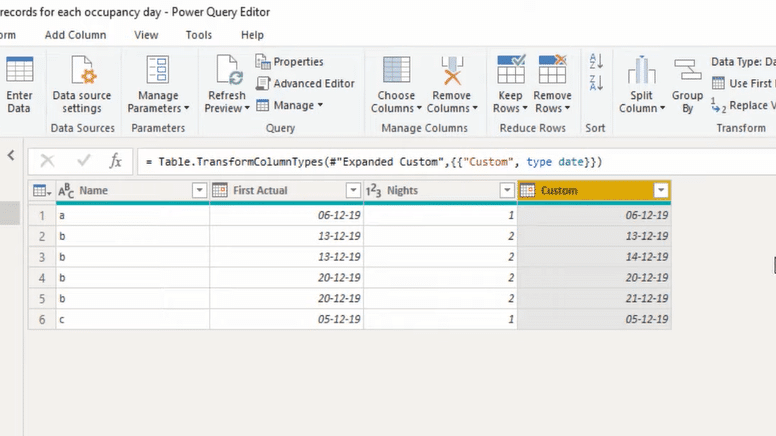
Now with these sideward arrows, we can Expand to New Rows. Then, I can set the data type into a date. So you can see that we now have the dates. For the first record, we’re returning that same value that’s in the first actual. For that second record, we have one record for the 13th and one for the 14th of December.
Method 2: Using M Function List.Dates In Power Query Power BI
For the second method, we can use an M function called List.Dates. I’ll reference my source query, and again, with that mini table icon, I’ll add a custom column.
I’ll add that function List.Date and then put it in an opening parenthesis. First, it wants a start value as a date and that’s in our First Actual column that contains our date values. So, we select that then put a comma. Next, is a count as a number, which means how many dates you want to return to that list. And we can see that that is in the Nights column.
Next, is step as duration. Think of that as an interval. Now we’re looking for consecutive nights and we want a continuous list of dates. A single day has a numeric equivalent of one, and so I’ll enter duration from one, then a closing parenthesis and press OK.
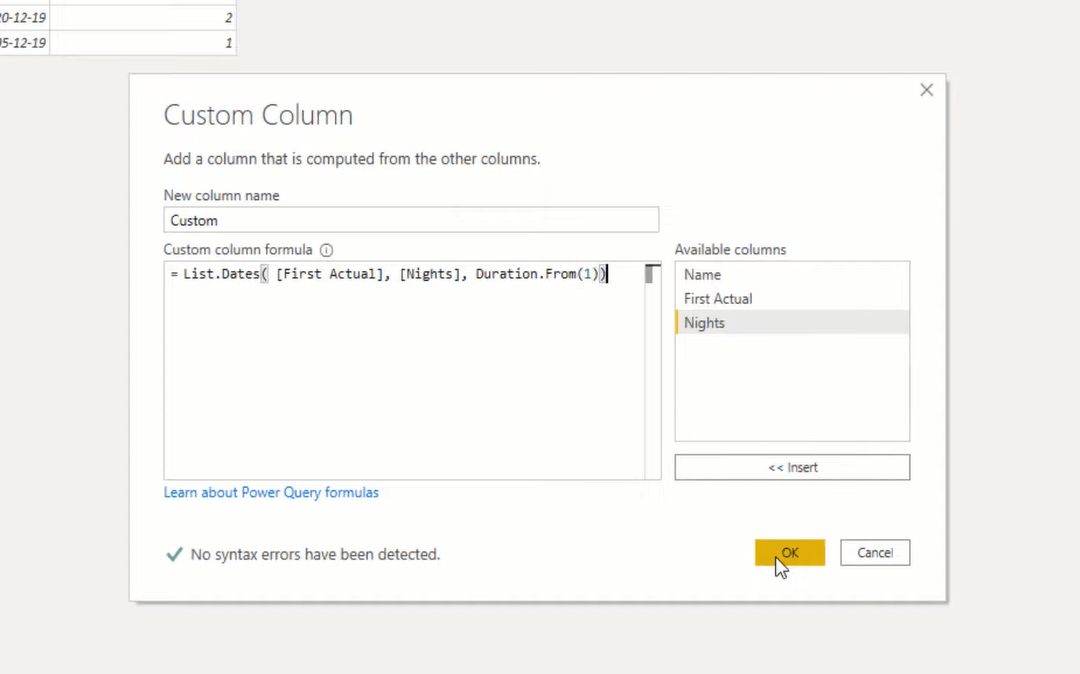
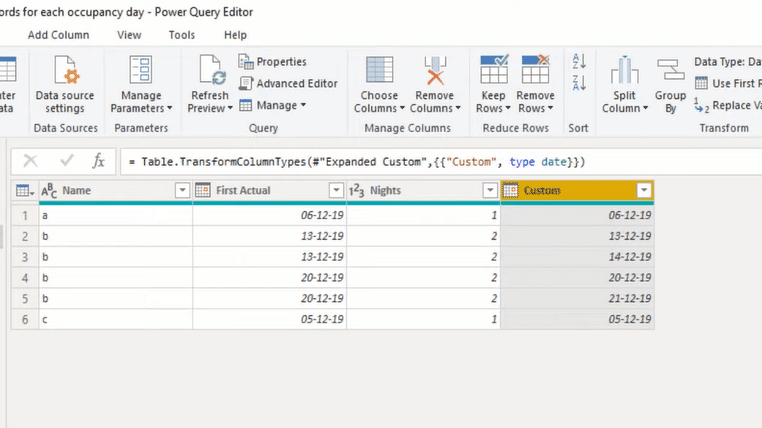
Again, we have a nested list. For the first record, we have just one value and for the second record, we have the 13th and the 14th of December.

Next, we can again Expand that to New Rows and set the appropriate data type to date.
Now, I want to point out the first perimeter in the List.Dates function requires a date data type. If I step to my Source step and change this data type into a Date/Time, it returns an error. That’s because it’s not passing a date. We can easily fix that by going into the formula bar and adding Date.From.

Another thing that I want to point out is that you can also create an alternating list of dates. All you need to do is change that final step parameter into a 2, for example.
***** Related Links *****
Record Values – Structured Value In Power Query
Extract Values From Records And Lists In Power Query
Creating Values For Each Date Using Power Query Formula
Conclusion
In this blog, I’ve demonstrated two ways to create new records based on date fields. The first is by generating a list of dates using the list initializers and the second is by using the function List.Dates.
I hope you find this tutorial helpful. You can watch the full video tutorial down below and check out the links below for more related content.
All the best!
Melissa


