In this tutorial, we’ll learn about Power Automate Static Results and how it works in our flows. Currently, this powerful feature is still in preview or beta mode. However, this is certainly a good feature that can we can add to our best practices when creating flow diagrams.
Sample Scenario
We’ll be using a sample flow that I previously created.
It sends out an HTTP request to a third-party endpoint.
This is what the HTTP request gets back.

Then, it’ll perform a Condition action. If the Status code of the HTTP request is equal to 200, that means the request is successful.
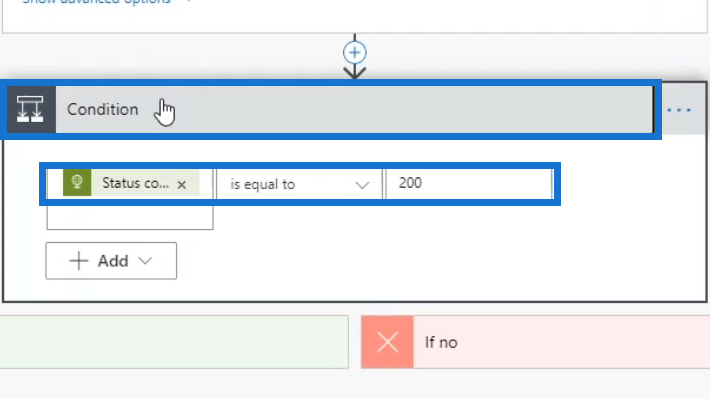
If the condition has been met, the flow will go to the If yes pathway. It’ll post a message saying “APPROVED” to the general channel in Slack. Then, in the budget channel, it’ll also post a message that contains all the data that we got from the third-party endpoint.
If the condition has not been met, it’ll go to the If no pathway and the general channel in Slack will receive a message saying “DENIED”.
After going through the sample flow, let’s click Save.
Let’s now test the flow and see how it works.
Choose the I’ll perform the trigger action option, then click the Test button.
After that, click Run flow.
Lastly, click Done.
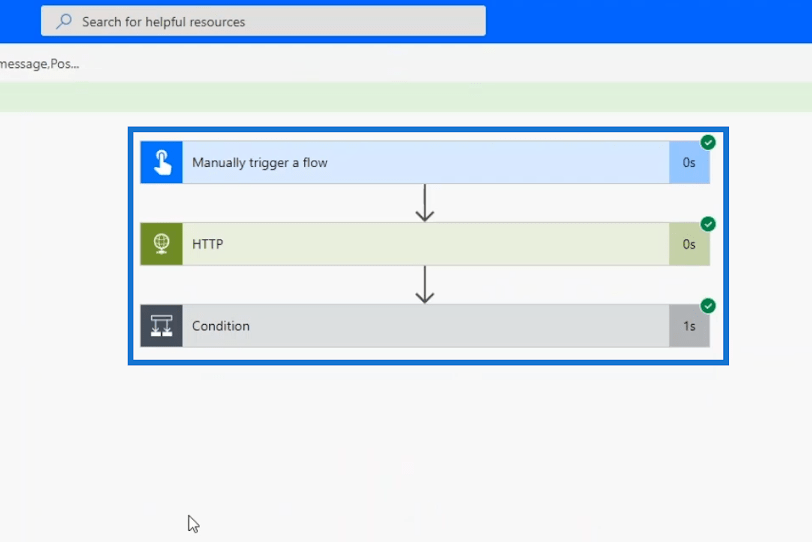
Let’s look into the result in the flow diagram. As we can see, every step was executed successfully.
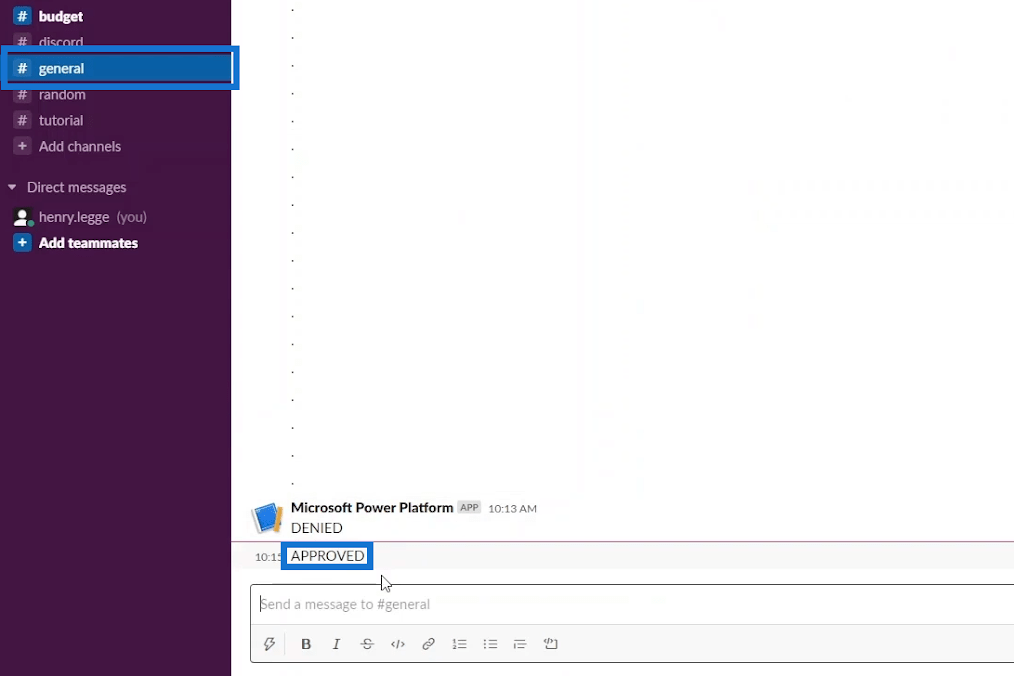
Upon checking the general channel in Slack, we’ll see that the message “APPROVED” has been successfully sent out.
Go to the budget channel and we’ll see the actual JSON that we got from the HTTP request.
For now, the endpoint is still active so our flow works properly. But, how do we test our flow when the endpoint server is no longer working?
When this happens, our flow will definitely fail. In instances like this, we don’t want the HTTP request action to actually ping the server since we’re assuming that the server is broken.
Therefore, we can just create fake variables in order to move on to the next step. But a much better solution for this is to use the Power Automate Static Results.
The Static results feature won’t trigger the actual action. Instead, it’ll just force certain outputs to occur.
Using Static Results In Power Automate Flows
To try out the Static Results method, let’s go back to our flow and edit it.
Click the ellipsis within the HTTP request step, then click the Static result (Preview) option.
Toggle the Enable static result (Preview) option.
When enabled, we can choose whatever output we want the flow to produce. In this example, we want it to produce Succeeded as a result with 200 as its Status Code.
Let’s click the checklist icon and select body.
Then, the body field will be displayed.
We’ll populate the body with the contents of the body from our previous successful flow run.
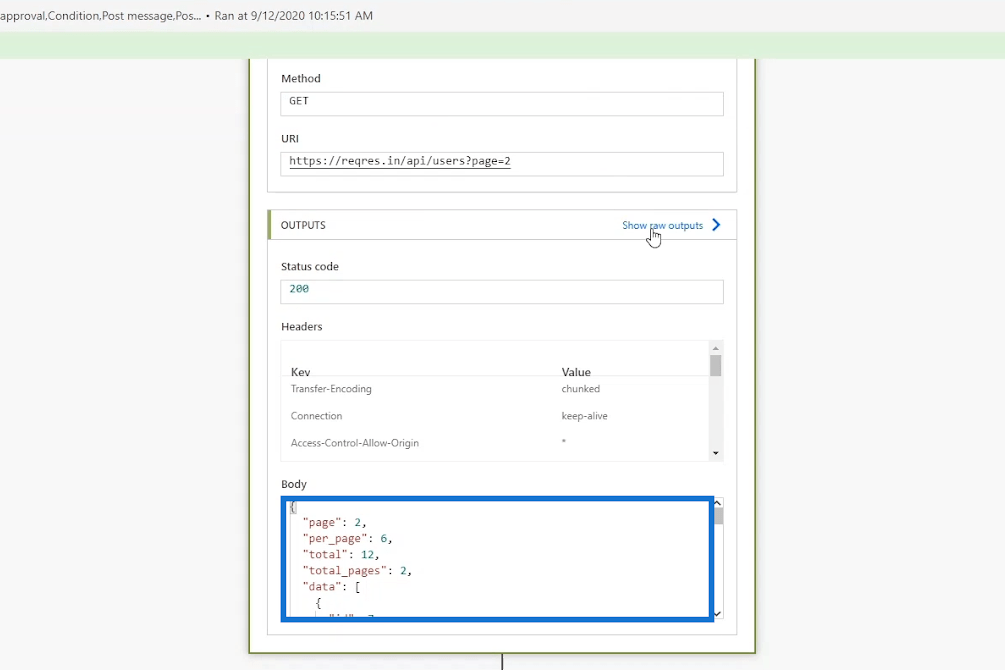
Keep in mind that every action has outputs. So, let’s click the Show raw outputs link.
By clicking that, we’ll see what our flow gets back such as the Status Code, the Header, and the Body. Let’s copy the contents of the body.
Then, paste it in the body field of our Static result.
Click Done after pasting.
We can also copy the contents of the headers and paste them in the Enter a unique property field for our Static result. But for now, we don’t have to worry about Headers because we’ll focus on forcing the Status code to be 200 and the body to be equivalent to the one from our previous successful flow run.
Once that’s done, we’ll see a little yellow beaker icon. Hover the mouse pointer over the icon and we’ll see a message saying “This Action has Static result configured”.
All Static results return strings. Therefore, we need to change the Status code from an integer 200 to a string by adding quotation marks (“) at the beginning and the end of the number. This is just a nuance that Microsoft is already aware of and they’ll probably fix it when they fully release this feature.
Lastly, click Save.
Testing Power Automate Static Results
Let’s now test the flow that we configured with Static Results.
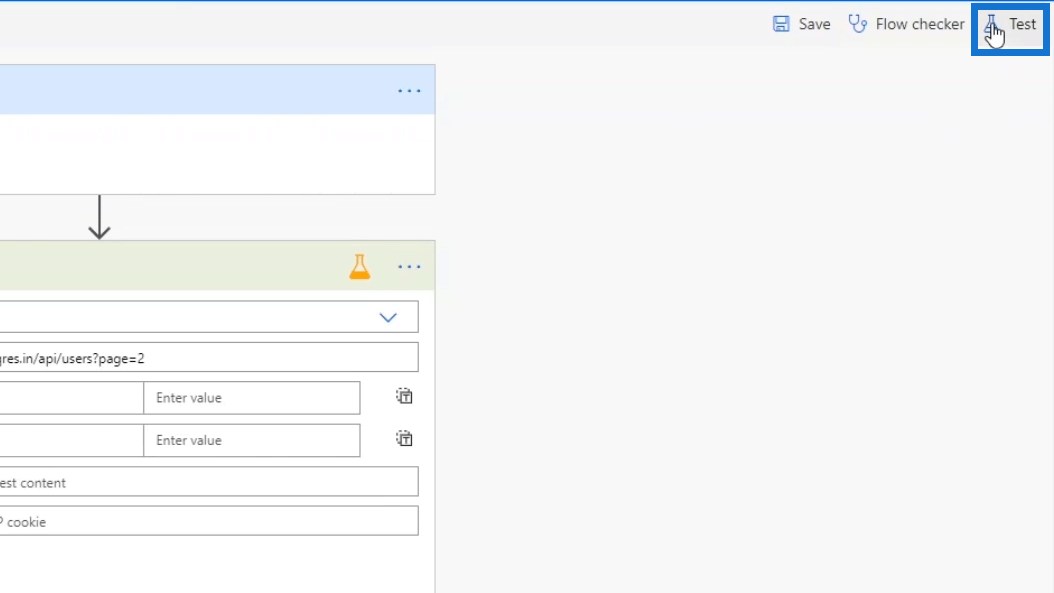
Choose the I’ll perform the trigger action option, then click the Test button.
Click Run flow.
Then, click Done.
The little blue beaker icon across HTTP request action indicates that the action was executed using Static result.
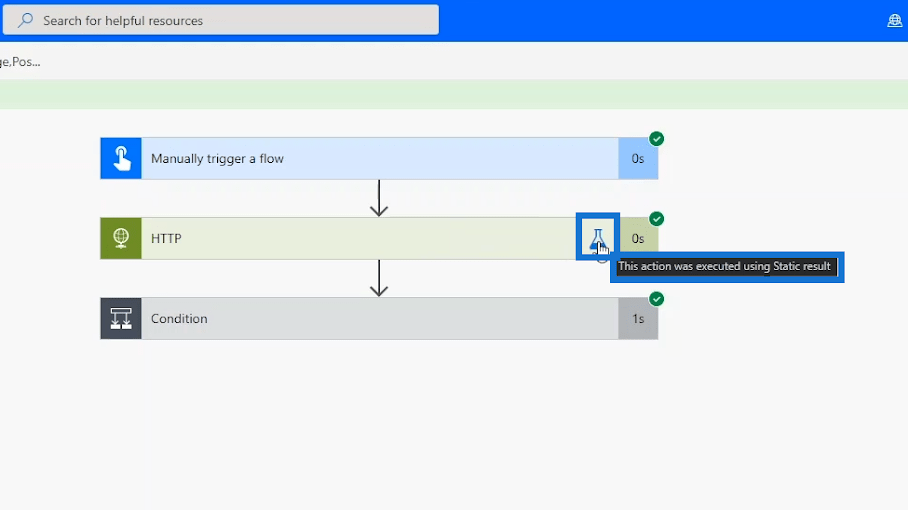
There are no Headers in this one since we didn’t assign any.
We’ll also see that the conditions worked properly.
Therefore, we’ll see that the message “APPROVED” is displayed again in the general channel in Slack.
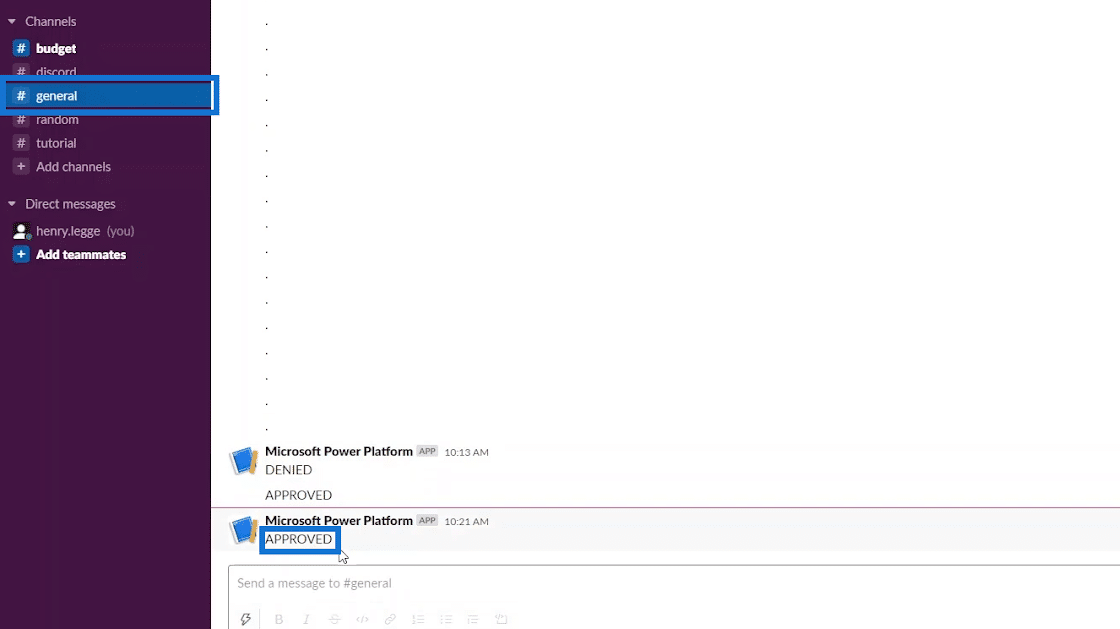
When we click the budget channel, we’ll also see the same message again.
Documentation Page For Power Automate Static Results
Another way to learn how to use Static Results is by checking the Power Automate Documentation. It’s essential to check its documentation page as new things come out from time to time.
Click the How to guides option. Then, click the Test logic apps with mock data topic. It’ll then display the guidelines on how to set up static results and other useful related information.
***** Related Links *****
Power Automate Development: Best Practices To Implement
Microsoft Flow HTTP Trigger | A Power Automate Tutorial
Power Automate Documentation Walkthrough
Conclusion
One of the most powerful features available in Microsoft Power Automate is Static Results. It allows users to force certain outputs to occur in every single scenario. So, no matter what happens, the workflow will produce the results that you’ve defined. It also makes things a lot easier knowing that flow diagrams can get more complicated over time.
Aside from this tutorial, you could start getting more familiar with Static Results by making yourself familiar with Microsoft Documentation. This is very helpful as you progress in your Power Automate career. Again, a good developer or administrator should also be able to find solutions to their problems by maximizing the usage of the documentation.
All the best,
Henry


