
In this tutorial, we’ll explore Power Automate expressions and how to use them in workflow automation. Microsoft Excel has formulas that take inputs and produce outputs. For example, one formula might be the SUM which can take various inputs or numbers and produces an output combining all the inputs.
Just like Microsoft Excel, Power Automate also has formulas called Expressions that can be used to perform specific actions within a flow.
Adding A Dynamic Content In Power Automate
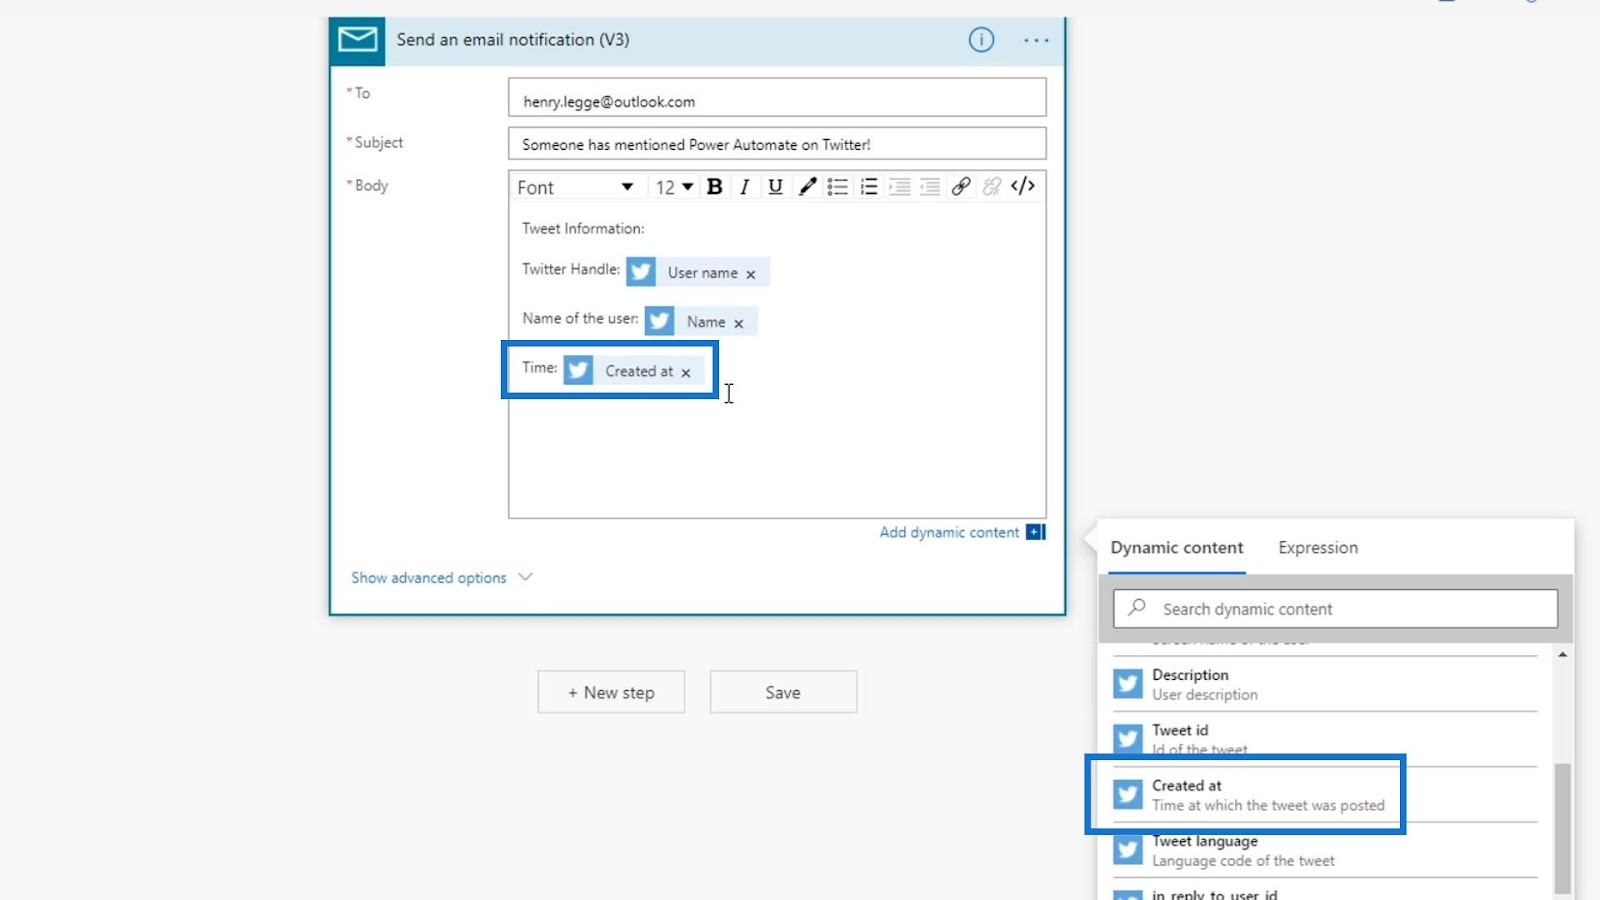
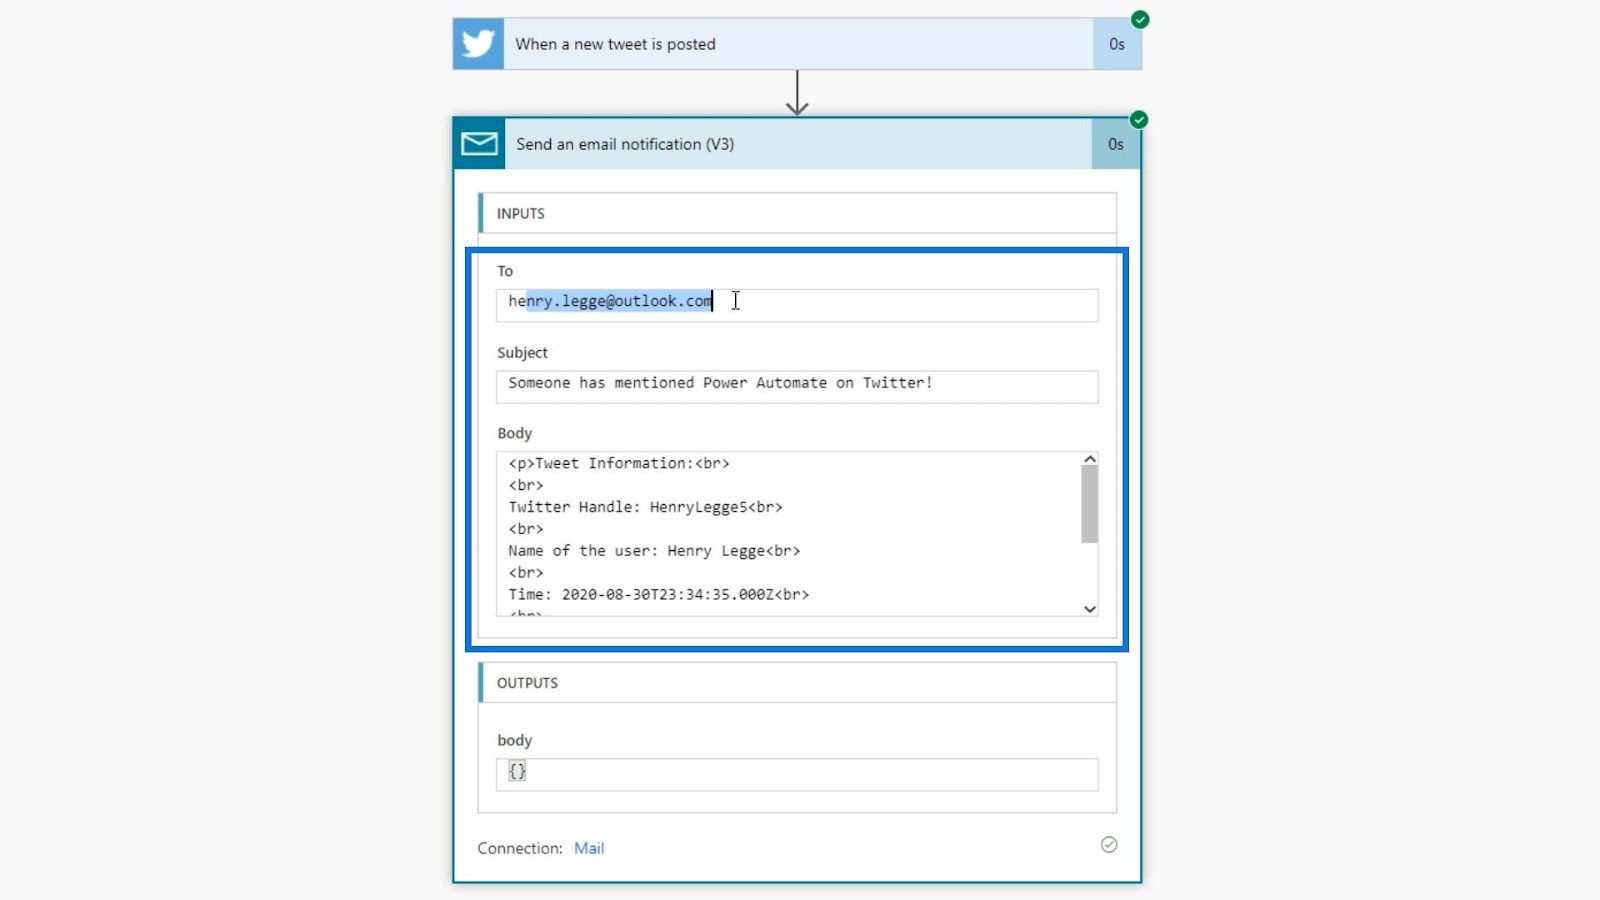
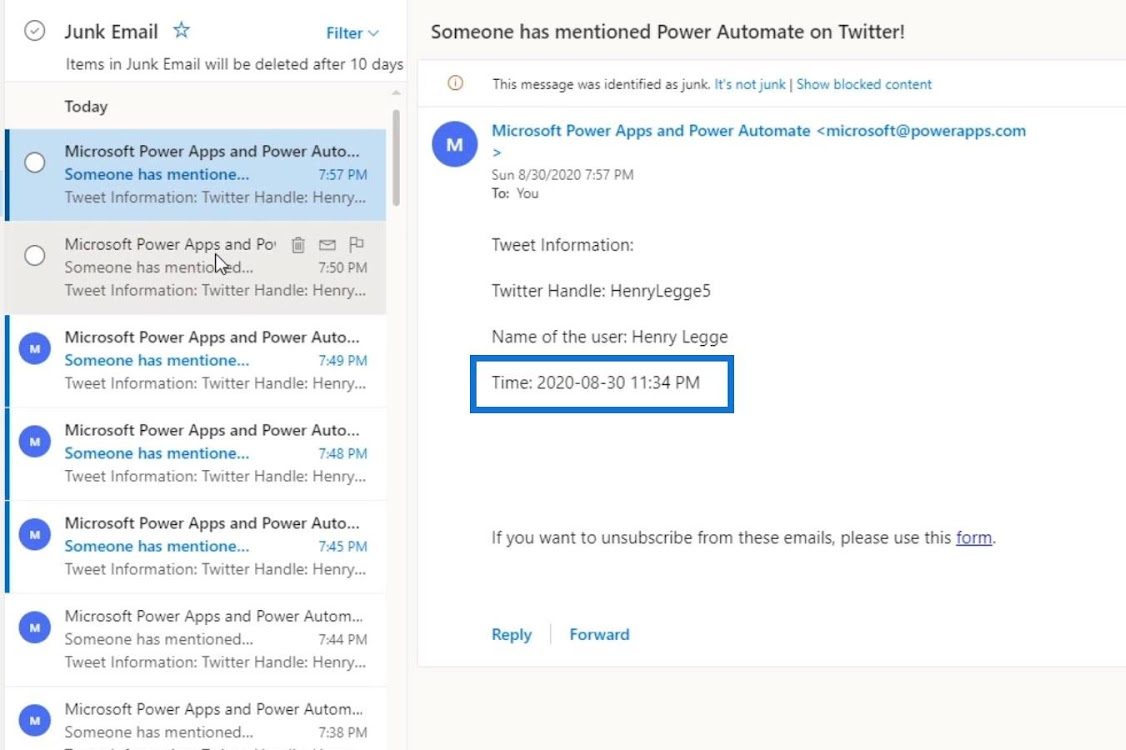
This is an example of a flow that I previously created. In this flow, I’ll receive an email notification once a user posts a tweet that contains the words “Power Automate”. Now, let’s add information for time using the dynamic content variable “Created at”.

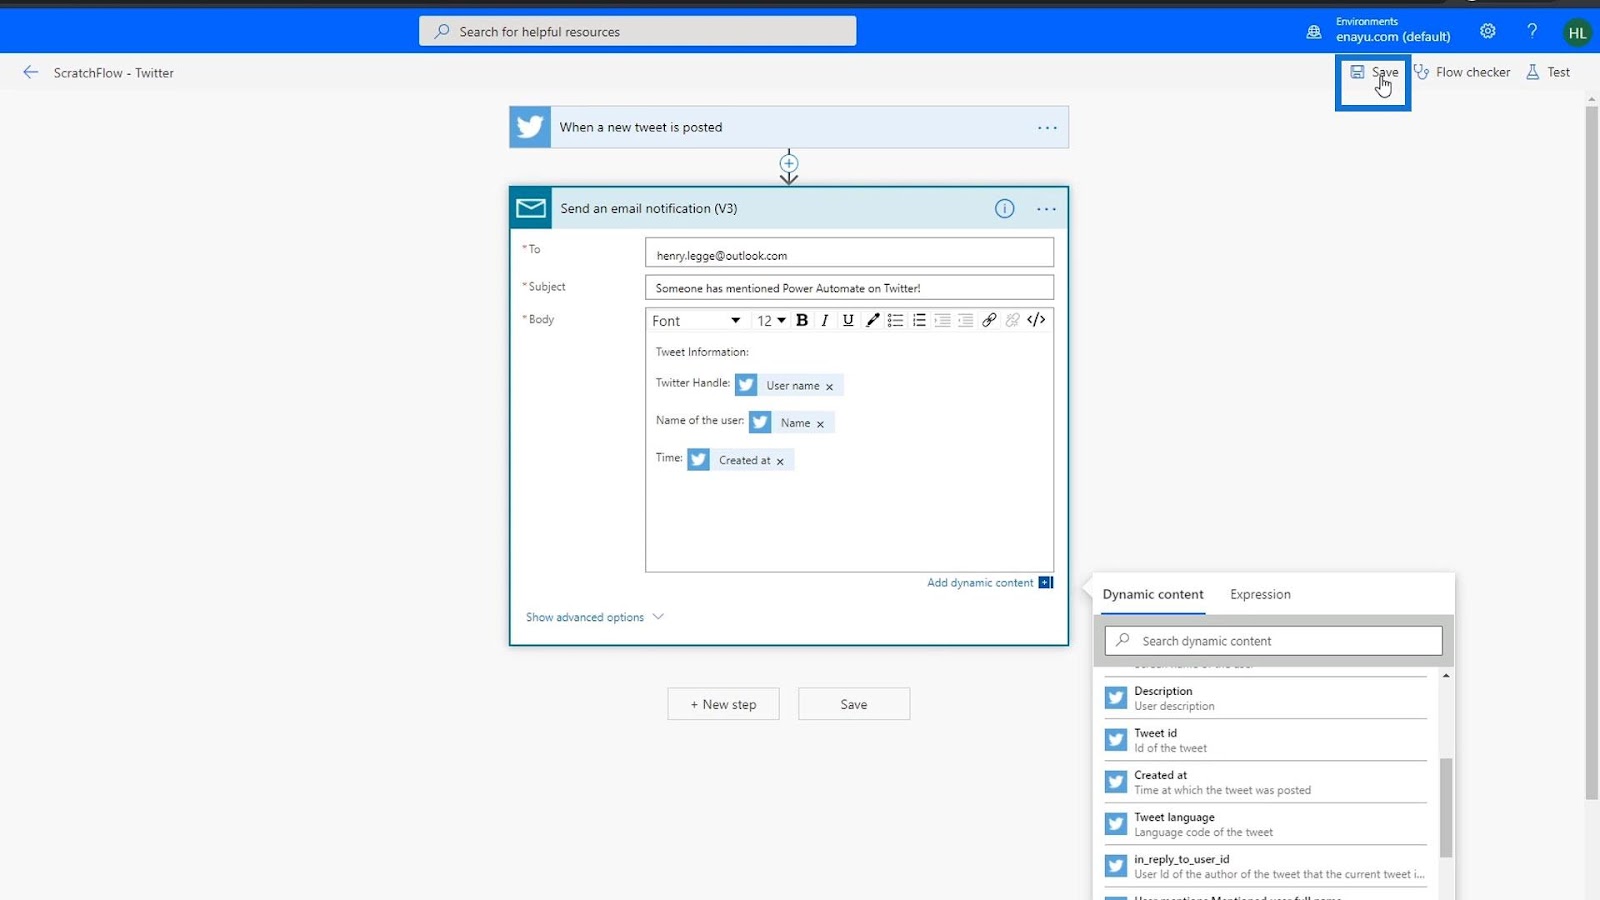
Then, click Save.
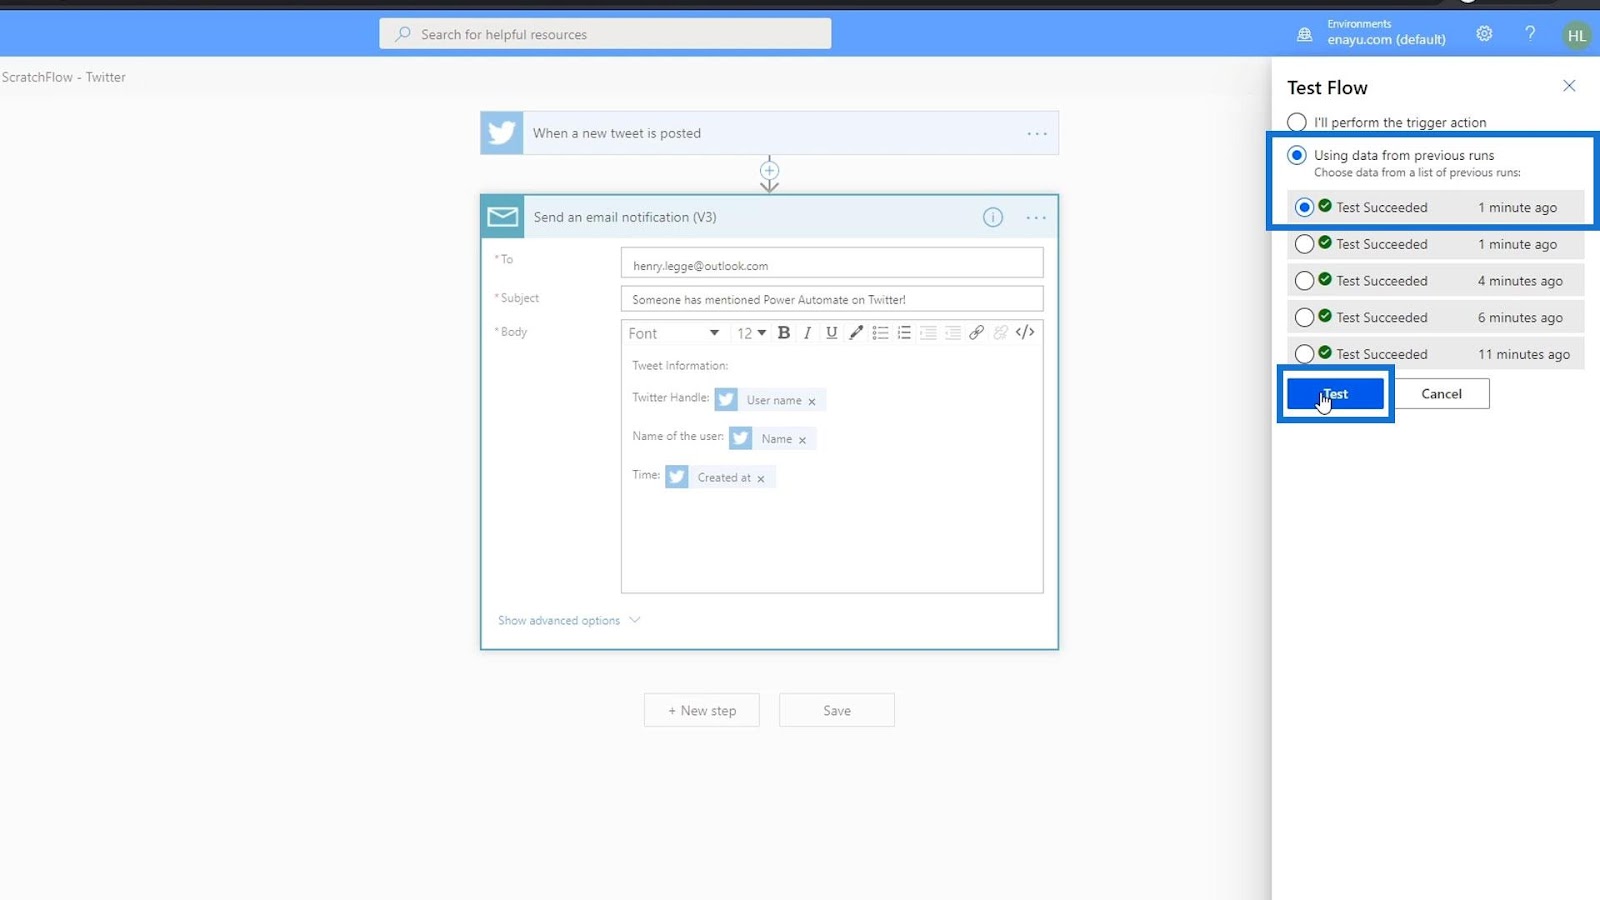
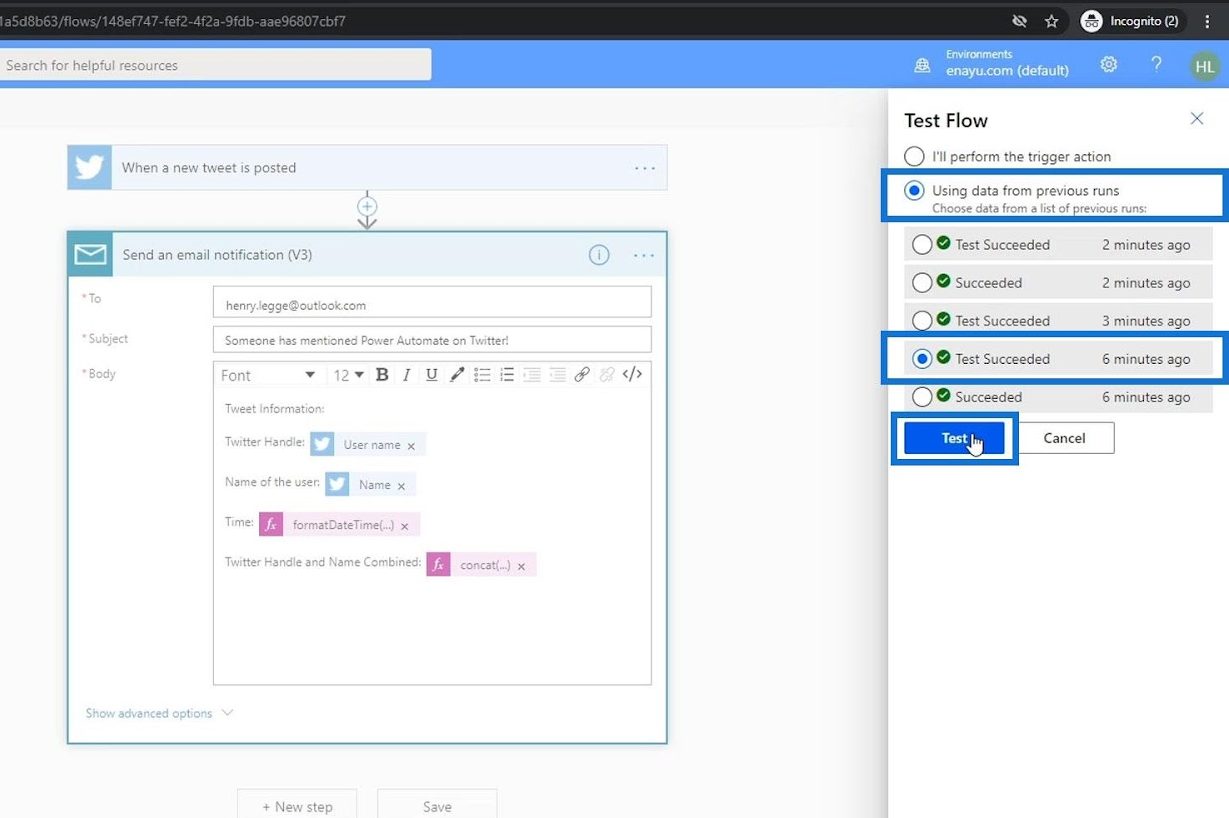
Let’s now test it. Choose the “Using data from previous runs” option, opt for the latest test on the list, then click the Test button.
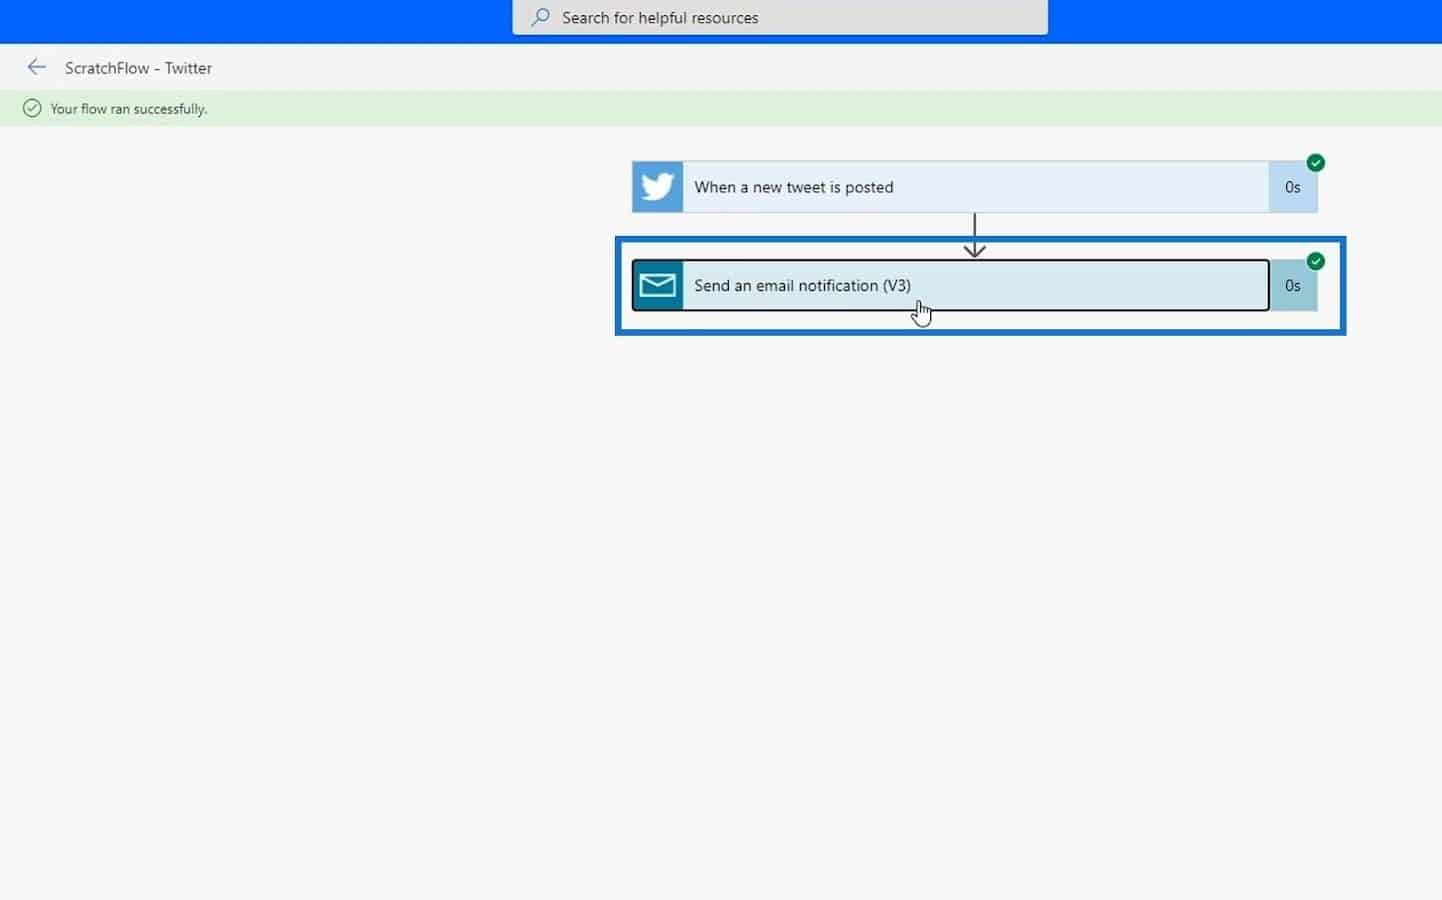
Aside from checking the output by going to our email, we can also do our test by clicking this run.
We can then check the metadata of this run to see what happened with our test. As we can see, it displays the email address where it was sent, the Subject of the email, and the information on the Body.
The metadata that we can see there is similar to the data that I received in my email.
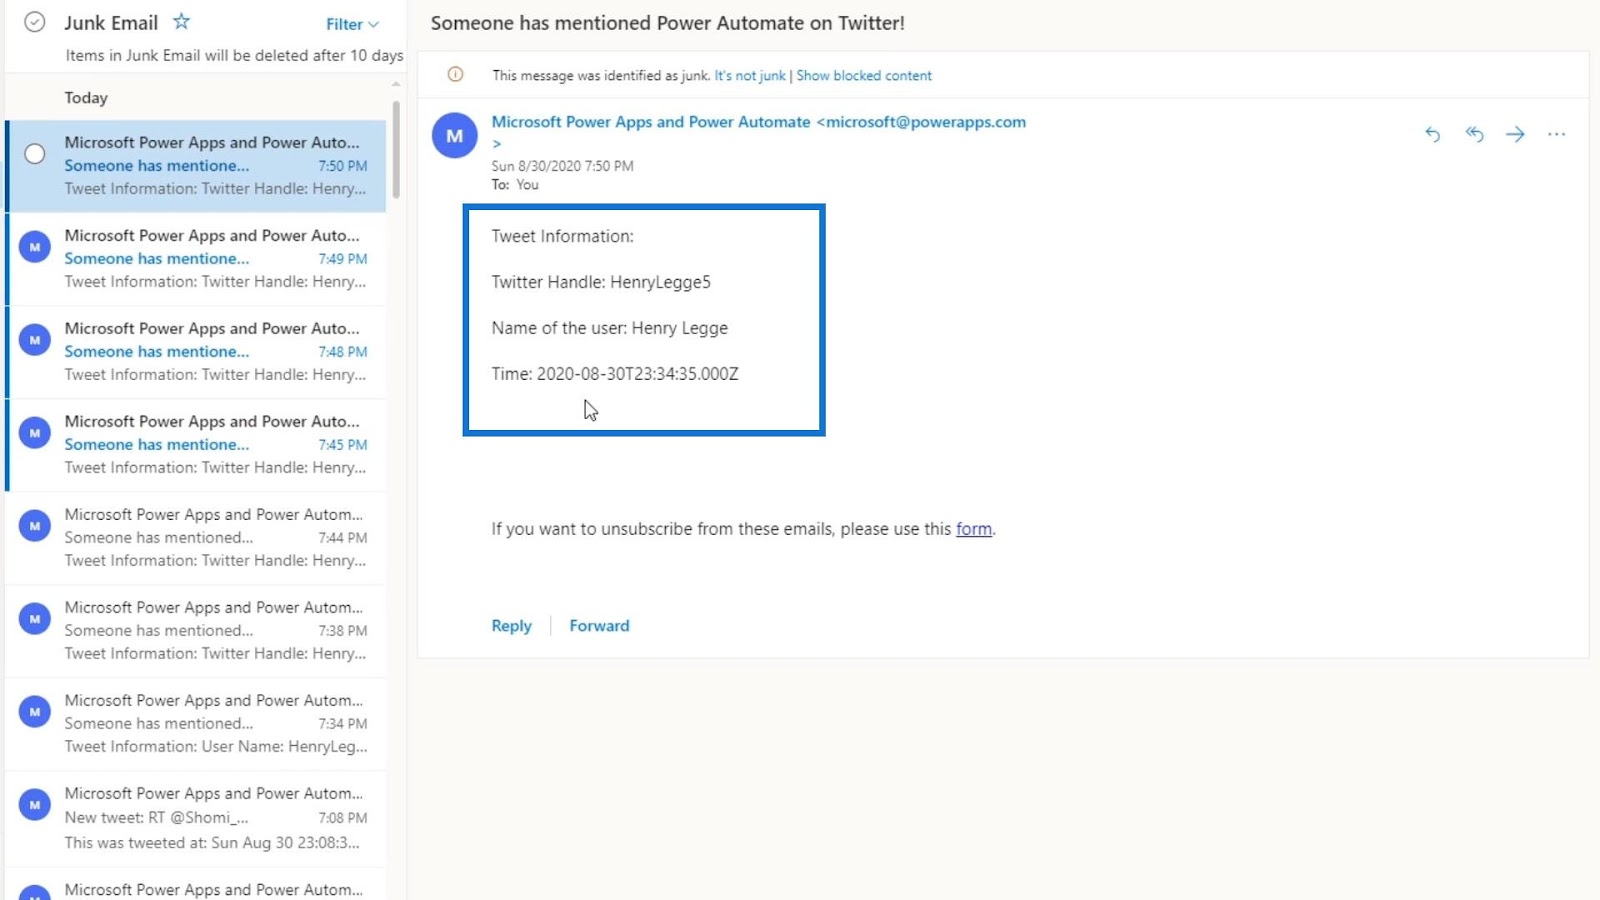
However, the time on this email is not in a good format at all. We don’t want users to read this type of format. So, we need to convert this into a time format that’s more readable for the users. We can do that by using expressions.
Utilizing Power Automate Expressions
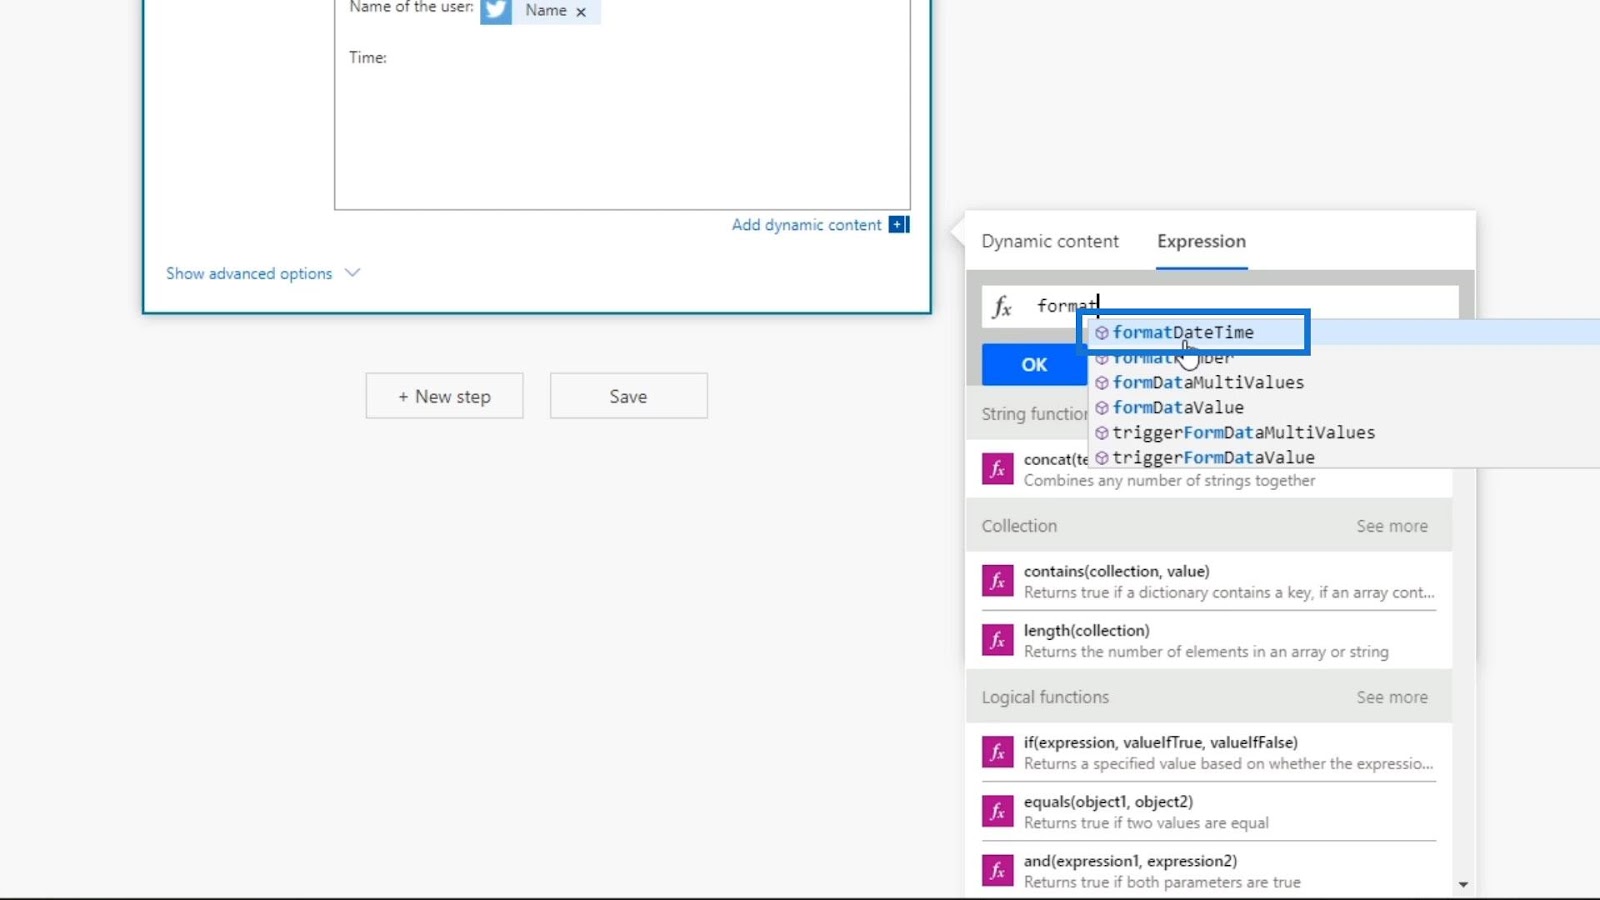
We can access different Power Automate expressions by clicking Expressions beside the Dynamic content.

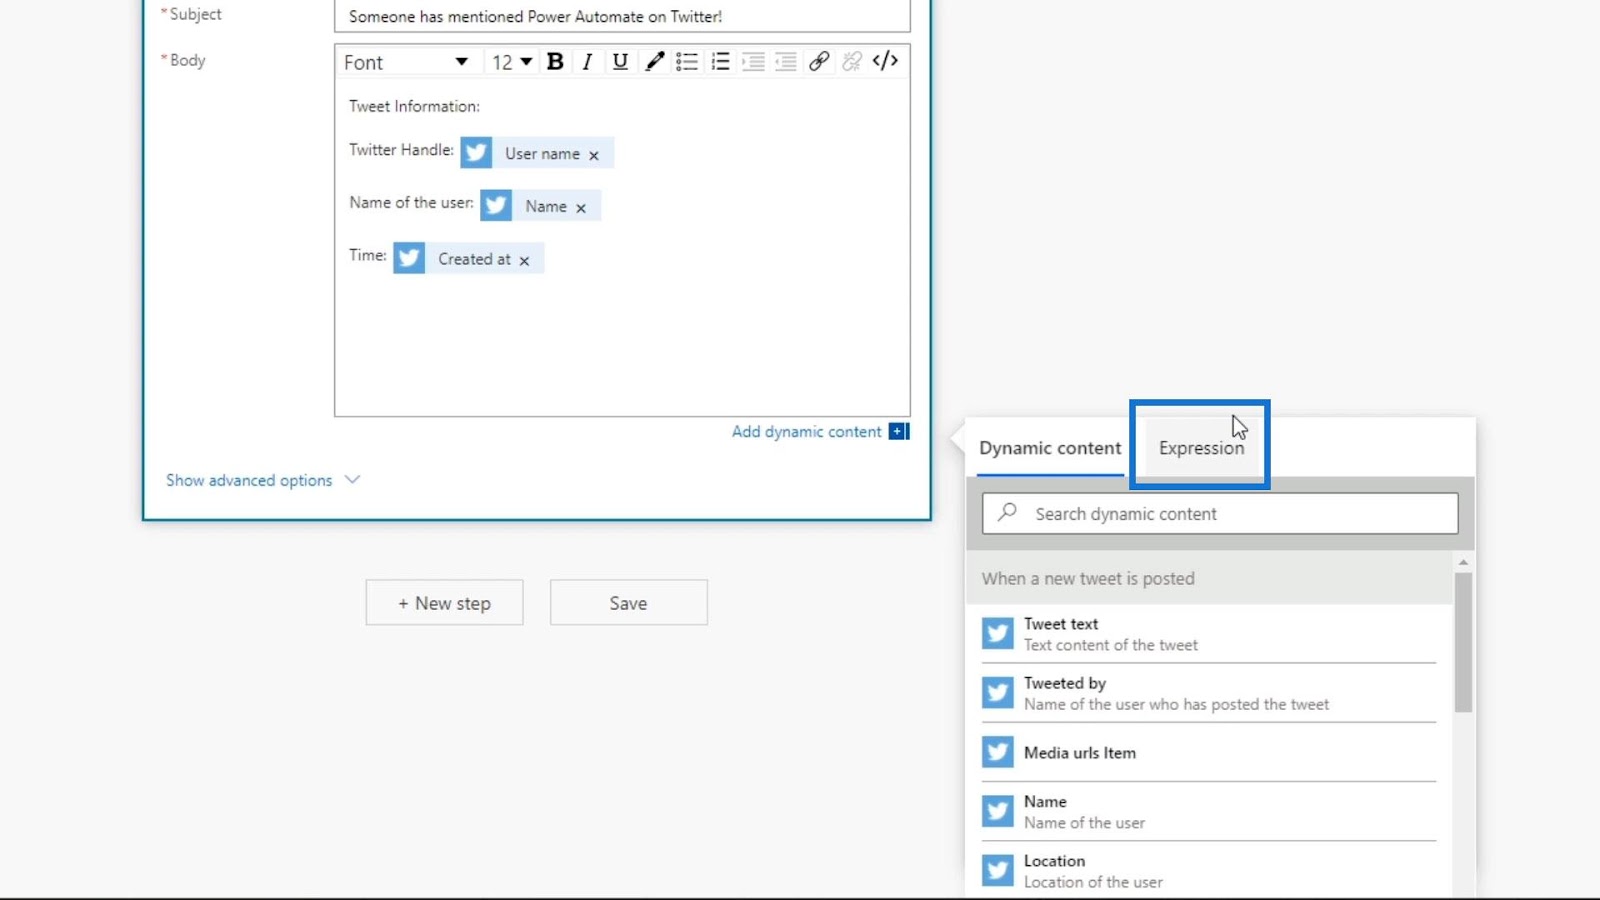
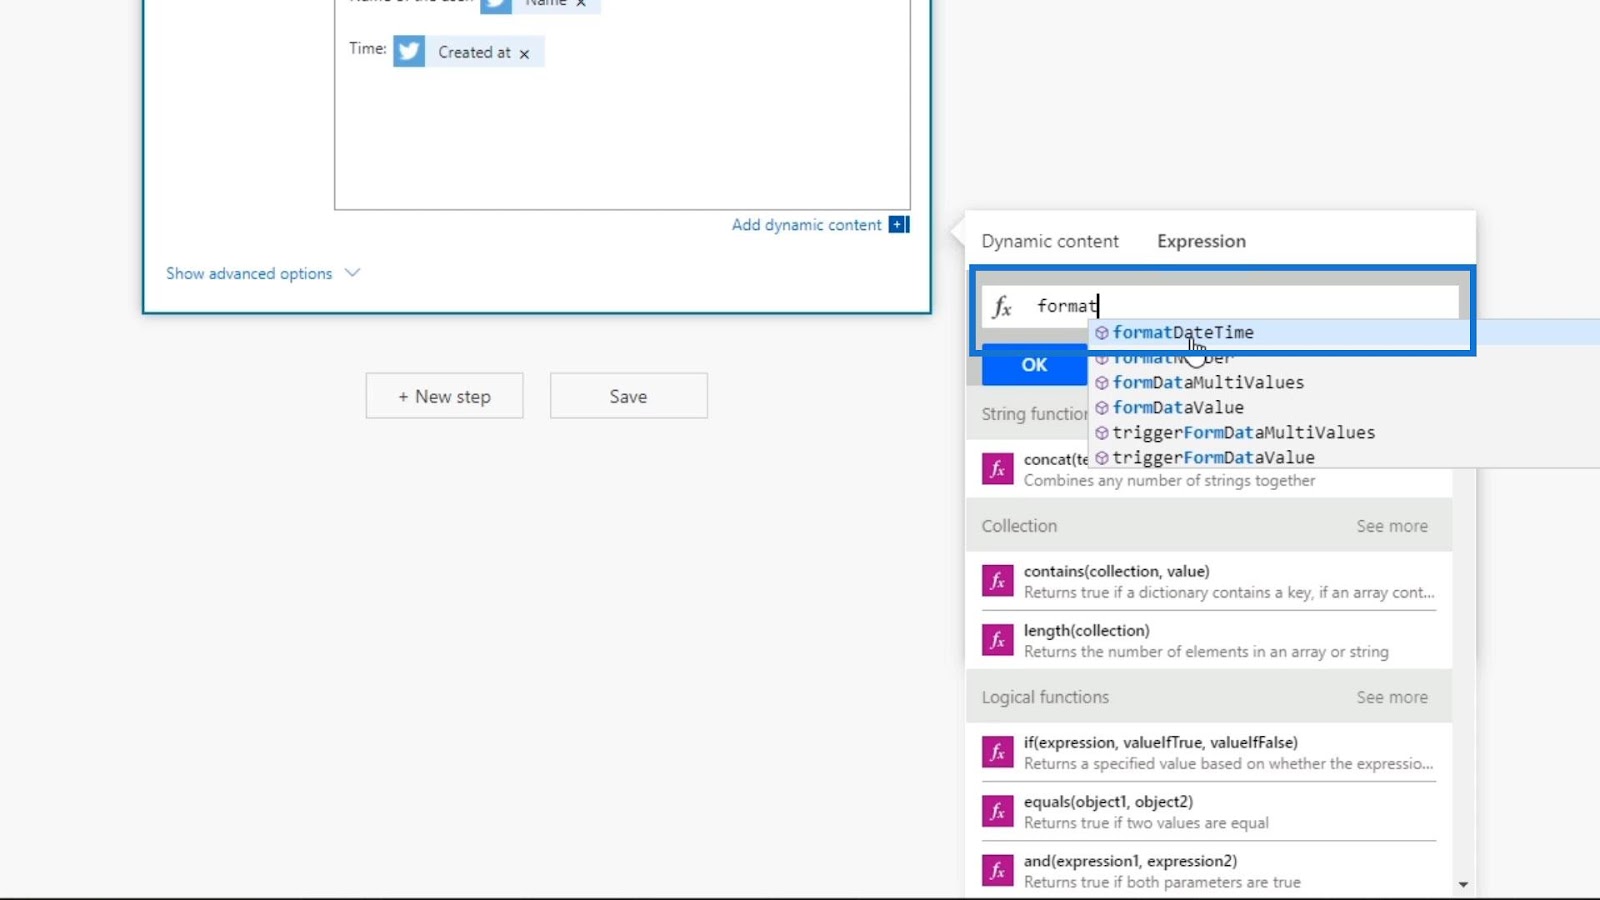
In this example, we want to change the format of the date and time that’s being displayed by the Created at variable. To do that, we can search for the word “format” on the search bar and it will show us the different format expressions that we can use. To convert the format of our date, we can use the formatDateTime expression.
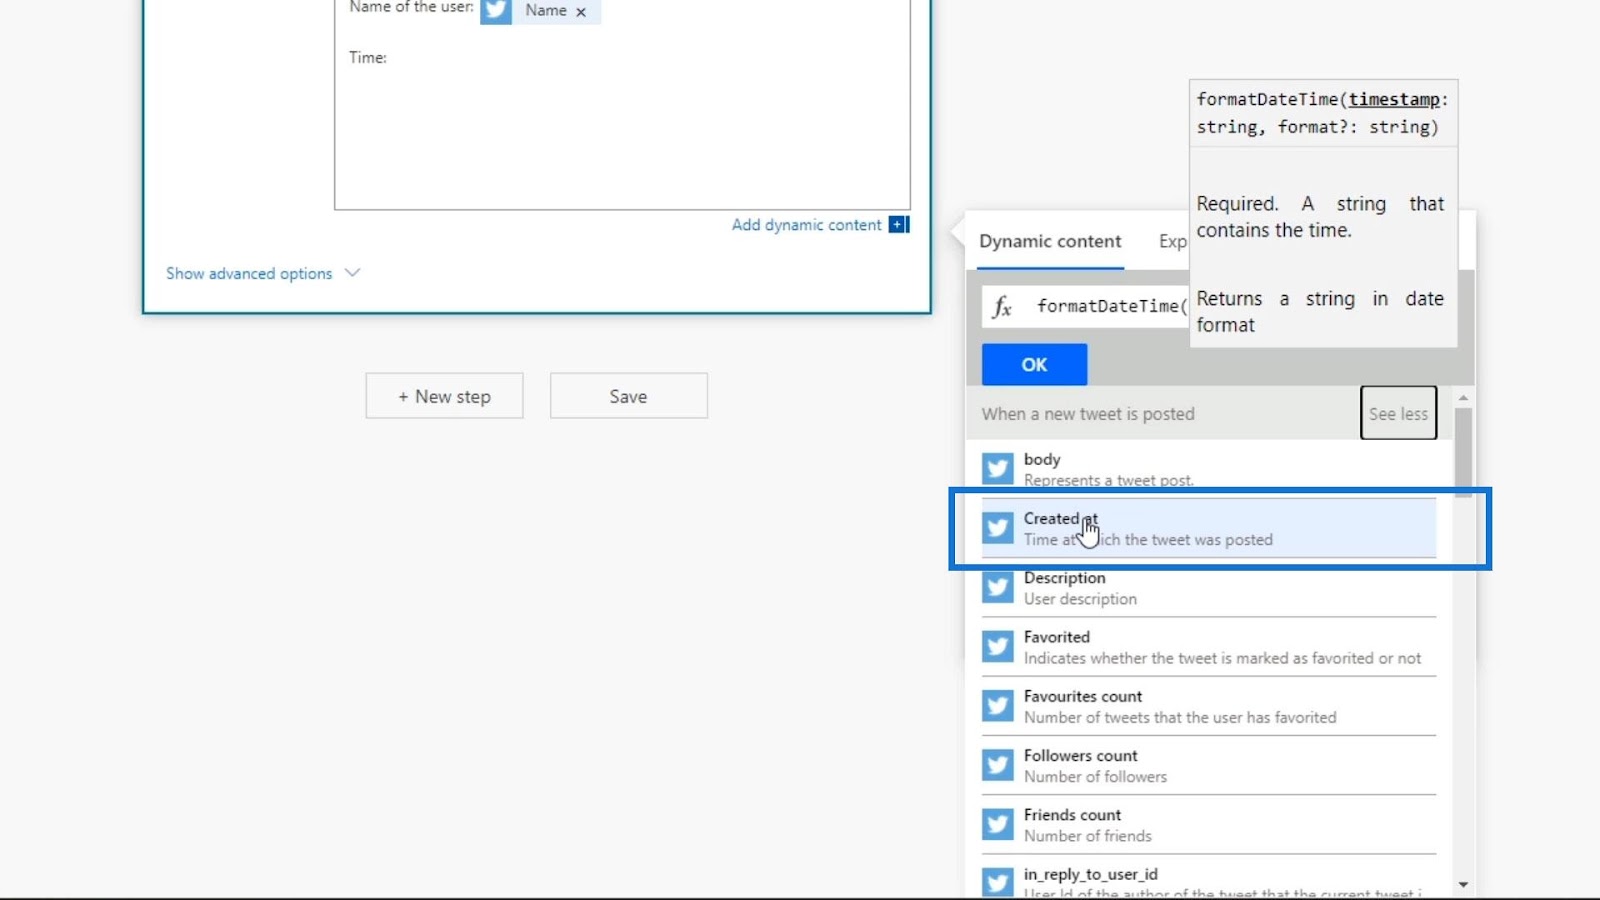
Before using the expression, let’s first remove the dynamic content variable Created at.

Let’s now use the formatDateTime expression.
This expression requires two inputs: the timestamp and format in the form of a string.

The timestamp input is the variable that we’ve used for our date which is the Created at variable. So, let’s click the Created at variable on our dynamic content.
We now have our first input for our formatDateTime expression. We can simply see the variable as “Created at” on Dynamic content. However, upon using it in our expression, it will show us how it was written in Microsoft code.
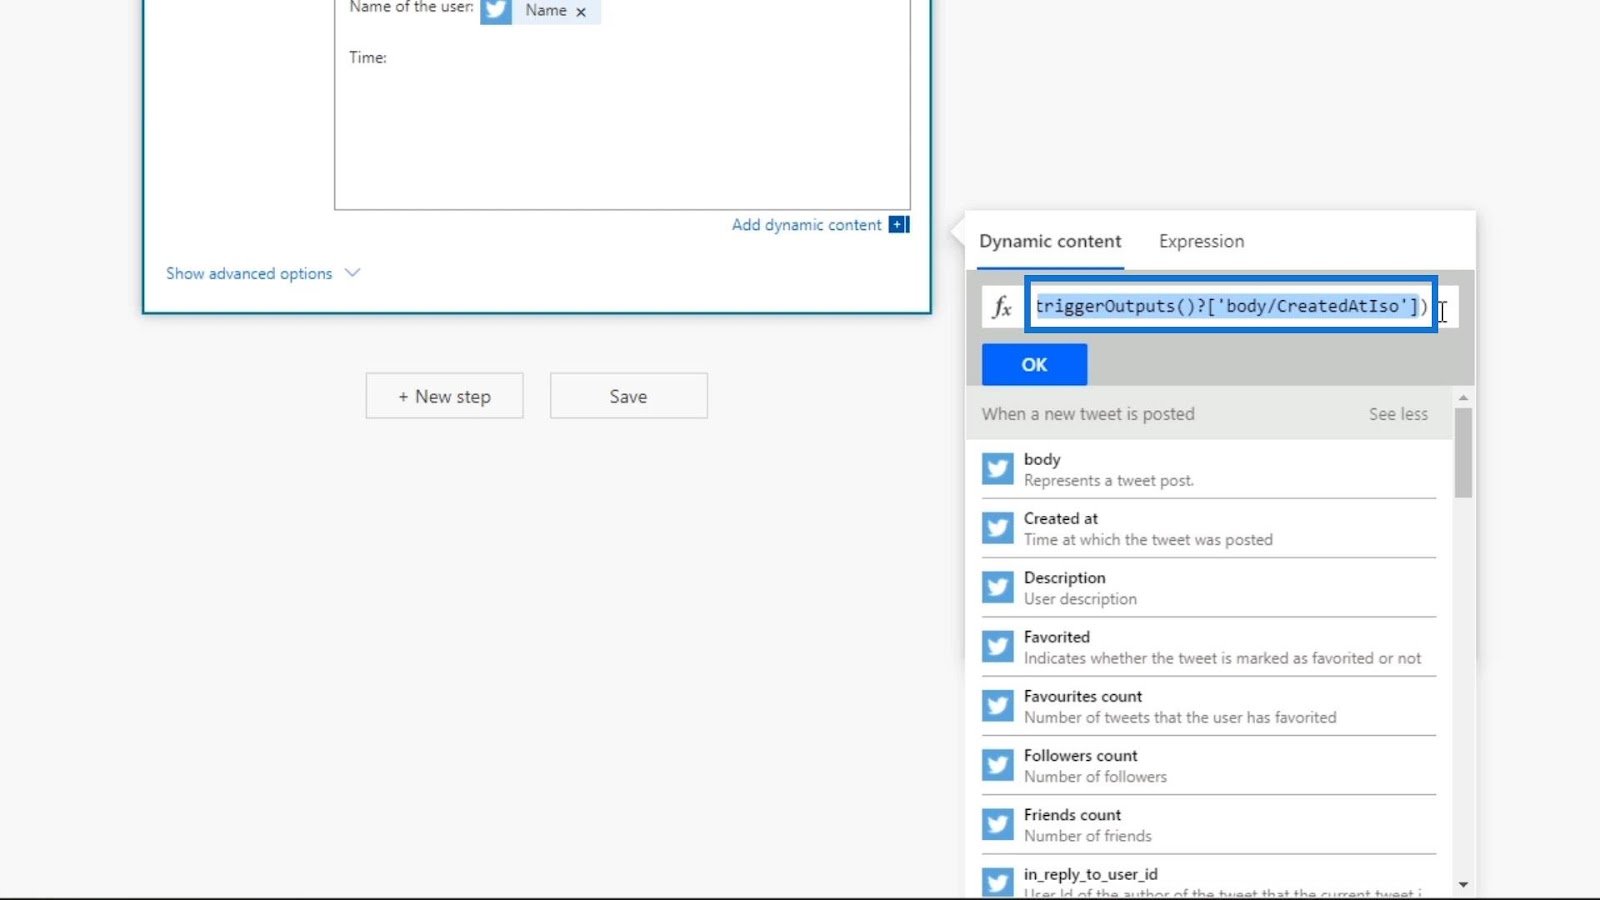
Let’s then add a comma after the first input before adding the second input.
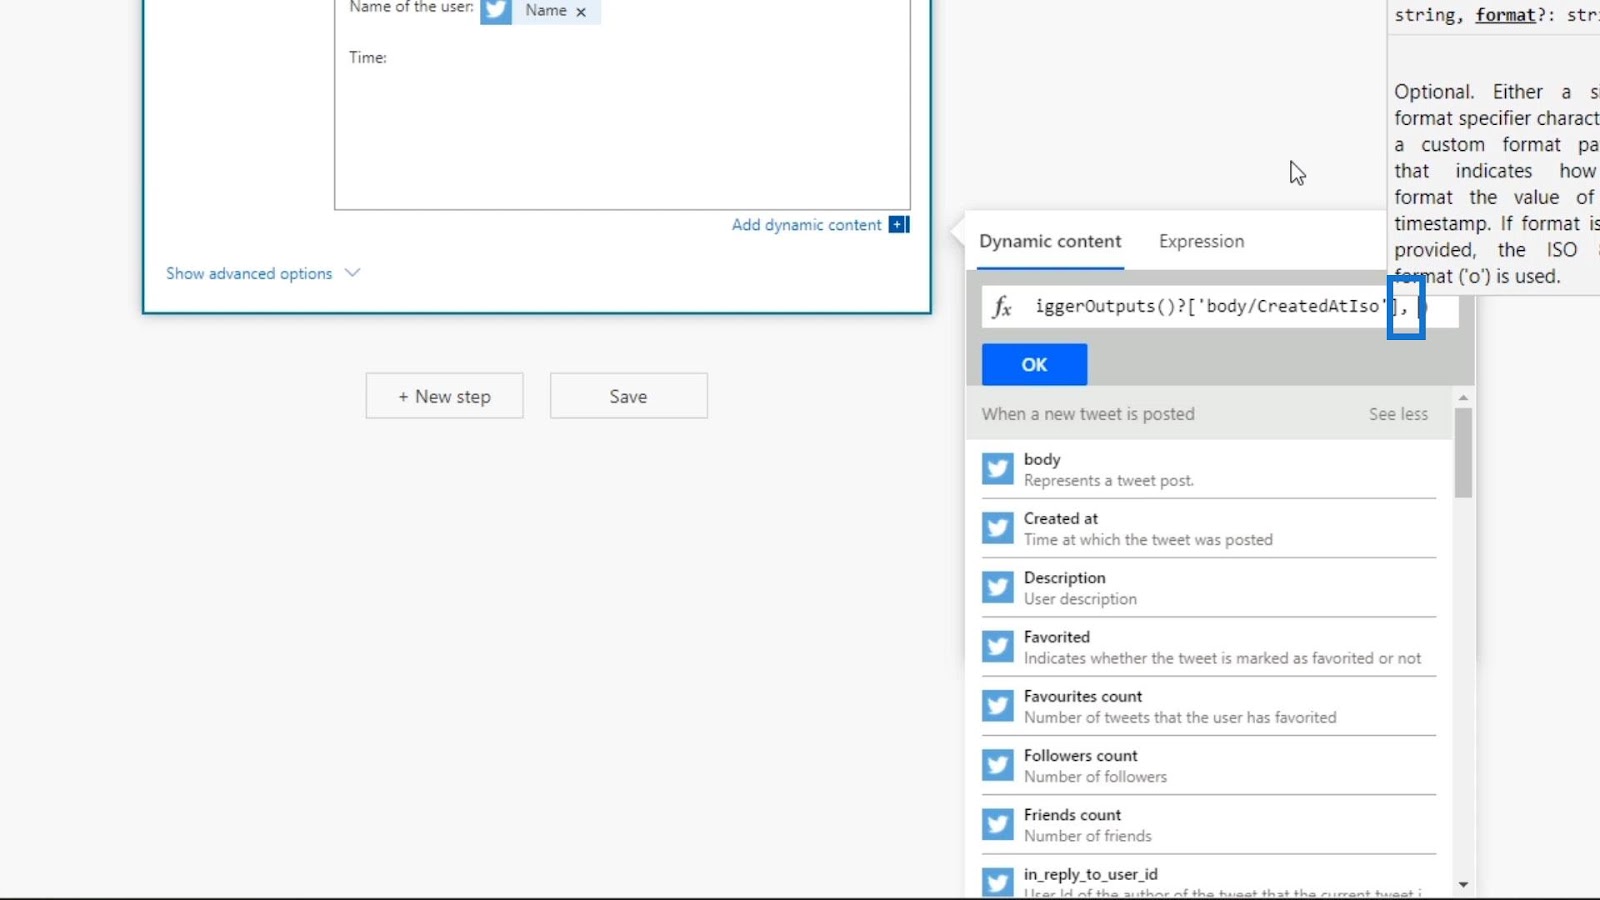
The second input for our expression is the format for our date. We want this to be in a year-month-date and hour-minute-am/pm format. Hence, we should type the format as ‘yyyy-MM-dd hh:mm tt’. Make sure to use a single quotation. We can also just search this format in Google as this is Microsoft’s proprietary way of calling what a daytime code is.
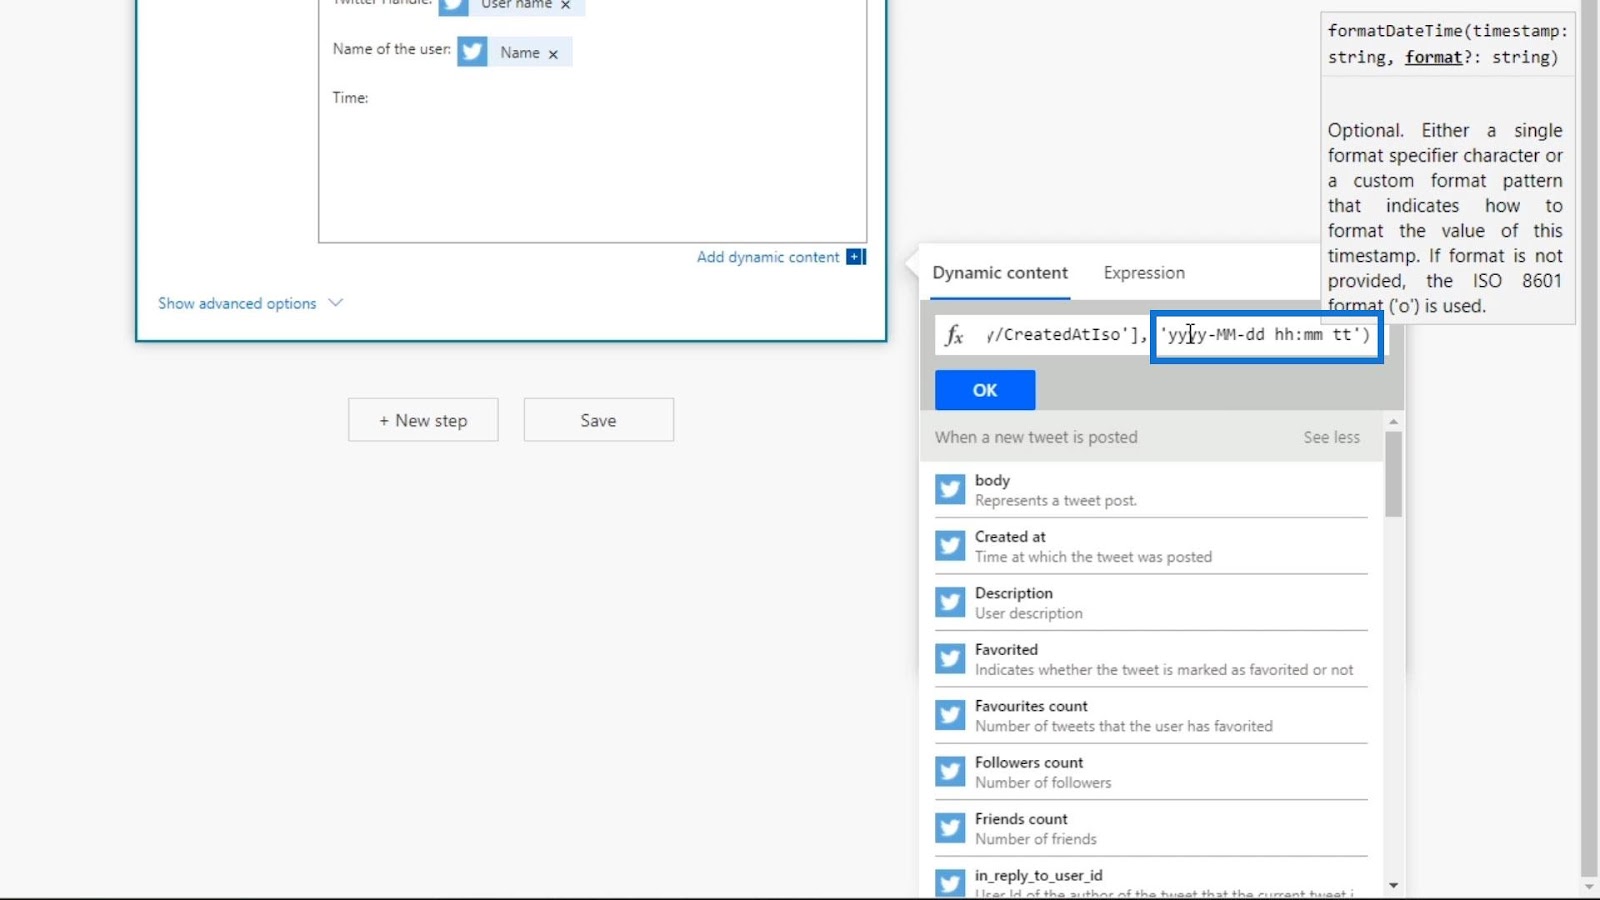
We’ve now created an expression. The expression takes the Created at time variable and changes it into a ‘yyyy-MM-dd hh:mm tt’ format.
Applying And Testing Power Automate Expressions
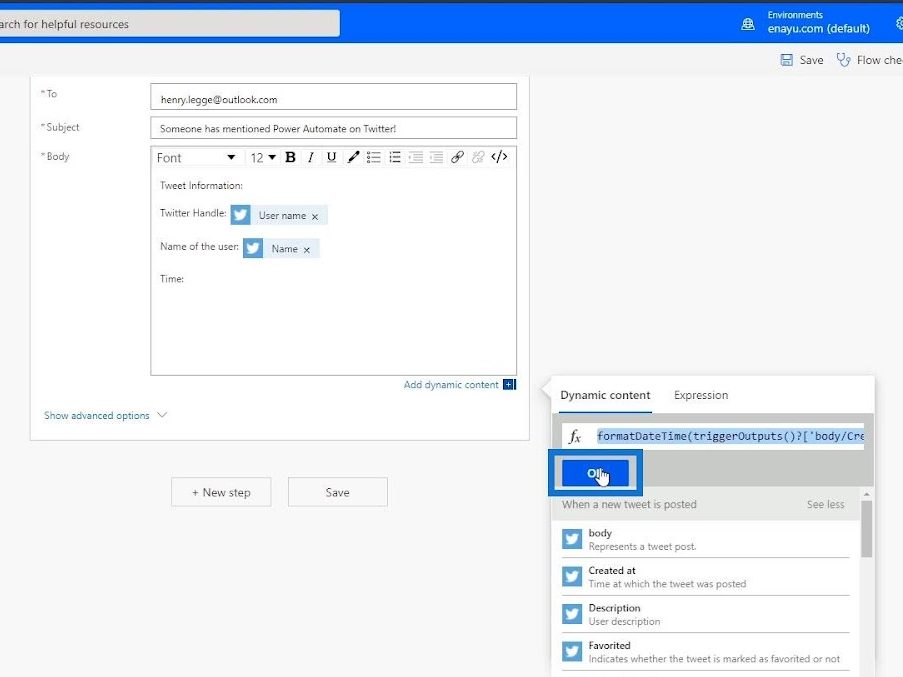
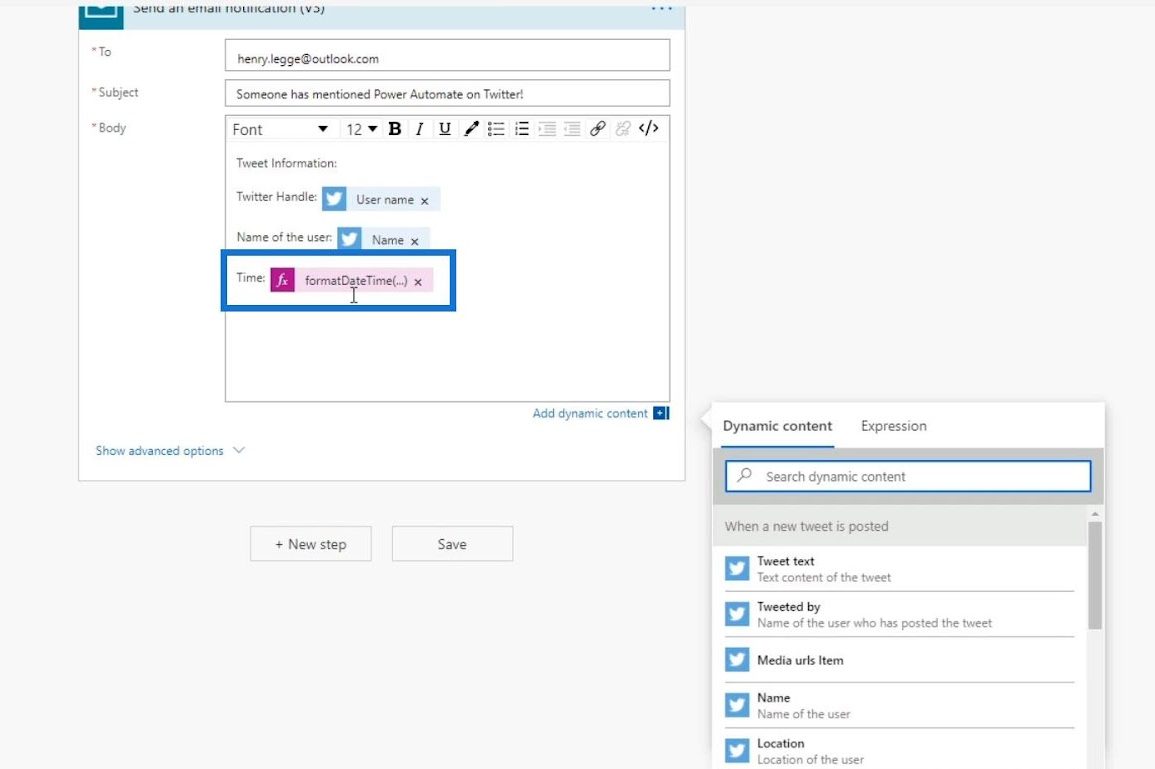
Let’s now click the OK button to apply this expression.
We can see it with a purple color because it’s not only a dynamic content, but also an expression of formula that includes a dynamic content.
Let’s now check if we have any errors on our flow checker.

No errors were detected. Therefore, we can now save it.

Let’s test our flow by using the data from our previous runs again.

After successfully running our test, let’s check our metadata. Subsequently, our date and time format is now more legible and easier to read.

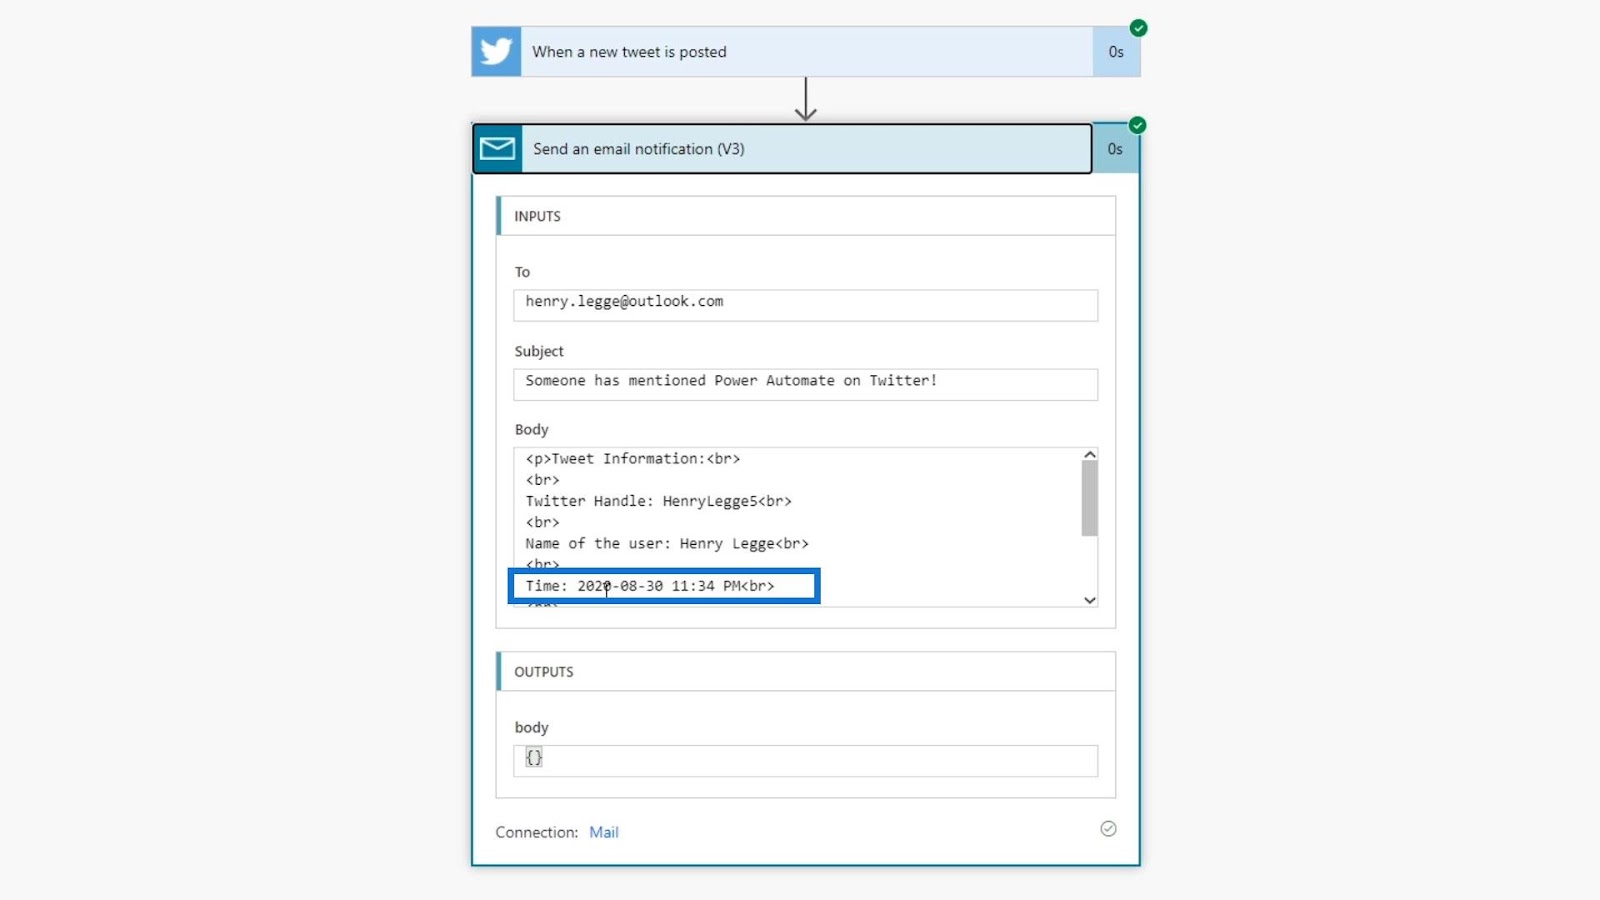
In our email, we can also see the format that looks better than what we previously had.
Understanding The Usage Of concat Expression
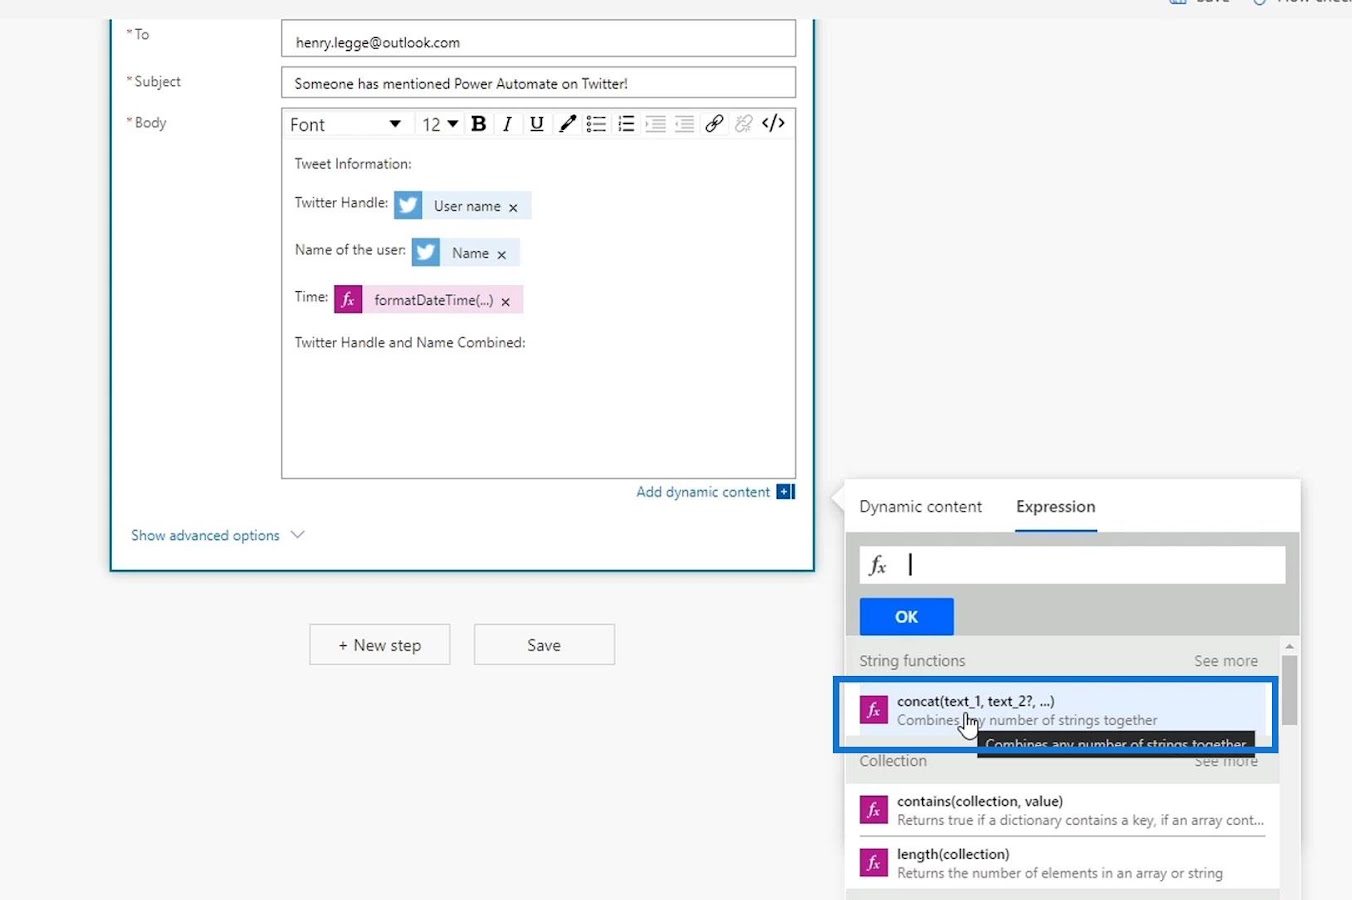
Let’s now create another expression using concat. The concat expression combines different strings together. Let’s first add another piece of information to the action of our flow.
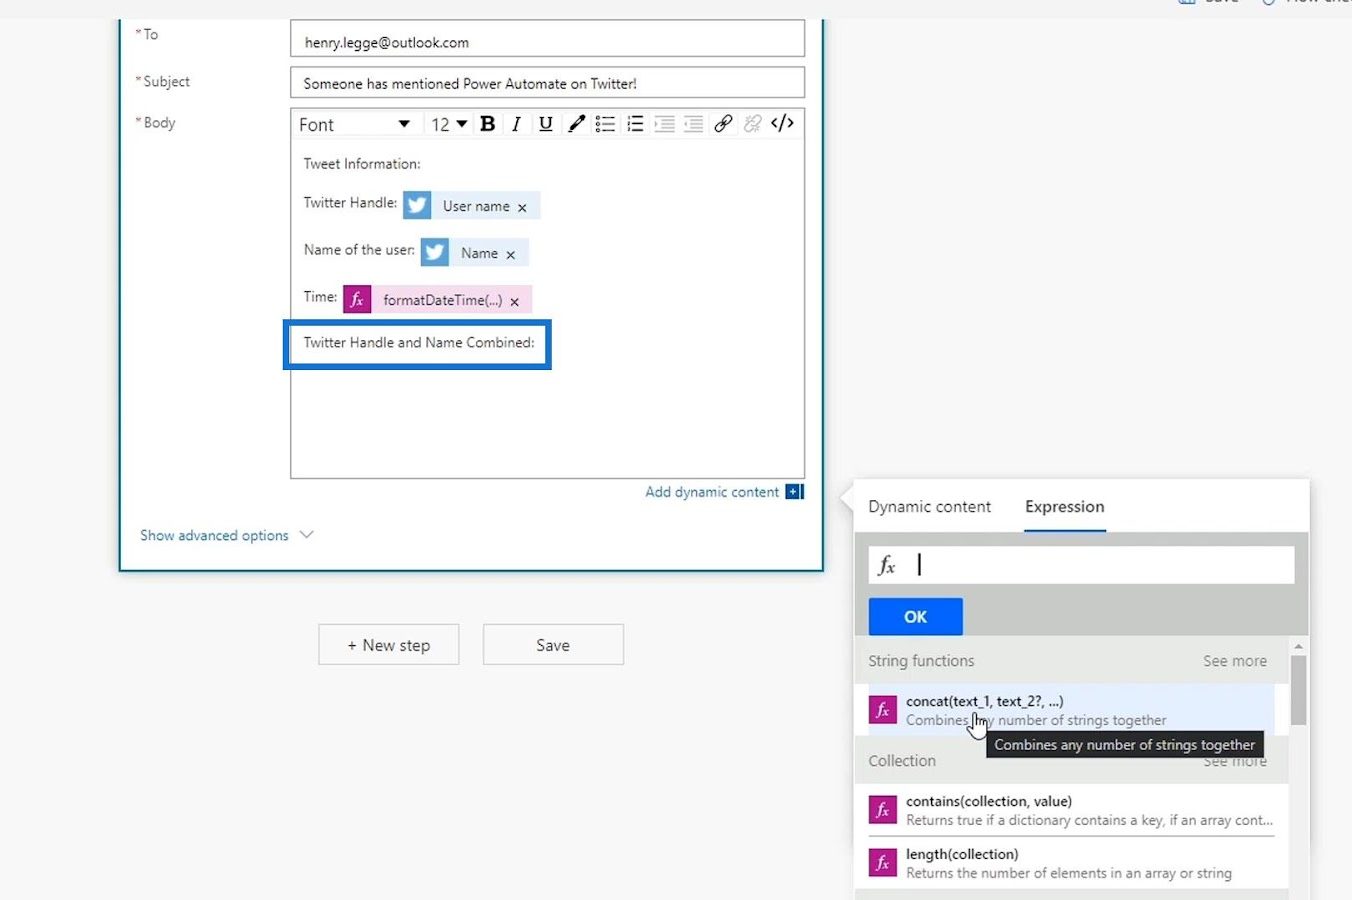
Then, let’s click the concat expression.
The first string that we want to concatenate is the username. So, let’s click the User name variable under Dynamic content.
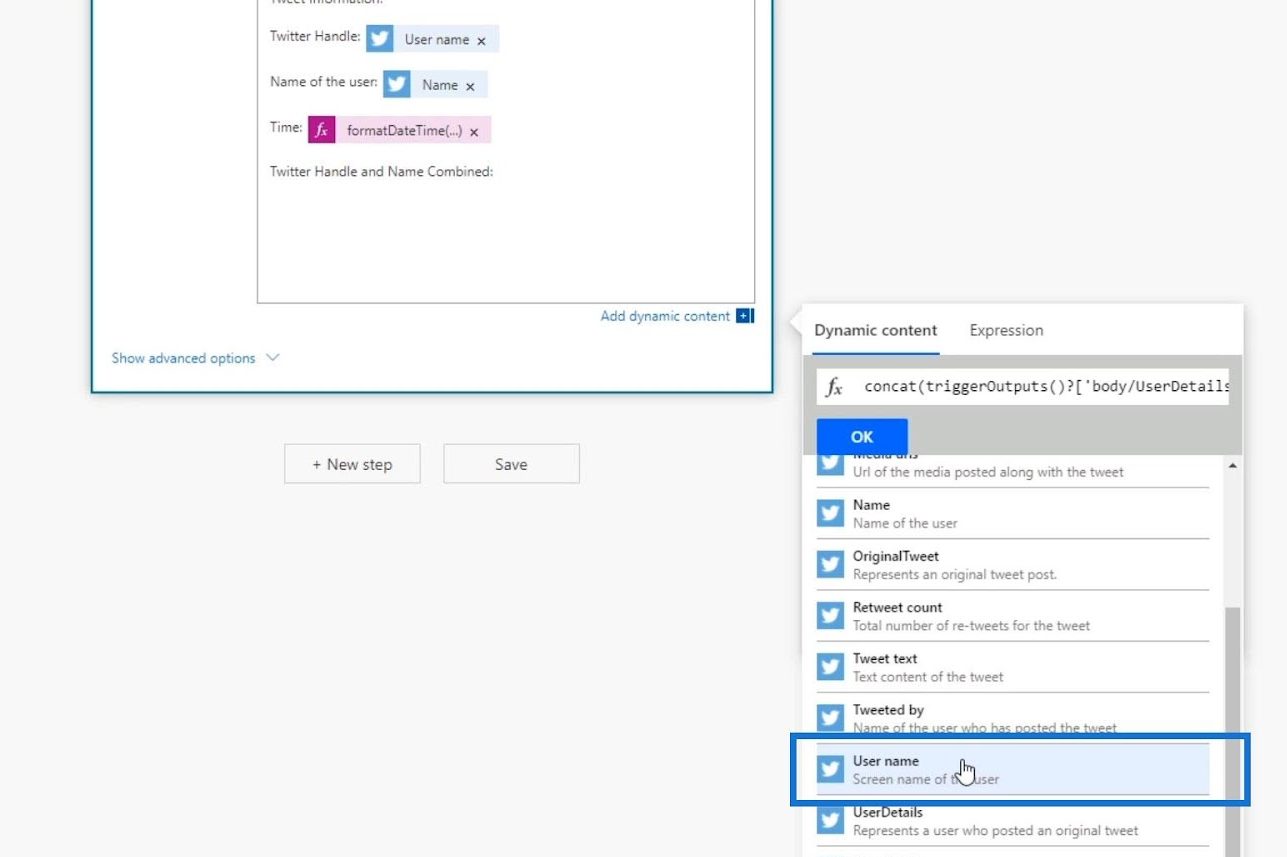
Let’s then add a comma here because we want to separate the different strings.
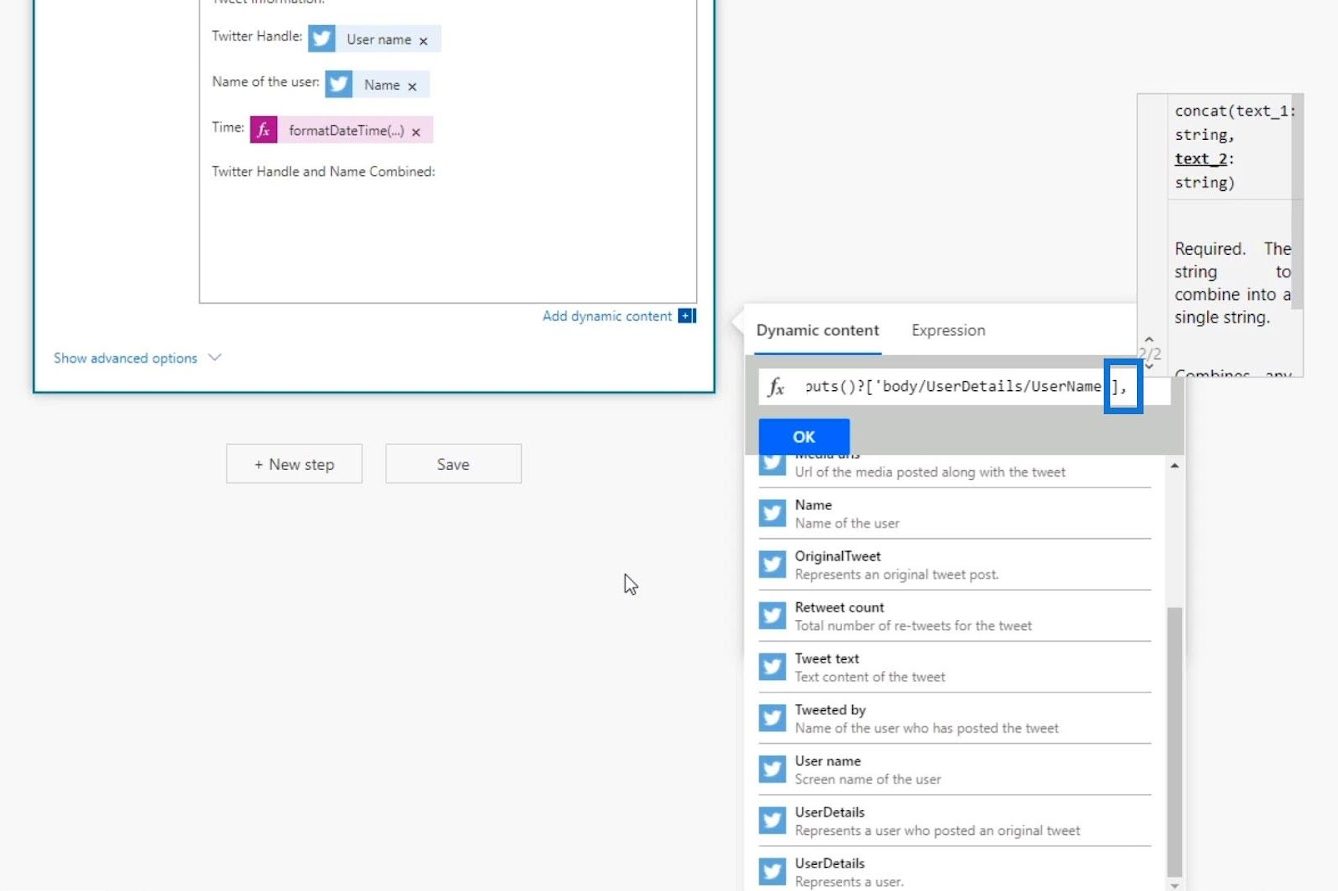
After that, click the Name variable.
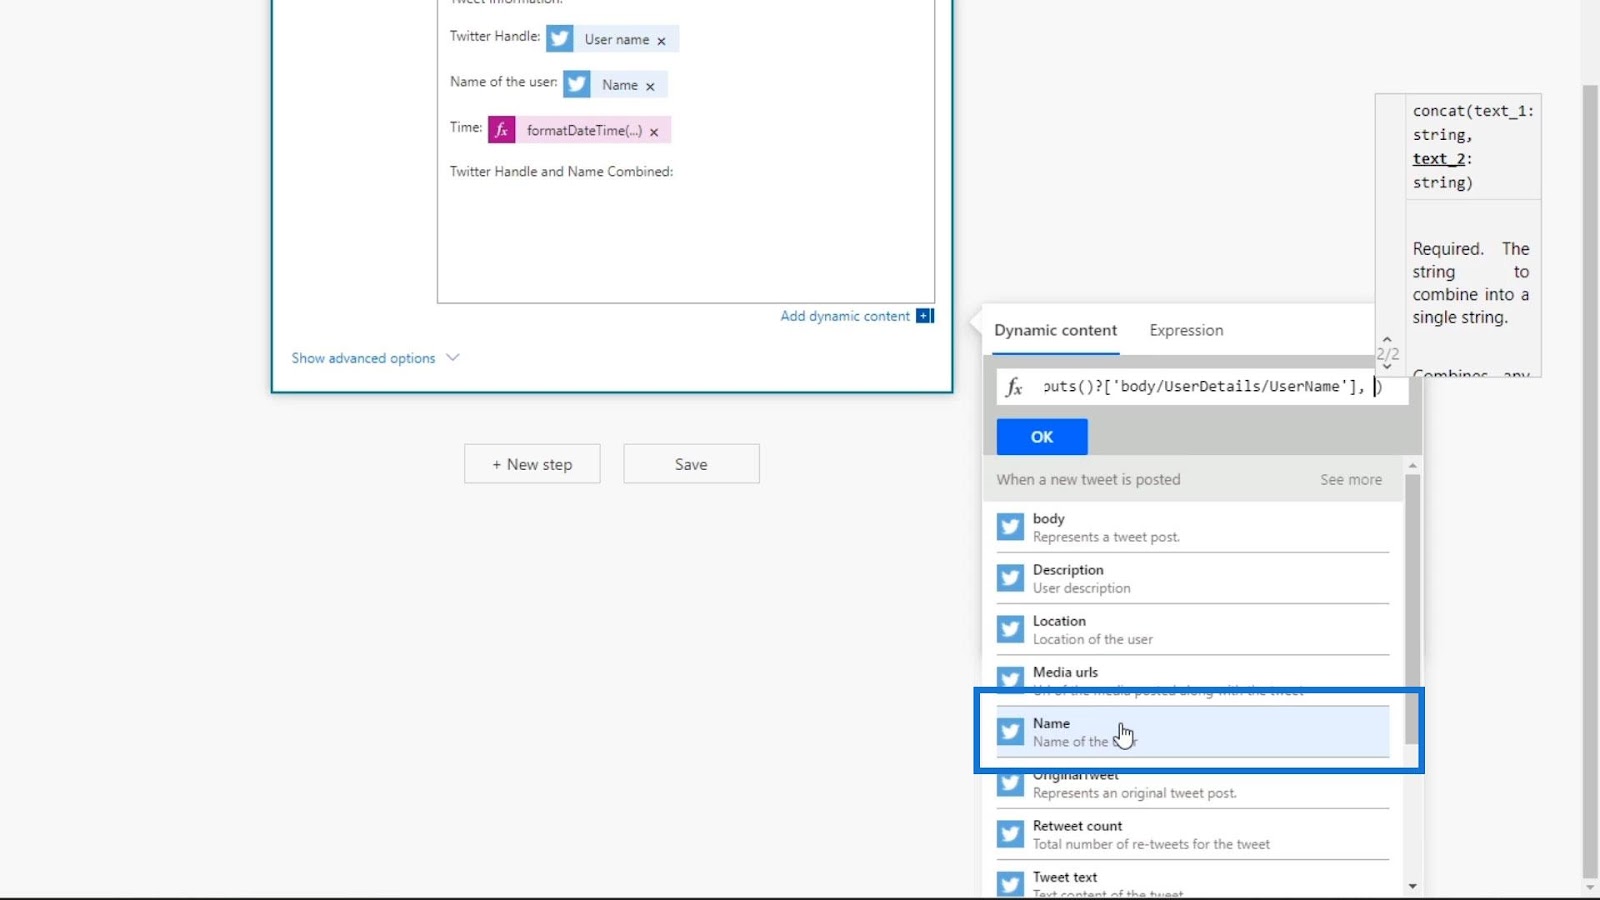
Then, click the OK button.

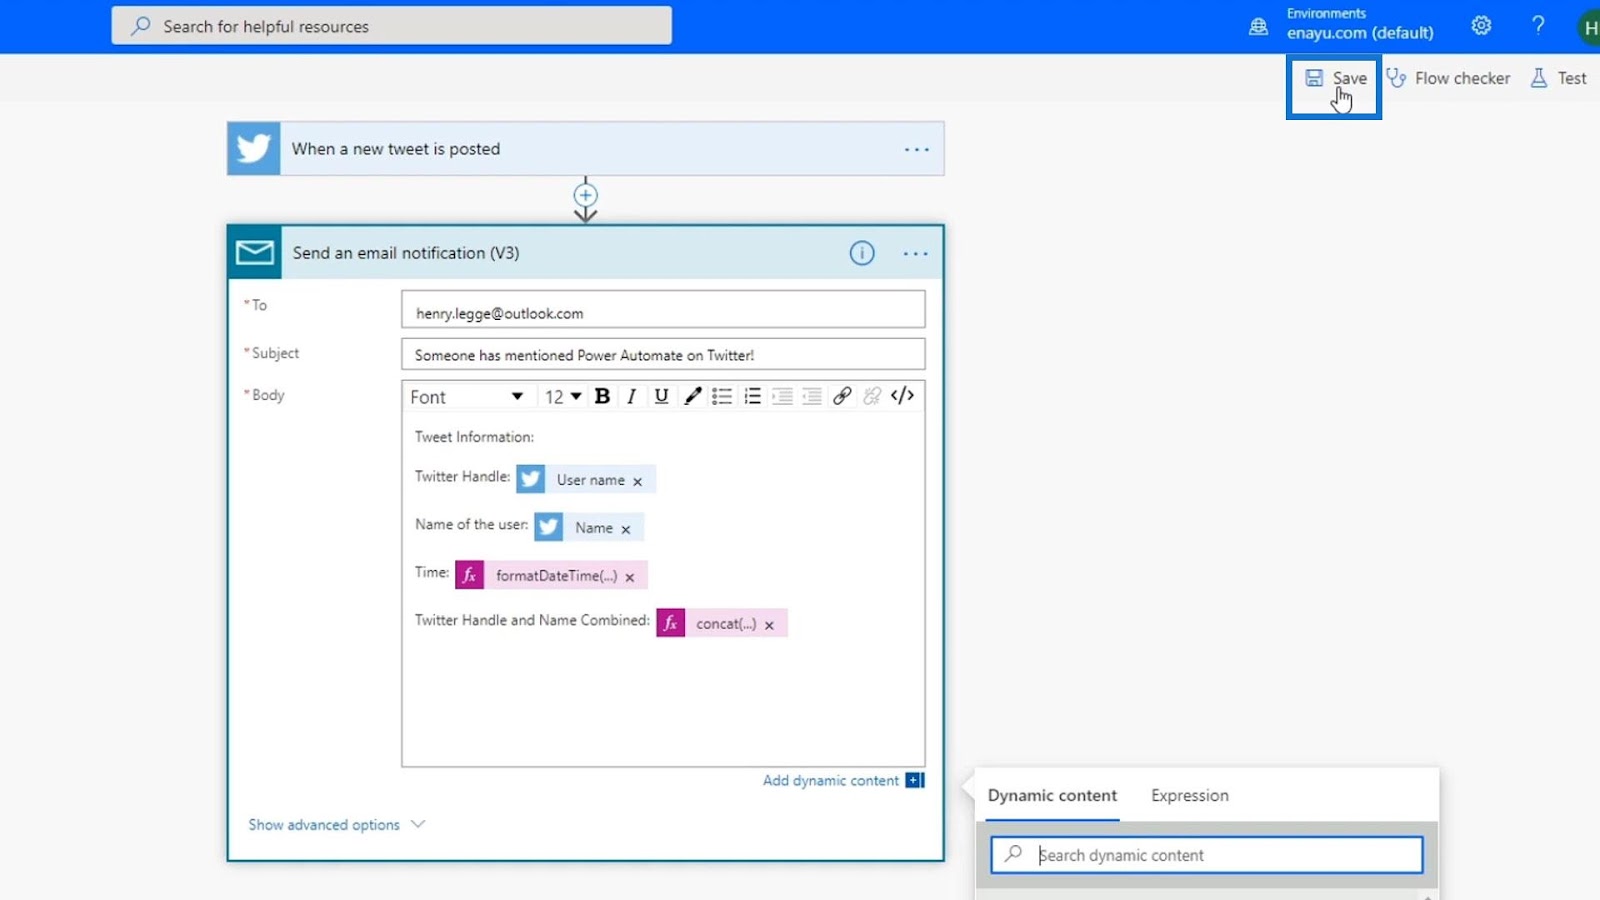
We now have another expression with dynamic content inside the Body of the email for our flow.
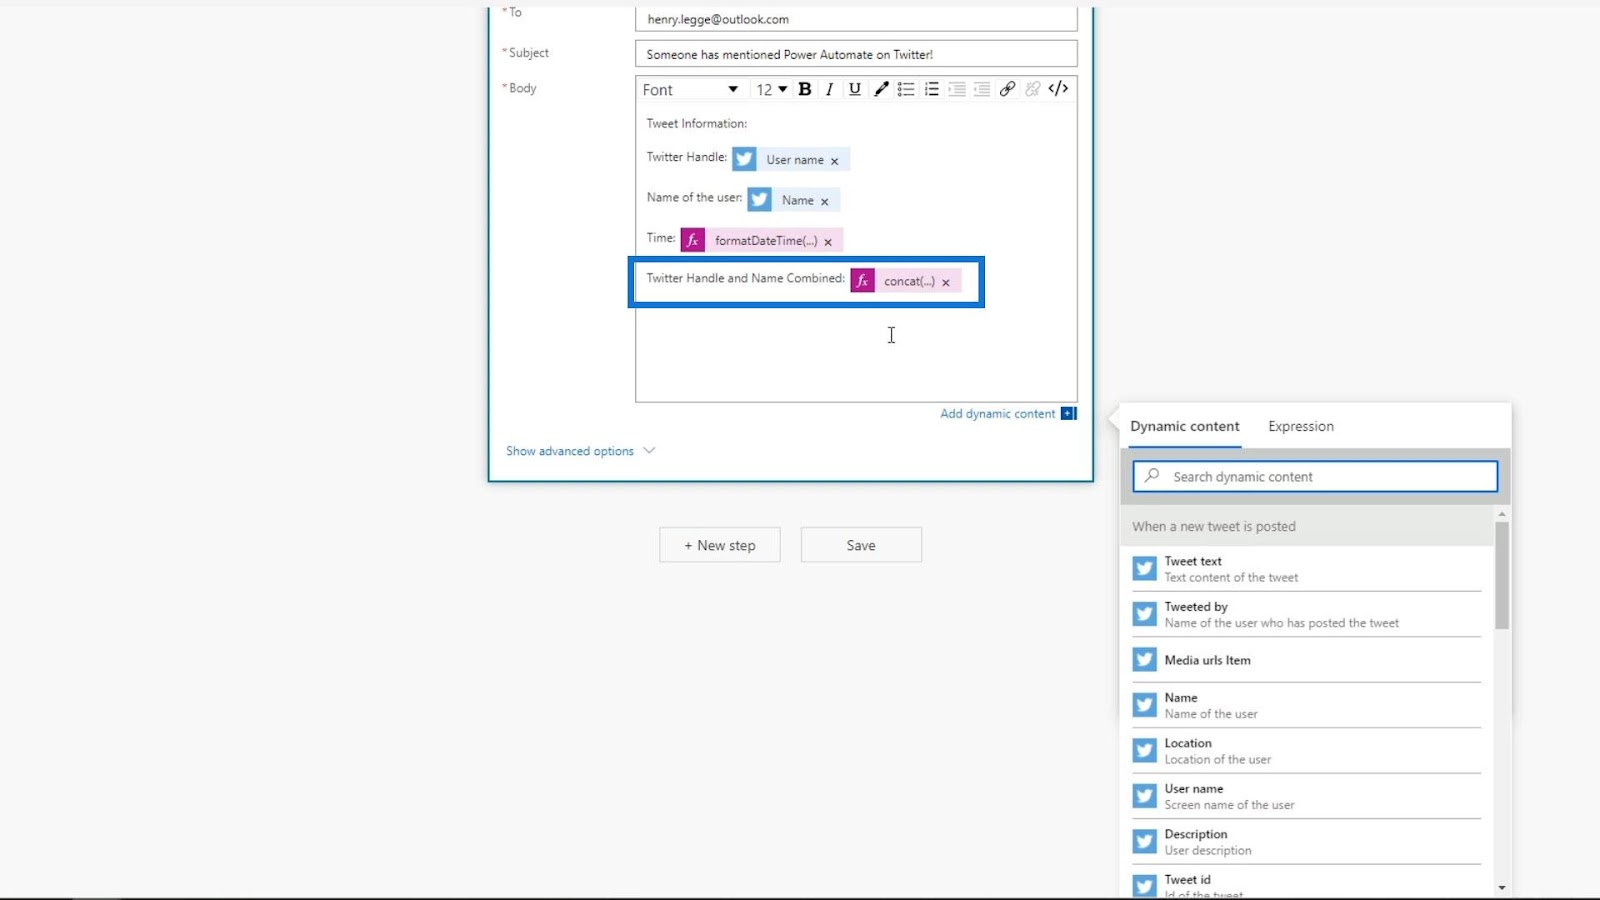
Let’s then save the changes by clicking Save.
Let’s test our flow by using the data from our previous runs. Make sure to use “Test Succeeded” and not “Succeeded” because this flow is already working in the background. When using “Succeeded”, it will use the inputs from someone who tweeted about “Power Automate” on Twitter instead of using our own inputs for our testing purposes.
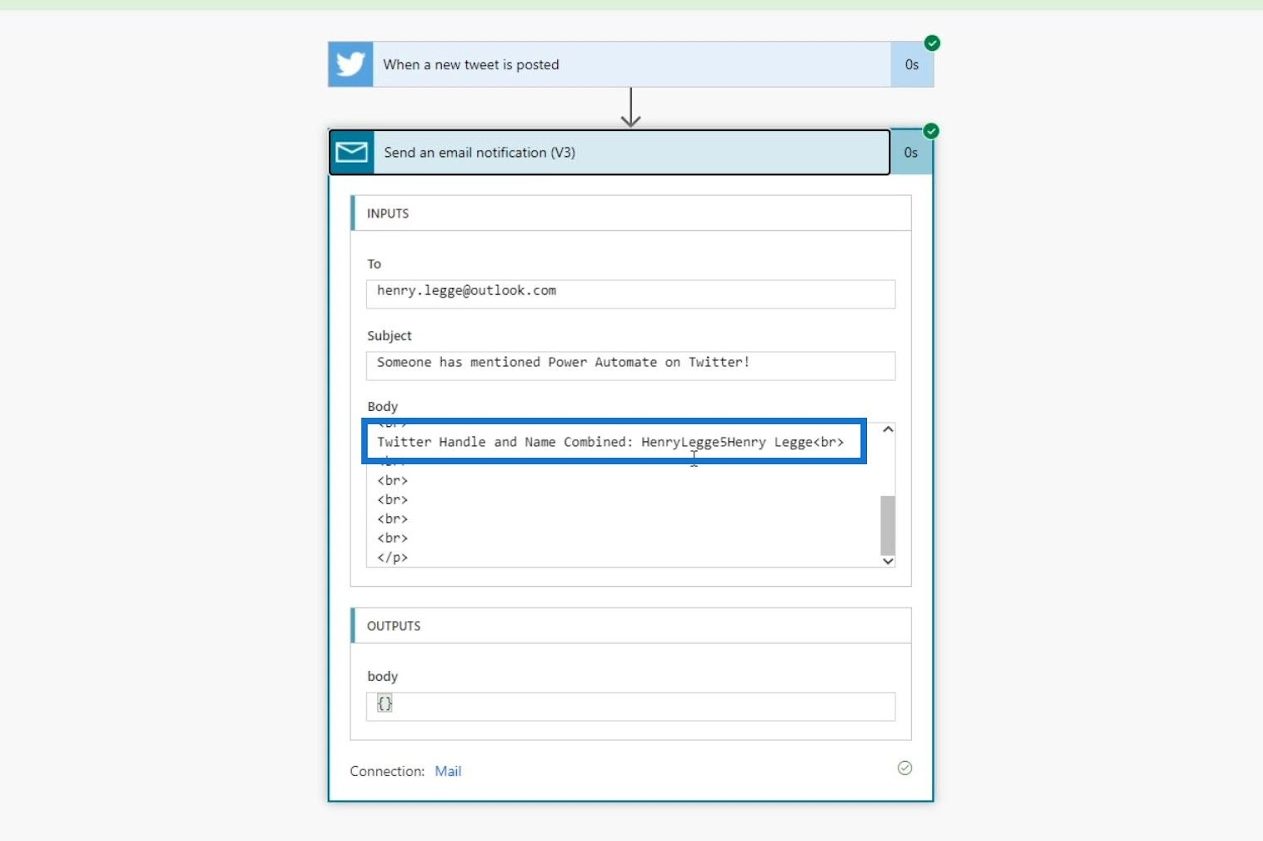
After running our test, let’s check our metadata again. We can see the output in this section. It combined the Henry leggge5 which is the username and the Henry Legge as the name.
Difference Between Test Succeeded And Succeeded
Just to show you the difference between the “Test Succeeded” and “Succeeded” options, let’s run another test and this time, we’ll use the “Succeeded” option.
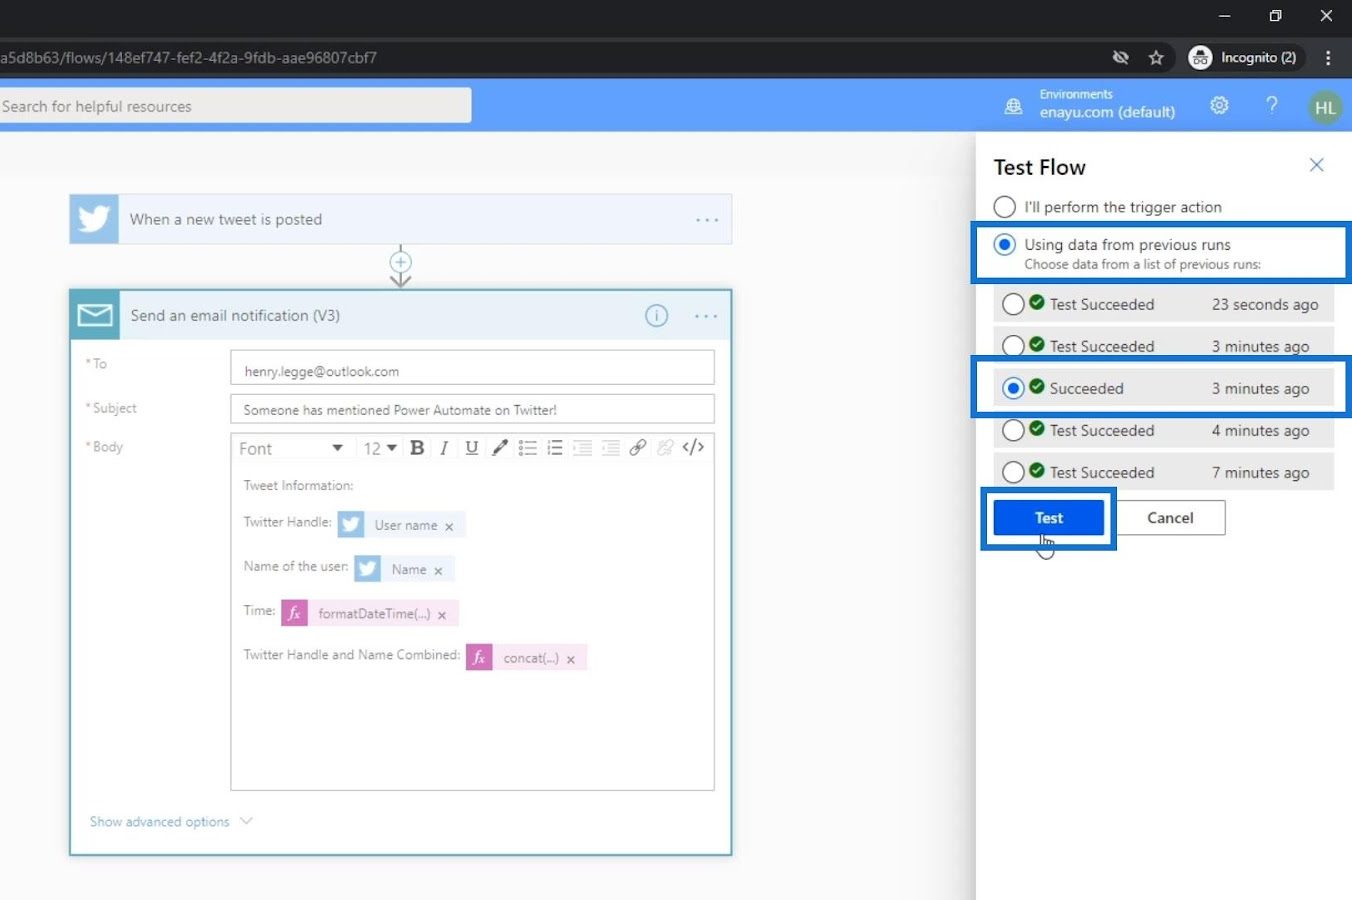
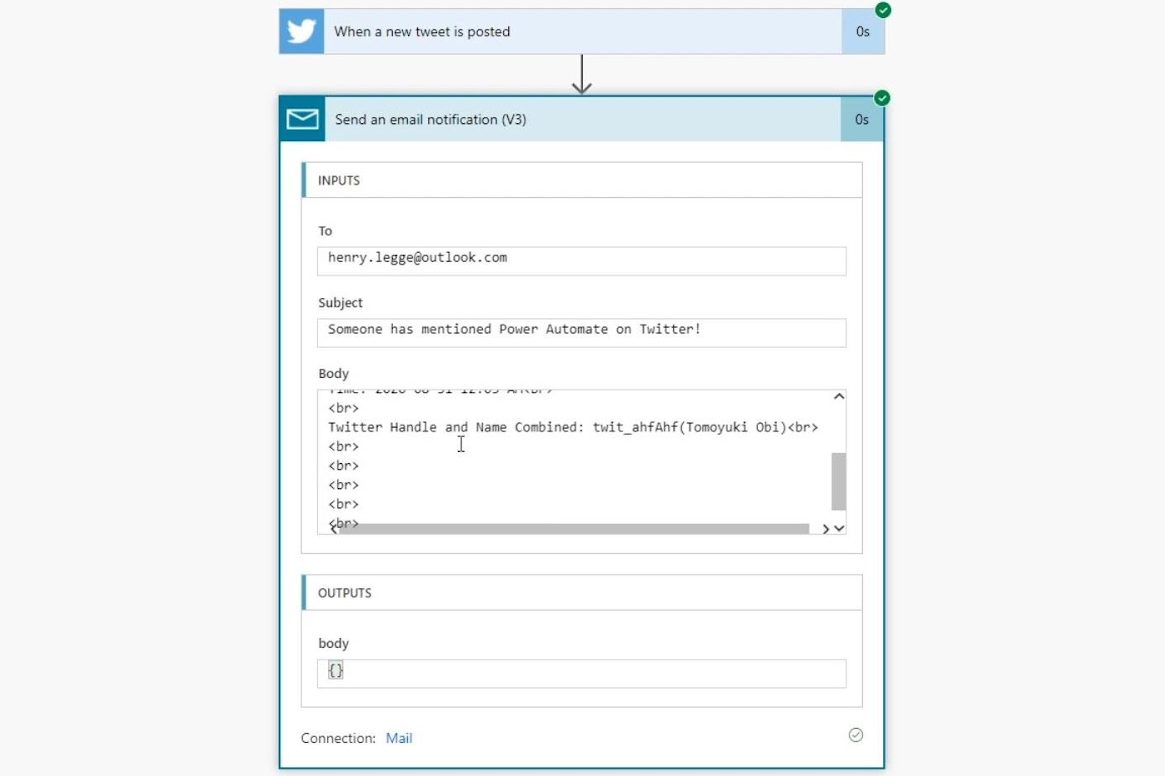
This uses the inputs from someone who tweeted about “Power Automate.” The information that we have for this test came from another person who triggered our flow.
.
***** Related Links *****
Microsoft Power Automate: Workflow Automation
Power Automate Flow: Usage And Types Explained
Microsoft Flows: Editing And Tracking In Power Automate
Conclusion
That’s how expression generally works in Power Automate. You’ve also learned how to use them in workflow automation. You just need to use functions in order to create expressions. Power Automate provides various functions which can be used to retrieve data, change data, evaluate data, and many more.
If you’re not used to formulas, it does take time to get used to them. For new users who are unfamiliar with expressions, you’ll be familiar with it as you keep trying out different expressions within your flows.
All the best,
Henry


