
In this tutorial, we’ll explore more about Power Automate Actions. We’ll also add and configure multiple actions in our flows. Flows can have one or many actions, depending on what’s needed to complete a particular flow.
Actions are tasks that start when a trigger is invoked. With actions, you can perform operations such as Create, Update, Delete, or Assign.
Adding Actions In Power Automate
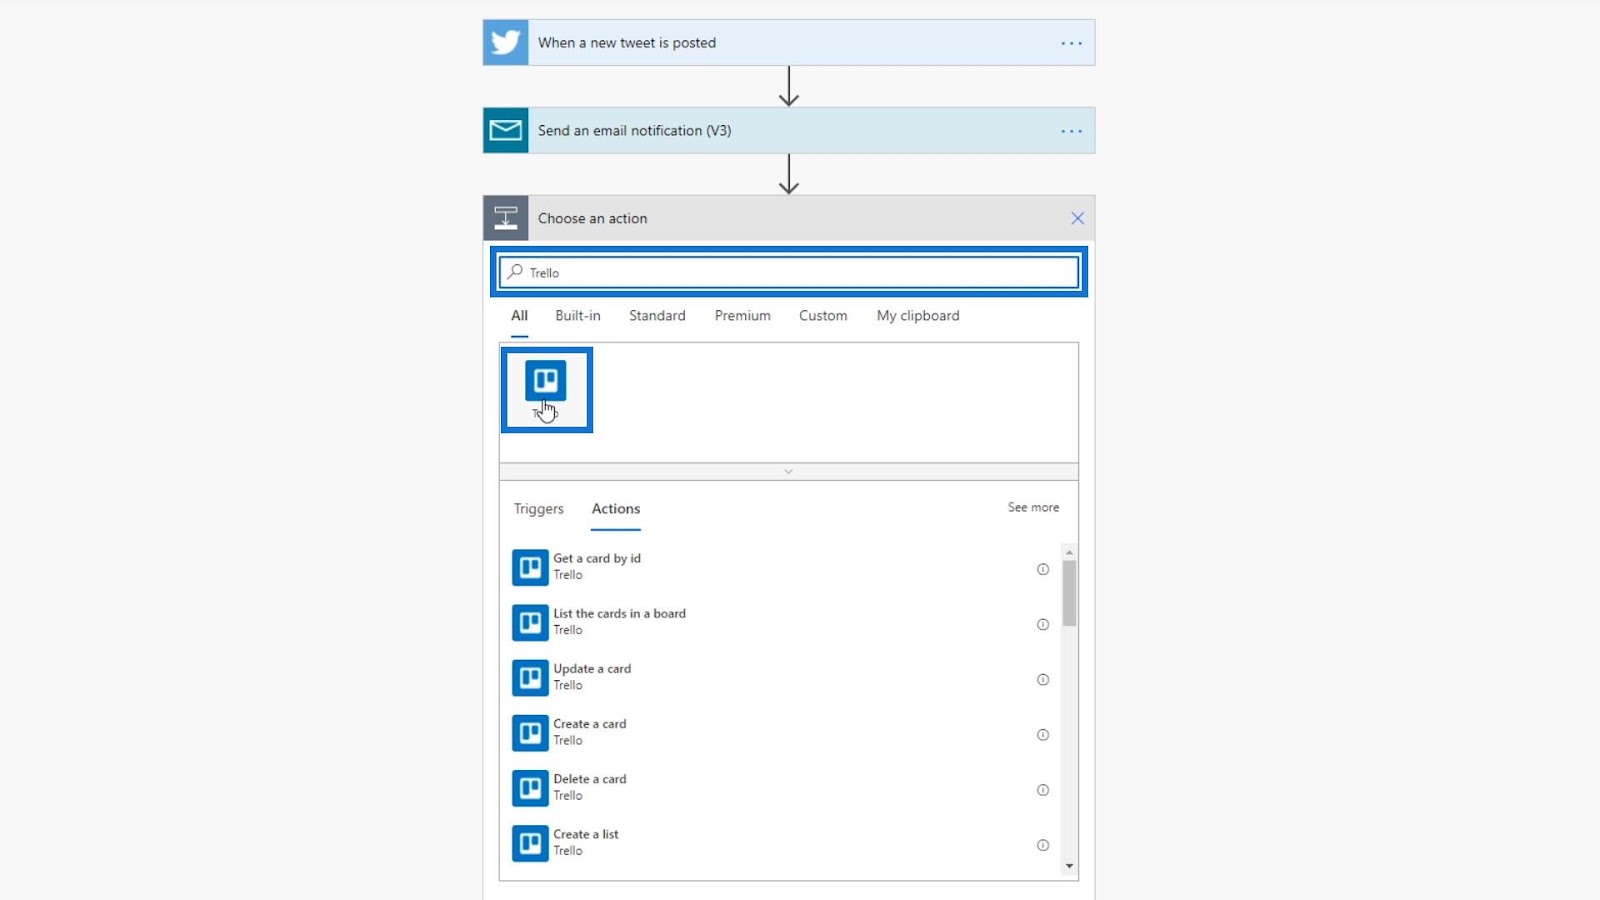
This is the flow diagram of a Twitter flow that I previously created. In this flow, I’ll receive an email notification once a user posts a tweet that contains the words “Power Automate”. Aside from receiving the notification on our email when someone tweets about our topic, we’d want to create a Trello card as well. To do that, let’s add a new action on our flow diagram by clicking the + New step.


Then let’s choose a connector. For this example, we’ll use Trello. Let’s search for Trello and add it in. Trello is a task management software where you can easily create to-do’s on different sections.
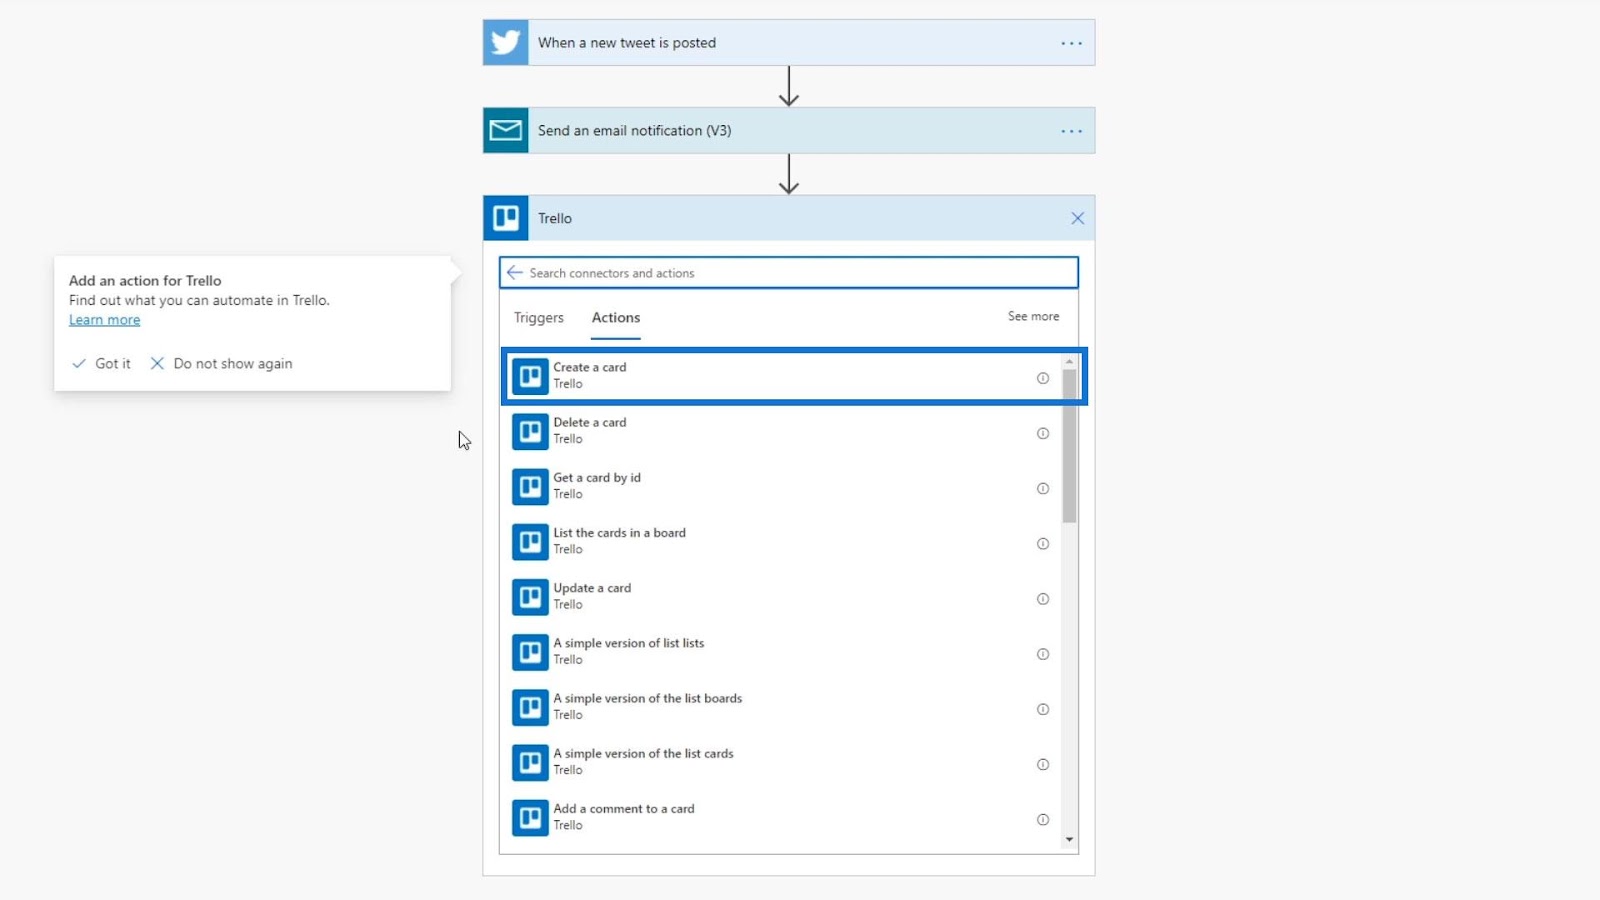
These are the available actions for the Trello connector.
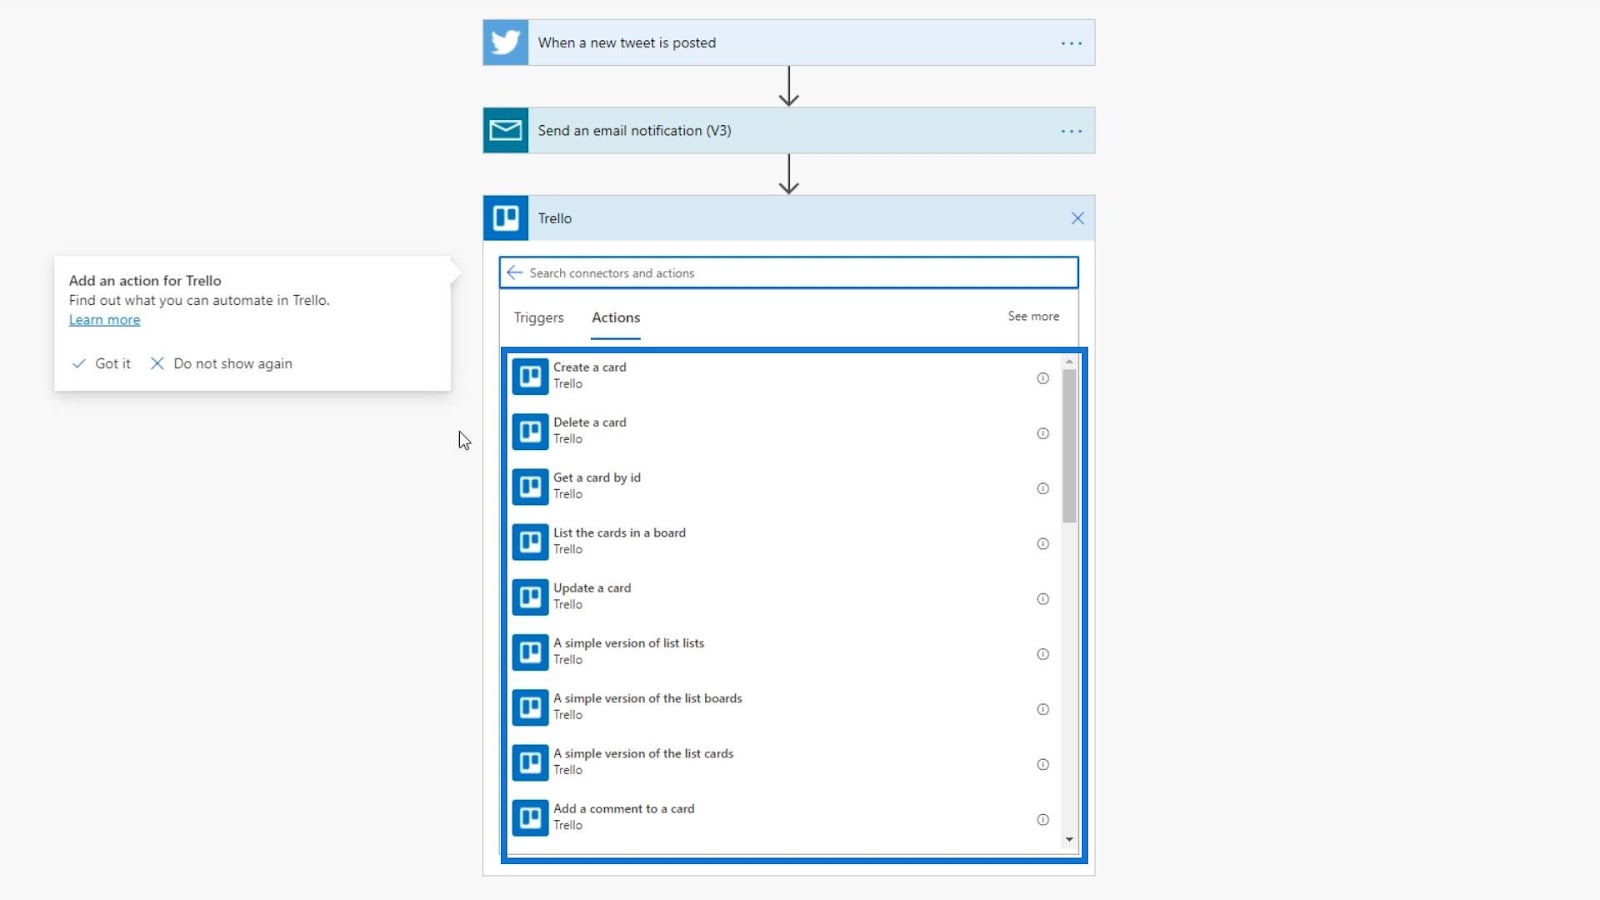
In this example, we’ll be creating a Trello card. Let’s click the “Create a card” action.
A card on Trello looks like this.

We then need to sign in to Trello.

After signing in, we’ll have access to these input fields from Trello.

Setting Up Arguments For Power Automate Actions
Let’s now set up the arguments for our Trello action. For the Board Id, let’s use the Tasks board. If your Trello has multiple boards, then you will have multiple options here.

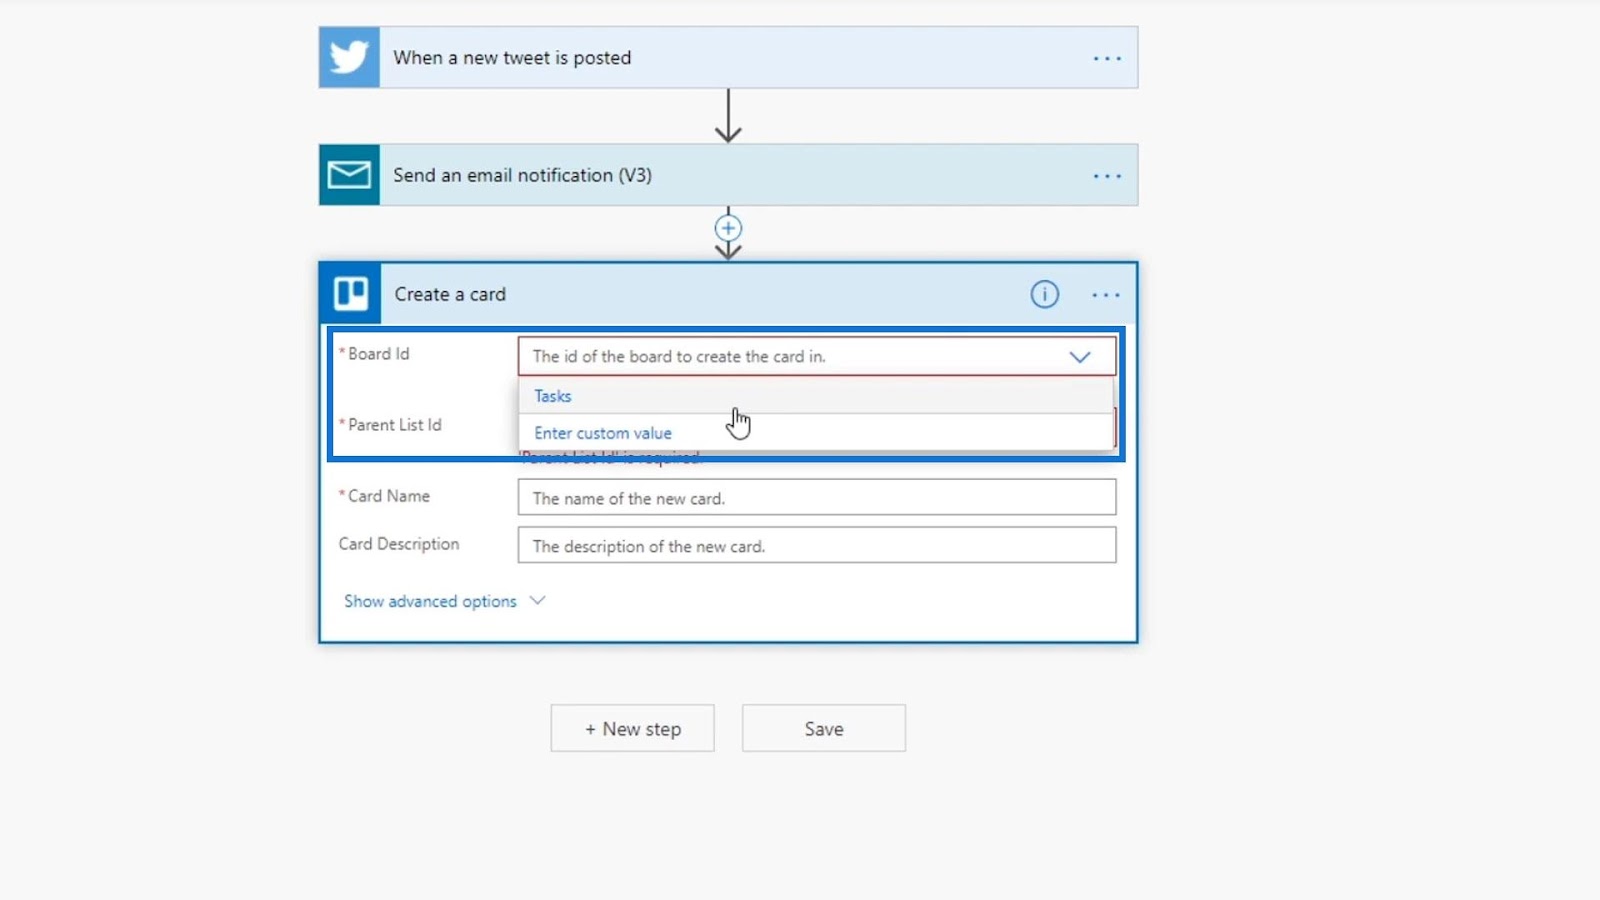
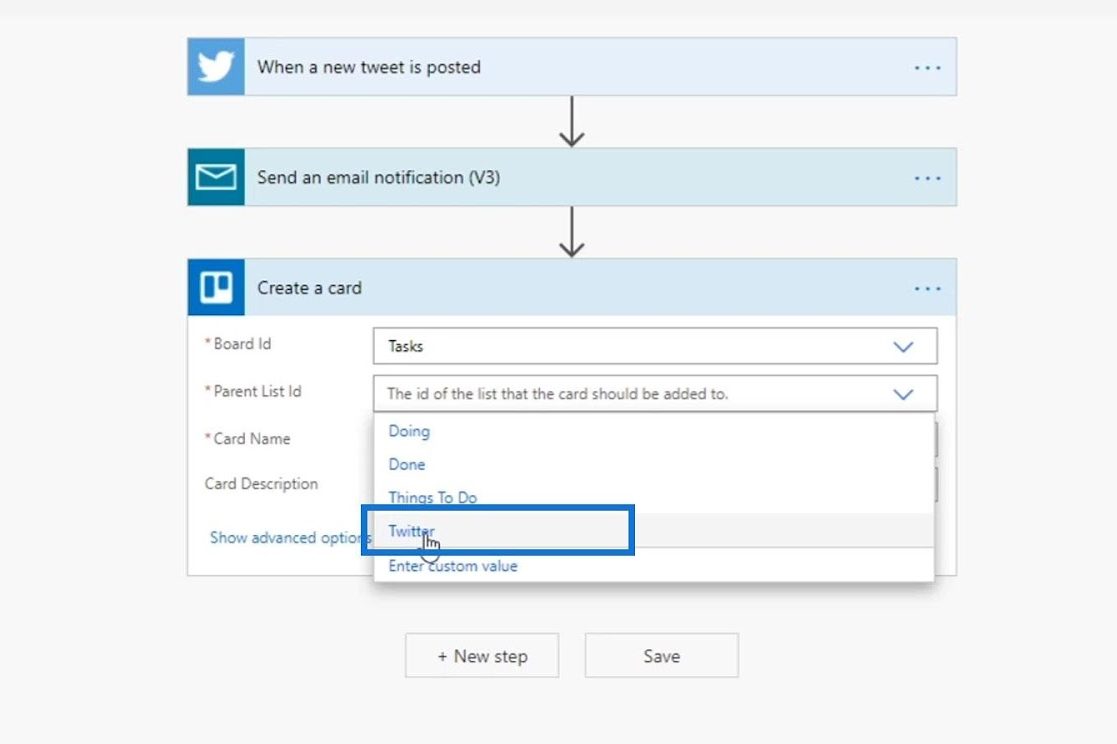
The options for the Parent List Id are these sections on our Trello board.

For this example, we’ll set it on our Twitter list.
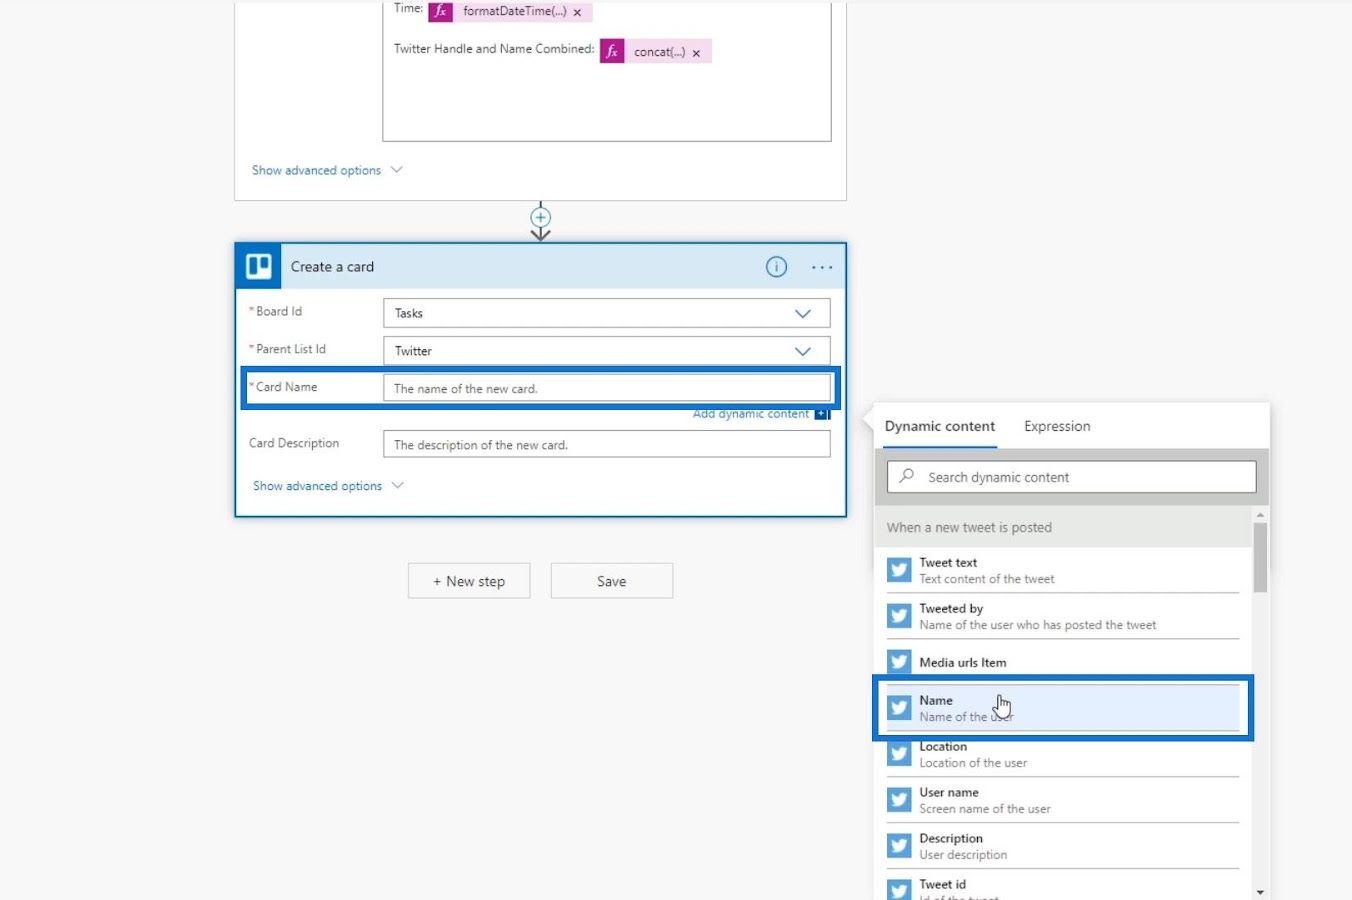
Then, let’s set the user name of the actual tweet as the Card Name. Click Dynamic content and choose the Name variable.
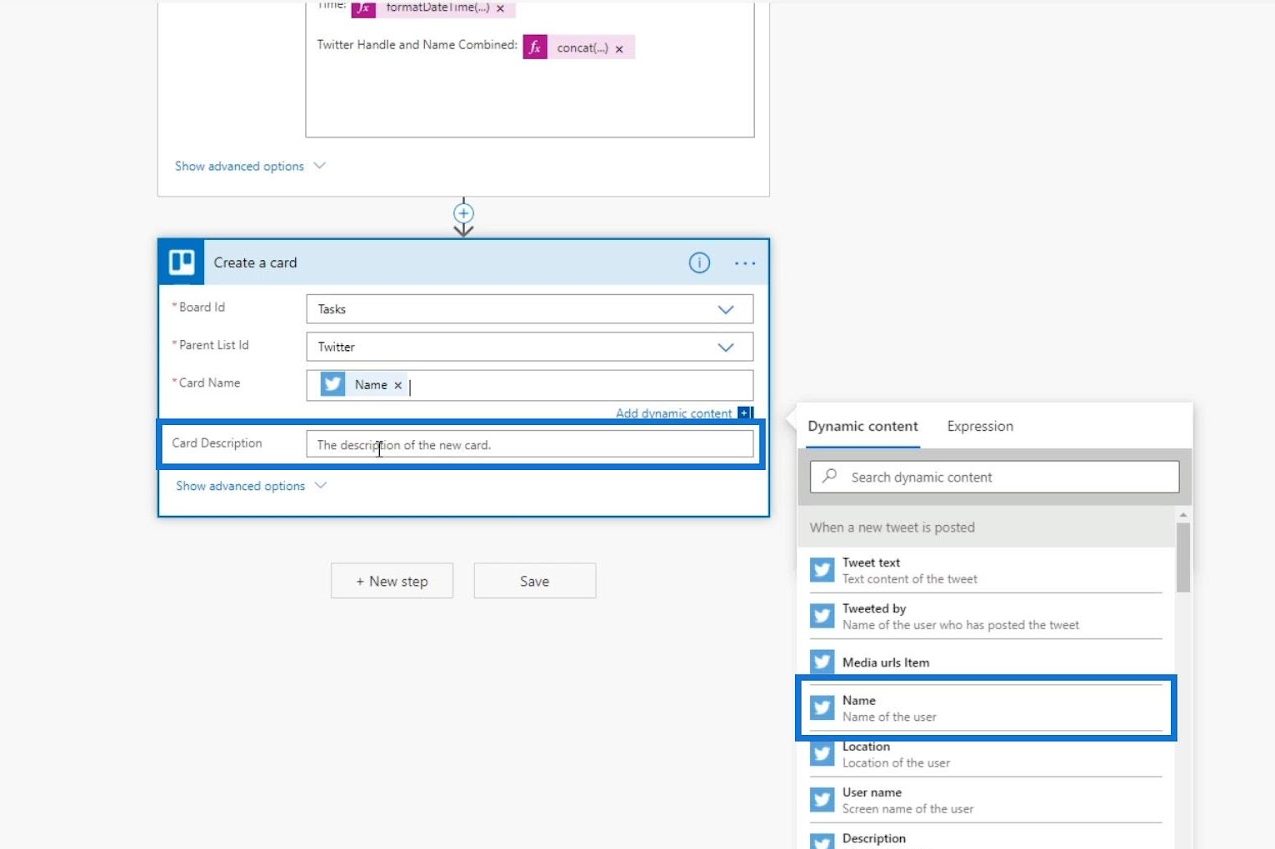
The Card Description is optional so let’s leave it blank for now.
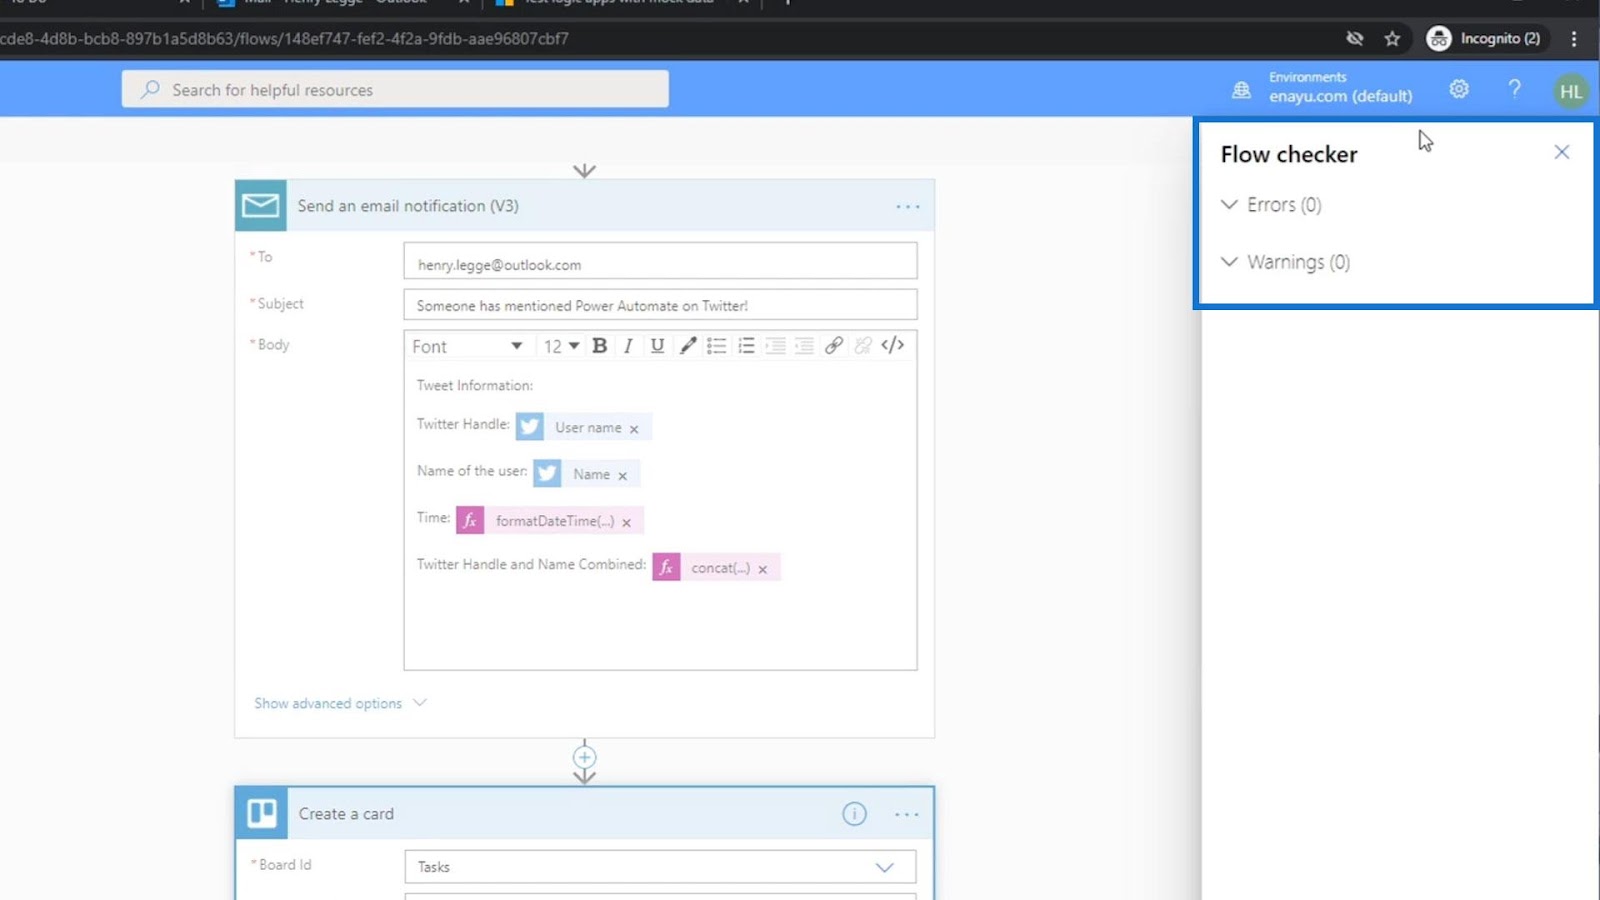
Click the Flow checker to make sure that we don’t have any errors.
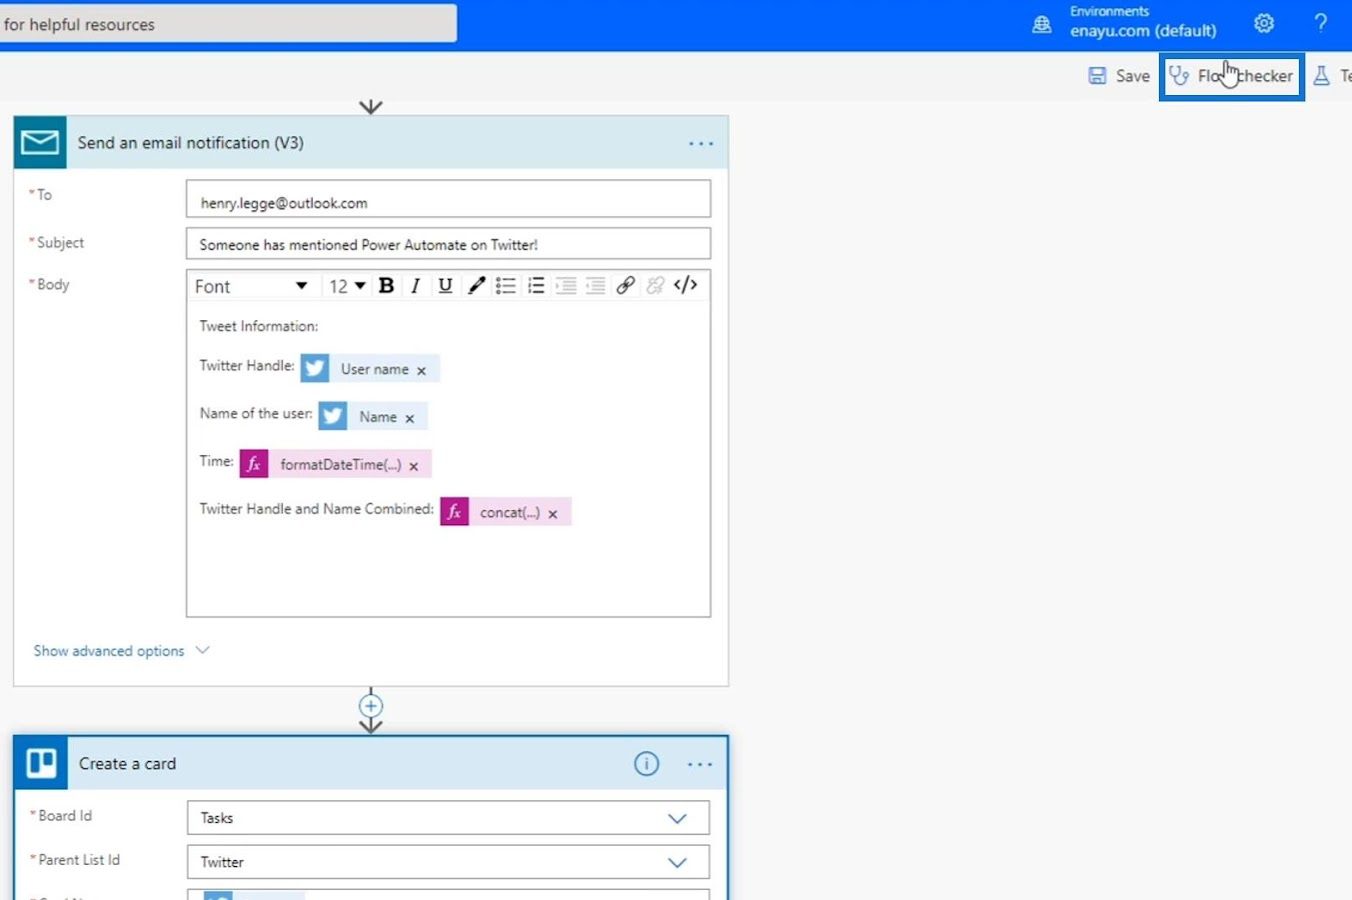
As you can see, we currently have zero errors and warnings.
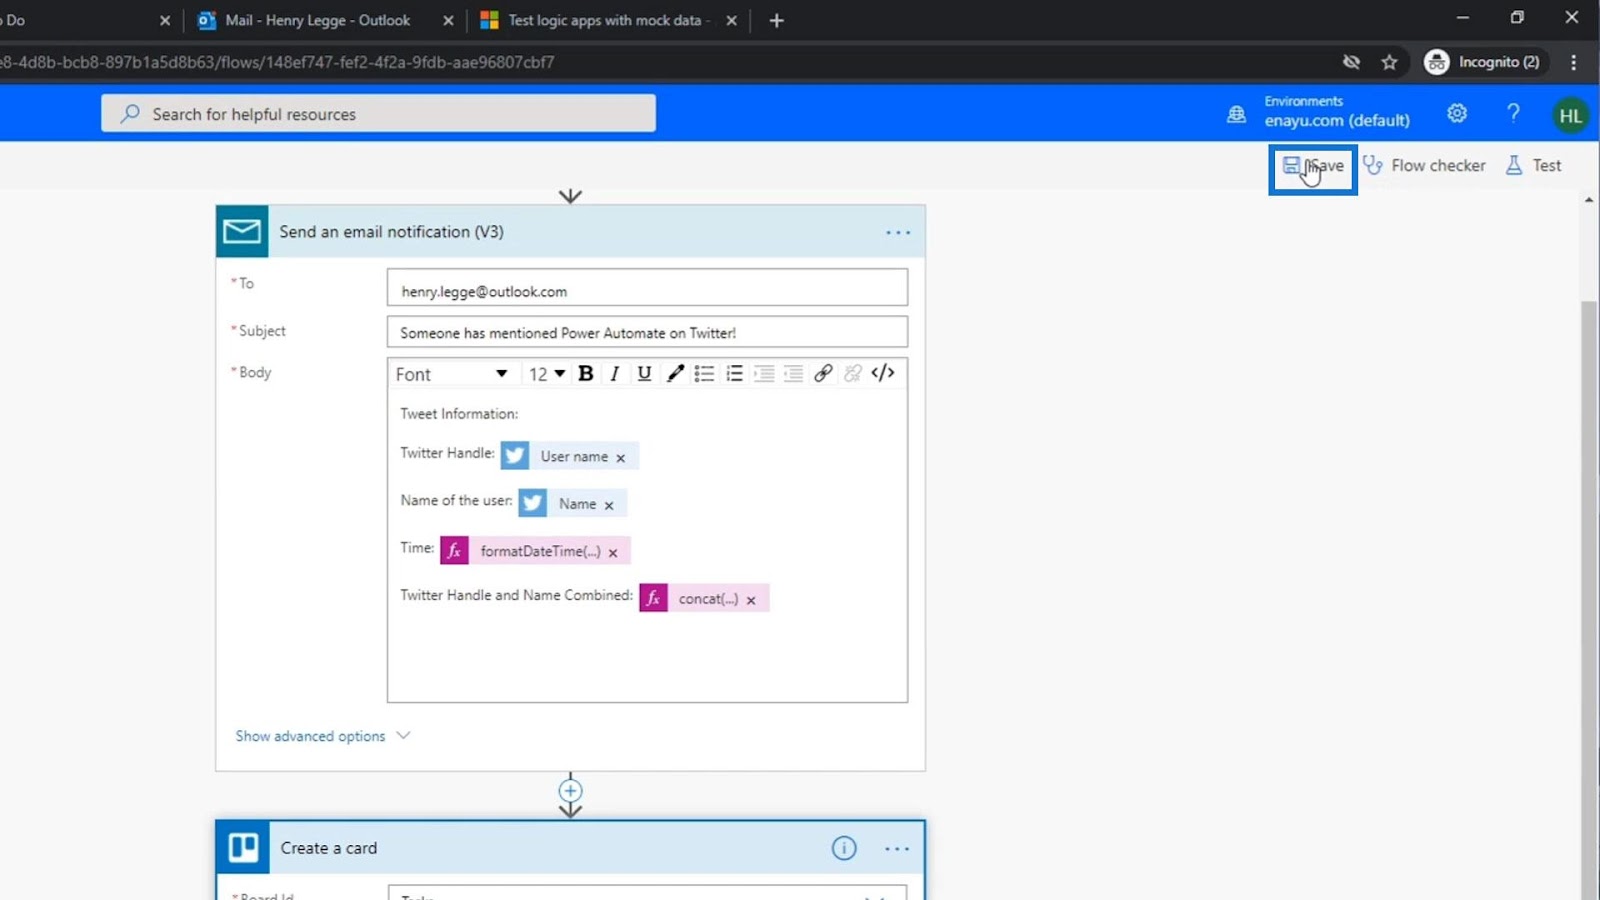
We can now save it.
Testing The Flow
Let’s then test our flow to see if it works.

Choose “Using data from previous runs”, then click Test.

The test used data from someone else’s tweet.
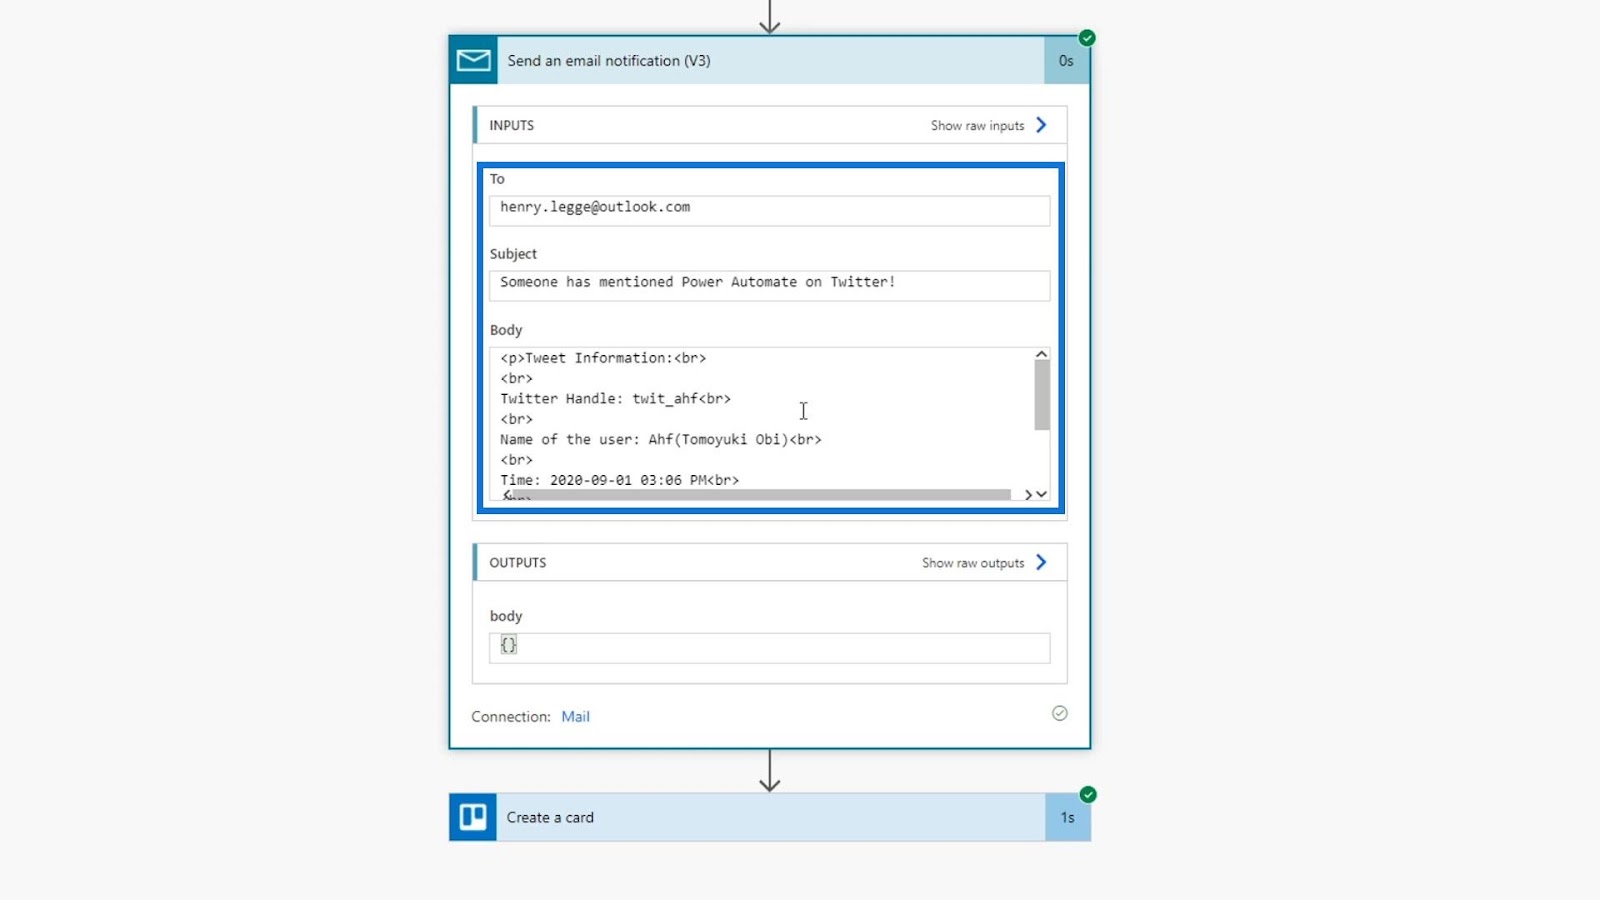
Let’s check the metadata to see if the fields are properly populated.

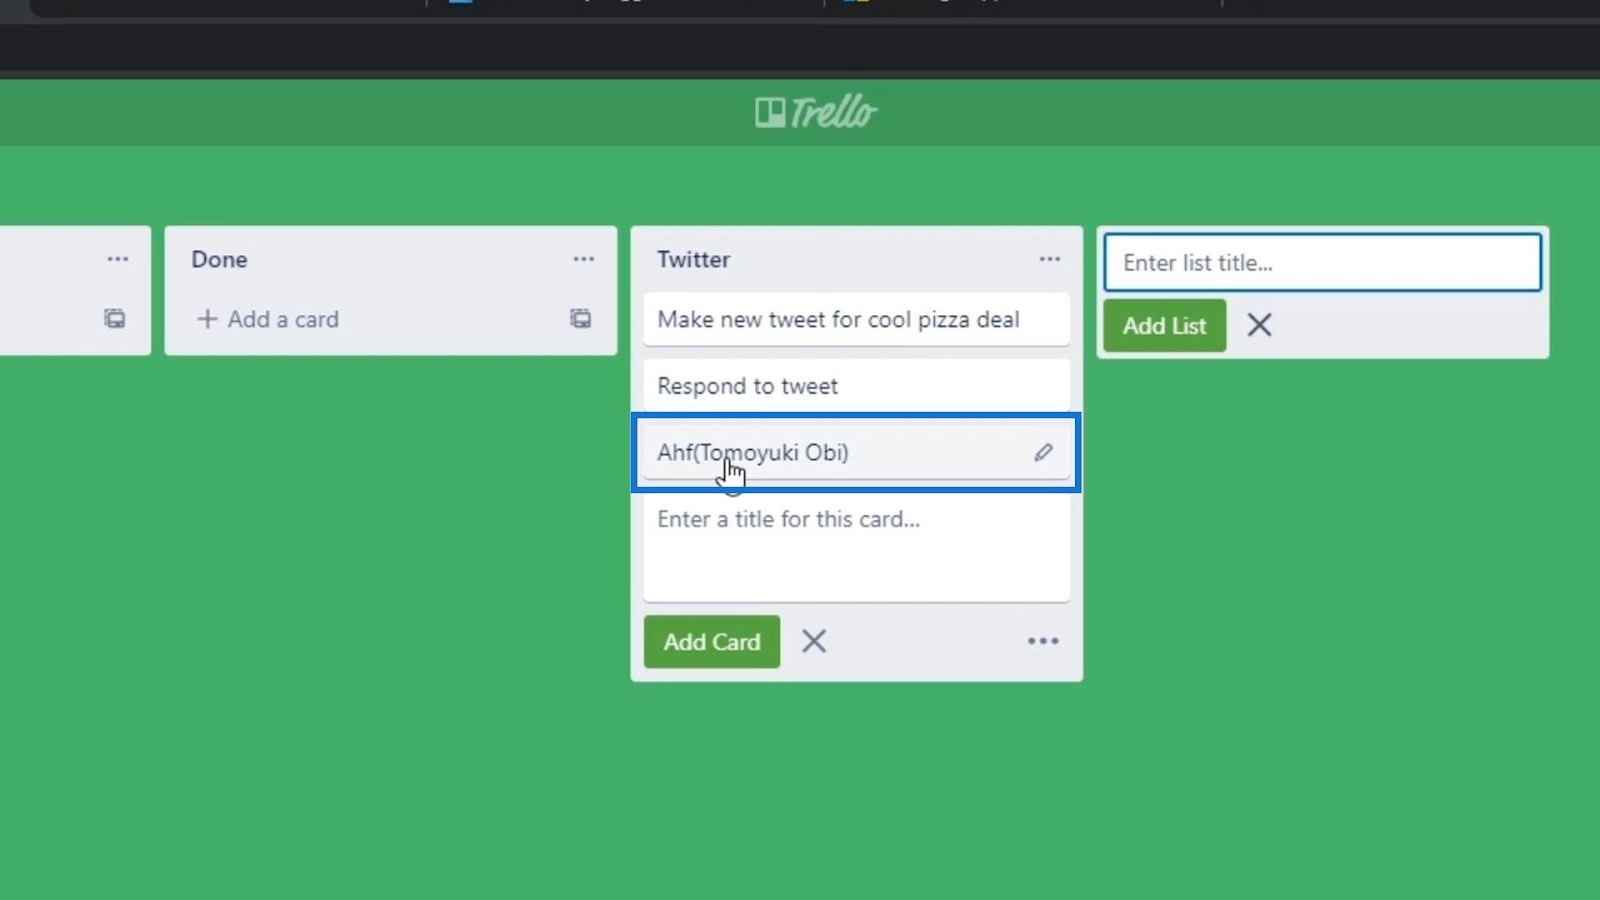
Let’s check our Trello board to see if the action really works. Upon checking, a new card was added under the Twitter list and the card name is the name of the person who tweeted it. Therefore, it’s working properly.
Modifying Power Automate Actions
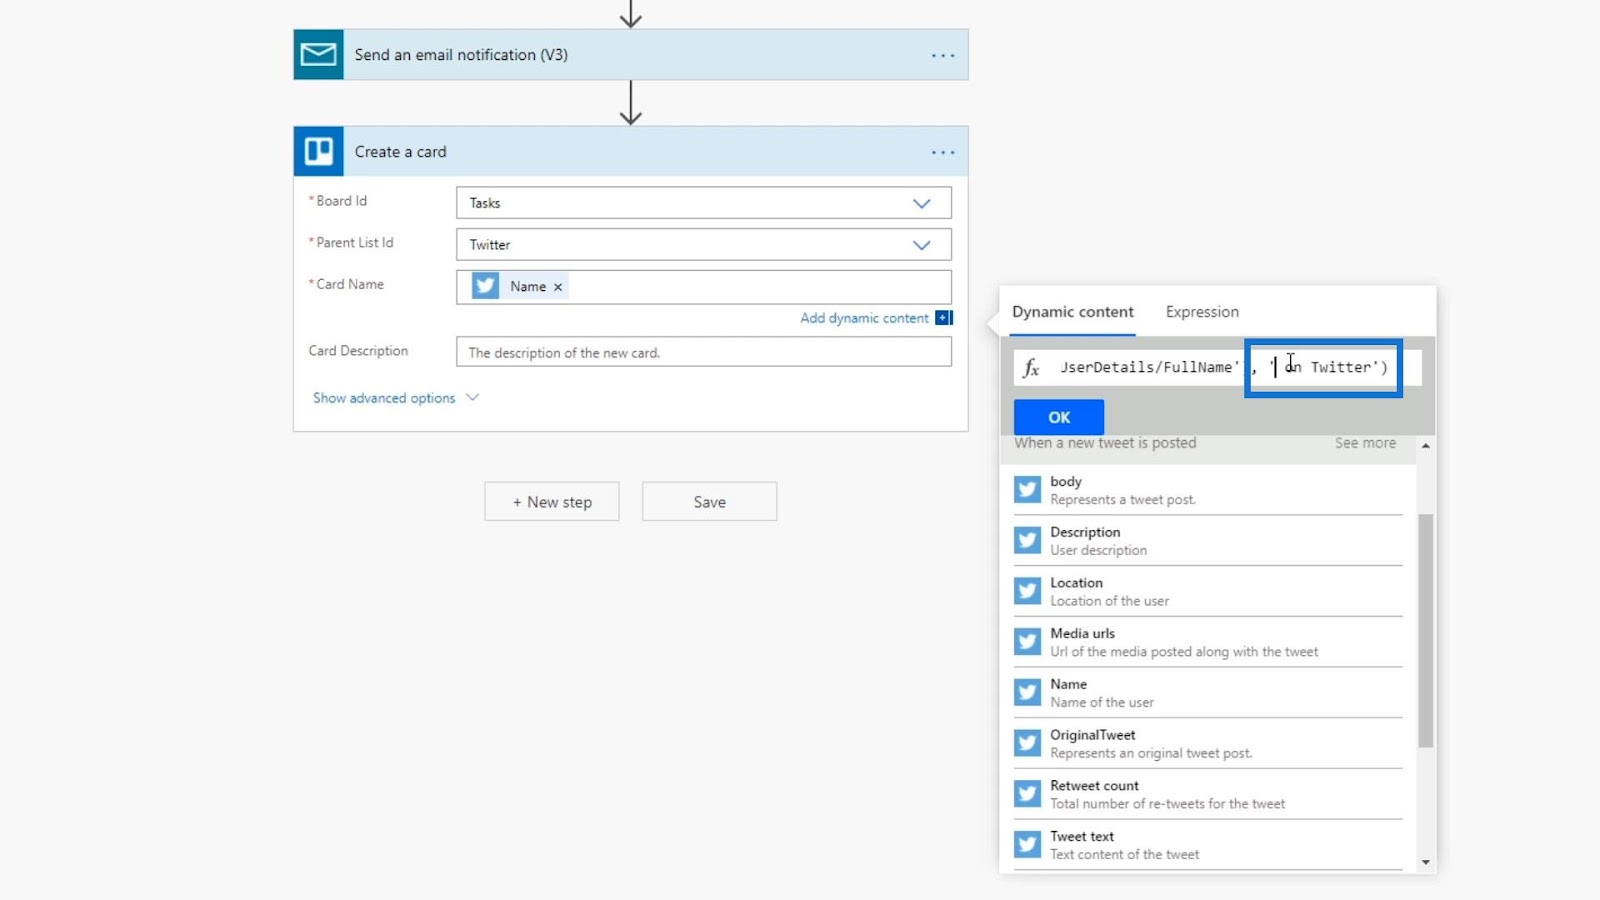
Let’s make the Trello card more usable by adding more information to it. We’ll use the concat expression on our Card Name field to display a text that prompts us to reply to the name of the person who tweeted it. So, inside the concat expression, let’s type ‘Reply to ‘.

Then, let’s add a comma (,) and the Name variable to get the name of the person who tweeted it.

Lastly, let’s add the text ‘on Twitter’ as the last string.

This will add the expression to the Card Name field.
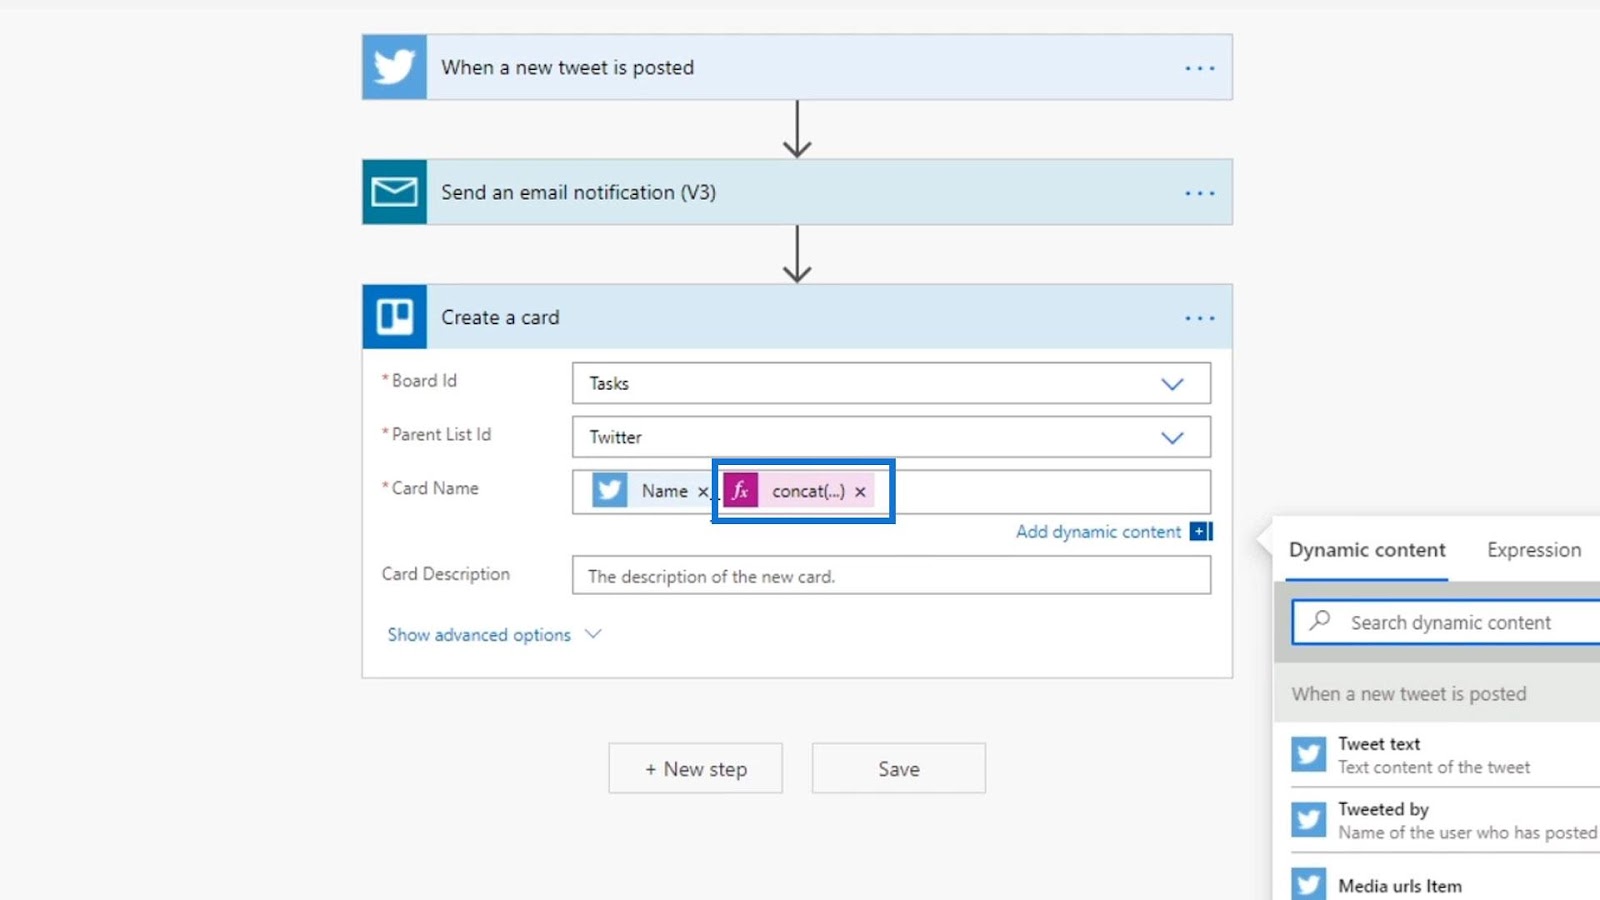
Let’s now remove the Name variable because it’s already in our expression.

Let’s also add details on the Description field because every card on Trello has a description.
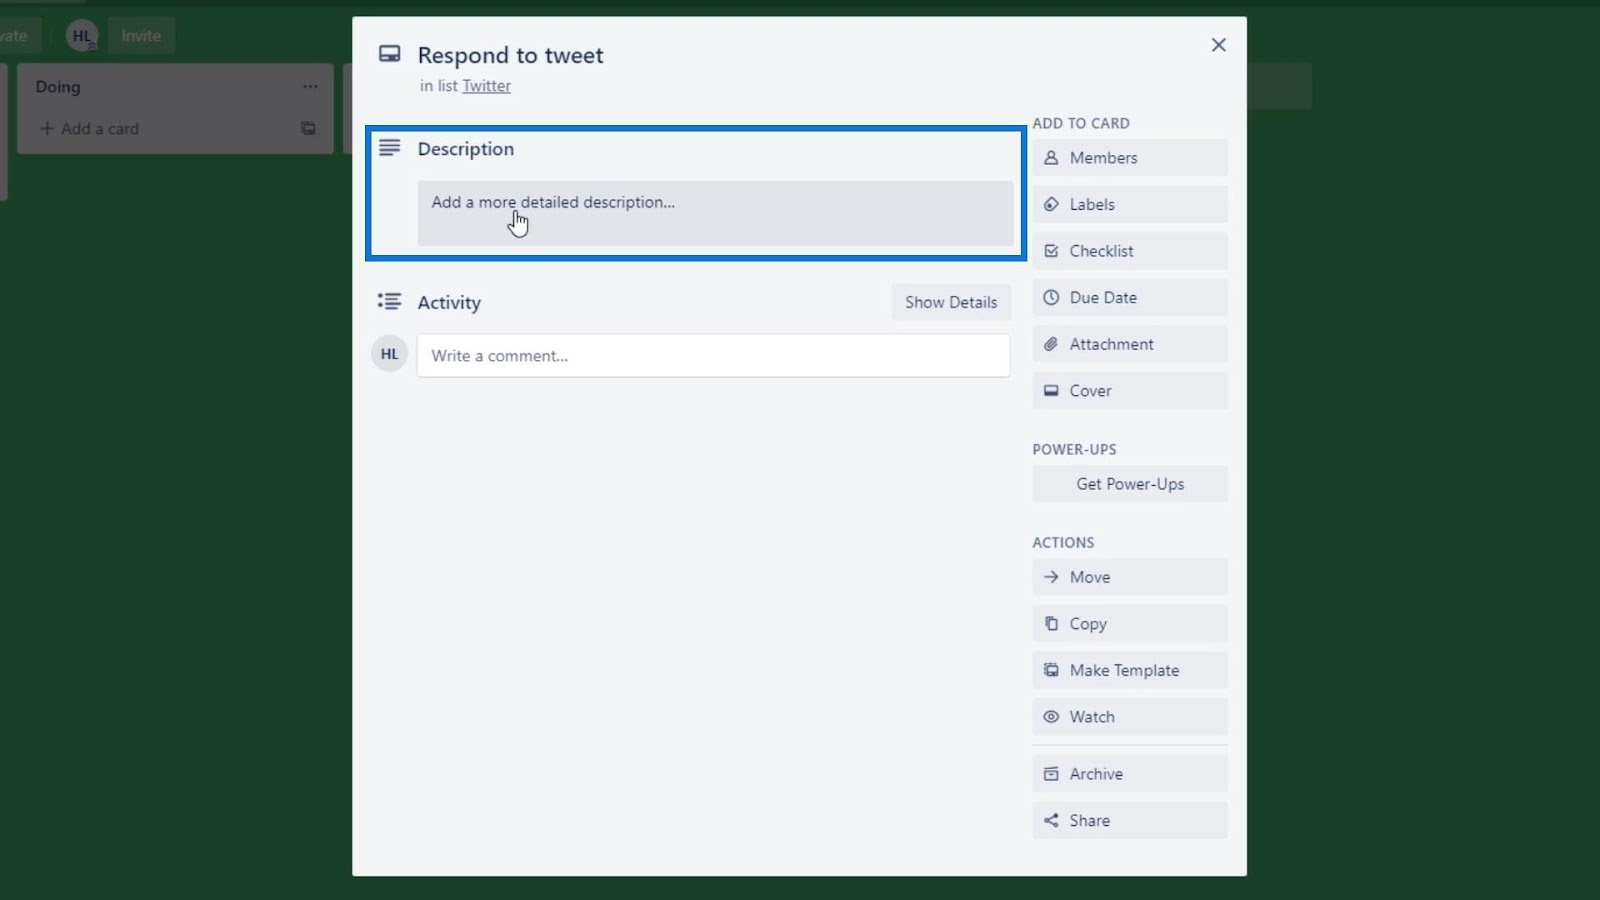
In the description, let’s add Tweet text, User name, and the Created at variables. These variables will display the content of the tweet, the username of the person who tweeted it, and the date and time it was tweeted.

Let’s now save these changes on our flow.

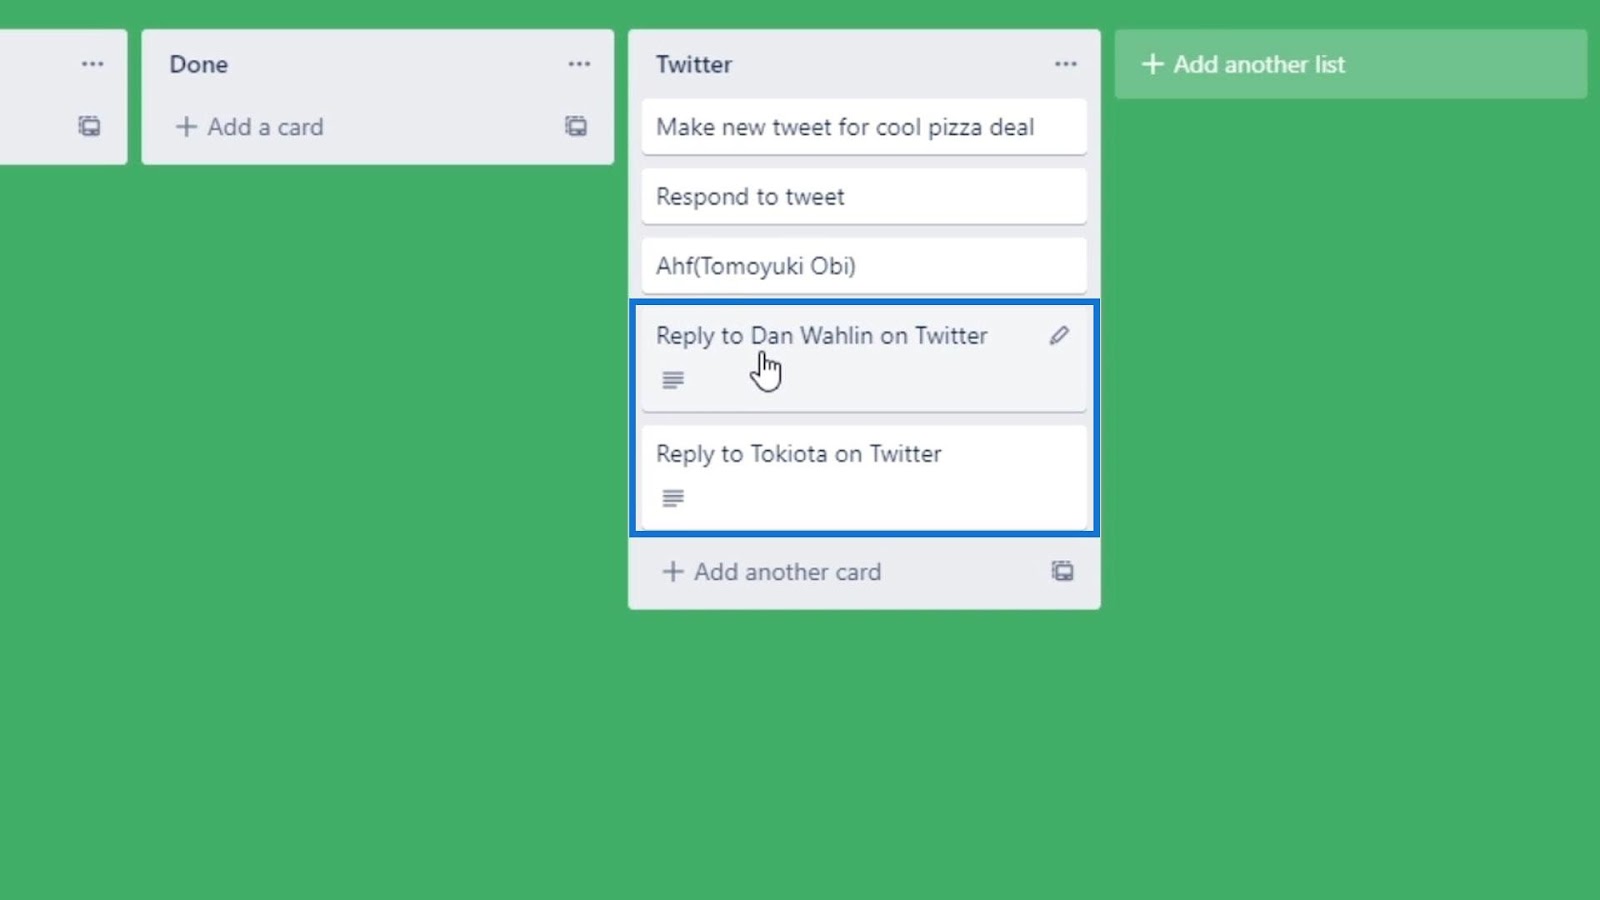
This flow is already running in the background. After checking Trello, we’ll see the newly-added cards. As you can see, the changes we’ve made are already working as the card name already displays the “Reply to “username” on Twitter”.
When we click this card, we can also see that the description now includes the content of the tweet, the username of the person who tweeted it, and the date and time it was tweeted.

Advanced Options For Actions In Power Automate
Let’s open the advanced options by clicking “Show advanced options”.

For the Trello connector, the first option is for setting the position of the card (whether the card should be added at the top or at the bottom of the card list).

For this example, let’s choose the bottom option.

This part is for assigning the card to someone. Since Trello is a task management software, we can add different teams of people. For now, I’m the only user on the Trello account that I connected to this flow.

We could also use expressions to suggest who you should assign it to based on the content of the tweet. For example, if the content of the tweet is related to issues with Microsoft Power Automate, we can change the assignment item to someone in our tech department to fix those issues.
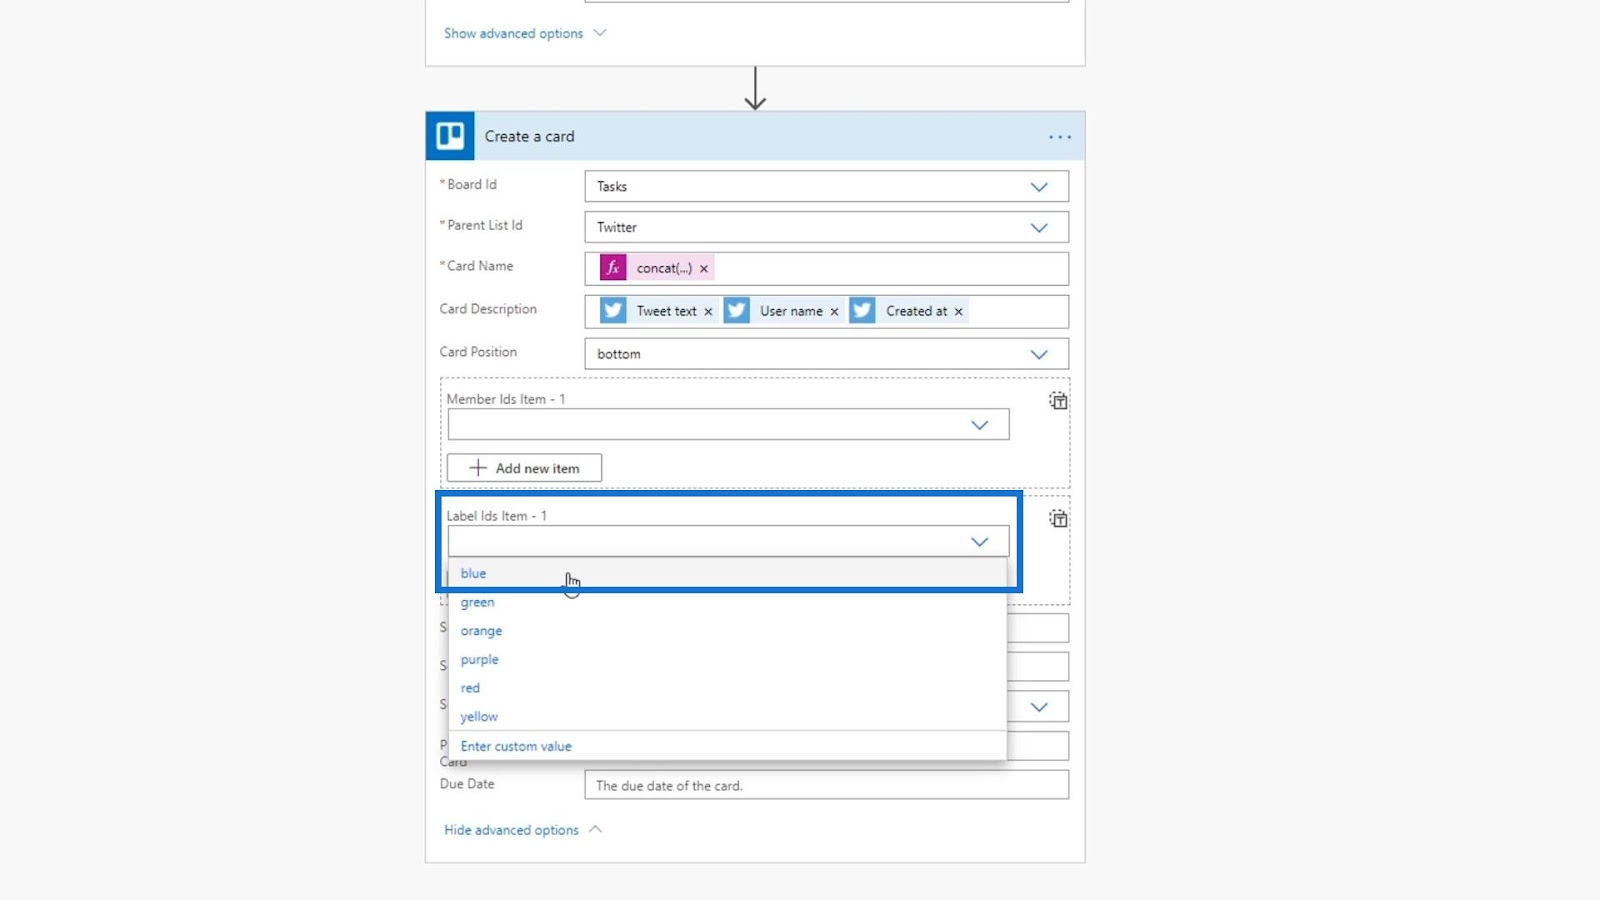
The labels are for assigning the colors that we want to set on our cards. For this example, let’s just use the color of Twitter which is blue.
The last one that we’ll use is the Due Date field. We can use this to set up a task with a due date. For example, if someone tweets about Power Automate, it will be added to our Trello, and we could set up a task for us to reply to that person within five days from when the tweet was created.

Setting Dynamic Expressions
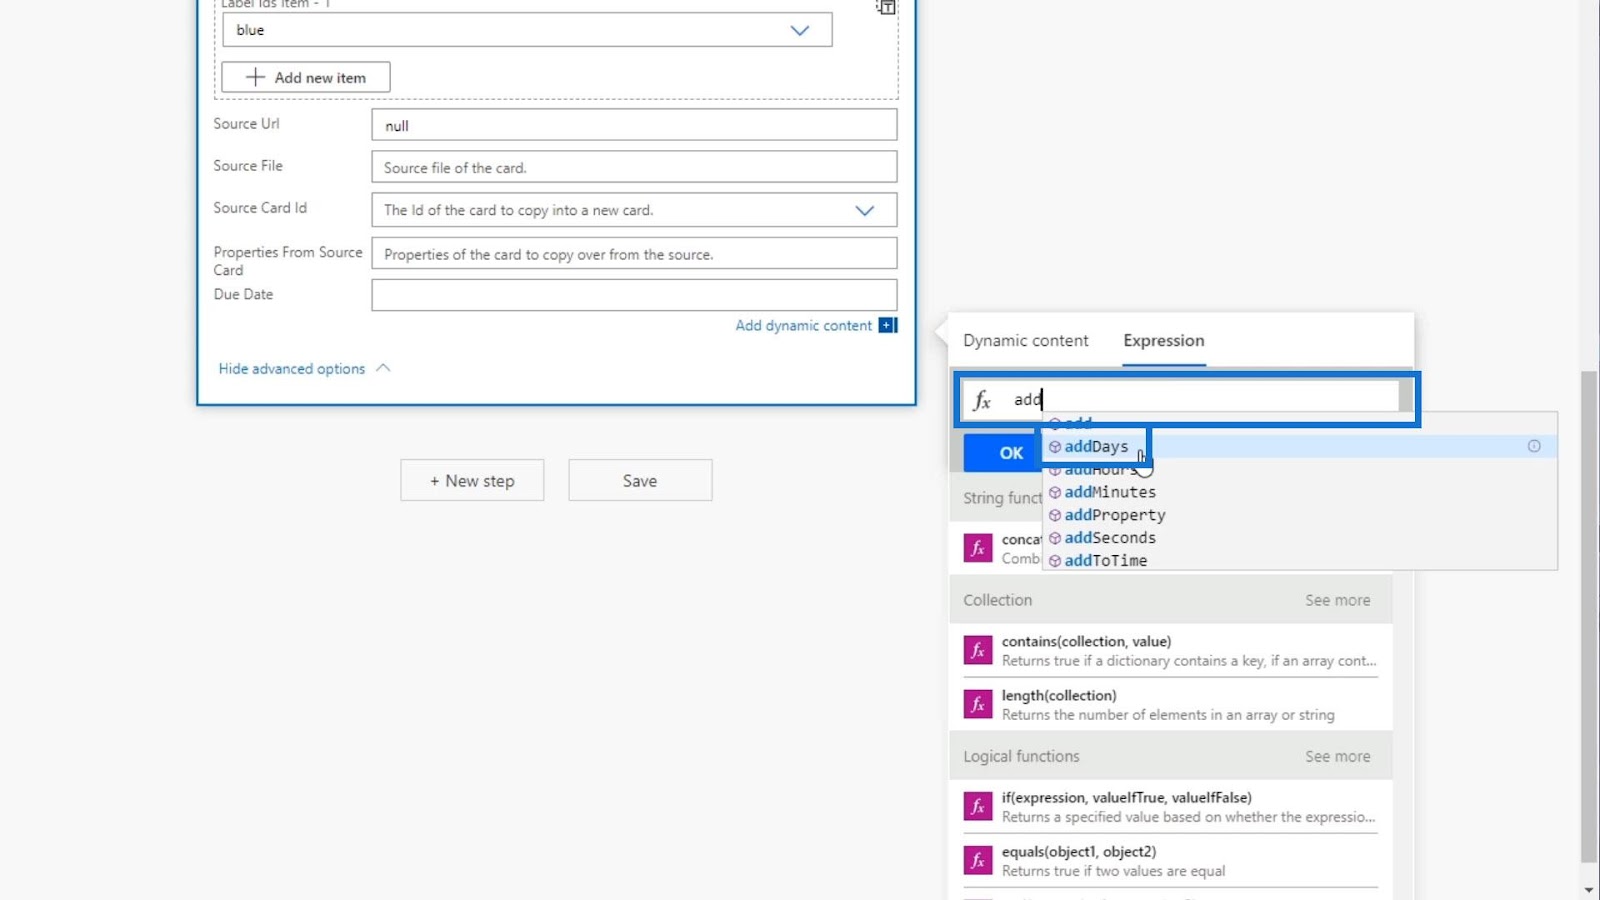
Let’s start setting the due date by using expressions. We need to use a formula that accepts a date and number of days. So, let’s use the addDays formula.
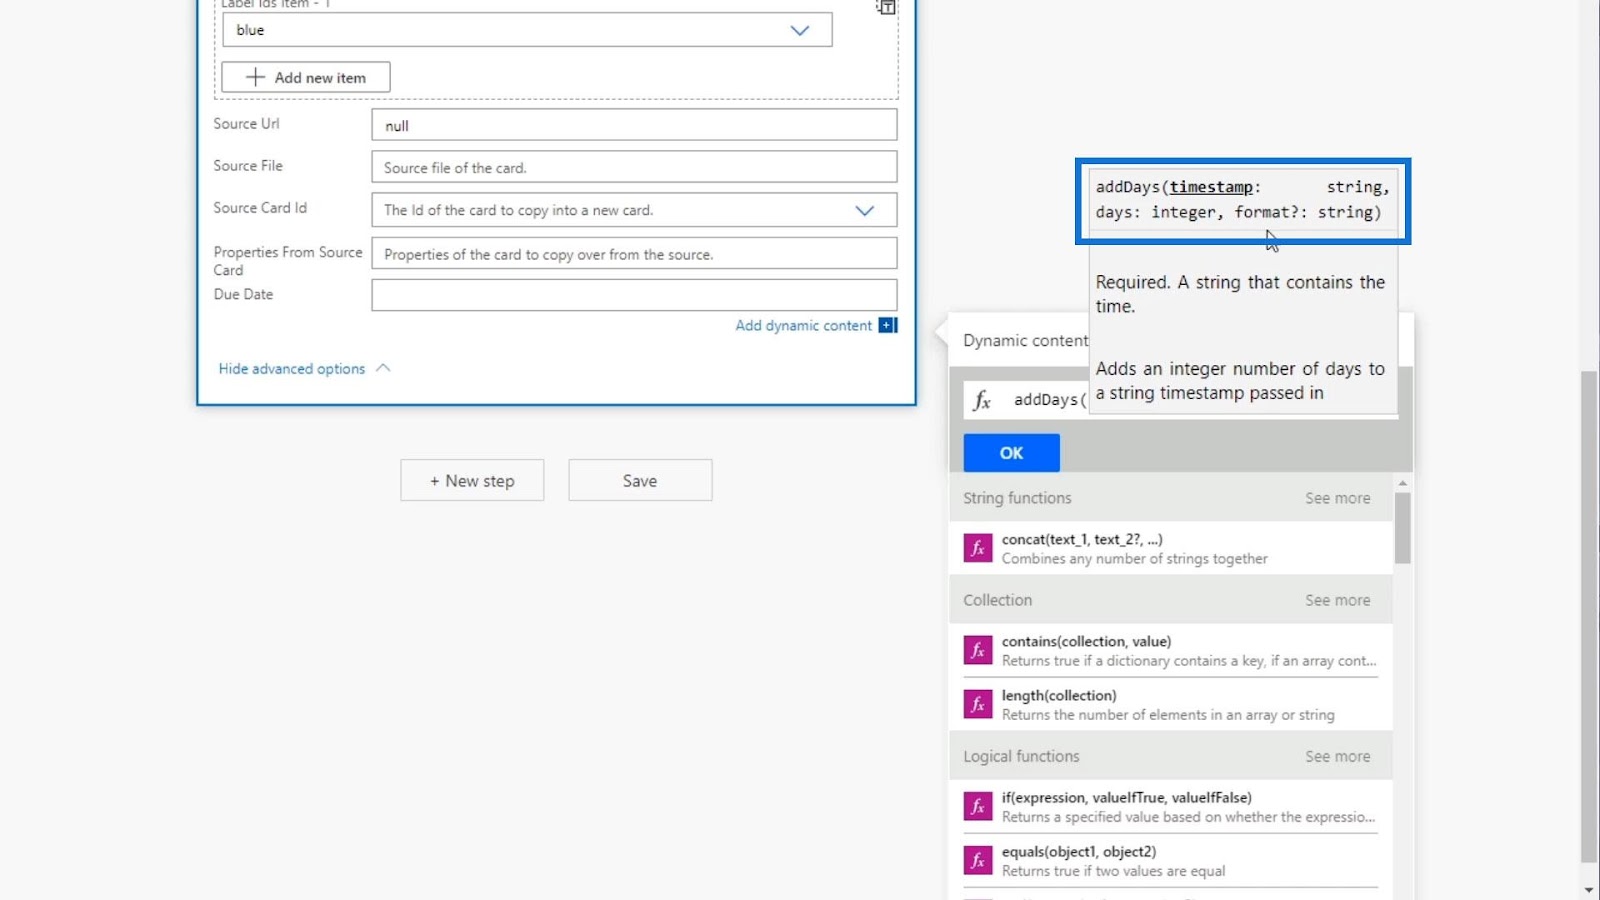
Then, let’s add an open parenthesis to check the needed arguments for this formula. As we can see, it requires a timestamp, number of days, and format.
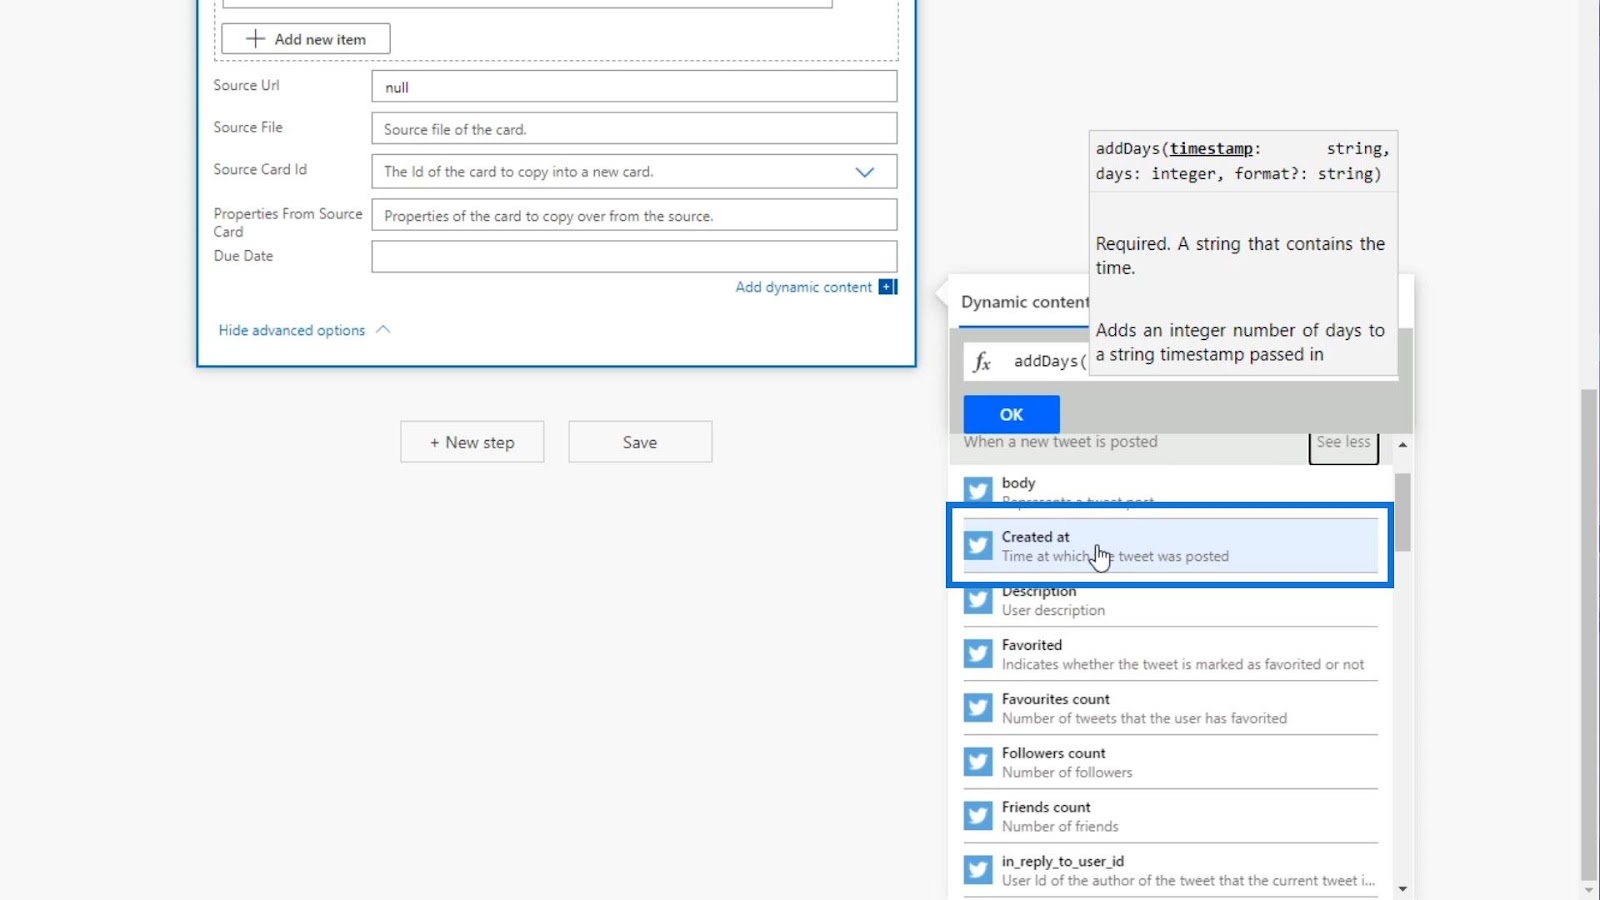
For the timestamp, we want it to be the date when the tweet was posted. So, let’s use the Created at variable from Dynamic content.
Let’s then add a comma (,) and add the number of days that we want. For this example, let’s make it 5 days.
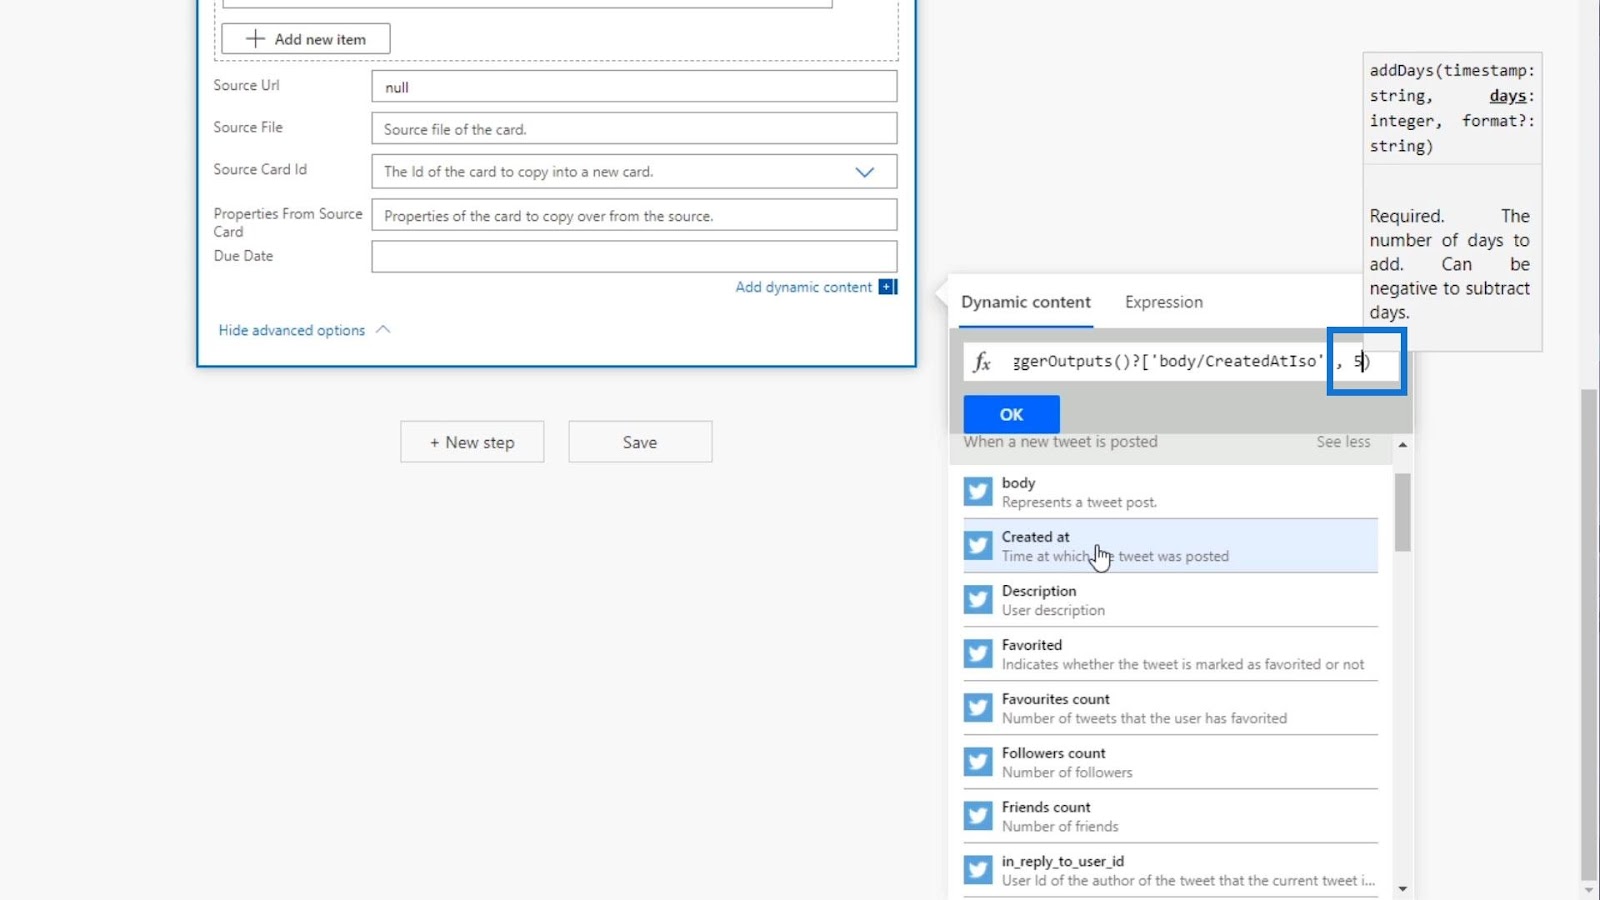
The format is optional so we don’t really need it. For this example, let’s not set any format.
Let’s now click the OK button to use our new expression.

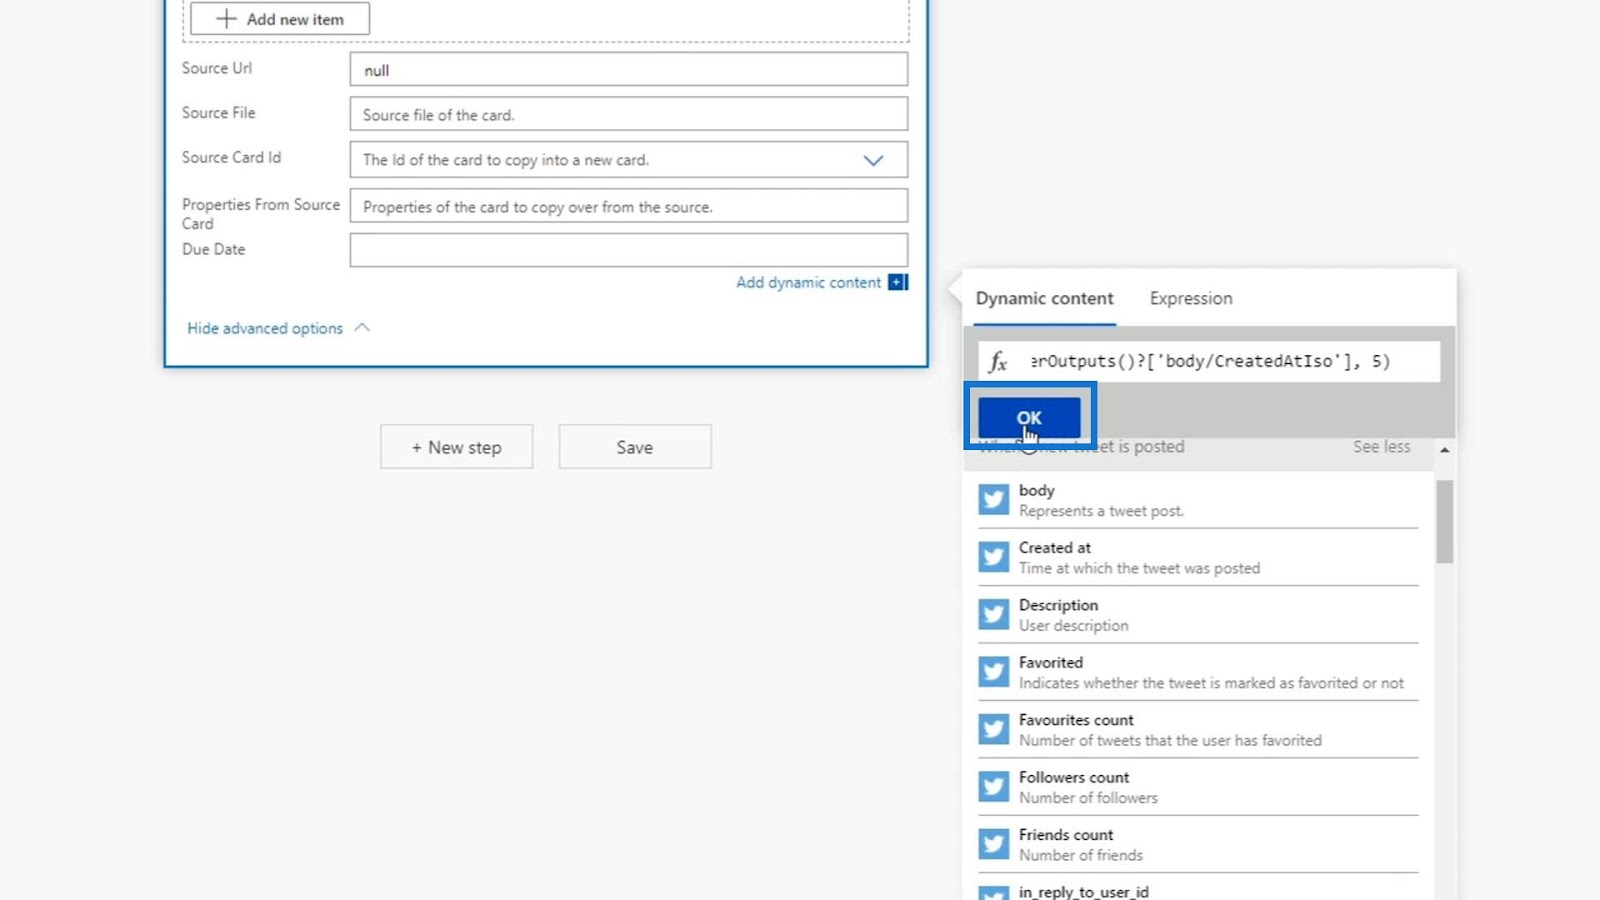
Then, our expression should now be added within the Due Date field.

Let’s click the Flow checker to check if there’s an error on our flow.
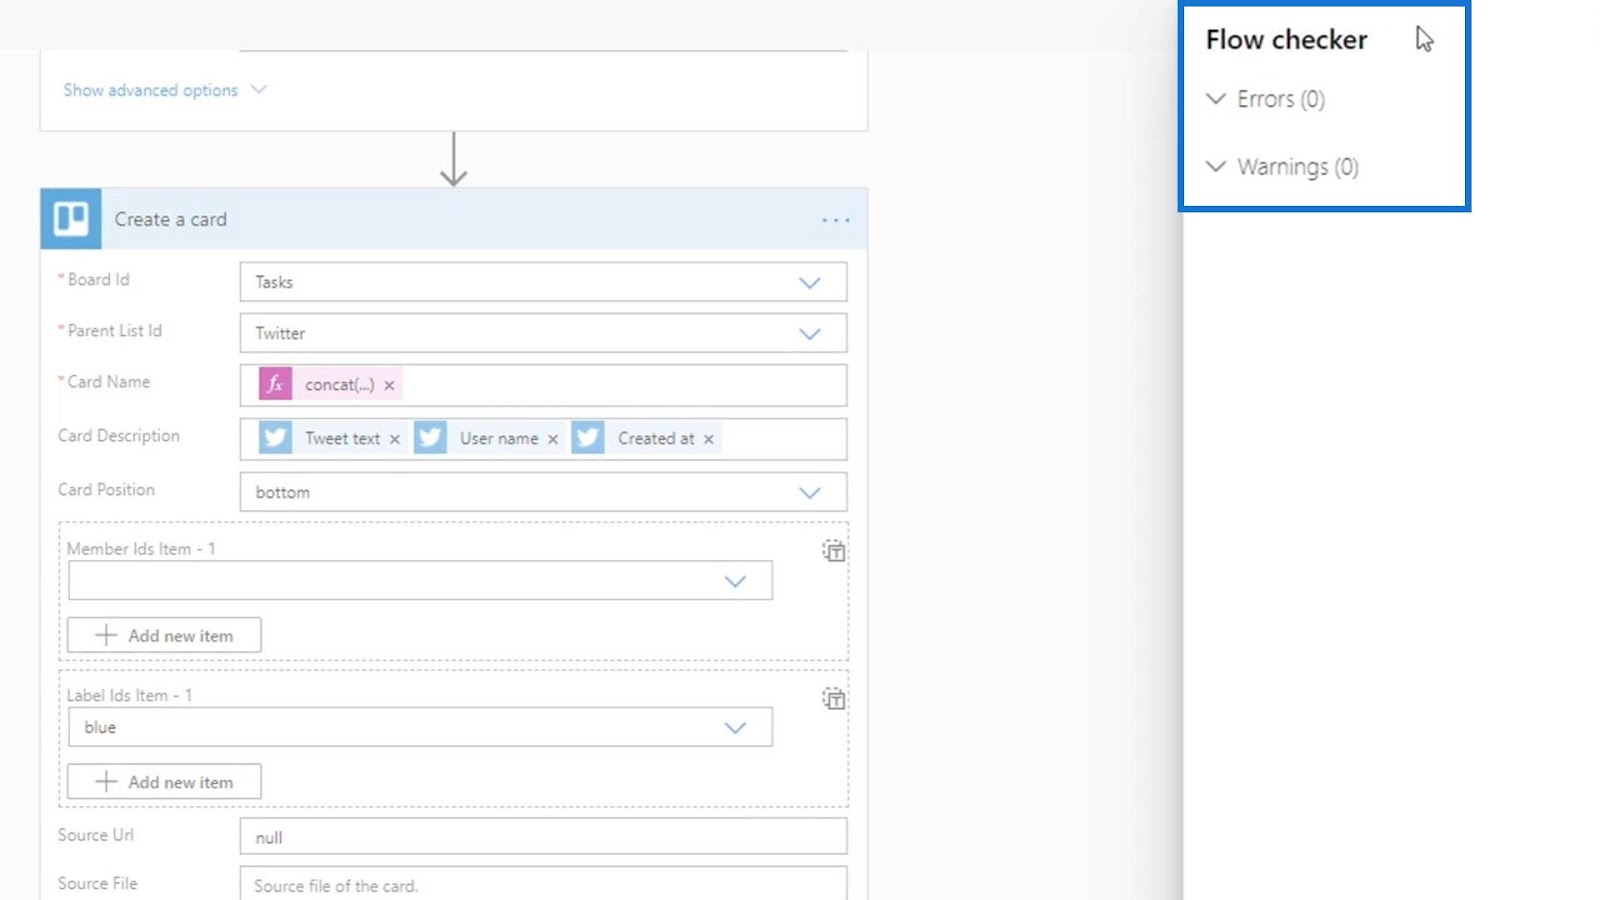
We don’t have any errors so we can simply save this flow by clicking Save.

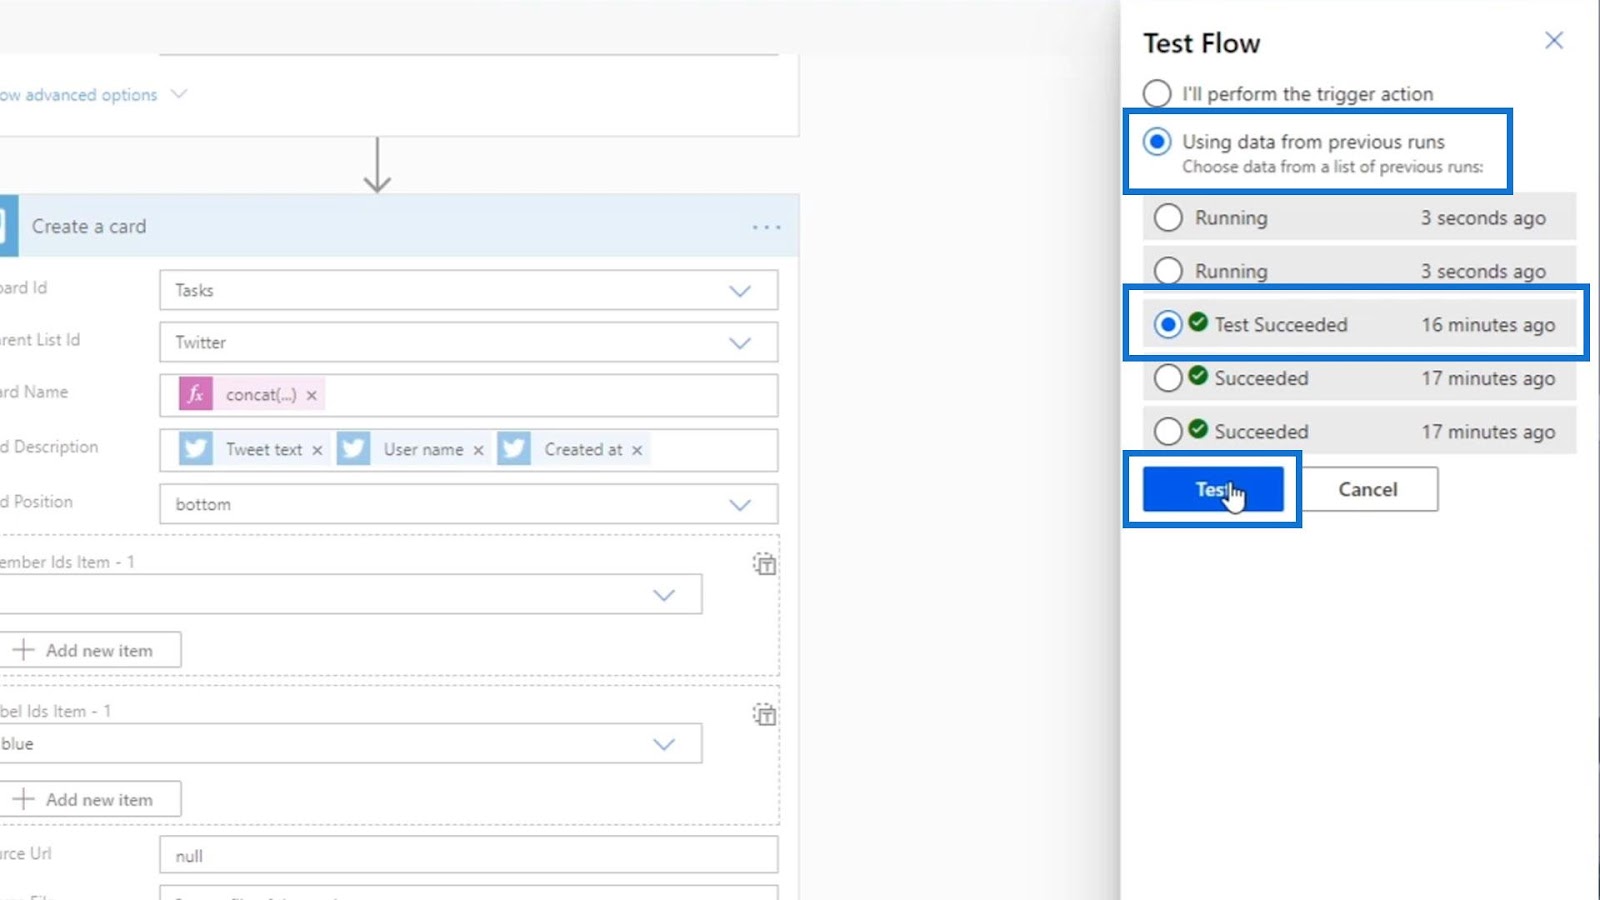
Again, let’s use the data from our previous runs and choose the Test Succeeded option.
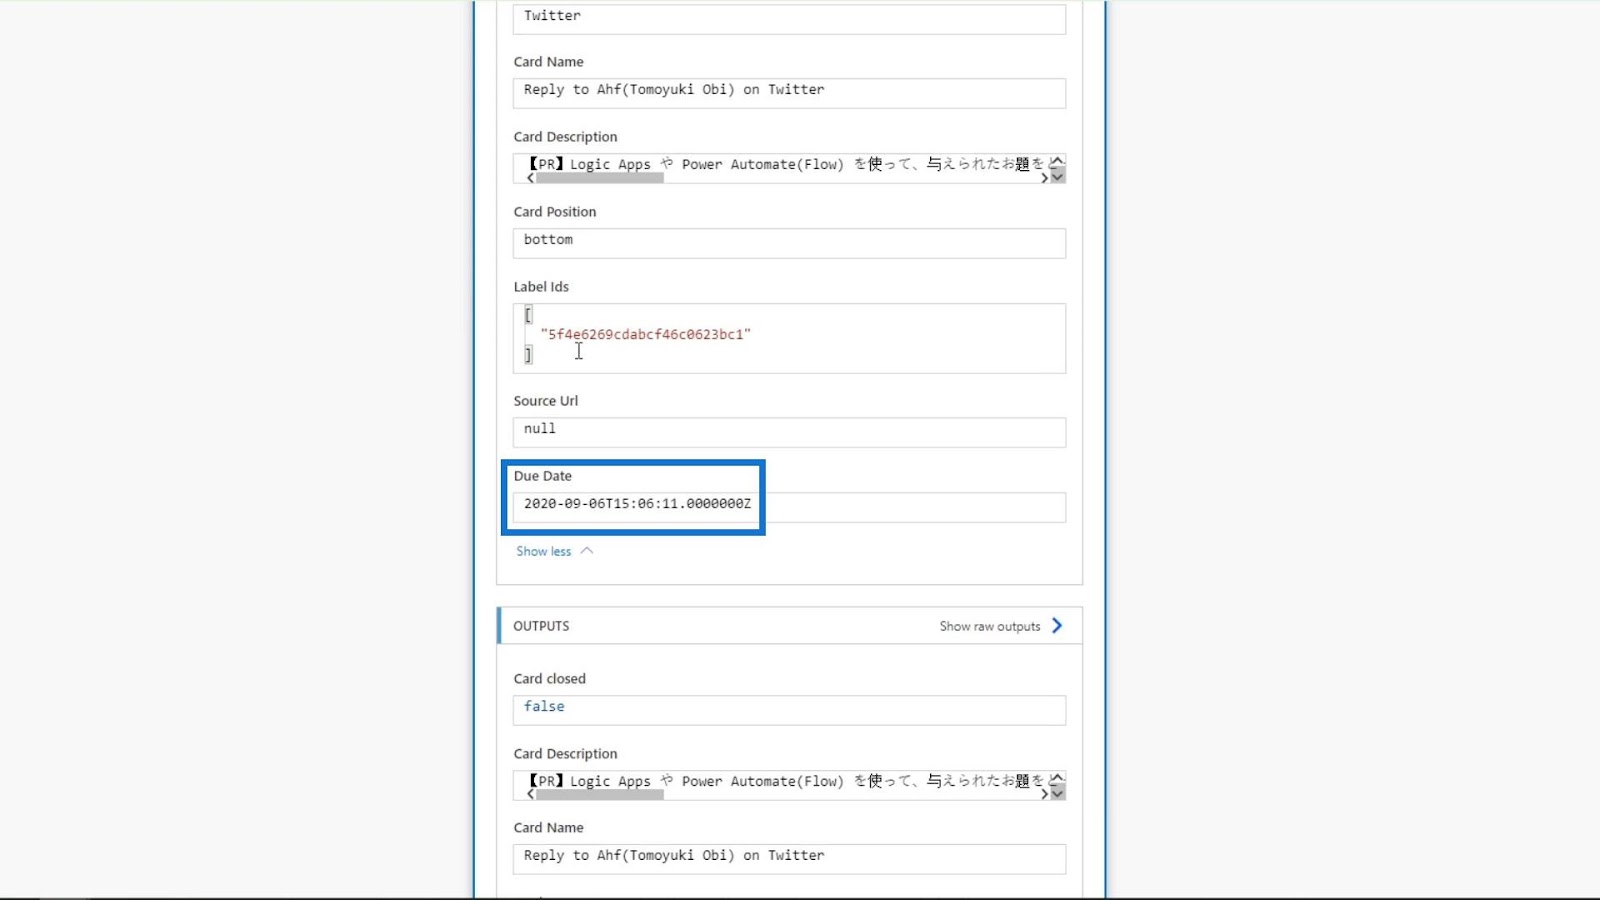
After running the test, let’s check the metadata.

Click the Show more option.

We can see the Due Date data which is September 6. This means it’s properly working because the date of the creation of this blog is September 1.
If we check the Trello board, we can see these newly-added cards with a due date on September 6 as well.

Conclusion
To conclude, we can do so much more with Power Automate actions by using the advanced options that are available. Aside from that, we can also use expressions that allow us to take inputs and modify them to be able to dynamically set the arguments.
That’s how advantageous Power Automate is, especially if you integrate this with your personal life, your business, and career.
All the best,
Henry
***** Related Links *****
Power Automate Expressions – An Introduction
Microsoft Power Automate: Workflow Automation
Automated Flow In Microsoft Power Automate
***** Related Course Modules *****
Microsoft Power Automate Masterclass
Power Apps Masterclass
Power Platform
***** Related Forum Post Links *****
New Dataflows Docs
Power Apps & Power Automate
Creating An Alert For All Users
For more Power Automate Actions support queries to review see here….


