I’d like to present the best practices I’ve adopted while preparing Power BI reports. Over the past few years, I’ve consumed many online resources on data loading and transformation which have been instrumental in my journey, but I quickly became overwhelmed by the content, so I ended up making my own notes. You can watch the full video of this tutorial at the bottom of this blog.
This is by no means an exhaustive list nor the best practices – they are just some of the ones that I’ve incorporated into my own development. Also, the best practices always evolve over time as new and enhanced capabilities are introduced in the Power BI application and are presented by the Power BI community.
I’d like to present the first of the four pillars of Power BI development. The four pillars are data loading and data transformation, data modeling, DAX calculations, and reports and visualizations. We’ll deal with the pre-development setup and the first pillar in this blog post.

Disabling The Auto Date/Time
It’s highly recommended you disable the auto date and time feature in Power BI. You can do this in two ways.
You can do this globally for all files with these steps:

You can also disable it for the current file by changing its setting.

Disabling Auto Detect Relationships
It is also highly recommended that you disable the auto-detect relationships. You can go to File, and view Options and settings to disable auto-detect new relationships after the data has been loaded.

Interacting With Visuals In Power BI Reports
The next thing I want to talk about is the two ways that you can interact with visuals in Power BI reports. These interactions can either be cross filtered or cross highlighted.

Cross highlighting is enabled by default in Power BI. You can change this by going into File then Options and settings. For the current file in the report settings section, you can change the visual interaction from cross highlighting to cross-filtering.
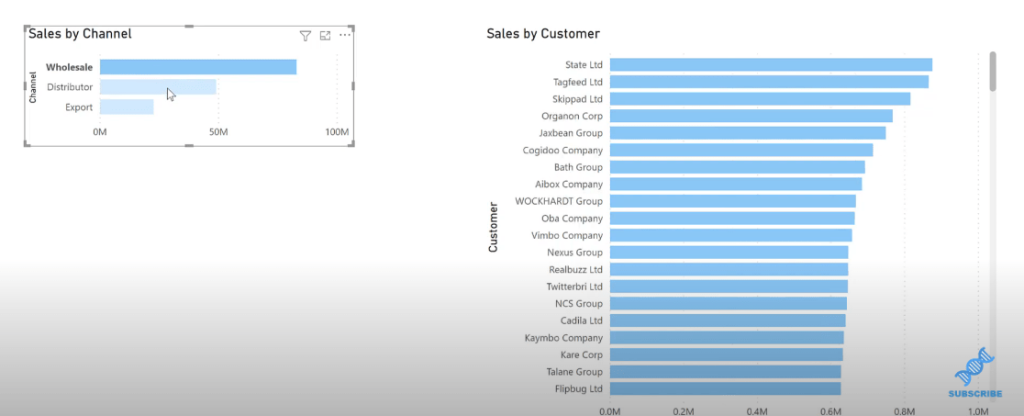
Let’s take a look at our report. You can see that by default, Power BI uses cross highlighting on related visuals. If I click on one channel from the left bar chart, you’ll see that the selected portion is highlighted in dark color while the unselected portion stays in light color in the second bar chart.
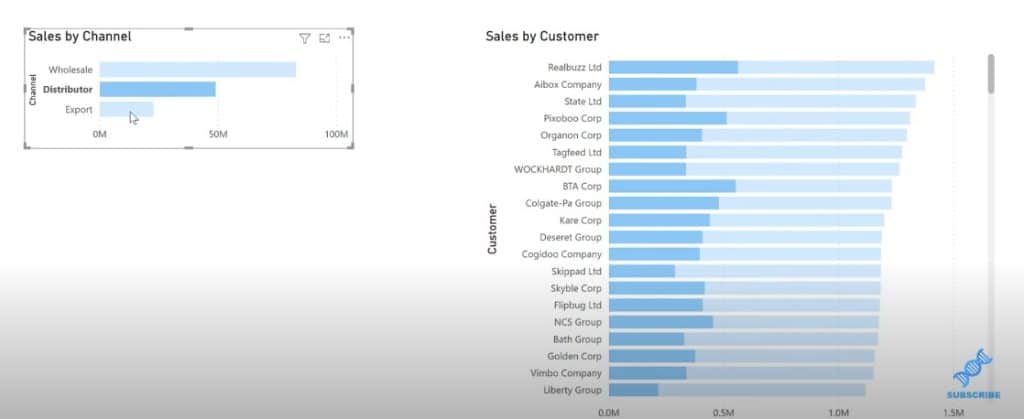
You can see that the full shape doesn’t change in the graph and you only see the highlighted portions. You can change this from the report settings, and change the default visual interaction from cross highlighting to cross-filtering.

Once you’ve done that, you’ll see that the shape of your related bar chart will change every time you make a selection or group of selections. This is a good practice to get into.
Separating Dataset From Report
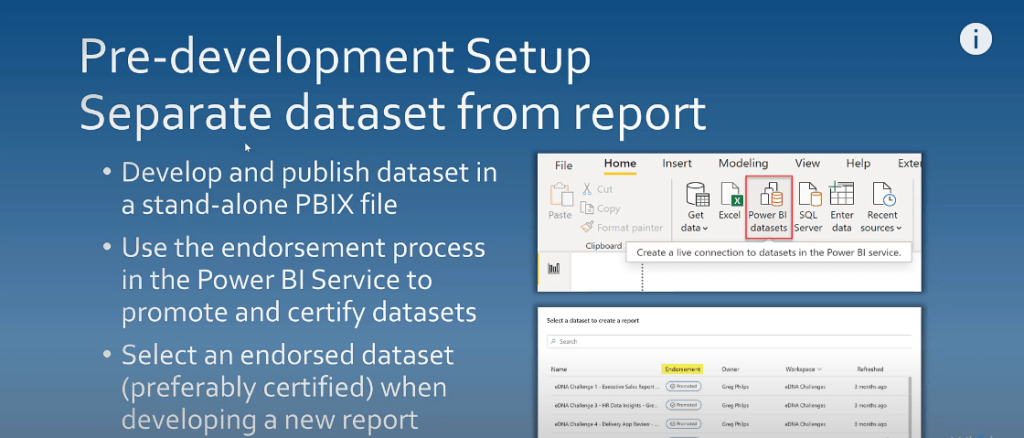
The next thing that I want to talk about is separating your dataset development from your report development. This is where you can have a thick dataset file published as a stand-alone dataset that has no visuals, and a thin report file development that will use these published datasets.
One of the advantages of publishing data sets separately is that you can use the endorsement process in the Power BI service to promote and certify datasets. It’s an ideal practice to select an endorsed dataset, preferably a certified one when you’re developing a new report.
Creating A Dedicated Dates Table
Make sure that your report has a dedicated Dates table in your report. You can use the extended date table that’s available on the Enterprise DNA forum. You can copy and paste the M code into a blank query.
The second thing to do once you do have a dedicated Dates table is to mark it as such. This will enable it to be used by Power BI for time intelligence calculations.

Other Reminders For The Dates Table
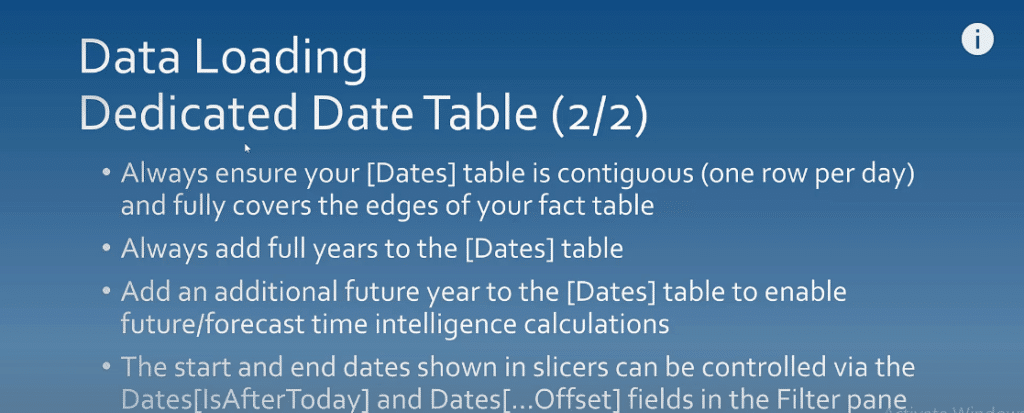
Always ensure that your data table is contiguous and that there’s one row per day. Also, check that it fully covers the edges of your fact table.
Also, add full years to the Dates table. It’s also a good idea to add an additional future year to the Dates table to enable any future or forecast time intelligence calculations.
If you have more days in your Dates table than you want to show on your report, you can control what is being shown in slicers using the IsAfterToday column or the offset columns that are available in the filter pane.
Asking Questions About The Report
The next thing I want to talk about is whether you should be doing a report at all. As you’re doing it, check to see if there is an existing report you can use to fulfill your need. If there’s no report, is there an existing data model you can use to fulfill the need? Is there an existing data set you can use or do you actually need to start from scratch?

Staging And Referencing Data
The next thing to talk about when data loading is the staging and referencing data. When you’re loading a flat data table, you may have facts and dimensions in the same table like an Excel file. When you do a load and move it into a staging query section and rename it, you can uncheck Enable load.
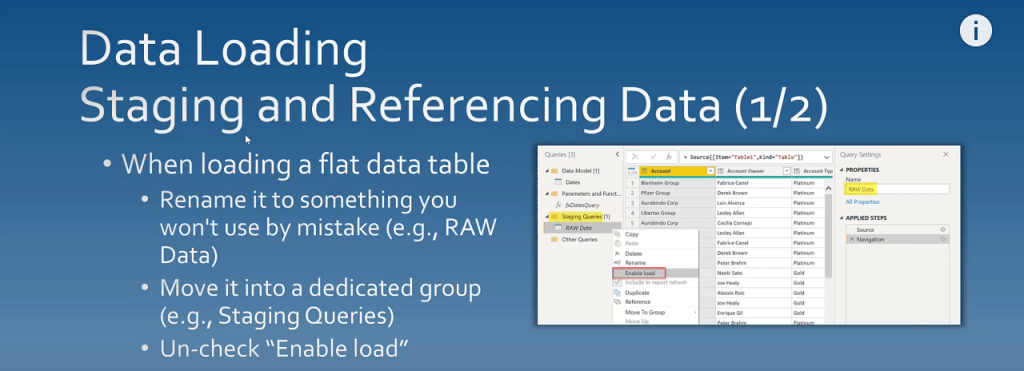

The next step is to create a reference of that table for each fact and lookup dimension and to rename the tables appropriately. Edit each reference, keep only the needed columns, and remove duplicates.


Organize your data model, and put it in its own group. I always have a group in my data models called Data Model which has all the tables that I’m going to use in my visuals.

Reducing The Data Load
The next thing to talk about is the performance of the tool when data loading. One of the biggest things that impacts performance is data volume, so strive to reduce the amount of data to be loaded as much as possible.
Follow this axiom:
If you don’t need it, don’t retrieve it.
It’s much easier to add new things into a report than it is to take things out of our report. Also when you put too many things into a report, you’ll be paying a penalty for performance that you need not experience.
Preferably, do your filtering in the source. If you can’t do it in the source, use the auto filter dropdown arrow in the power query to filter the fields that you’re interested in.

Also in the source, you can also reduce the number of columns that are being shown by using the Choose columns dropdown and selecting only the columns that are of interest to you.
You can use either Choose columns or Remove columns. I recommend using Choose columns as best practice because it is easy to go back to.
If you change your mind at a later date, it allows you a quick way to do it through the UI instead of going into the advanced editor and editing the M code directly.

Query Folding
Query folding is another data loading attempt by Power BI to combine several data selection and transformation steps into a single data source query.
To determine if a query is being folded, right-click on the applied steps of a query. You can see if a native query is grayed out.
If it’s grayed out then the query is not being folded. If it is not grayed out, then the query can be folded.
Let’s go to Transform data, then power query. In this table, if I right-click on the navigation step, I can see that the View Native Query is not grayed out so I can select it.

We will see a simple SQL select statement here.

If we go to the next step after the filtering has been done and view the native query, we can see that the query has been slightly changed and there’s a ‘where’ clause at the bottom of that query.

If we go to the third step and right-click on it, we can see that the native query is not grayed out, so we can select it one more time.

Once we select, we can see that there’s an even greater collapse of the three queries into one. This is Power BI saying that the best way to get the data into the model is for the source to do the work rather than me do the work.

Using Data Sources For Query Folding
Data sources that can typically be used with query folding are standard objects in relational databases like tables and views.
Custom SQL queries to relational databases cannot use query folding. Flat files and web data cannot also be folded.
Some of the transformations that can be used with query folding are filtering rows, removing columns, renaming columns, and joins to other queries from the same data source.
Some of the transformations that cannot be used with query folding include adding index columns, changing column data types, and merging or appending queries from different data sources.
Choosing The Correct Connectivity Mode
The next thing to do to improve performance is choosing the correct connectivity mode. Import mode is the default and should be used whenever possible as it offers the best report performance.
Direct query mode can be used if up-to-the-minute data is desired, but just be aware that it can and likely will have a negative performance impact.
Finally, a live connection mode is available when you’re accessing data warehouses like an SSAS multi-dimensional cubes.
Locating The Transformations
The next thing I want to talk about is the location of where these transformations are to be done. The best place to do them is in the source. If you can’t do them in the source, do them in power query. If you can’t do them in power query, then do them in DAX.
Perform your data transformations as far upstream as possible, and as far downstream as necessary.
If you can do something in power query, then you probably should.
Again, if it’s not something that’s dynamic within the context of report session, please consider doing it in power query to simplify your DAX and increase your report performance.
As far as the shape of your tables go, strive to make fact tables long and thin and strive to make dimension tables short and wide.
Best Practices On Naming And Data Types
Use a consistent naming and casing scheme that’s easy to understand for report users. Rename your tables and queries as necessary to conform to the naming and casing standards for your report.
Rename your columns as necessary to conform to those naming and casing standards, and also rename your power query steps as necessary to make the steps self-describing as you may not be the person that maintains the report.
Power BI does an excellent job of assigning the correct data types when importing data, but sometimes some adjustments are necessary as well. You should ensure that columns in different tables will be used as the linking columns between two tables that are of the same data type.
Ensure that all of your date columns are Date and not Text. Split your date/time columns into separate Dates and separate Time columns.
As a final step, recheck your data types. Make it a practice before hitting Close and Apply in power query to always recheck your data types since certain transformations can silently switch data types to text.
Sourcing Data At A Consistent Granularity
The last thing to discuss is granularity. During the data loading and transformation process, you should strive to source your data at a consistent granularity. When you’re combining different granularities in your solution, use power query (preferably) or DAX to allocate the reference data appropriately.
For example, if your main sales data is at the daily level, it’s granularity is daily. If your budget reference data is at the monthly level, its granularity is monthly. Here is a an example of a budget allocation DAX formula you can review on making the granularity adjustments.
***** Related Links *****
The Ultimate Budget Allocation Formula For Power BI Analysis
Best Practices For Transforming Data In The Query Editor
Advanced Transformations In Power BI
Conclusion
I hope you found this tutorial on data loading and transformation useful. If you did, please don’t forget to subscribe to the Enterprise DNA YouTube channel to ensure you’re notified of any new content.
Greg


