
In this blog post, we’ll take a closer look at a custom function for text cleaning that I created for our ongoing series at Enterprise DNA TV called Problem of the Week. You may watch the full video of this tutorial at the bottom of this blog.
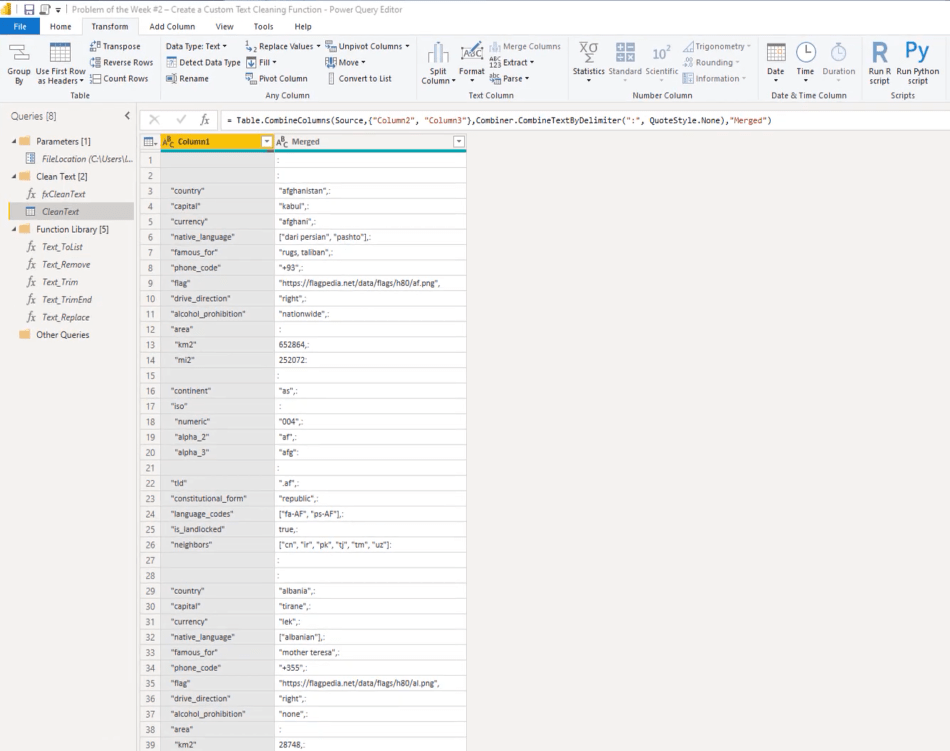
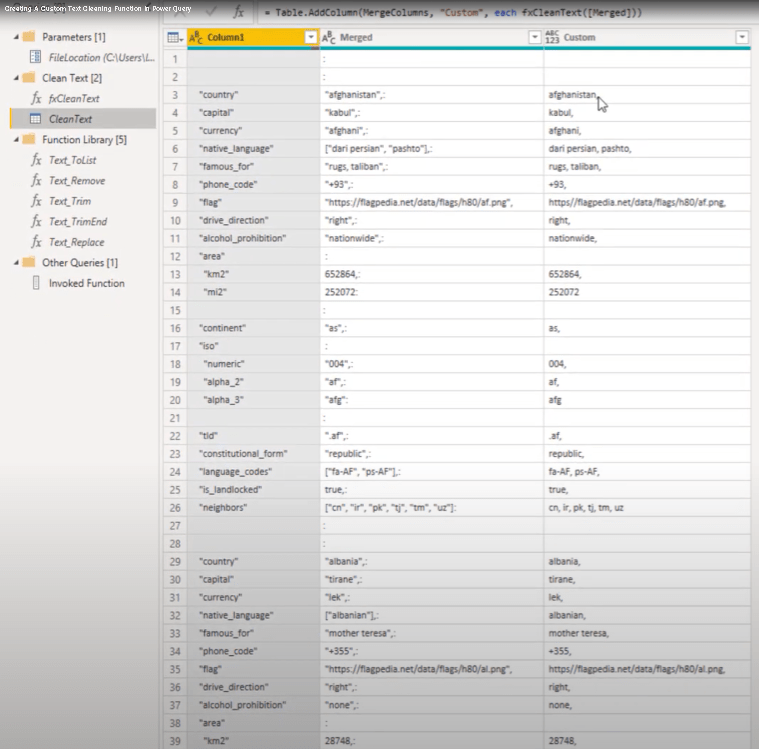
For week #2, we have some messy data that needs cleaning up. Our goal here is to clean all the text values in both columns up.
For this task, I created a clean text function.

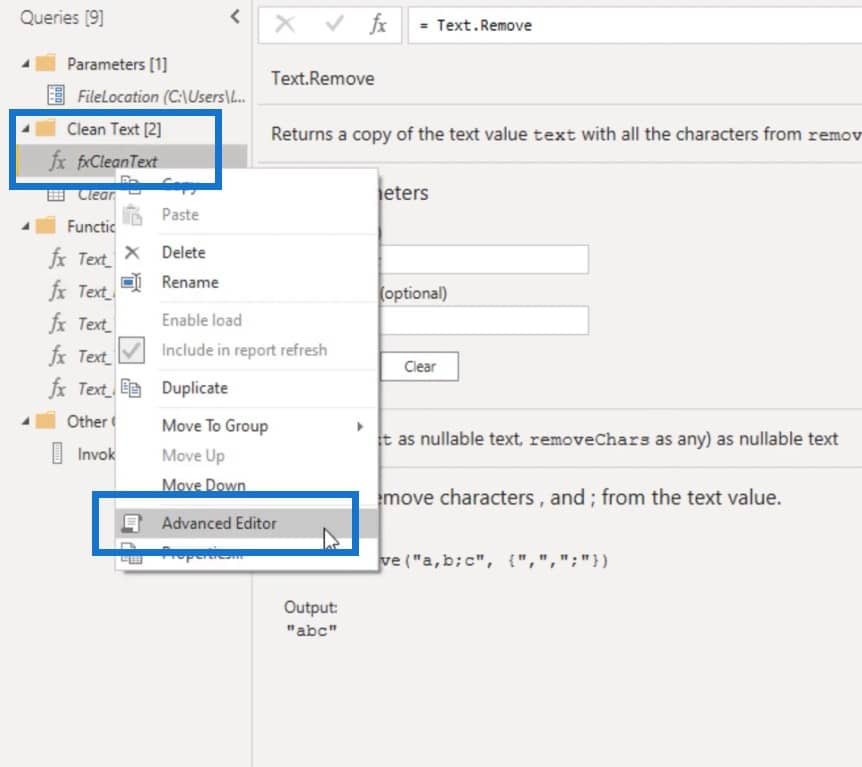
But first, let’s take a quick look at the M code.

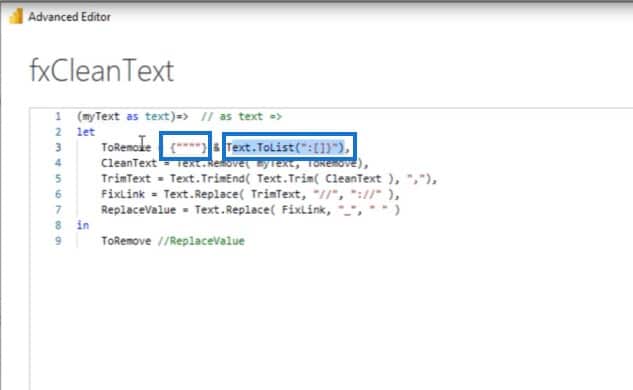
This function takes one parameter called myText. Its value should be of type text and the function should return a text value because not all the variables listed below will return a text value.
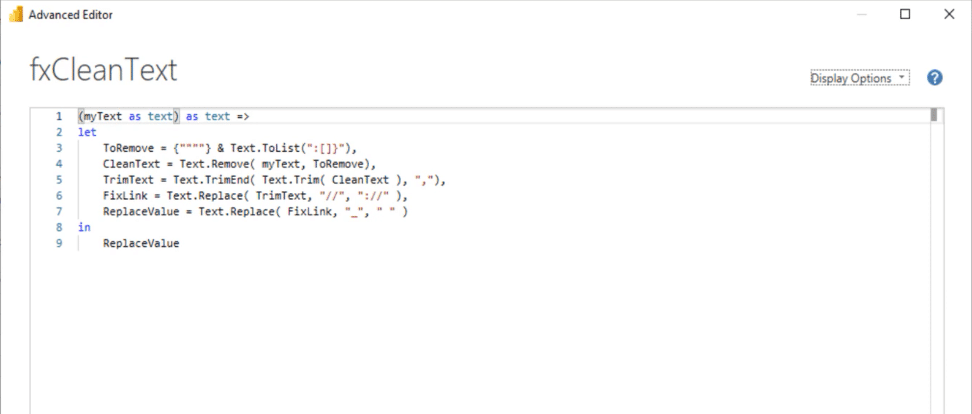
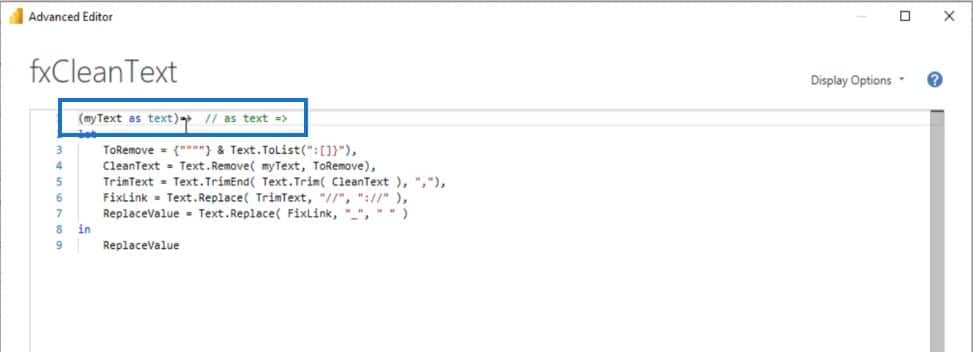
Declaring the return type will result in an error. To prevent that error from happening, I can comment that out for now.
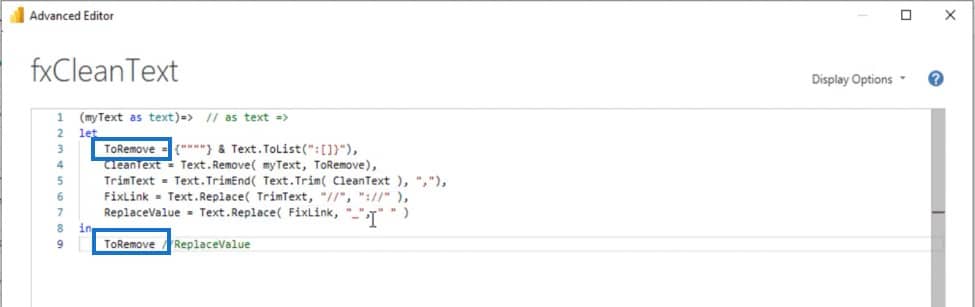
If we want to see what the first variable returns, all we have to do is refer to it by name, after the in clause. So I’m going to copy the ToRemove variable, paste it at the bottom line, and press Okay.
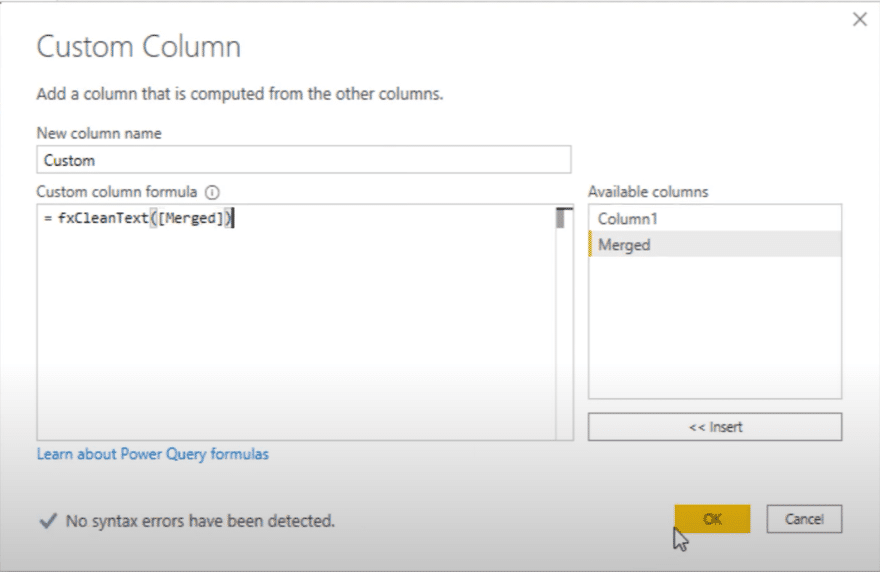
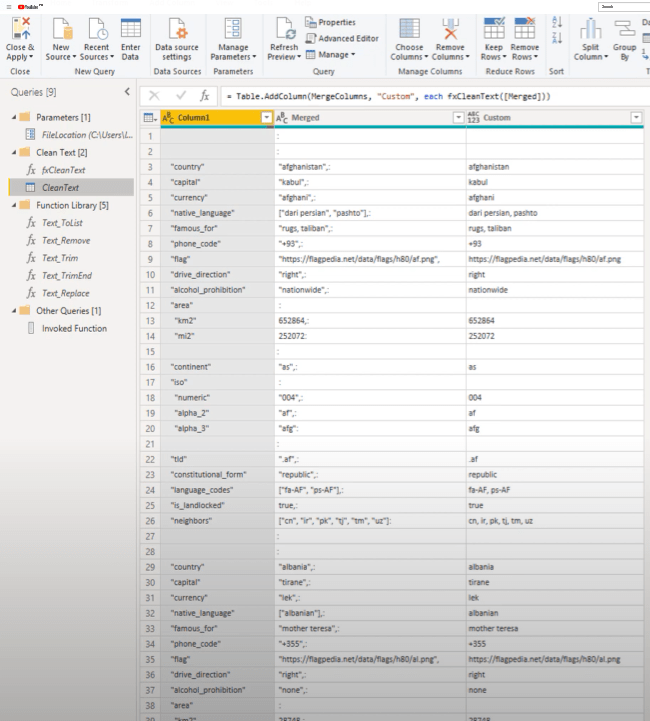
To see the result of that function, we have to invoke it. So let’s add a custom column to this query.
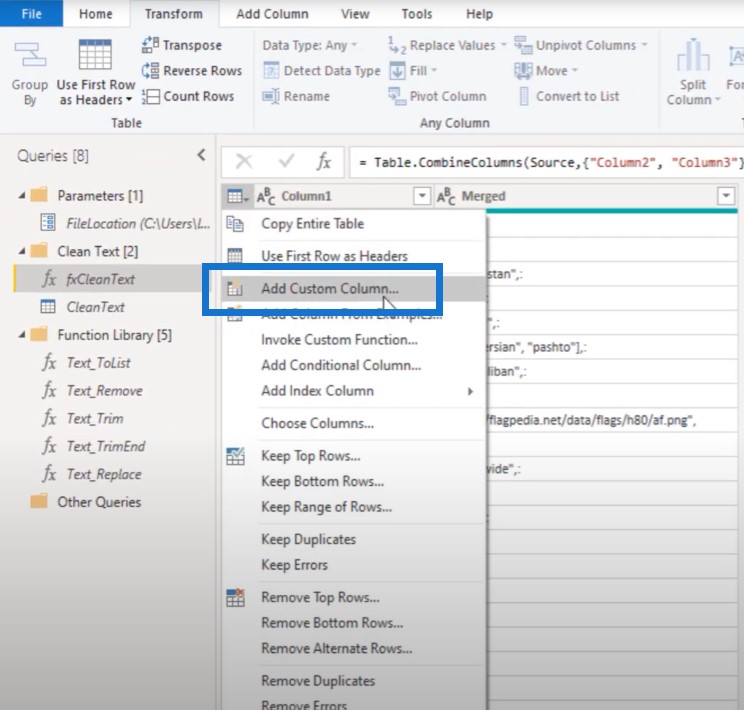
Then invoke our function, select this merged column, and press Okay.

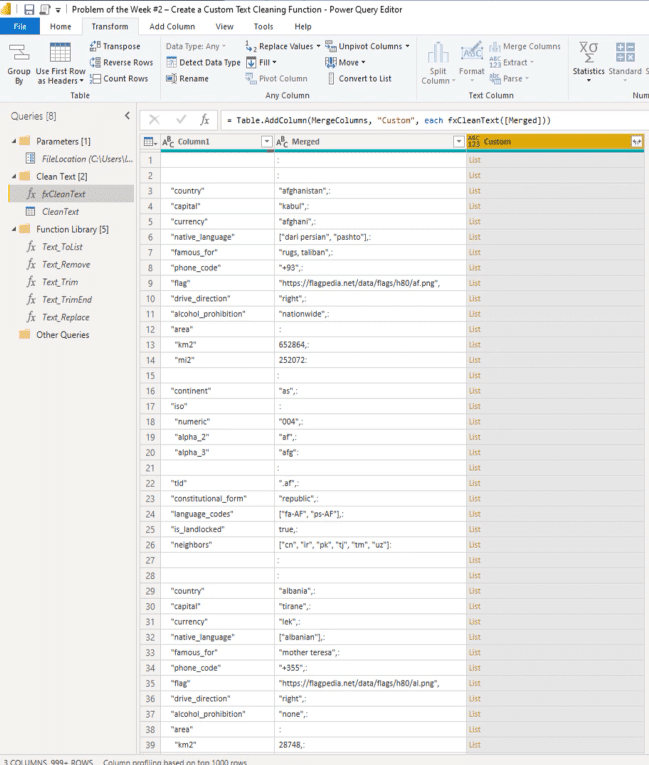
Creating The Lists From Blank Query
We now see that the ToRemove step creates a list. In fact, it is a combination of two lists.
The first list created the quote signs and the second list is a range of characters that I wanted to remove.
How did I create this list?
Well, I used a function called Txt.ToList.
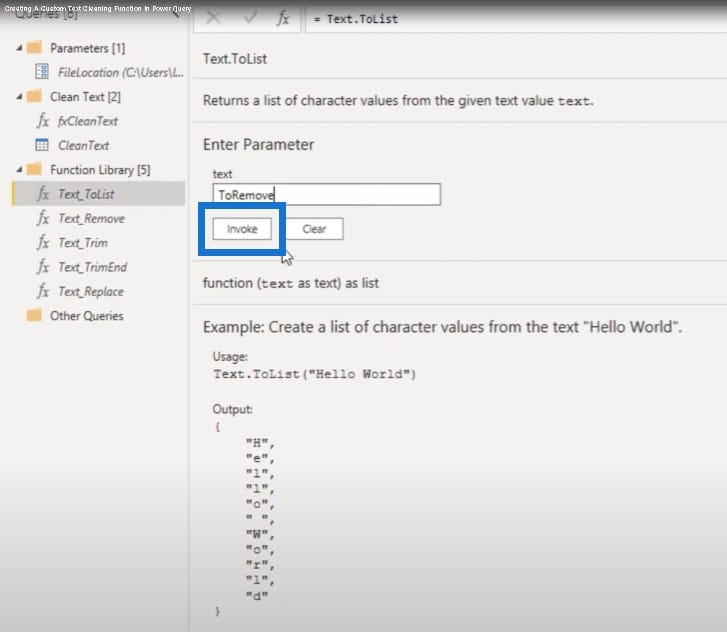
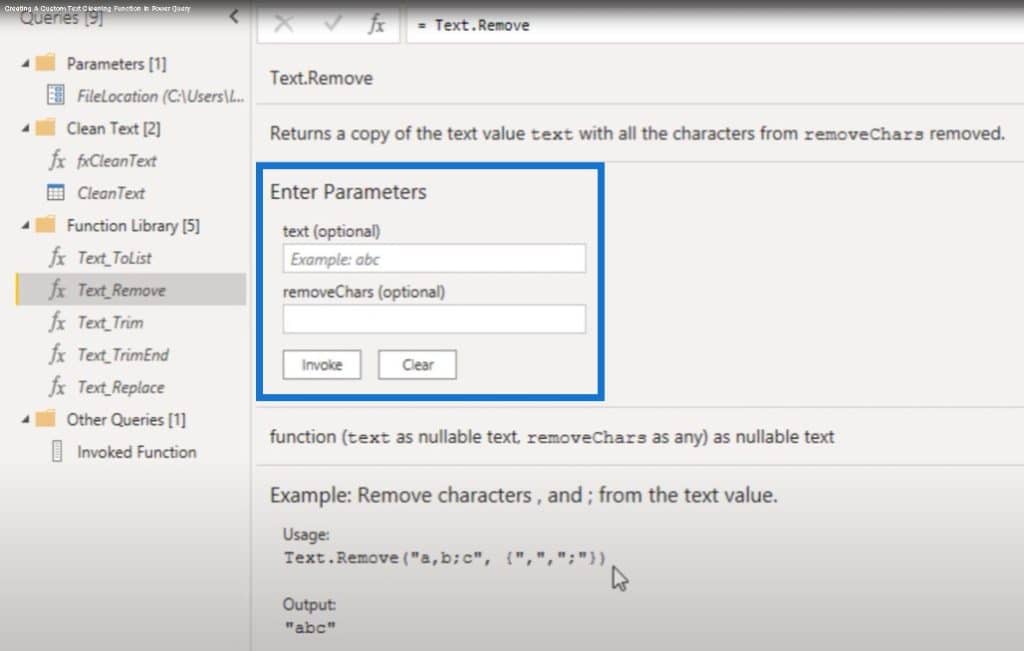
You can access the internal function documentation by creating a blank query, entering the function name without the parentheses and by then pressing Enter.
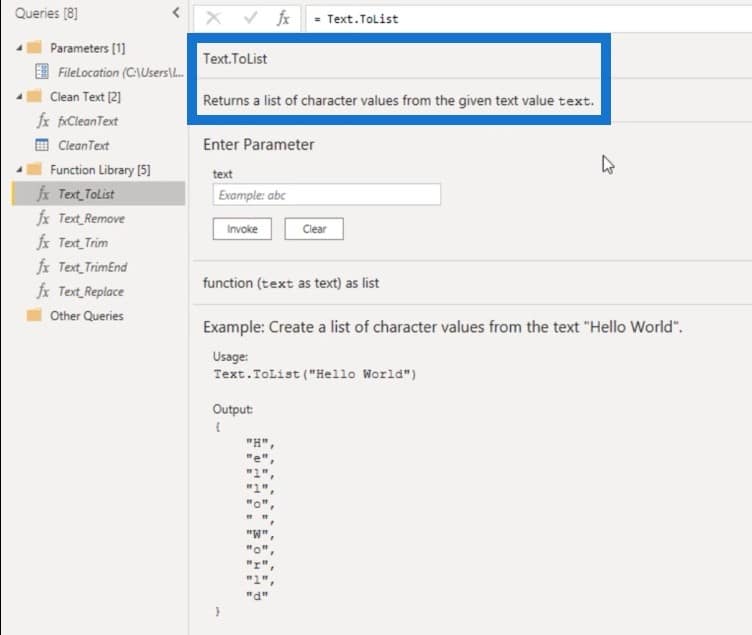
We see that Text.ToList returns a list of character values from a given text value.
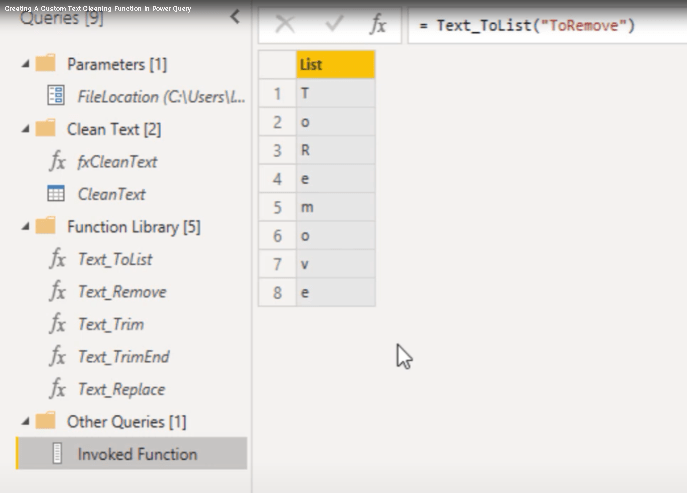
Let’s paste in some texts and invoke this function.
It creates a new query and you can see that this list contains all the letters that we see here in the text.
Remember that I added an additional list, right? I combined two lists and I used the ampersand to do that.
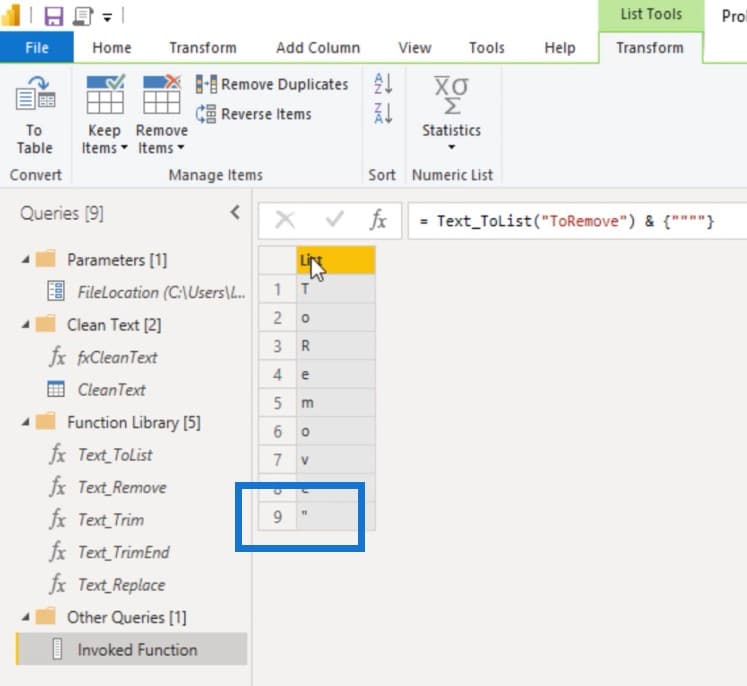
Let’s recreate that now. I used the ampersand and the list initializer, then entered those quote signs.
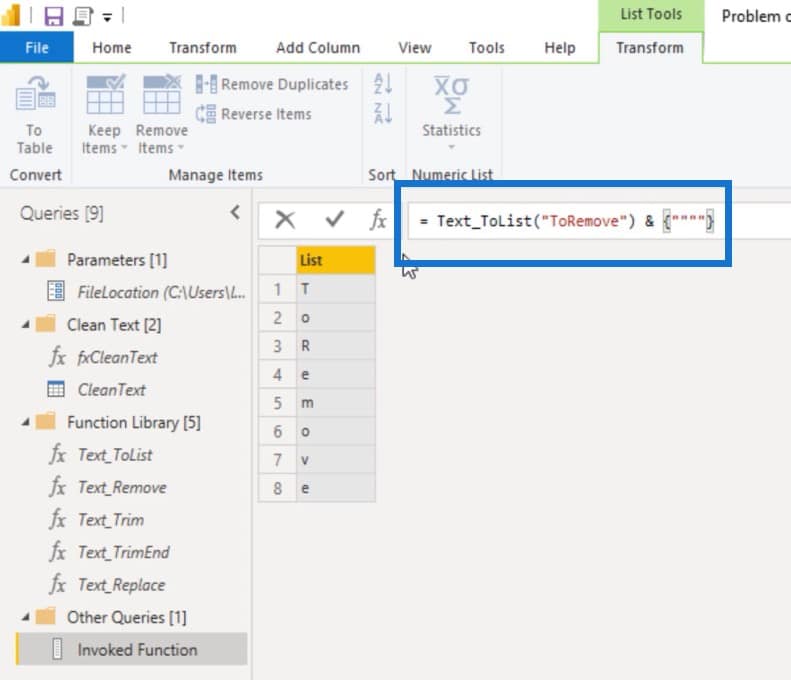
We now see that the quotes have been added to this list, but why did I create a list?
Well, in the next step of my text cleaning function, I used an M function called Text. Remove.

And you see that you can enter a text and then a list of characters that you want to remove from that string.
Let’s go back to our text cleaning function.

To. Remove created these two lists, and then combined them together into a single list.
And then let’s paste in the CleanText variable. The ‘in’ clause calls the M function Text.Remove and passes the myText variable, and then calls the To.Remove list. Let’s see what this does.
Let’s go back to our query. This no longer returns a list, but it returns some text values.
Trimming In Power Query
The next step is trimming. As you can see from the image above, we have some additional spaces and a trailing comma at the end that we want to get rid of. To do this, we can use the trim functions. Let’s go back to query to examine the M code.
In the M code, I nested 2 trim functions. The first string function removes the additional spaces at the front and end of our CleanText variable.
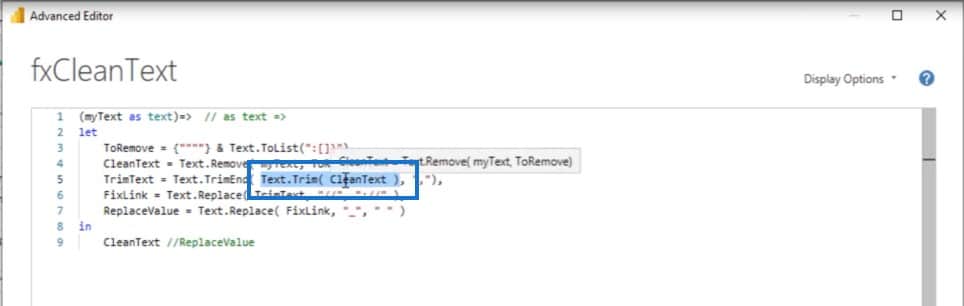
For the remaining texts that we have, we’ll also remove the spaces from the result string.
We’re also going to remove the trailing comma.
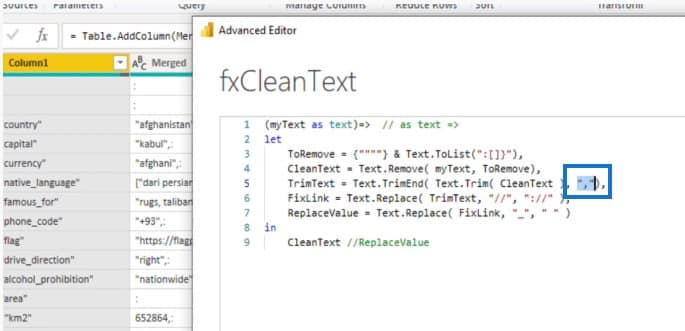
Let’s see the result. I’m going to copy the variable name, paste it after the ‘in’ clause, and click Done. When we refresh our query, you can see that the additional spaces have gone and the trailing comma has been removed.
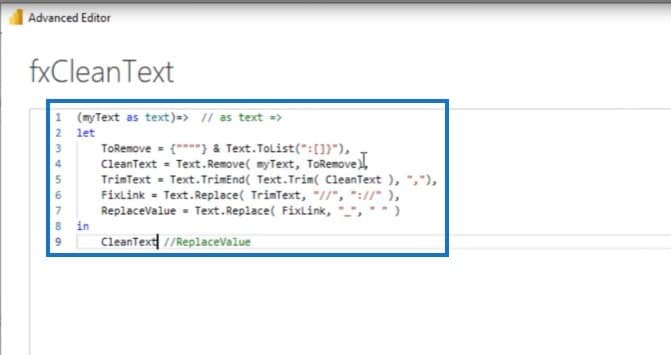
In the final steps of my query, I just replaced some text values.
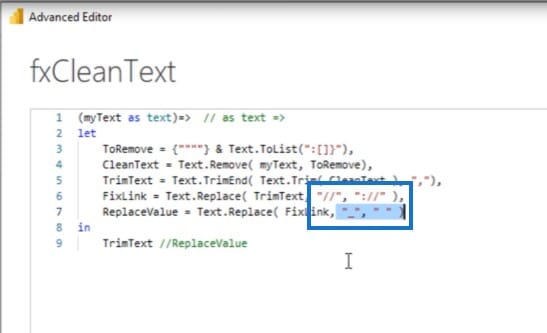
In the last case, I replaced that underscore by a space. Let’s copy that and paste it in after the ‘in’ clause. I also enabled the return type again.
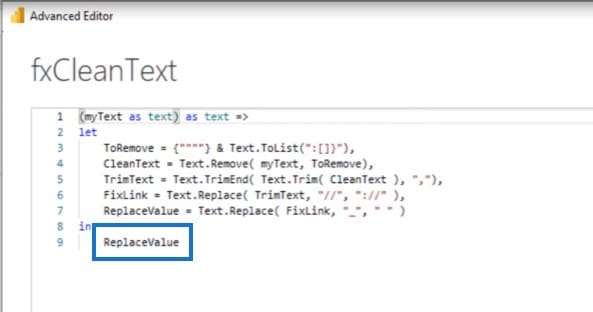
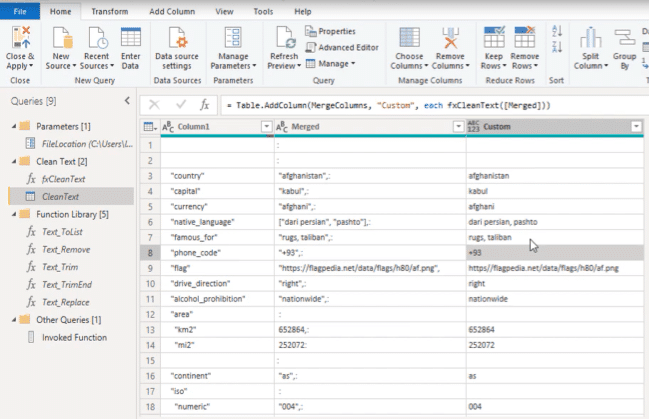
Let’s go back to our query and examine the results – so far, so good!
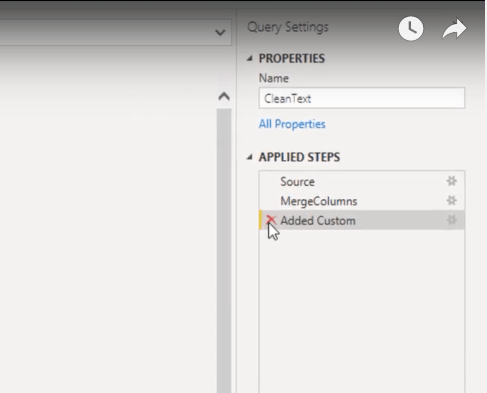
Now, we don’t want to create new columns to invoke our function, right? What we can do is transform our column 1 in our merge column instead.
I’m going to remove this custom column step.
Then I’m going to use the UI to create the bulk of the code for us. On the transform tab, select both columns, go to Format, and select a function.
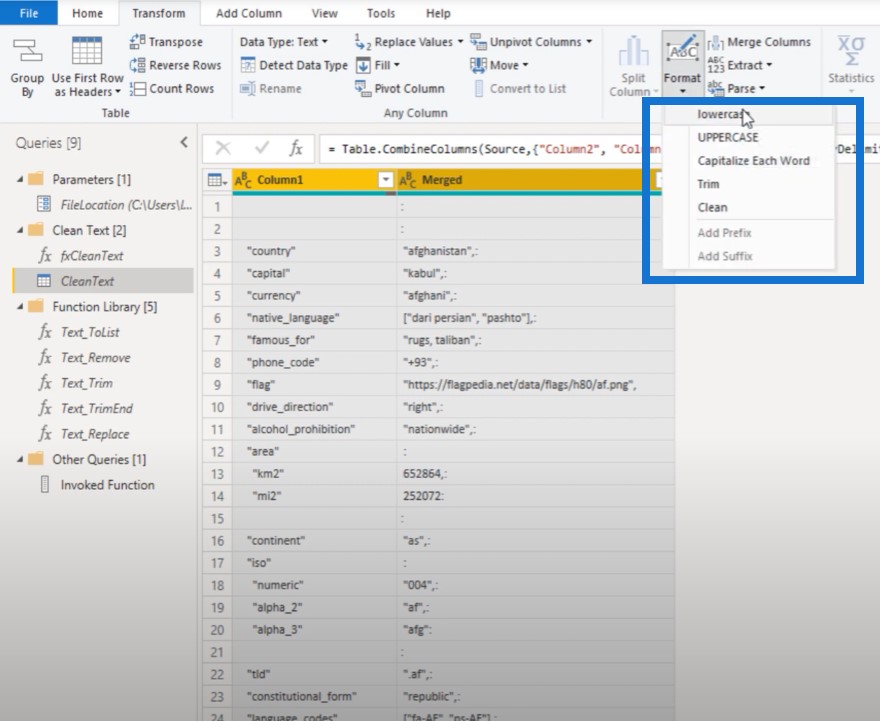
It really doesn’t matter which function is selected because this is the M code that’s generated by the UI. We can now replace that Text. Lower function…
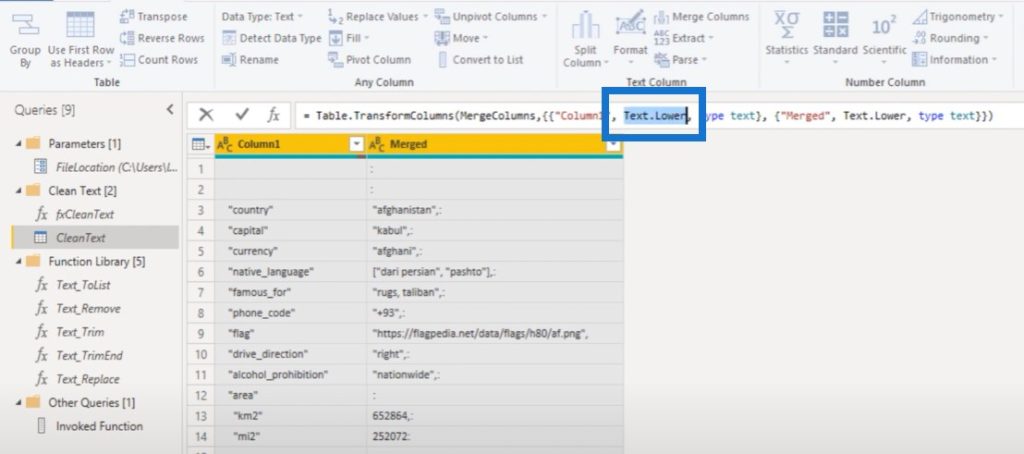
… with our clean text function. Hopefully, you’re getting why I had to add fx in front. There is no ‘in function’ that starts with that.
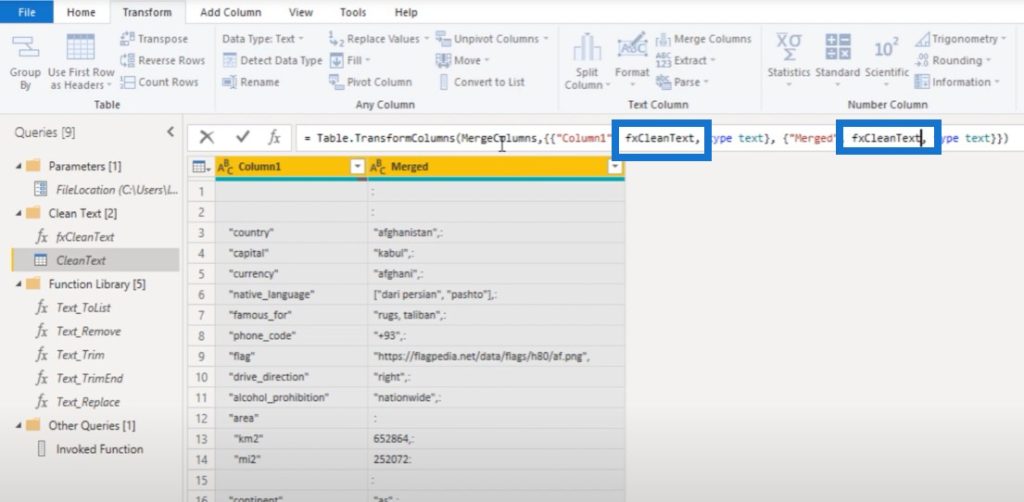
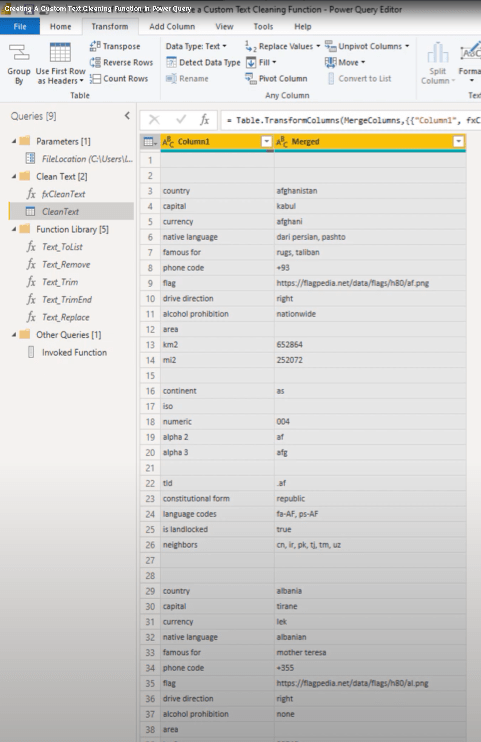
When we press OK, you can see that our texts have been cleaned. This is awesome.
***** Related Links *****
Beginners’ Guide To The M Code In Power BI
How The Query Editor Works In Power BI
Unpivot Multiple Columns Dynamically In Power BI
Conclusion
Why did we have to go through all the trouble in creating a custom cleaning function? Well, if it’s likely you will have to repeat this step or use similar logic in the future, you can store this function query.
By doing so, it will speed the query development up at a later stage. Another good reason is because it’s also fun to do.

I hope you’ve enjoyed this tutorial. If you did, please don’t forget to subscribe to the Enterprise DNA channel.
Melissa
[youtube https://www.youtube.com/watch?v=WEbKDVAbLdk&t=144s?rel=0&w=784&h=441]


