I’m going to show you how to turn an M code for a date table into a table query. You may watch the full video of this tutorial at the bottom of this blog.
I would consider the level of difficulty for this tutorial as intermediate because if you have any experience with M codes, it would be easy for you to follow along. If you don’t have any related experience, I suggest you look into M codes first to make it easier for you to grasp the concepts presented here.
Invoked Function Query And Date Table Query
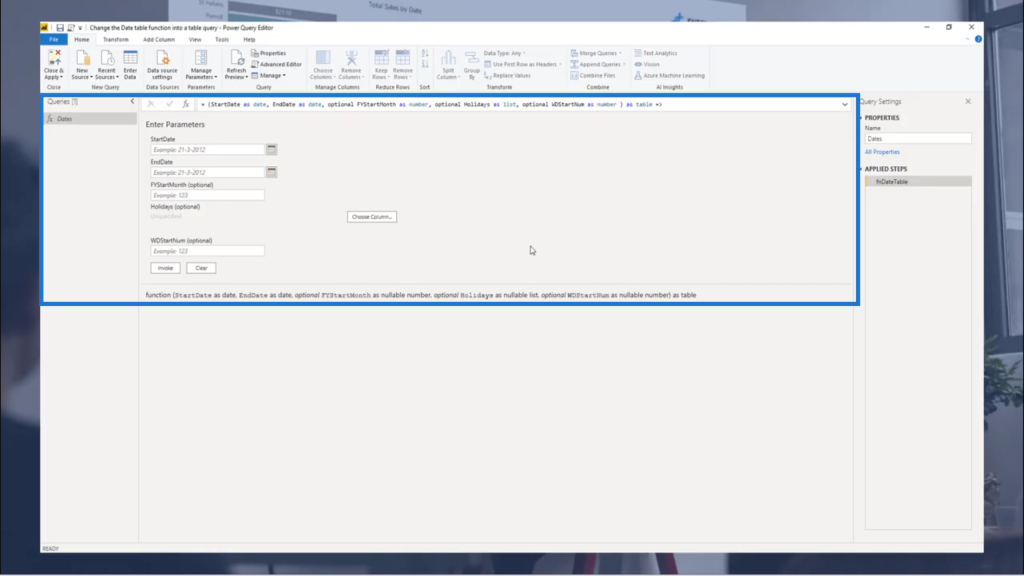
This is the date table query and the invoked function query.
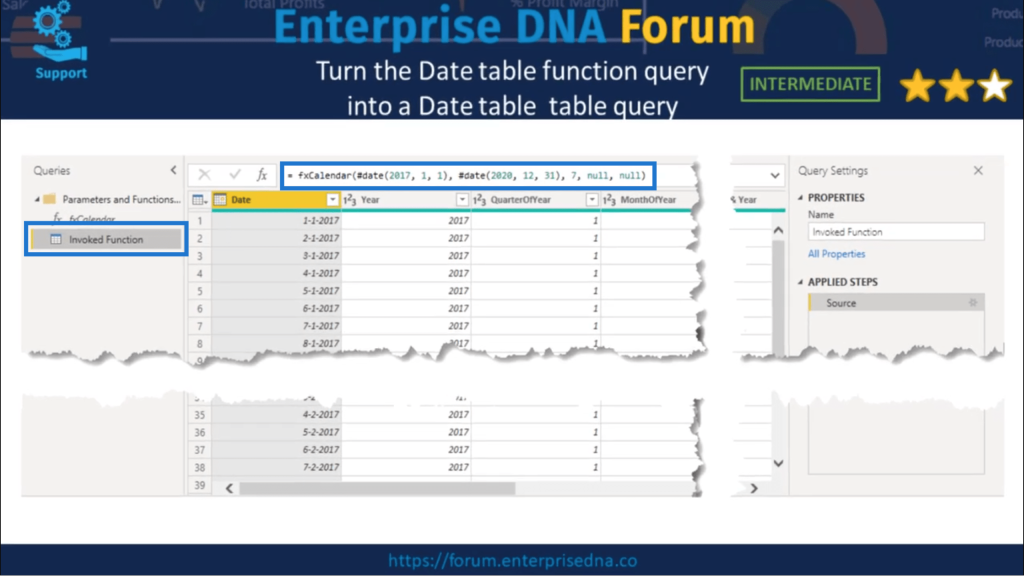
If you look at the Applied Steps pane on the right, there is only one step. It shows the source for that query.
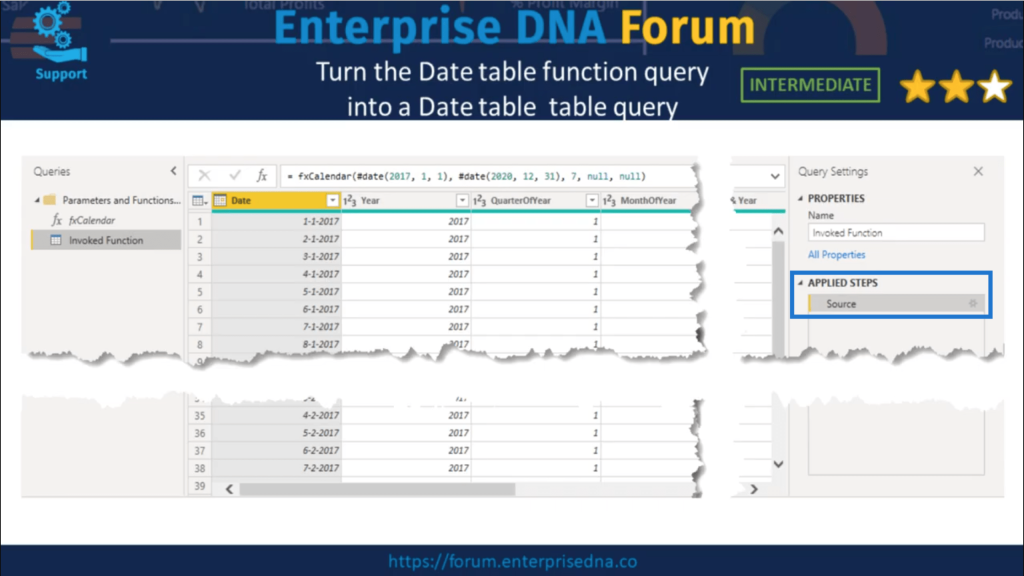
So, if you want to develop the M code for this date table, you’d have to switch between the function and the table query to see any changes you apply.
This means that it’s more complicated to deal with errors caused by any of your changes. It will lead to an error in the table query itself, then you’d have to search through lines of code to fix the error.
The next page shows the date query returning a table instead of a function.
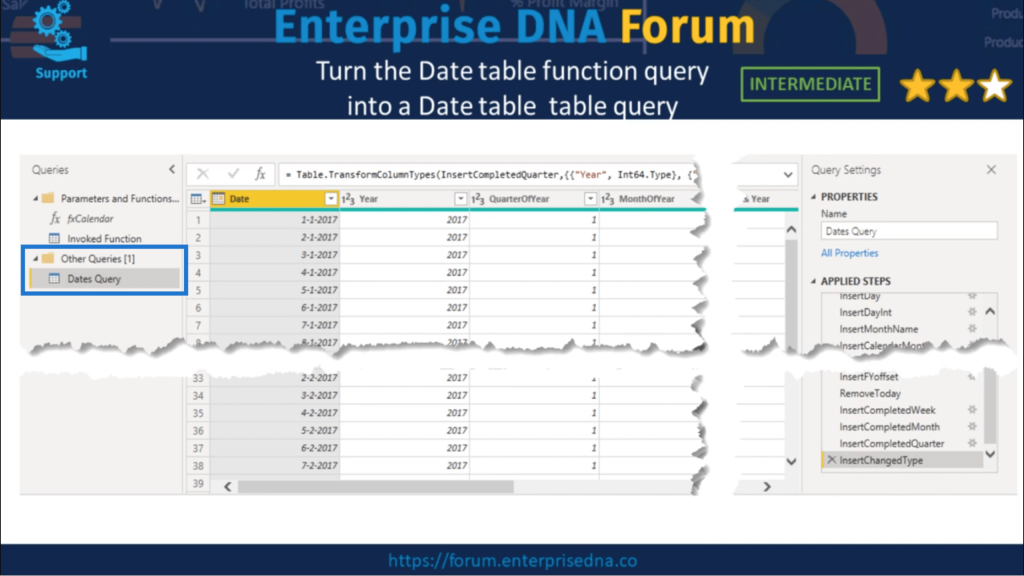
Looking at the Applied Steps on the right, you’ll see that there are multiple steps listed this time.
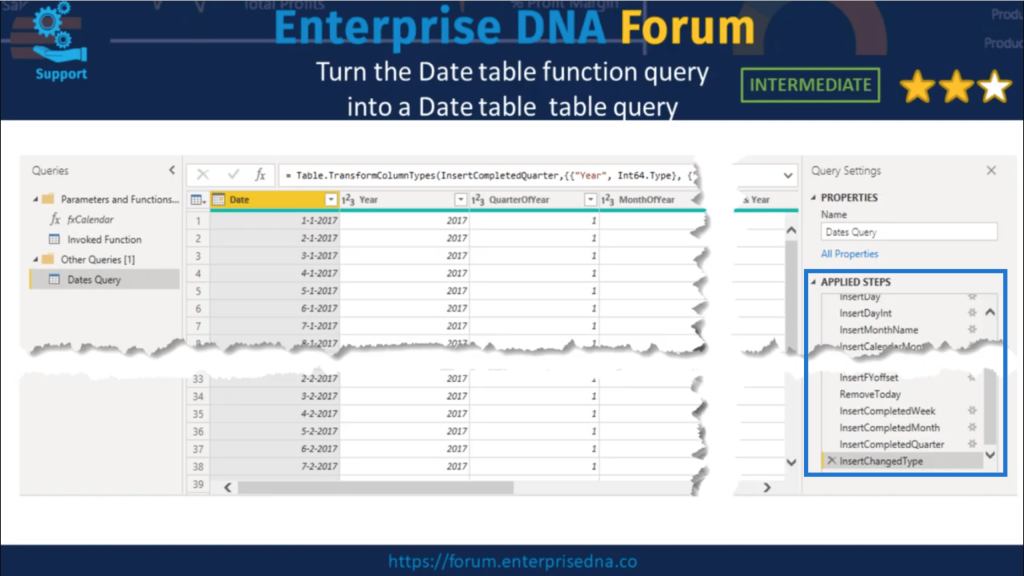
This means that as you develop your date table M code, you’ll immediately see the results of your changes in this table query.
More importantly, whenever your change results in an error, you can easily identify the step that caused the error. This makes it easier to resolve the issue.
Applying The M Code
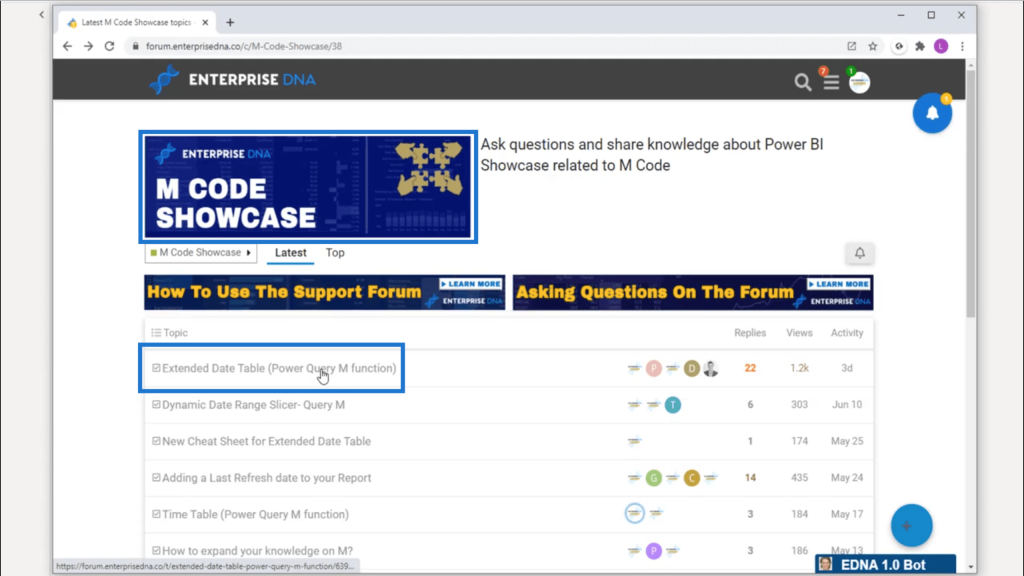
The date table M code can be found in the Enterprise DNA Forum. It’s under the topic Extended Data Table Power Query M Function within the M Code Showcase.
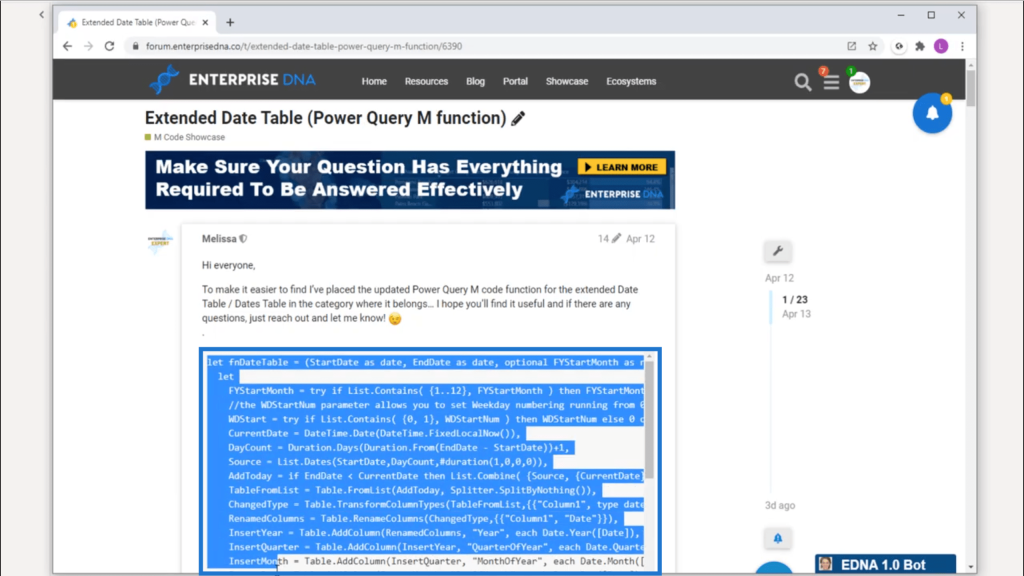
The M code is all the way up the top. I’ll highlight the entire code and copy it.
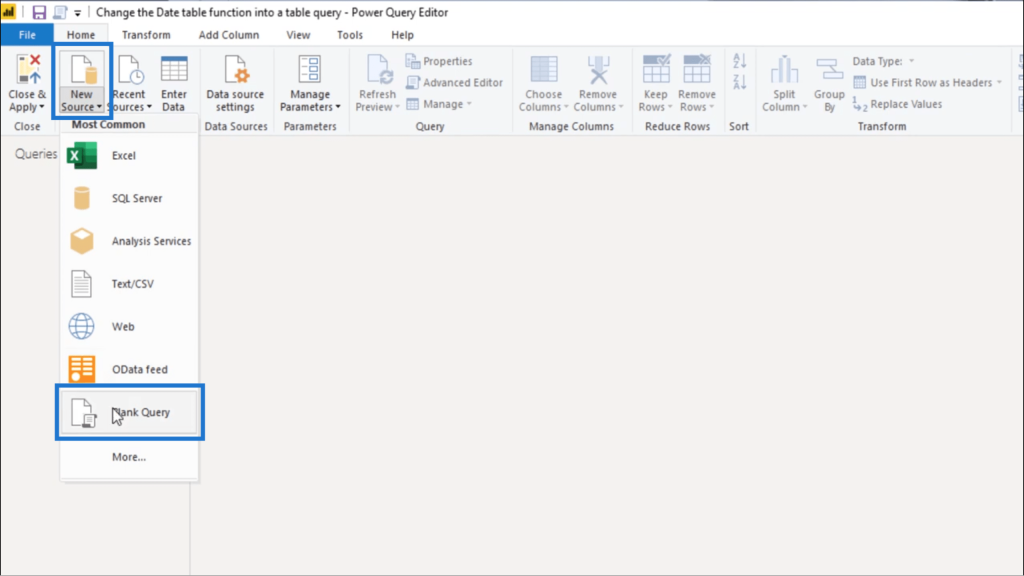
Then, I’ll create a new blank query.
I’ll open my Advanced Editor and paste that code in.
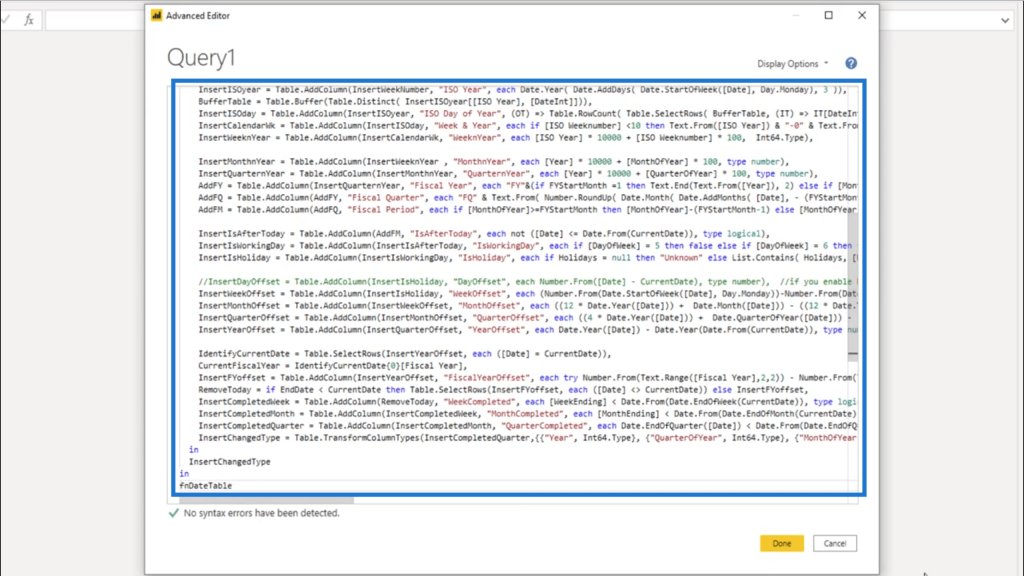
Since I see that no errors have been detected, I’ll click on Done.
Let me rename this and call it Dates.
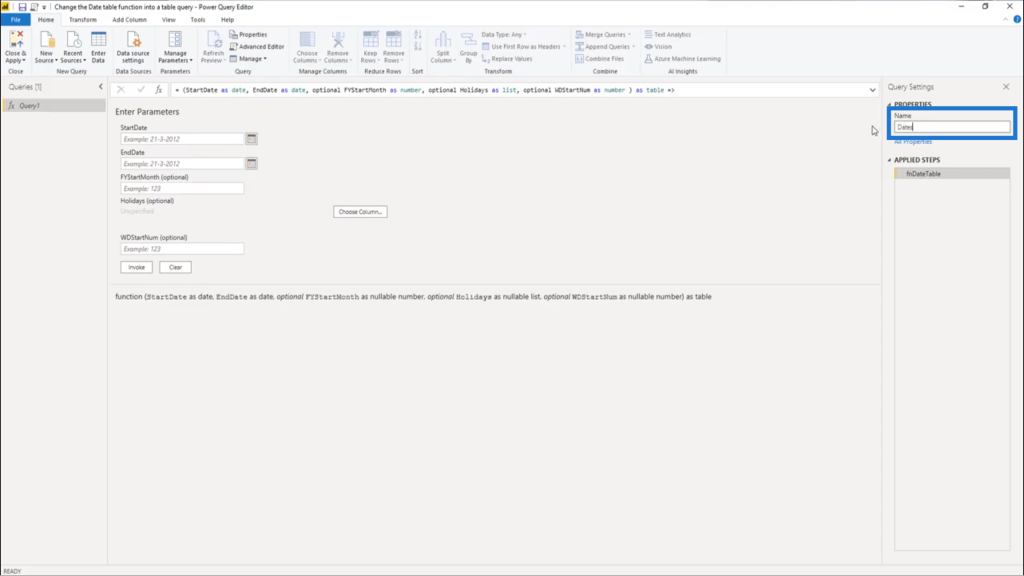
This query returns a function, but what I want is a table.
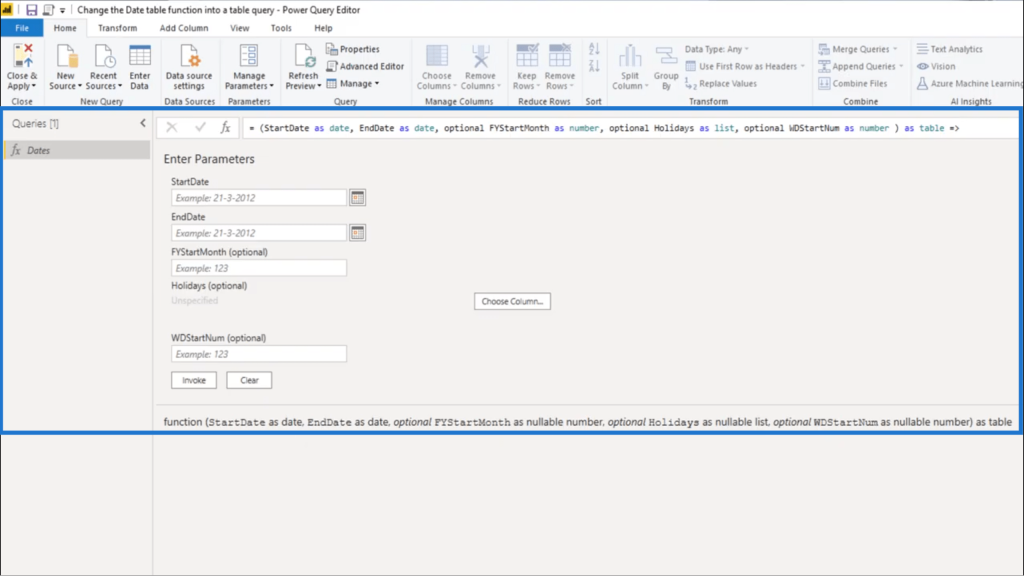
To make the necessary changes, I’ll go back into the Advanced Editor.
Converting The Function Into A Table
To make this return a table instead of a function, I would need to make some changes to the M code in the Advanced Editor.
Looking at the M code, I can easily see at least two environments based on the number of let statements.
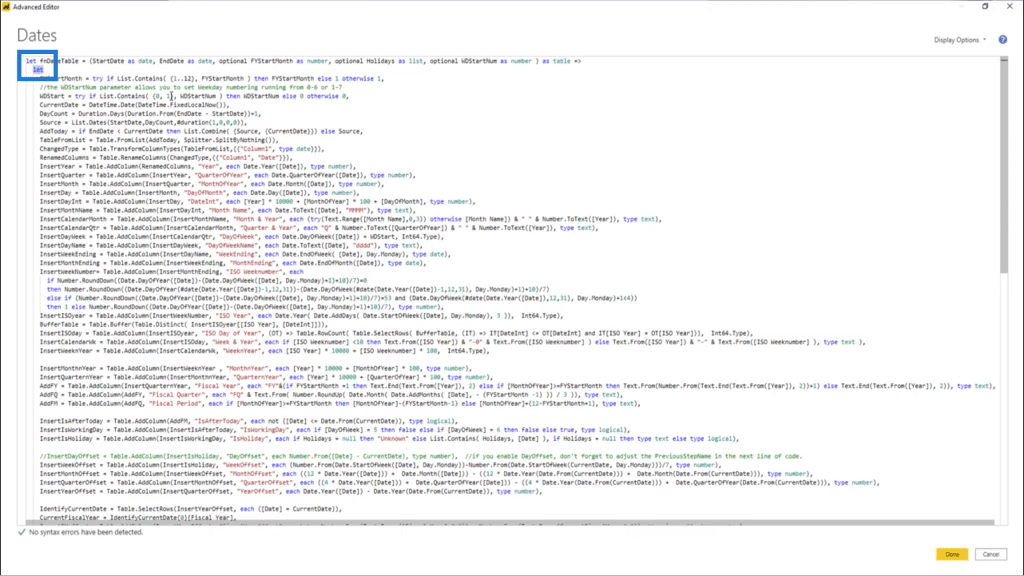
Each let statement has its own in clause, which can be found at the bottom.
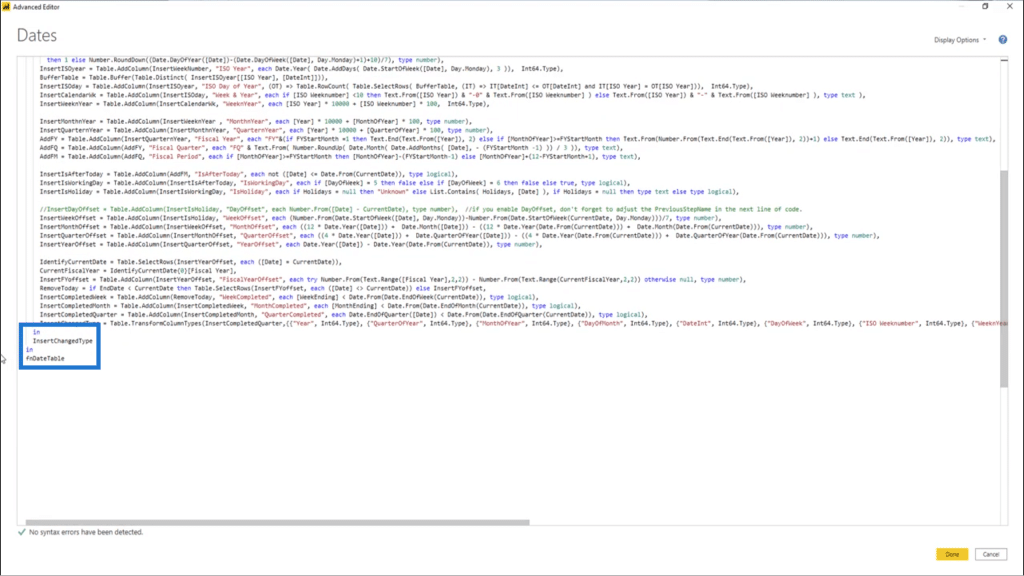
You might think that it would be easier to just delete this last in clause to turn this into a table.
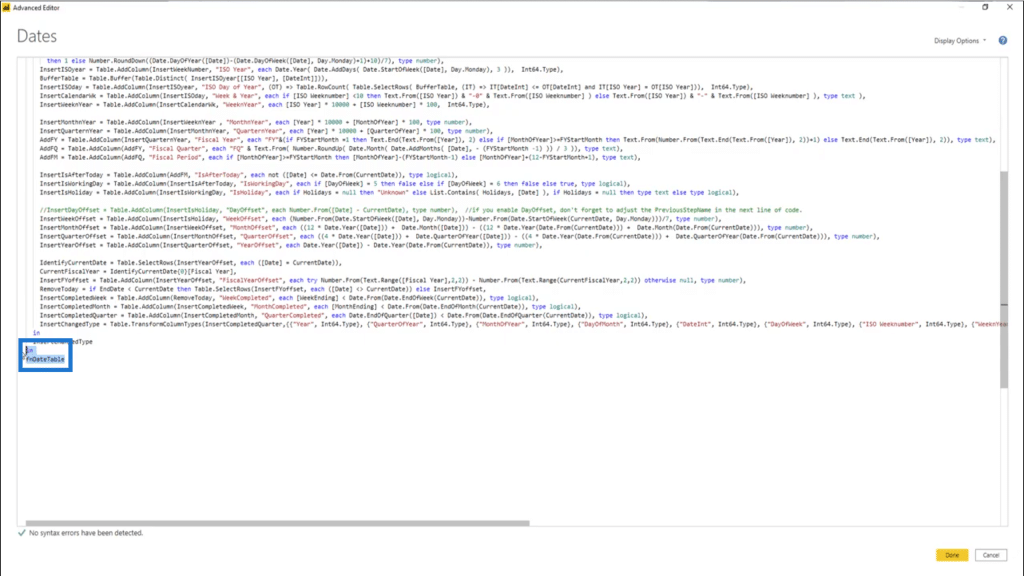
But I’m not going to do that. Instead, I’m going to comment that out by adding two slashes in front of the last in clause.
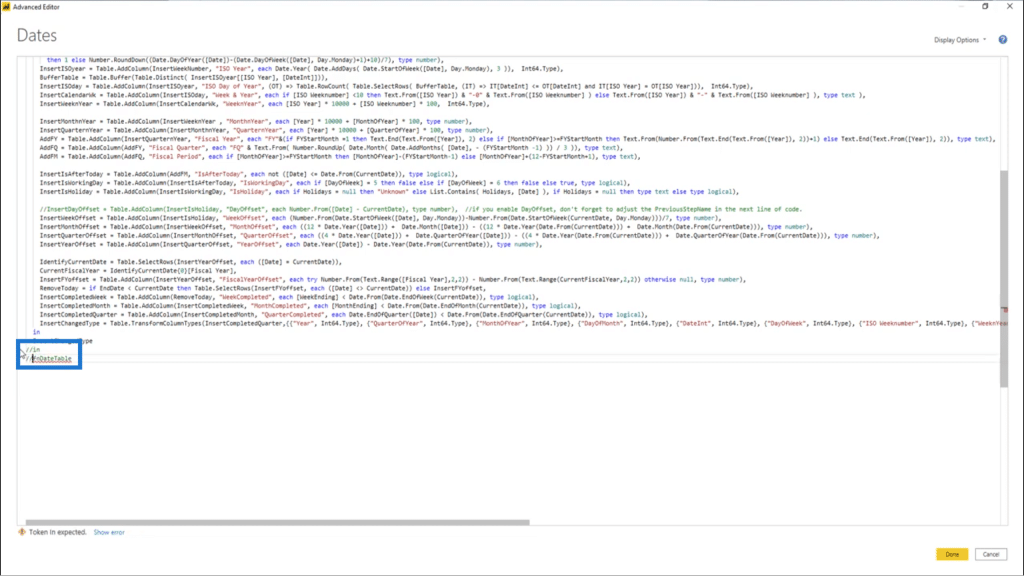
I’m also going to do that for the first let statement. This makes it inactive.
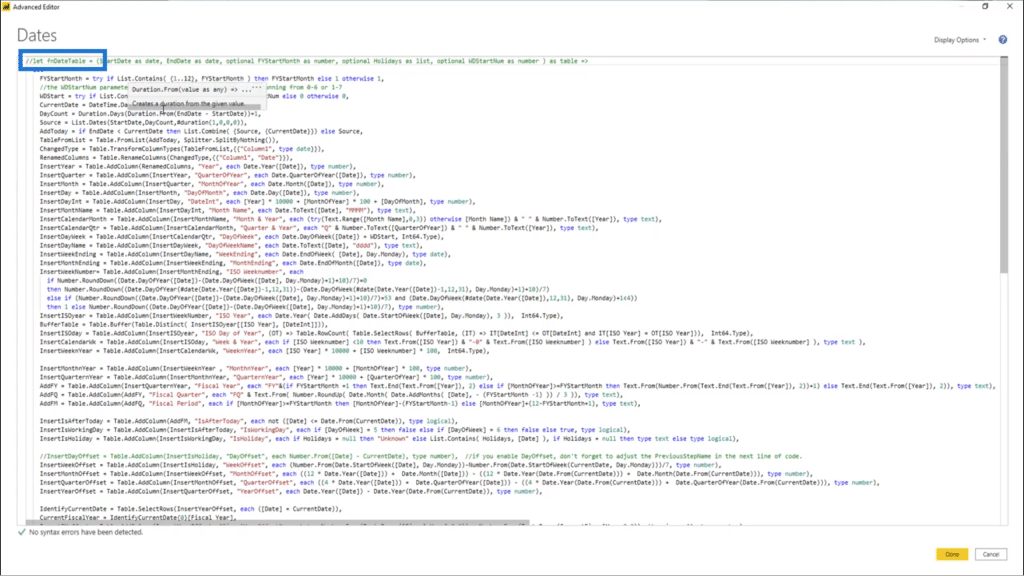
Below the inner let statement, I’m going to create a section to declare my parameters because I still need to pass those parameters to this code.
I’m going to mark where those variables should be declared.
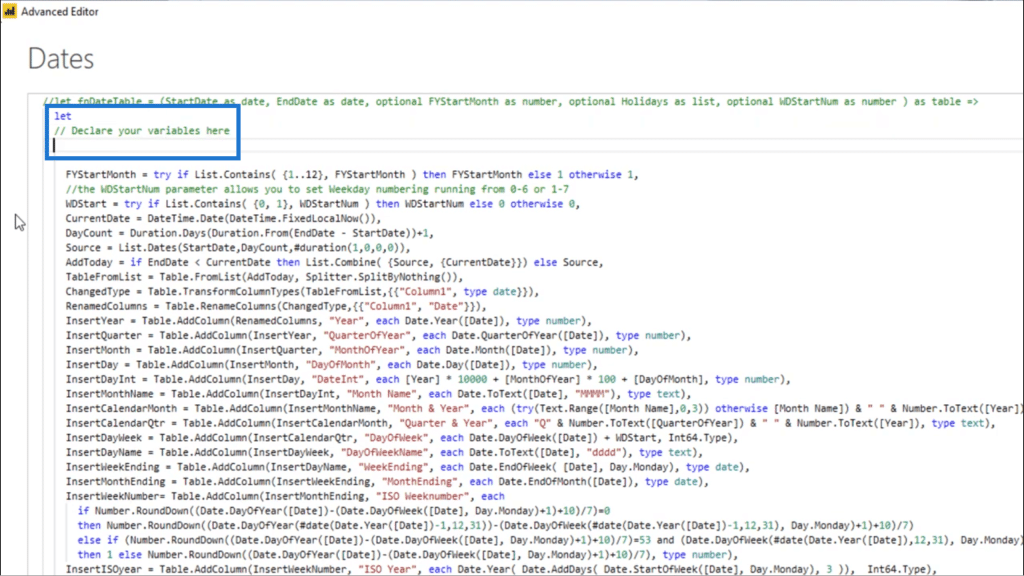
Now I’m going to copy the first variable from the outer let statement and paste it into the space.
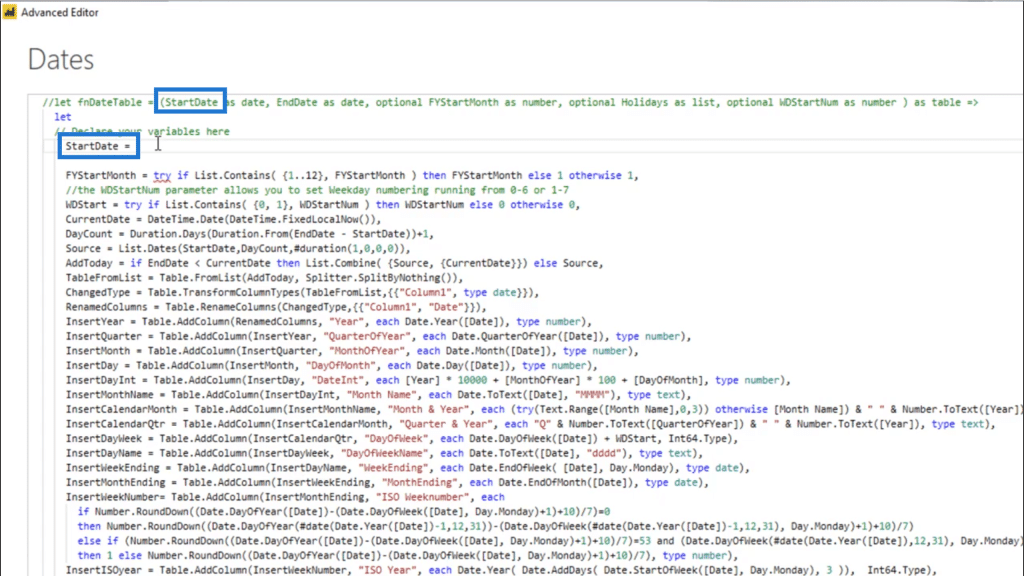
In my data set, the historic data doesn’t go further back than 2017. So to pass the value to the StartDate variable, I can use the intrinsic date. I’ll put the 1st of January, then I’ll end the line with a comma.
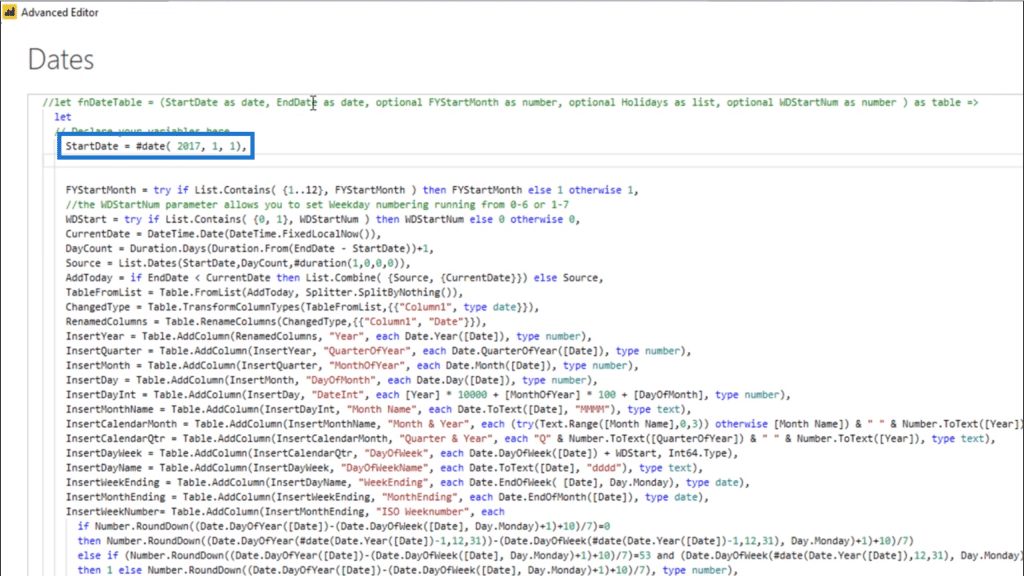
I’ll then copy and paste the next variable, which is the EndDate.
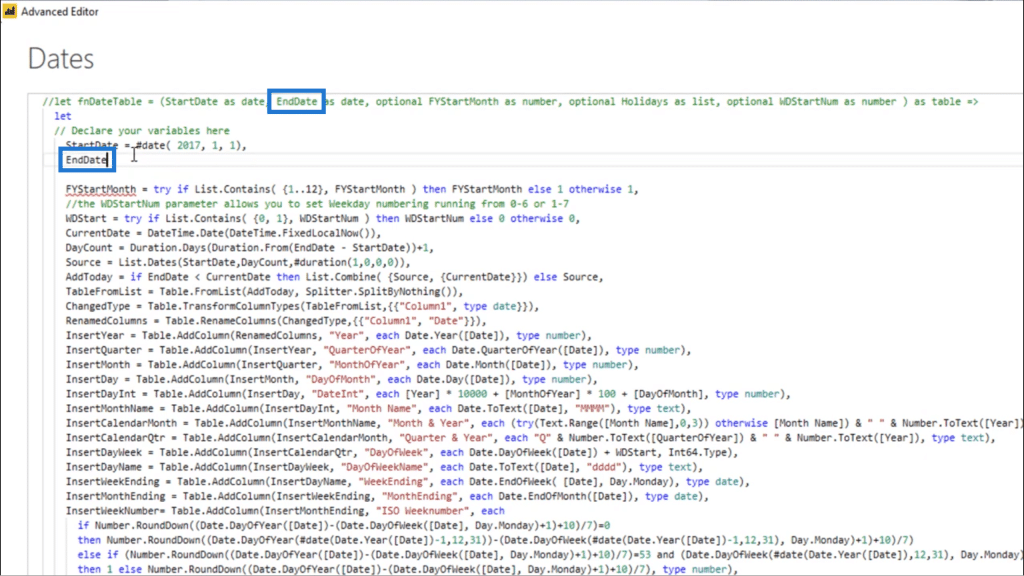
I know that the EndDate would require forecasting. That’s why I want this EndDate to always be the end of next year.
I already have a variable inside my M code for the CurrentDate, so I’m going to reference that.
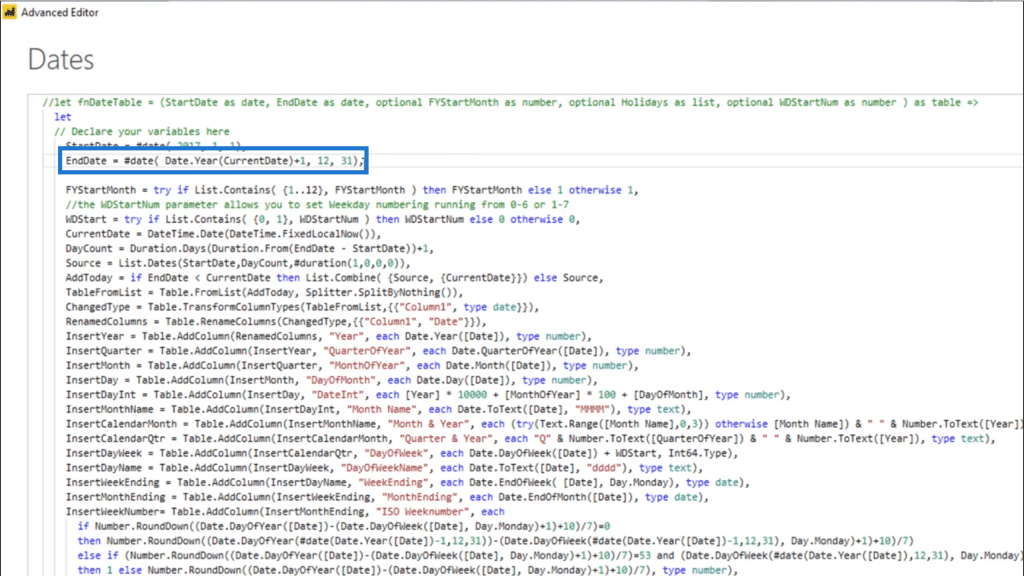
Again, I’ll be using the intrinsic date. I’ll extract Date.Year and use CurrentDate as the year value +1. I also want the date to be December 31st.
Again, I’m ending that line with a comma.
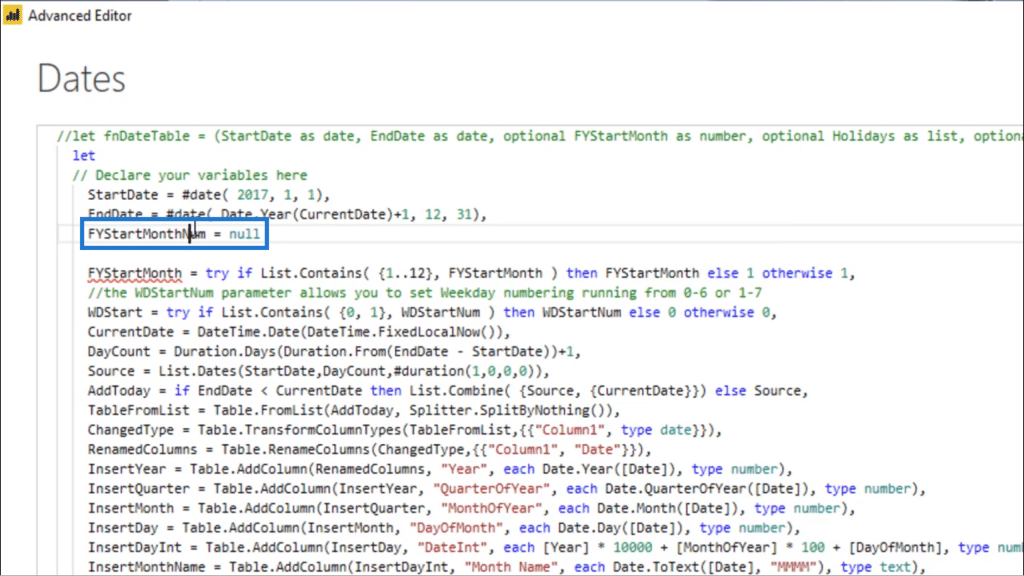
The next variable is an optional parameter called FYStartMonth.
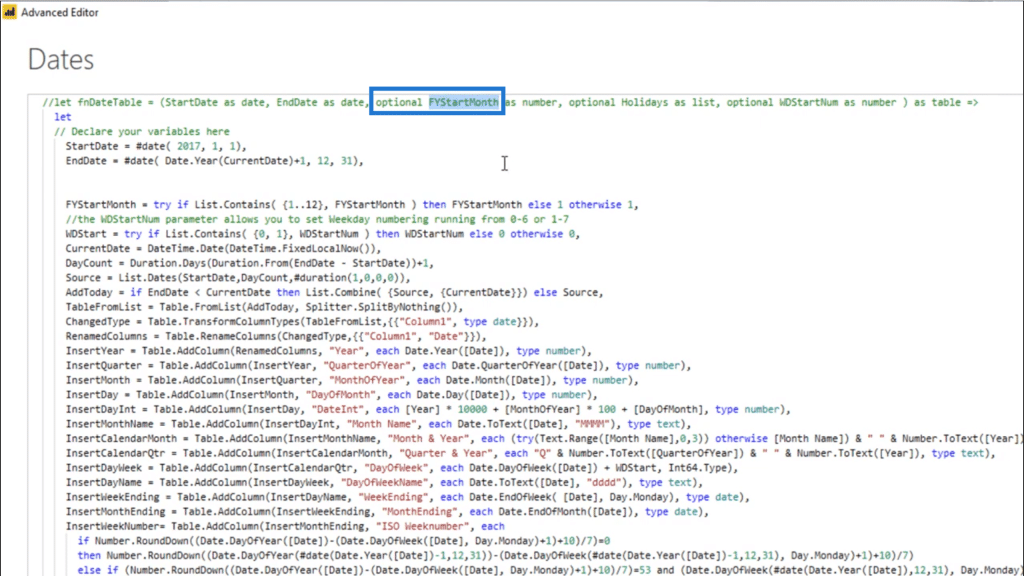
So I’m just going to copy that name and paste that in.
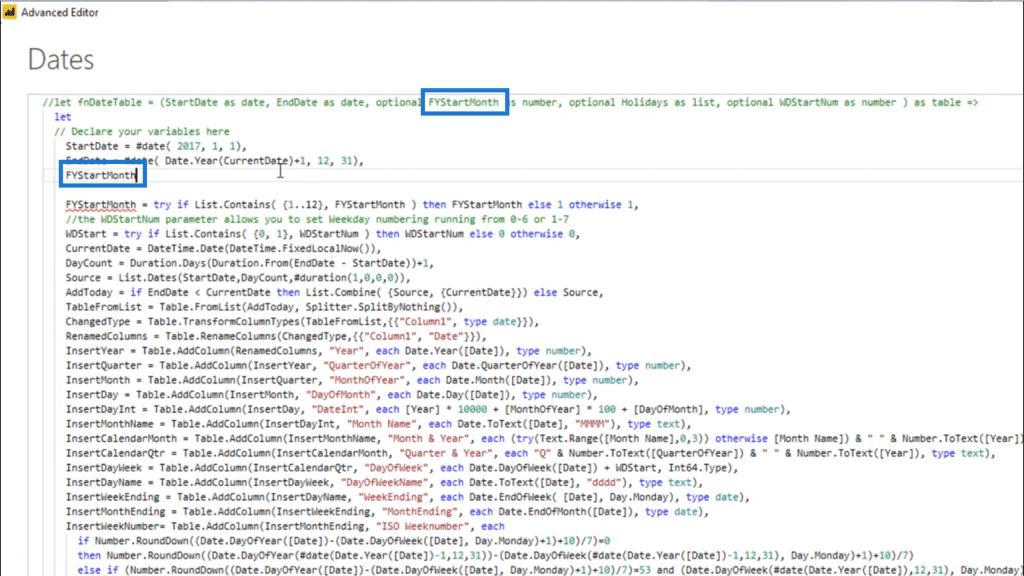
Notice that a red underline appeared under the FYStartMonth below the variable I just pasted in.
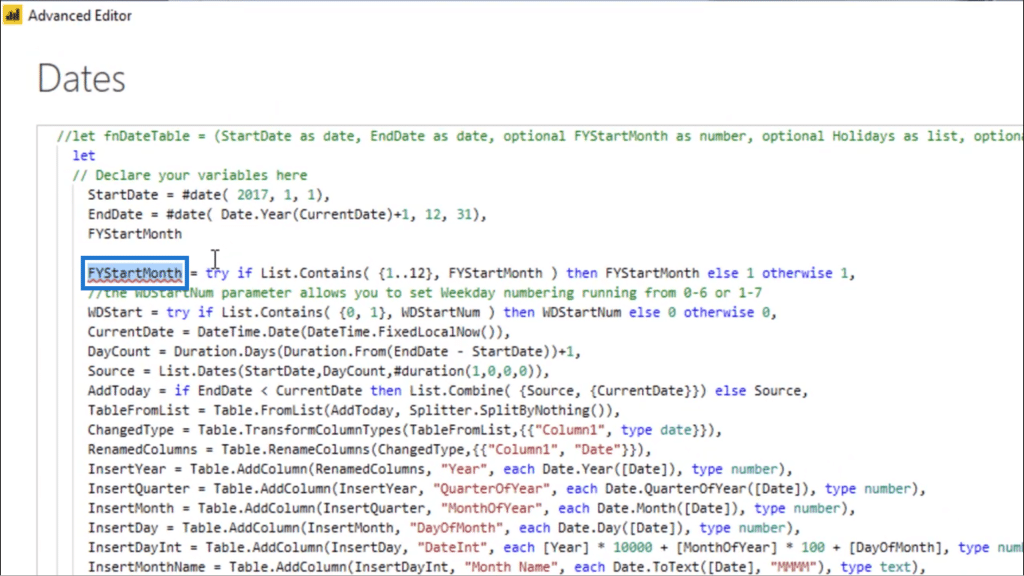
This is because their names match. It wasn’t a problem when they were in separate environments. But variable names within a single environment have to be unique. This means that I need to change the name of the new variable I just pasted.
Instead of calling it FYStartMonth, I’m going to call it FYStartMonthNum.
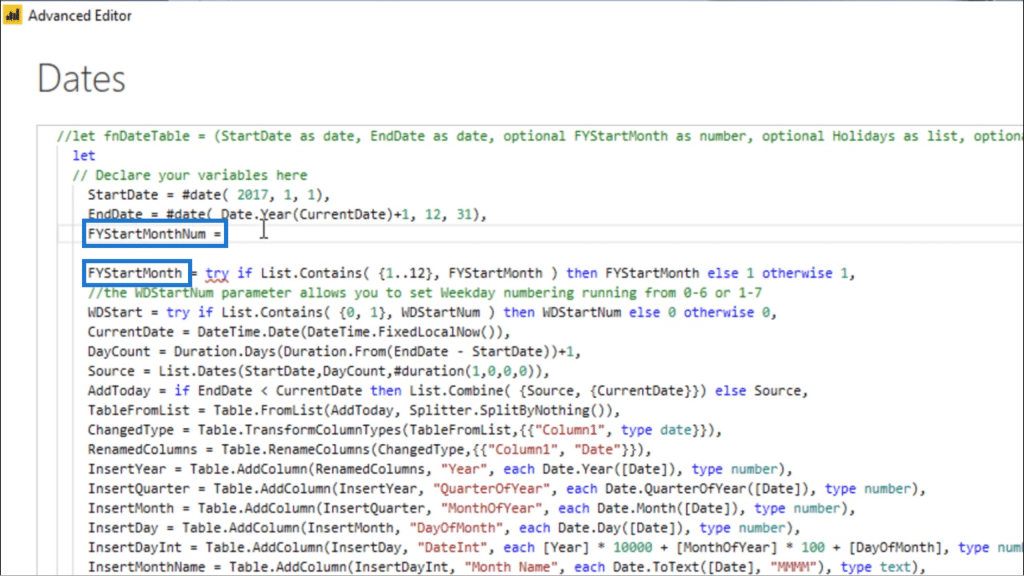
I’m not going to assign a value for this variable, so I’m just going to put null.
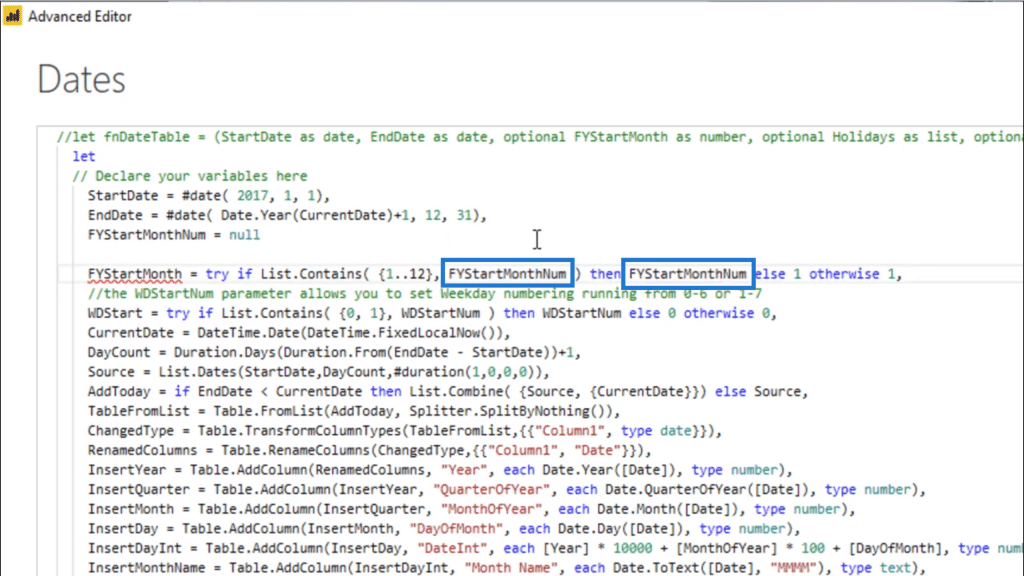
Because I changed the name of the variable, I also have to change the name wherever this parameter was referenced.
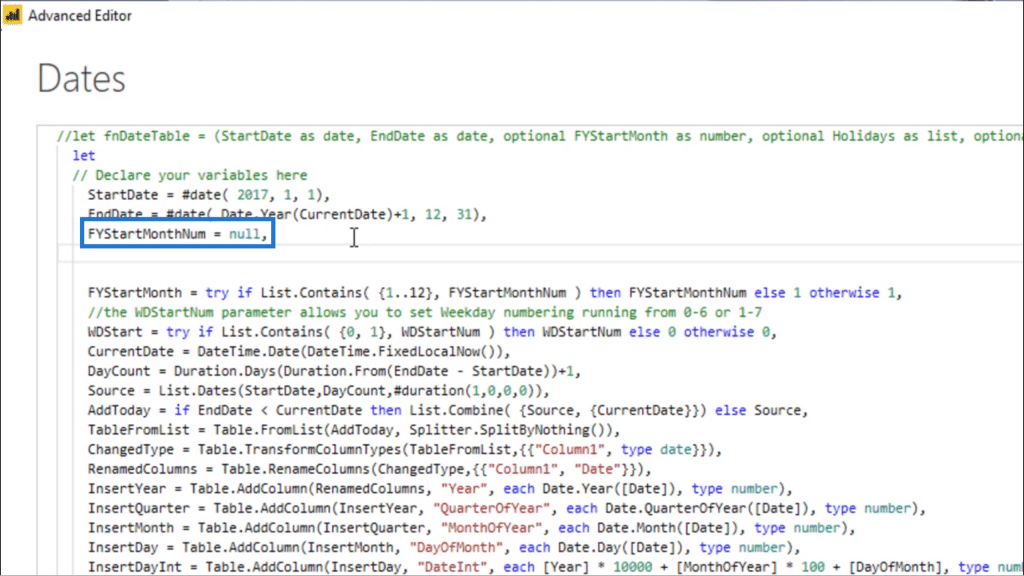
Going back to the variable, I’ll close that line by adding a comma at the end.
The next parameter is the optional Holidays list. I’m going to copy and paste that in as well, and will also declare it as null.
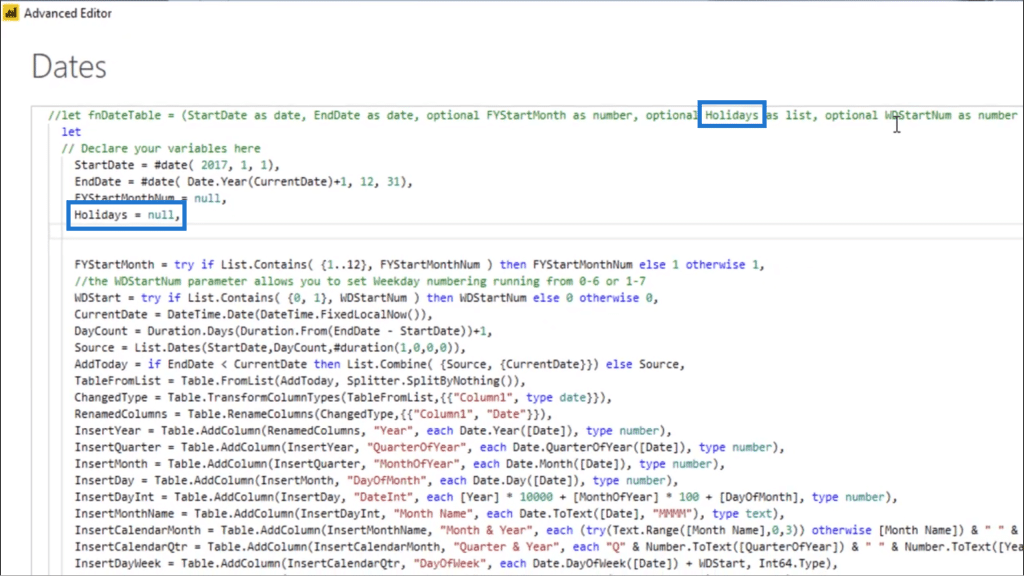
The same thing goes for the WDStartNum. I’ll copy and paste it, then declare it as null.
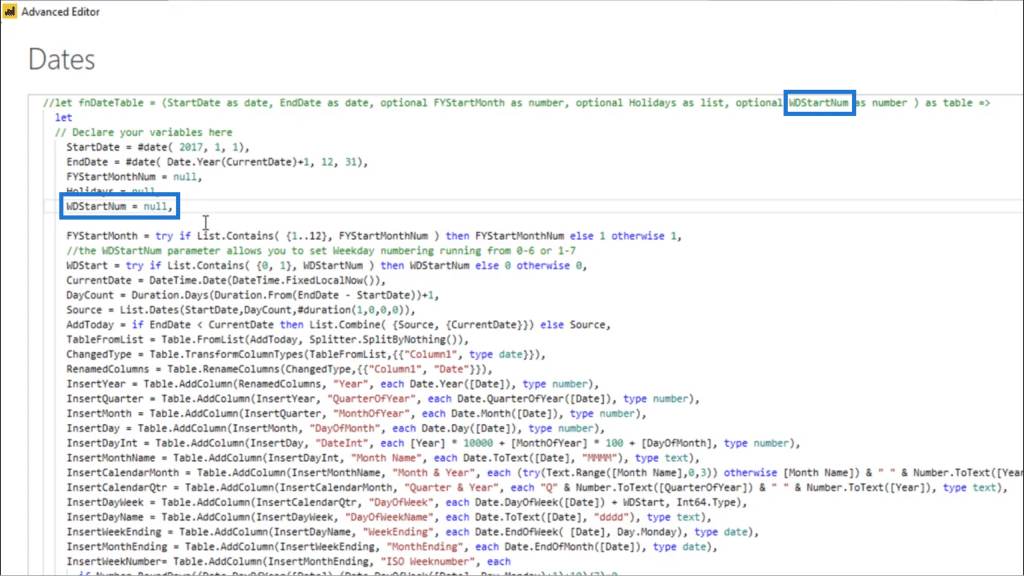
To mark where the date table code starts, I’m going to add another comment here.
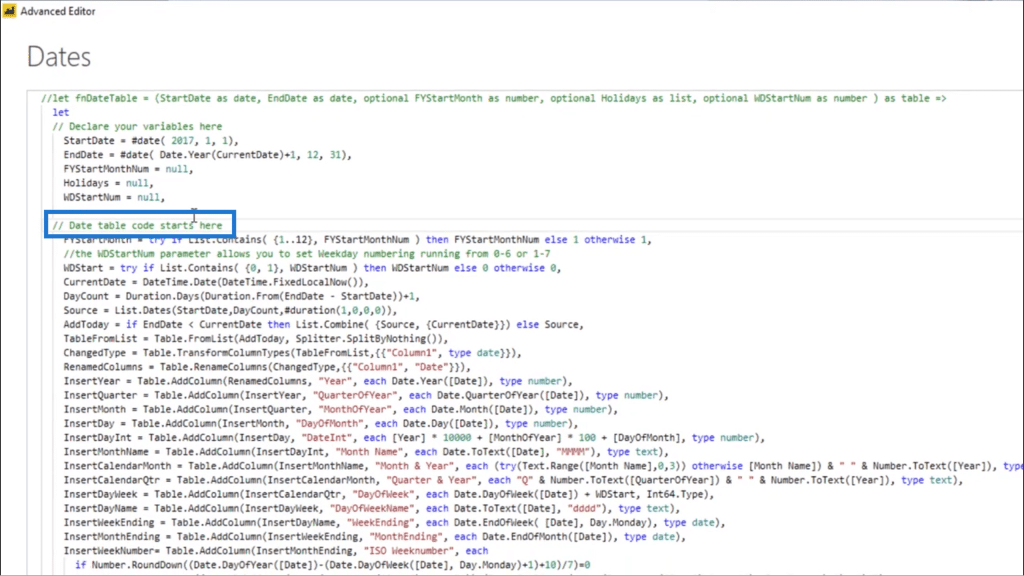
Once I press Done, you’ll see that the query now returns the right type.
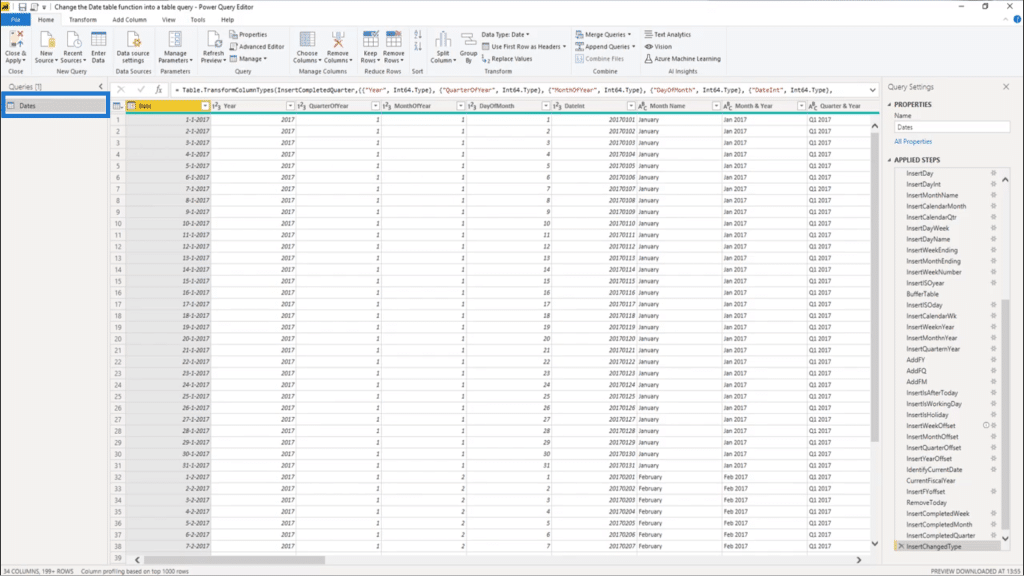
I now have a table instead of a function.
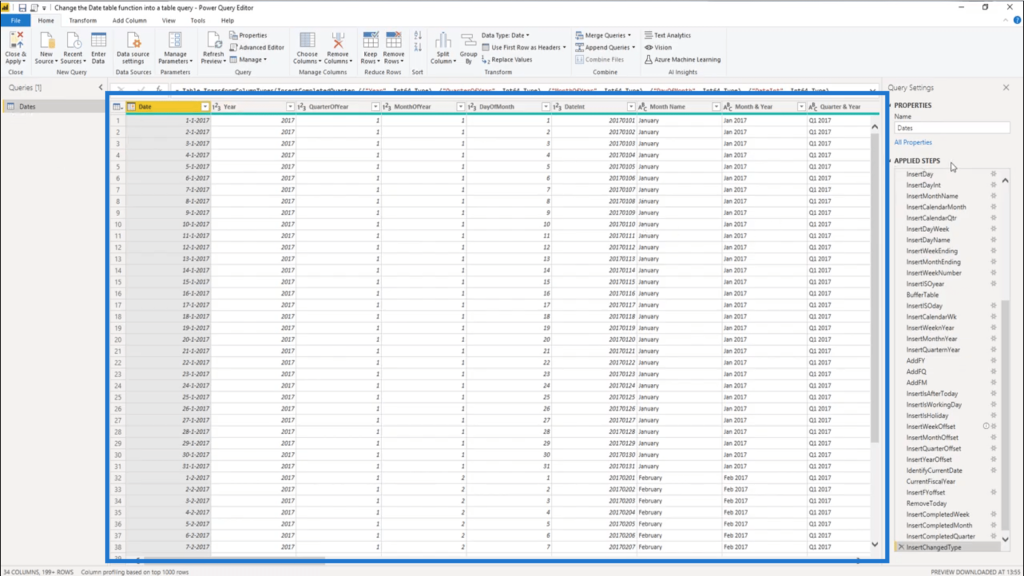
Inside the Applied Steps pane, I can also see all the steps that make up the query.
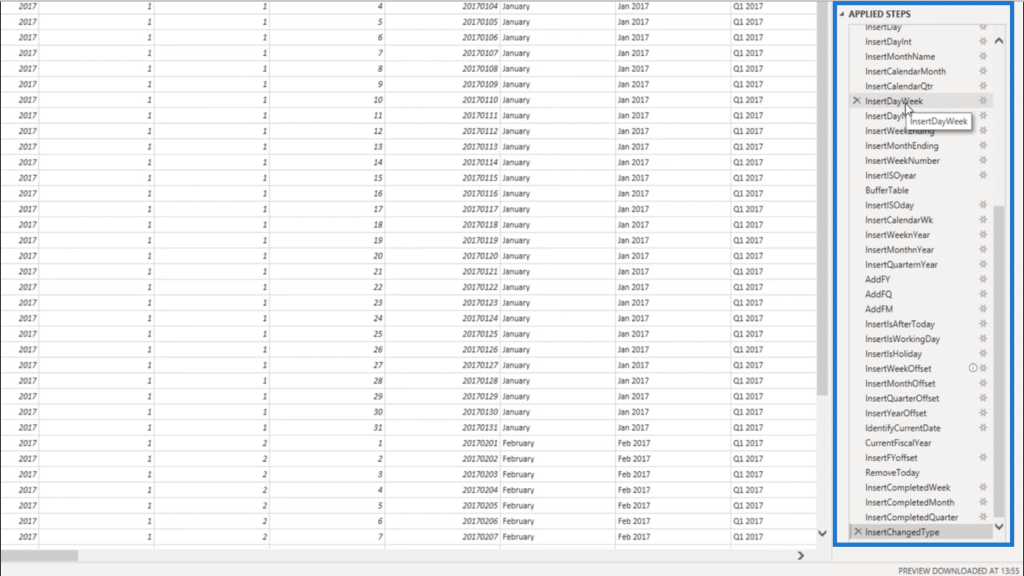
If I want to make any changes on the date table, it’s easy enough to use the ribbon to modify or add steps. For each change that I make, I will also see the results in the query immediately.
Turning The Table Query Back Into A Function
Let’s say I want to turn the date table query back into a function. It’s just a matter of tweaking a few things within the M code to reverse the changes I made earlier.
I’ll go back into the Advanced Editor and remove the slashes before the outer let statement.
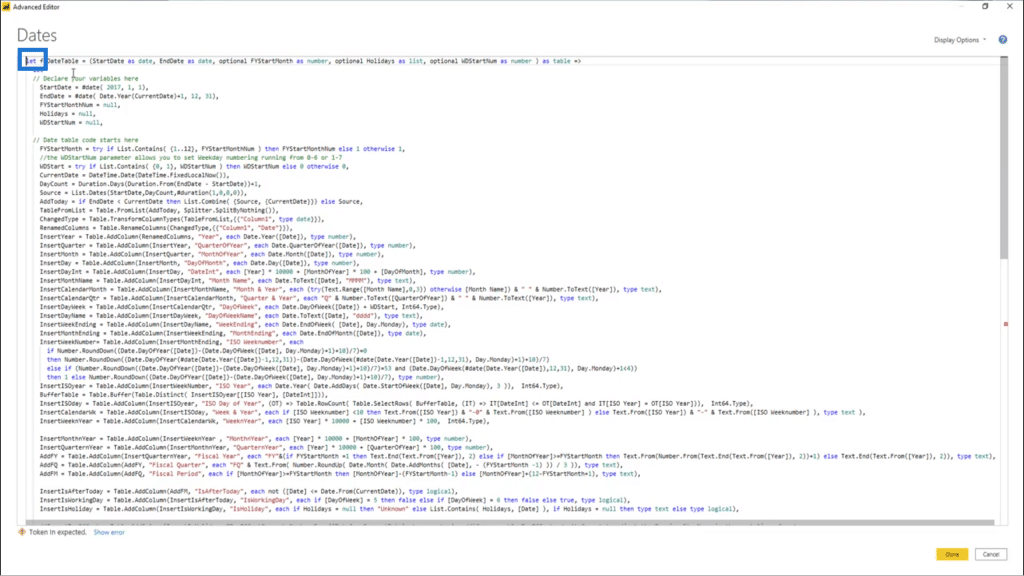
Next, I’m going to remove the slashes before the in statements.
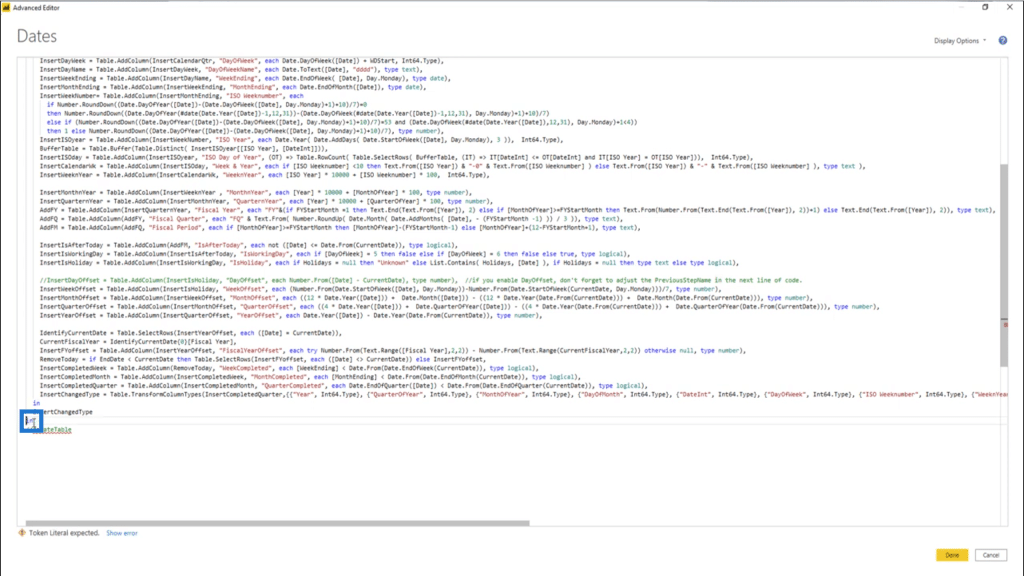
Then I’ll comment out the variable block I added earlier. So I’ll add a slash and an asterisk here.
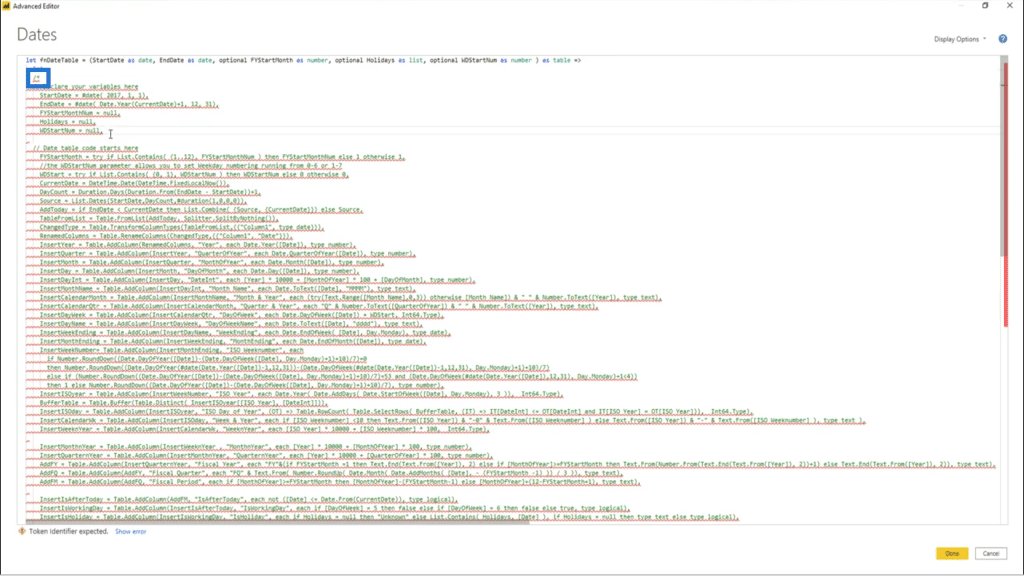
Then an asterisk and a slash after the variable block.
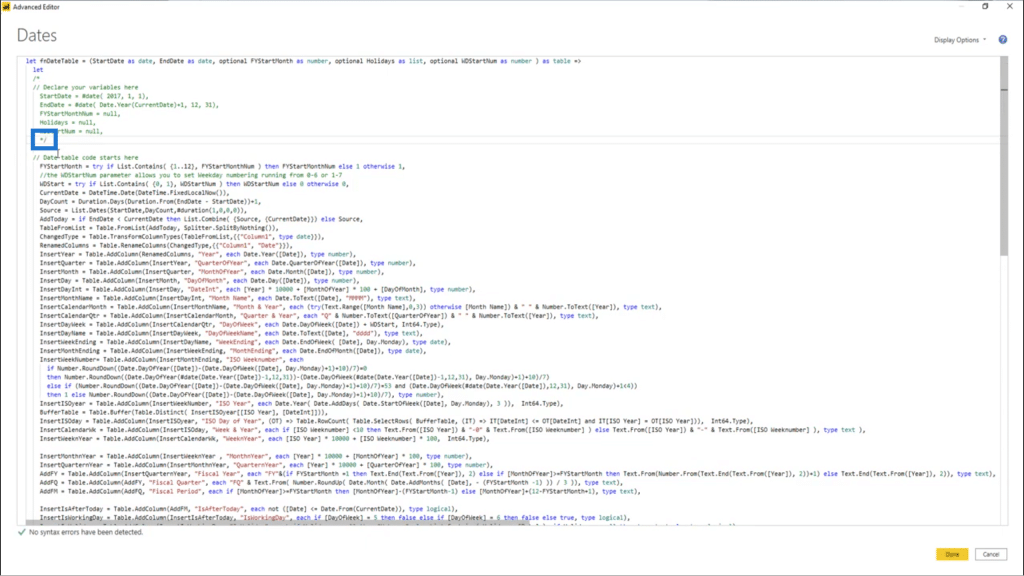
Remember when I changed this line of code earlier because of the FYStartMonthNum?
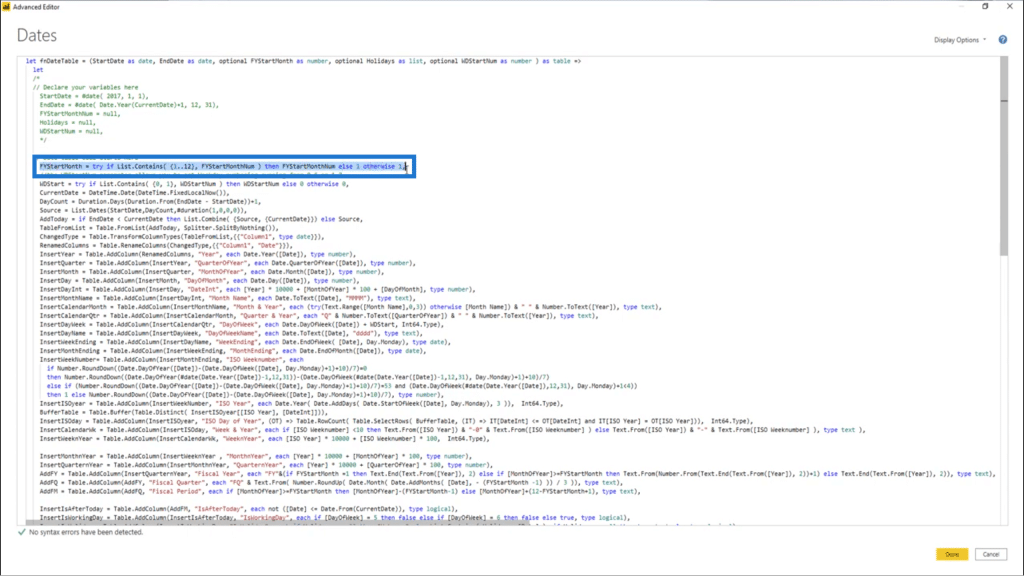
I’m going to copy that line of code. Then, I’ll add a new line and paste it in.
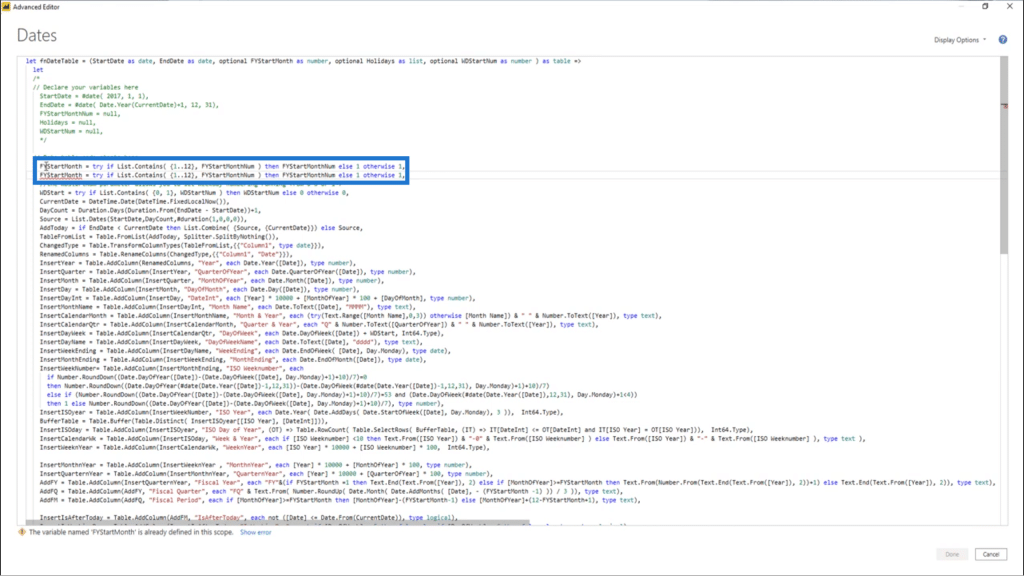
I’ll slash out the first one (which is where I made the changes to the variable name earlier).
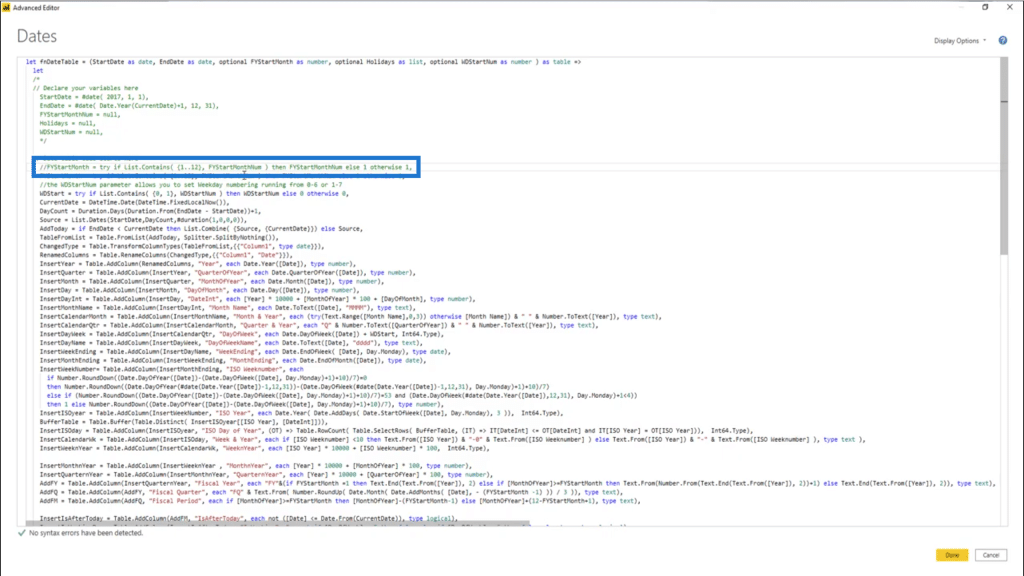
Then on the second one, I’ll find the edited variable names.
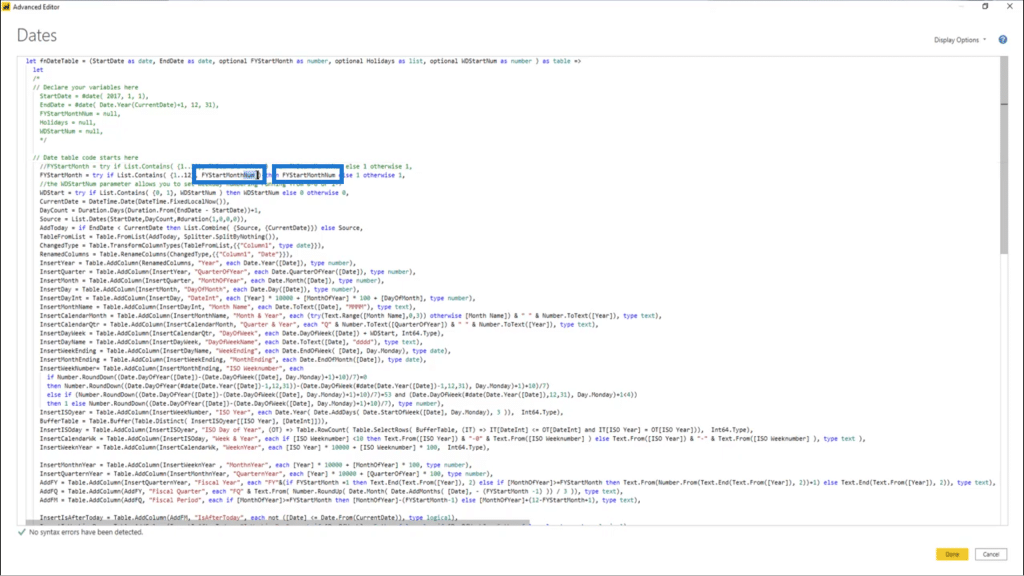
And I’ll turn them back into FYStartMonth.
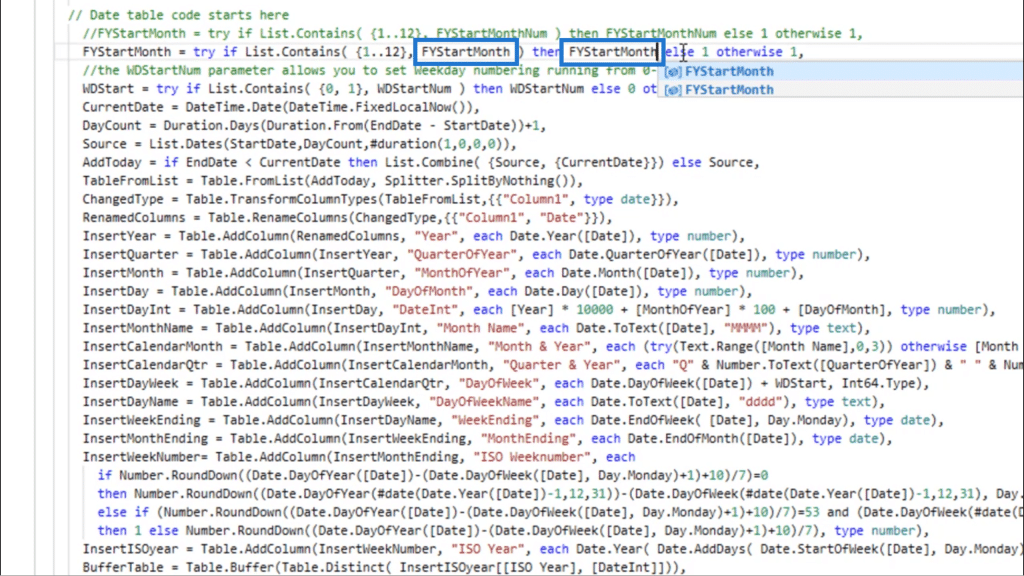
Once I press Done, the table query will once again turn into a function.
***** Related Links *****
Creating a Dynamic Date Query Table in Power BI: A Query Editor Tutorial
Creating A Date Table In Power BI
Setting Up A Dynamic StartDate And EndDate For Power Query Date Tables
Conclusion
Once again, I’ve shown you how convenient M codes are, especially in cases like these where we converted a function into a table query, and vice versa. As long as you have access to the M code we have in the Enterprise DNA Forum, you can use it in scenarios like these in the future.
You can also browse through other M codes you can use in other situations in the M Code Showcase on the Enterprise DNA Forum. It’s a collaborative community, so you can read through the comments for other ideas from our experts and members.
All the best,
Melissa
***** Learning Power BI? *****
FREE COURSE – Ultimate Beginners Guide To Power BI
FREE COURSE – Ultimate Beginners Guide To DAX
FREE – 60 Page DAX Reference Guide Download
FREE – Power BI Resources
Enterprise DNA Membership
Enterprise DNA Online
Enterprise DNA Events


