In this tutorial, you’ll learn about the fundamentals of coding with R. Specifically, you’ll be focusing on working with objects and object classes in R.
Objects are like boxes that you put information or data into.
The tutorial is divided into four sections. First, it will discuss about assigning and printing objects. The next section focuses on how to perform basic operations on these objects. The third topic will discuss about comparison operators for objects. And lastly, it will discuss about object classes and how to use them in R.
Assigning And Printing Objects In R
Open a blank R script in RStudio.
To demonstrate, let’s store information inside object a. To do this, you need to use the assignment operator ( <- ) which is a less than sign followed by the minus line. The keyboard shortcut for this operator is Alt + ?. If you follow 2 after the assignment operator, this indicates that you’ve assigned the number 2 for object a. What this means is you’re putting number 2 in a box labeled a.

When you run this code, you’ll notice that this will appear in the Console window. It also shows as Values in the Environment window.
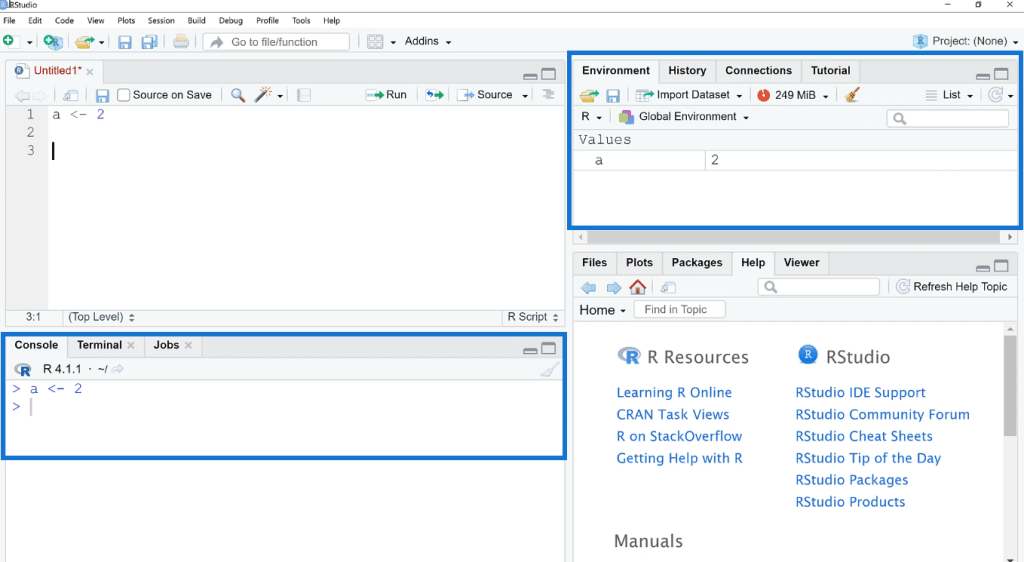
To print this data, input the object name and Run it. You’ll see in the Console that it has the value of 2.

Performing Basic Operations On Objects In R
Now that you’ve assigned data to an object, you can use this to perform basic operations. You can type any operation using the object and the answer will appear in the Console.

If you Run the square of a, you’ll get 4. If you Run a > 3, the Console will return False because 2 is not greater than 3.
Using Comparison Operators
If you try to execute a = 3, you won’t see FALSE in the Console.
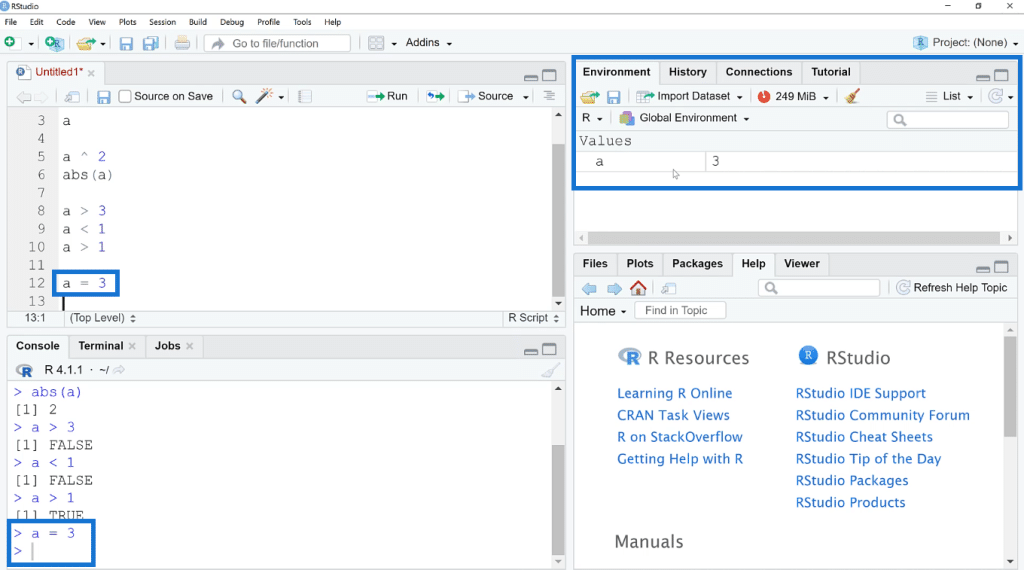
This is because instead of doing a basic operation, you assigned a new value into object a. You can see in the Environment that a is now 3.
There are many ways in which you can assign values to an object. You can use the assignment operator or the equal sign. But oftentimes, the equal sign can cause confusion so its better to use the assignment operator instead.
If you do want to check what an object’s value is, you must use two equal signs ( == ).

Moreover, you can also assign objects to other objects. For example, you can assign the object b to have the value equal to the square root of a. If you Run this, you can see that b will now have this value. And the value of b changes whenever the value of object a is changed.
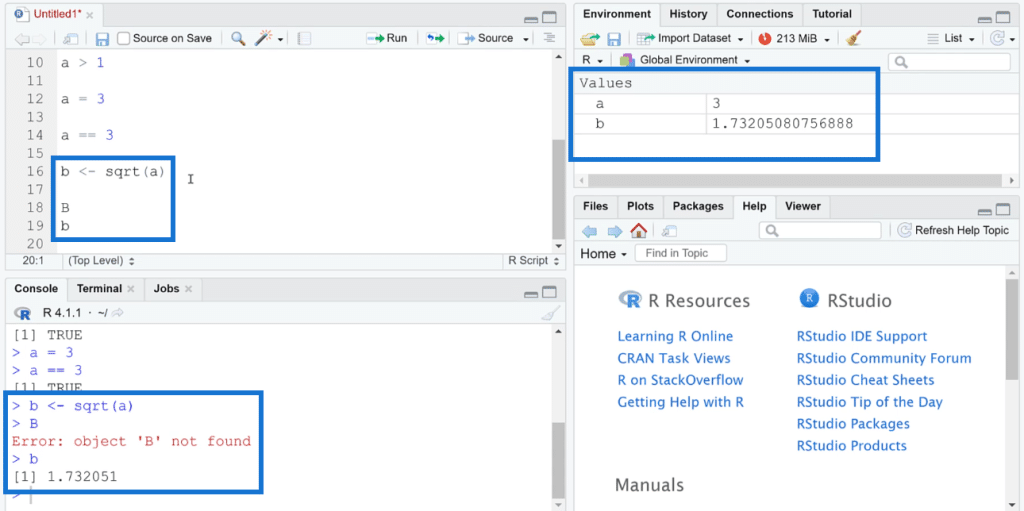
You should also note that R is case-sensitive. So if you try to run a capital B, it will result in an error.
Using Object Classes In RStudio
The next thing to learn when dealing with objects in R is about object classes.
Remember the analogy of objects; they are like boxes where you place data into. Object classes therefore are the different types of boxes. The common object classes are numeric, character, and logical.
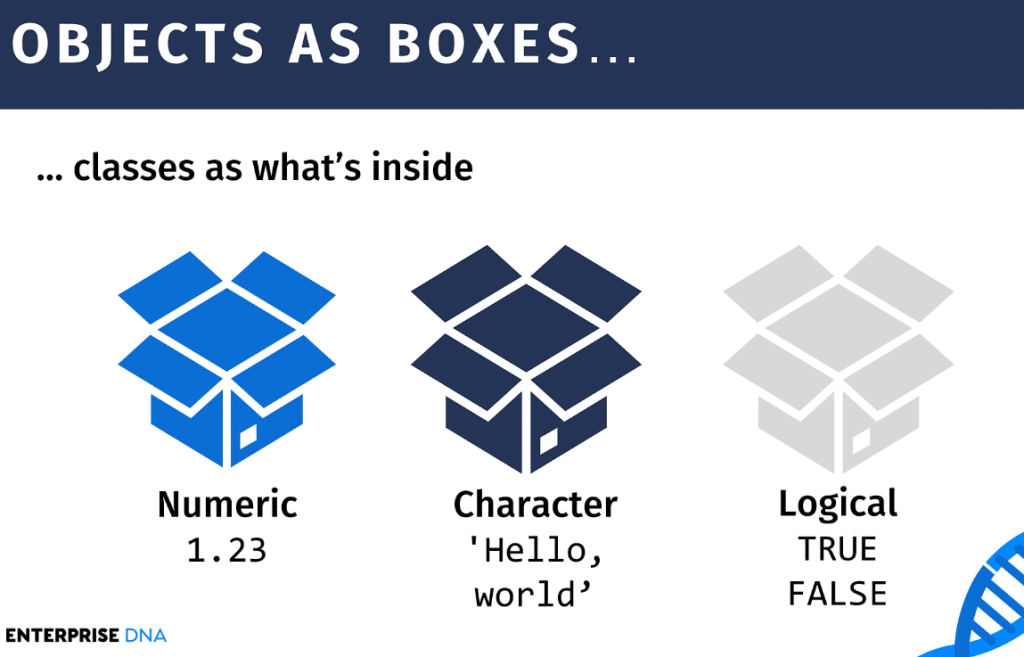
There are other types of object classes, but the rest of this tutorial will focus on these three.
Now, open a new R script in RStudio. Assign four objects which different object classes as seen in the image below.
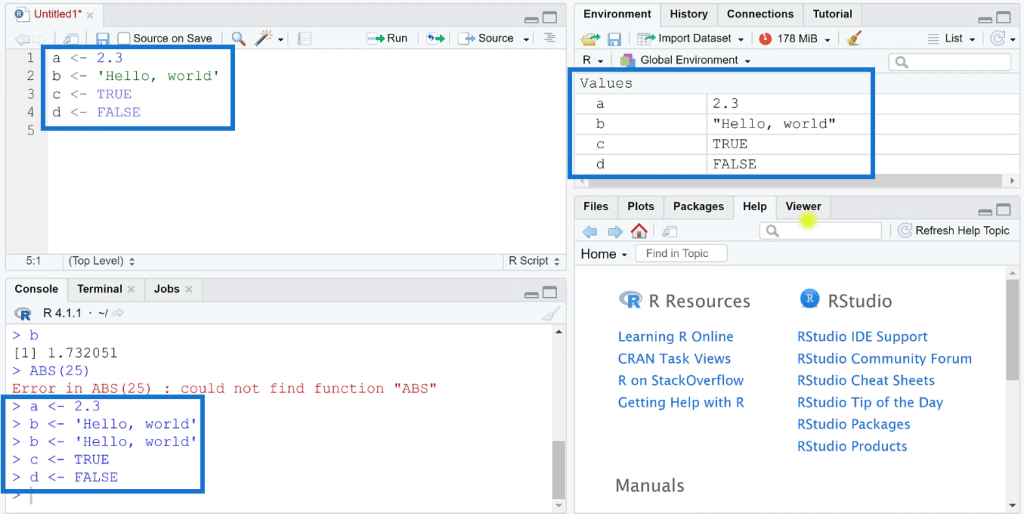
When you’re using string or text in R, you can use either single or double-quotes. For Boolean input, you need to remember that it is case-sensitive. Make sure that you input capital TRUE and/or FALSE. You can also opt to use T and/or F instead of the full word. But it’s generally more acceptable to spell them out.
To identify the class of any object, use the class function. Once you Run this, the object’s class will appear in the Console.

Things To Remember
Depending on the type of data you’re using, some functions will work, some will not. This is the same case for Power Query and MS Excel.
If, for example, you try to execute the sqrt(b), this will result in an error since object b is not a numerical value. But if you try toupper(b) which is a function that converts a string to uppercase letters, then it works.

One interesting thing when dealing with the logical object class is that you can use them with operations. If you try to multiply or sum up object c and d, you will get results in the Console.

R treats TRUE and FALSE as 1 and 0, respectively.
***** Related Links *****
R In Power BI: Downloading R And RStudio
Power BI With R And RStudio: How To Get Started
Three Ways To Use R Script In Power BI
Conclusion
The examples in this tutorial worked with data that’s very small. Assigning each piece of information you’re working with into an object doesn’t sound very useful. But you’ve only scratched the surface. R and RStudio are capable of much more.
In the next tutorials for R, the lessons will gradually build up until you’re able to work with tables containing many rows and columns as you would in standard Power BI reports.
George


