
In this blog, we’ll talk about the importance and usage of SharePoint lists. We’ll also discuss the different ways of creating lists in SharePoint.
SharePoint’s way of managing a collection of data like a table or a database is through SharePoint lists. A database is a way to store information. Any type of information you want to store is possible, whether it is for your school or business.
To give you more idea, here’s what SharePoint lists could look like using an example we previously made.

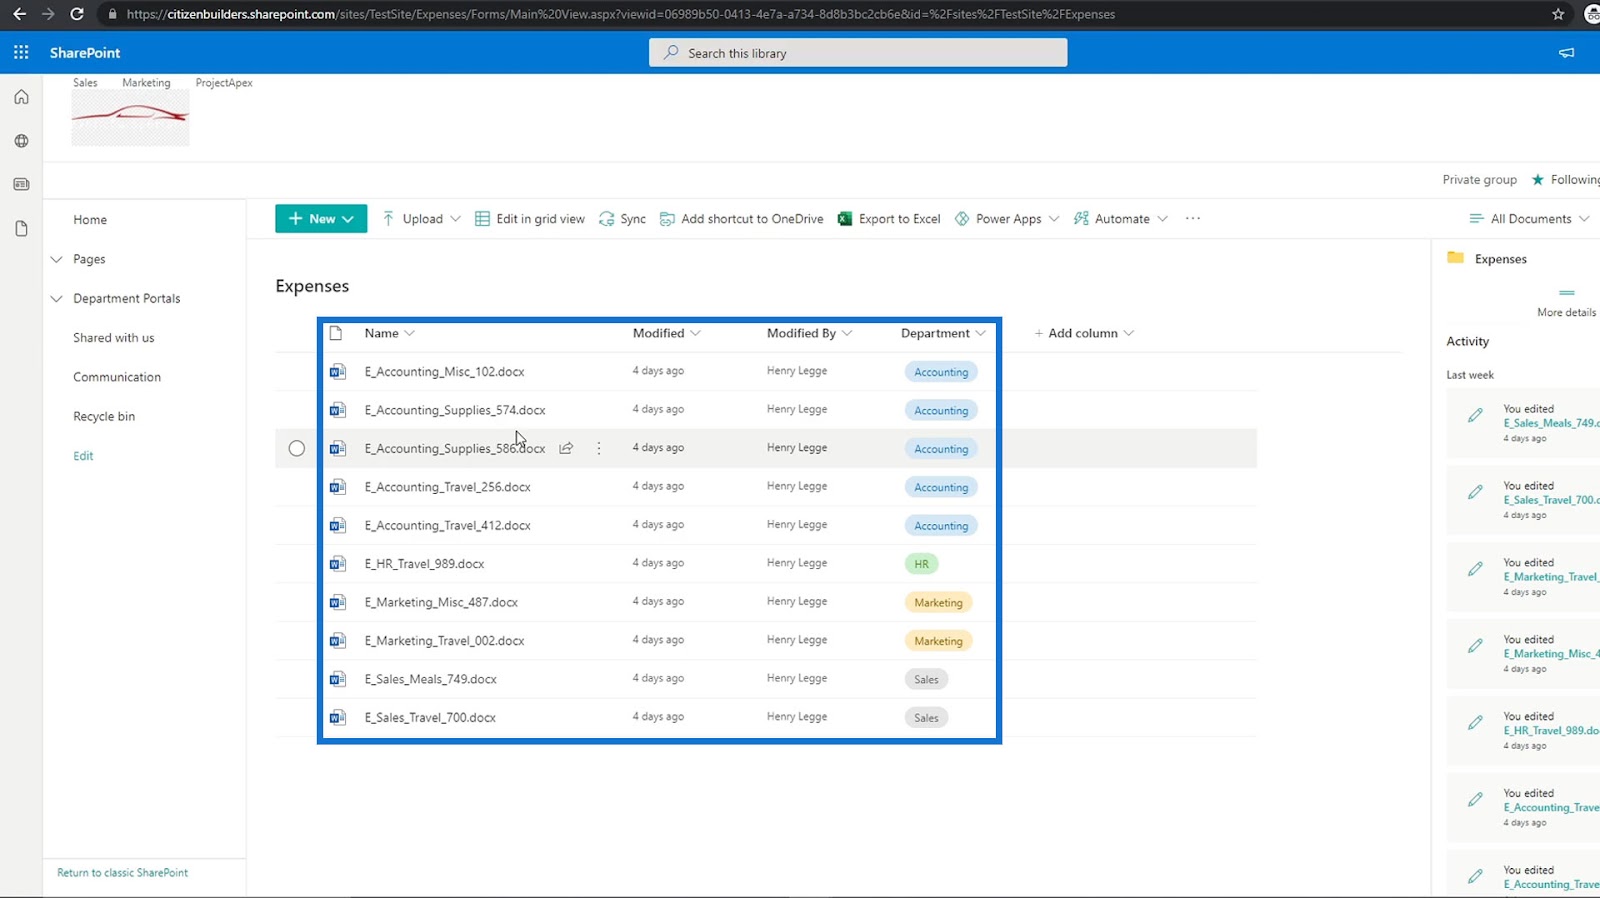
As you can see from the image, these are files for the expenses of a company.
Preparing The Excel File For Your SharePoint List
We’ve included a resources link on this blog where you can download this sample file that we’re using. You can certainly use your own Excel file if you have one.
First, let’s open the Excel file.
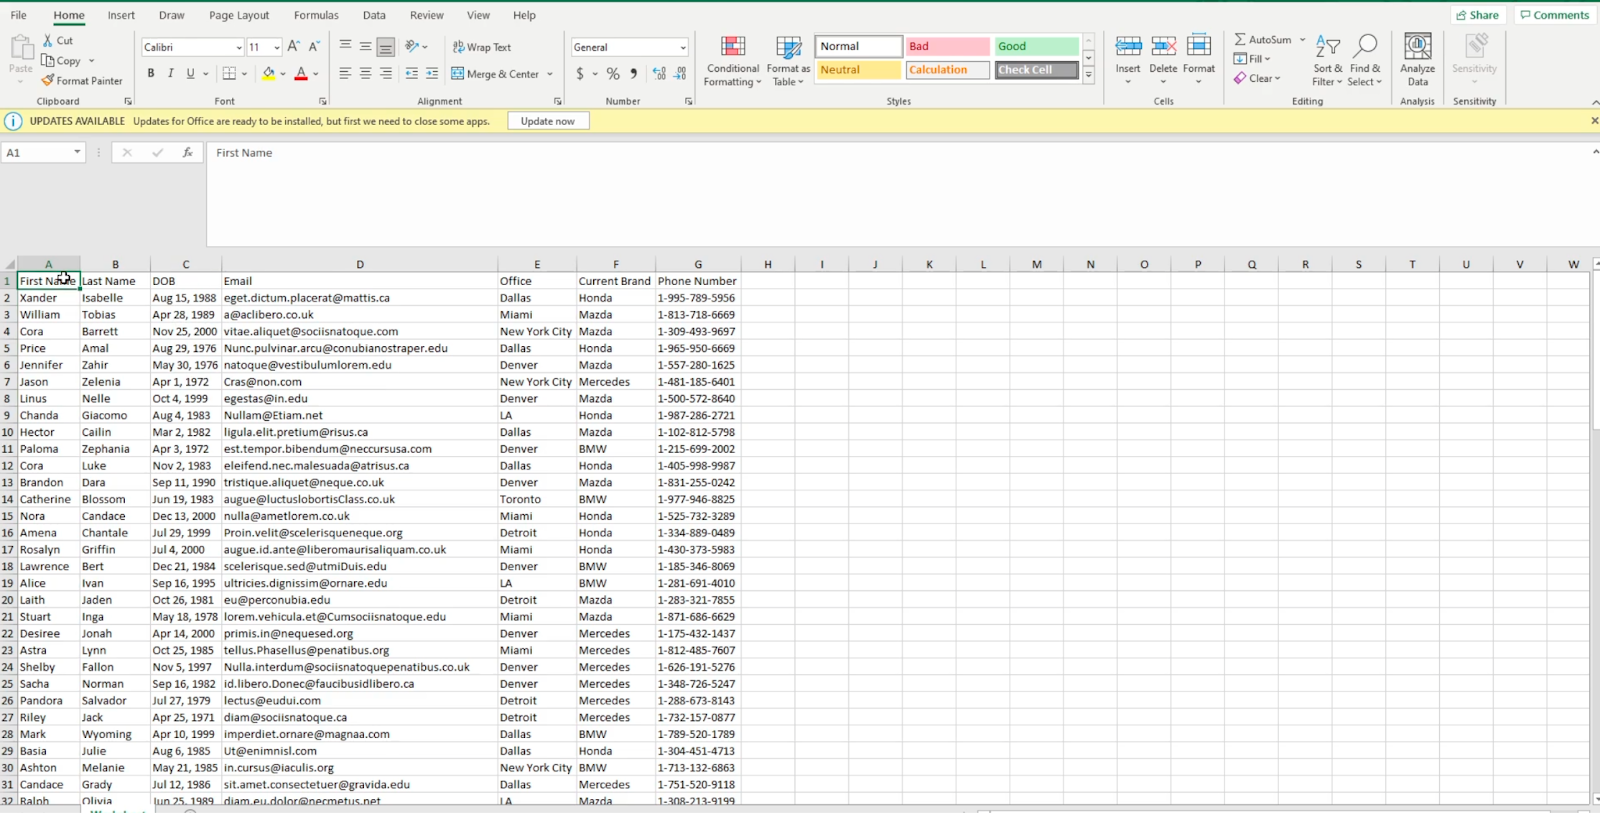
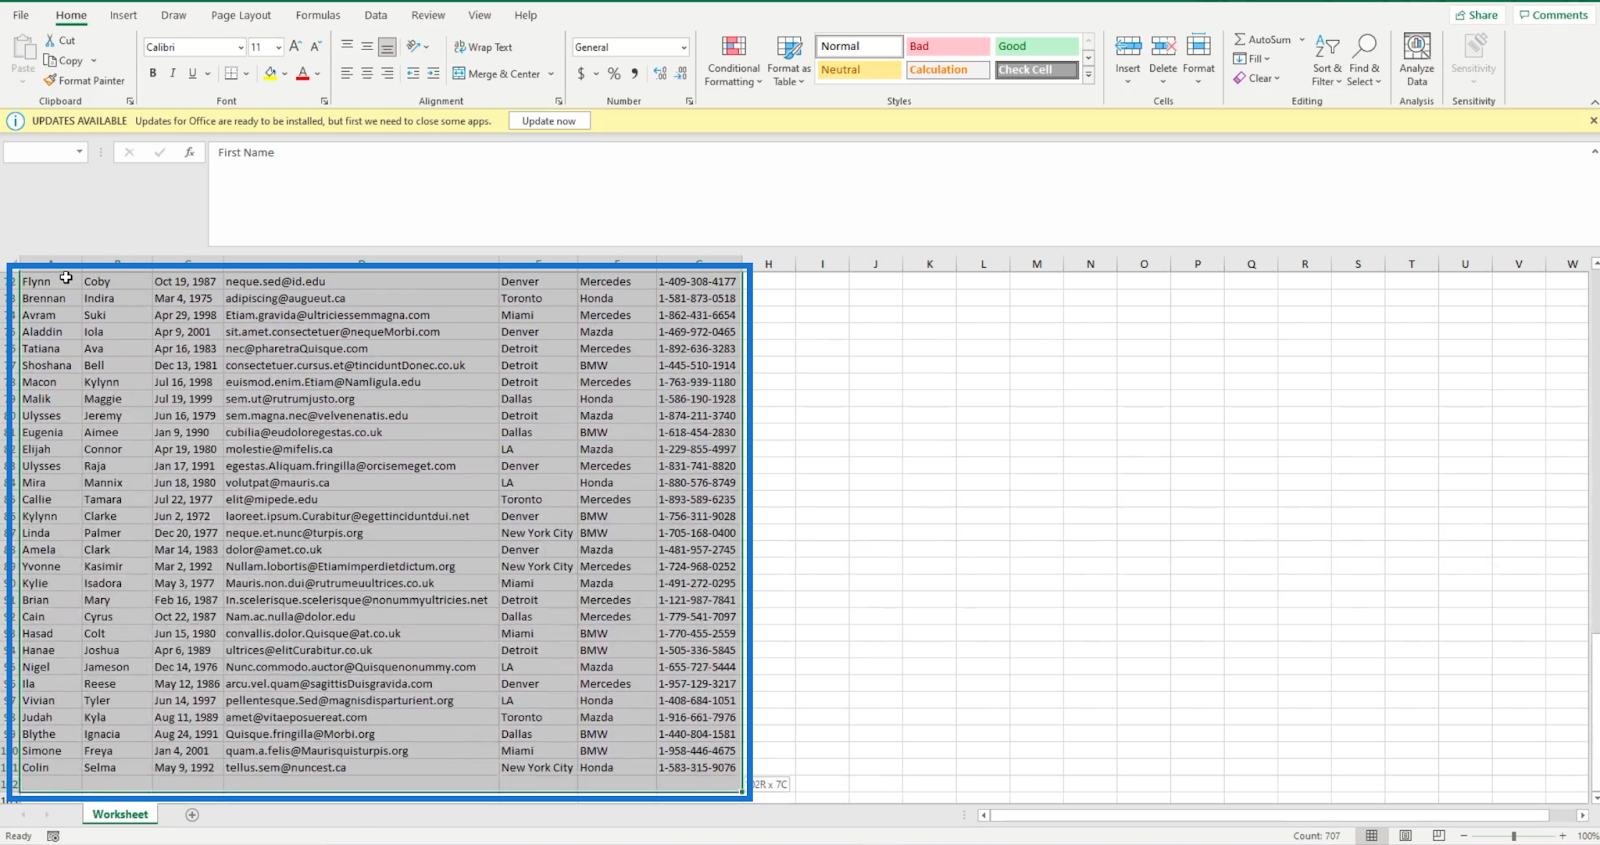
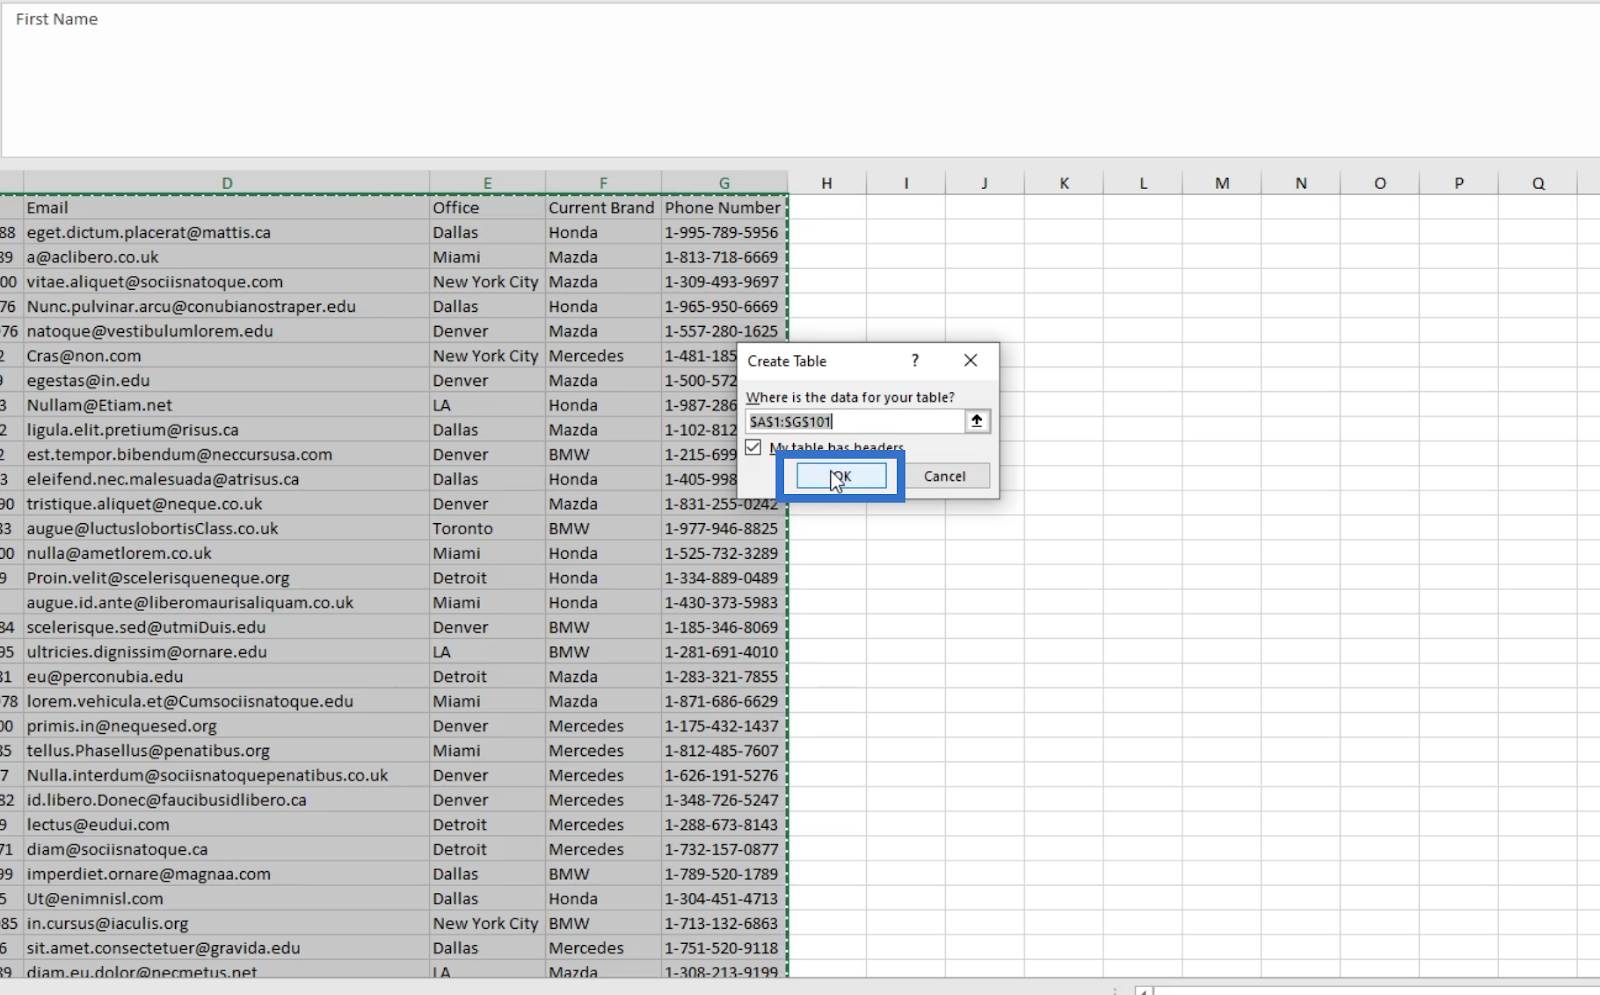
However, before importing the file to your SharePoint, you have to tell your Excel file that it’s a table of information. So, in your Excel file, highlight the information you are importing.
Then, click Format as Table.

You can choose any table styles you want. But for our example, we’ll use the first option under Light.

After that, a Dialog Box will appear. It’ll ask where the data is in the table.
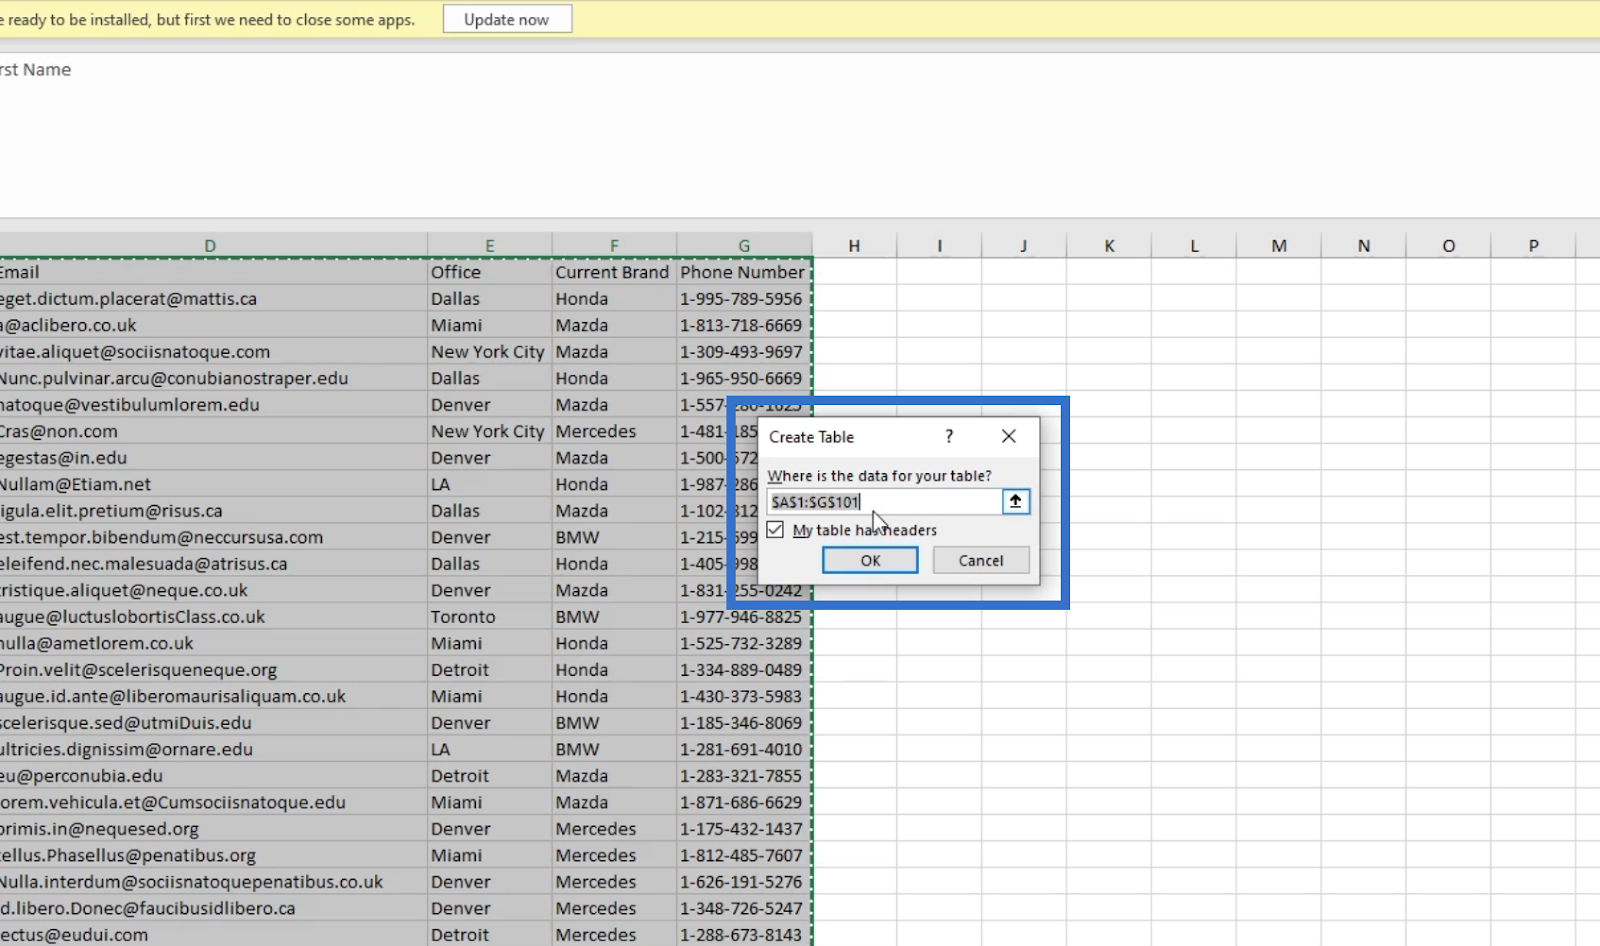
However, since we highlighted it earlier, the range of rows are already there. So, there’s no need to put anything.
Next, tick the check box that tells the Excel file that your table has headers.

Then, click OK.
This tells Excel that this is a table within Excel.
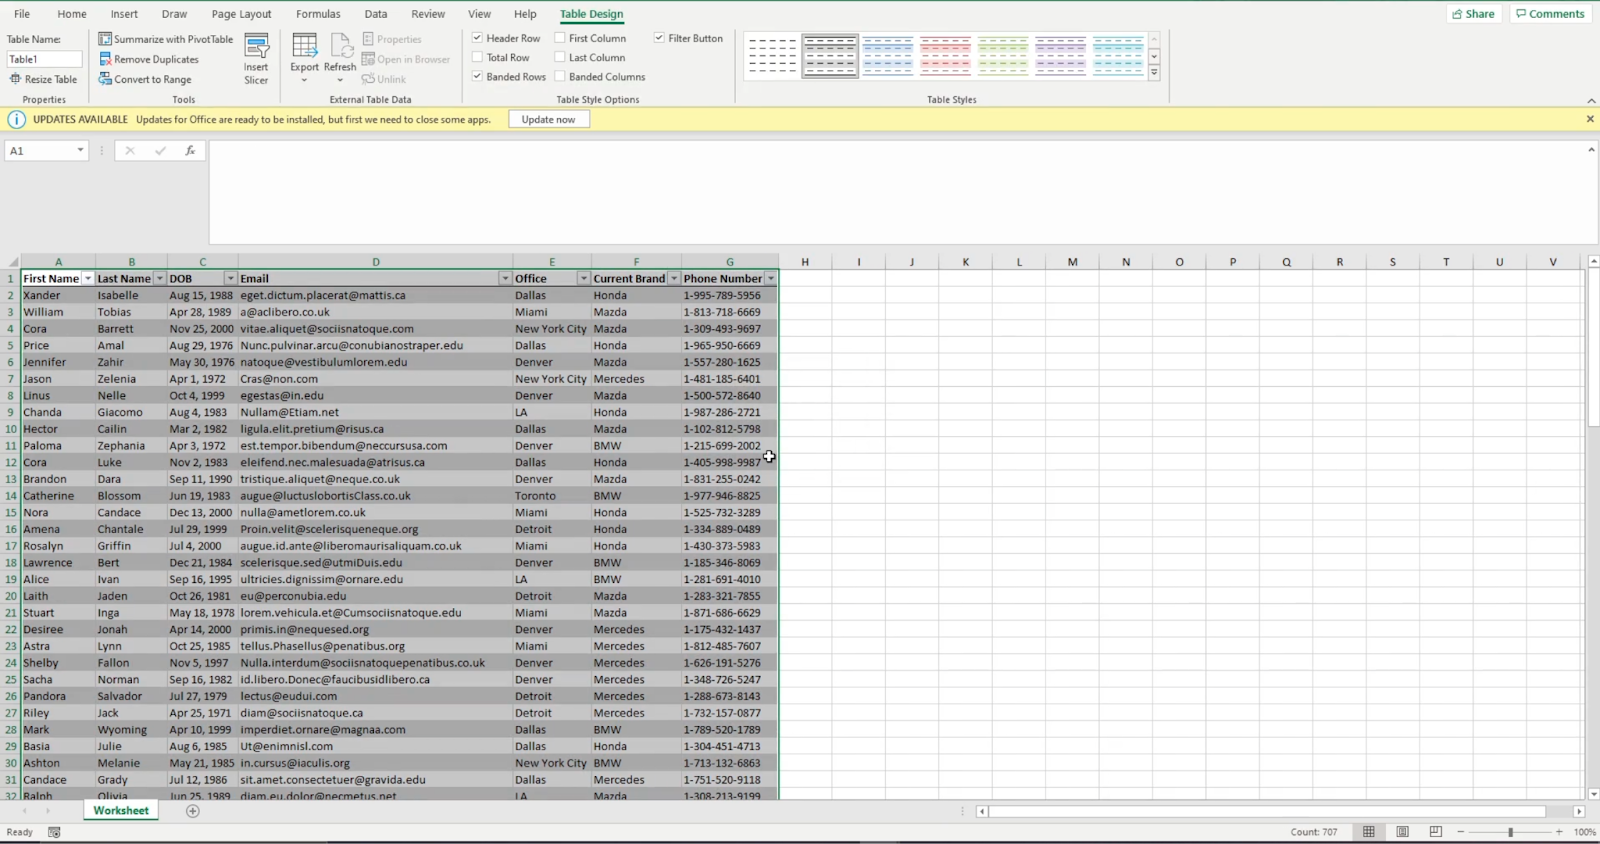
So when you put information in other columns outside the table, Excel will ignore it. When you import it to your SharePoint list, the information outside the table will not be included.

Make sure to save the file.
Creating SharePoint Lists From Excel File
First, you have to make sure that you are on the main page or home. Click New, then select List.

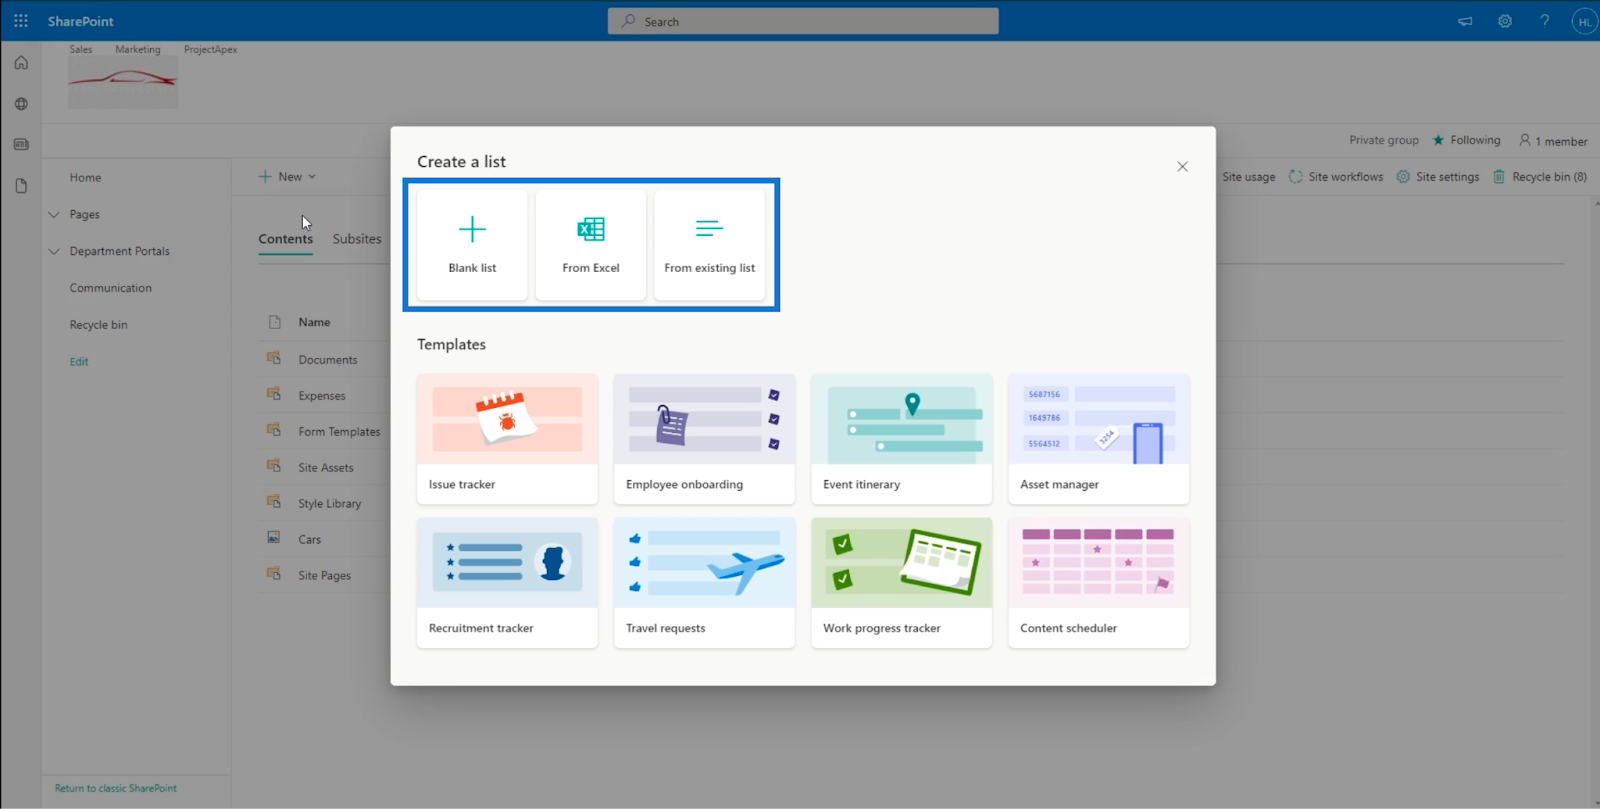
A new window will appear. This is where you can choose how you want to create the list. There are three ways to create a list. In this blog, we’ll focus on creating a list from Excel.
If you’re going to import one from an Excel file, choose From Excel. In our sample file, we’ve told Excel that it is a table.

Let’s navigate to the file, and click Open.

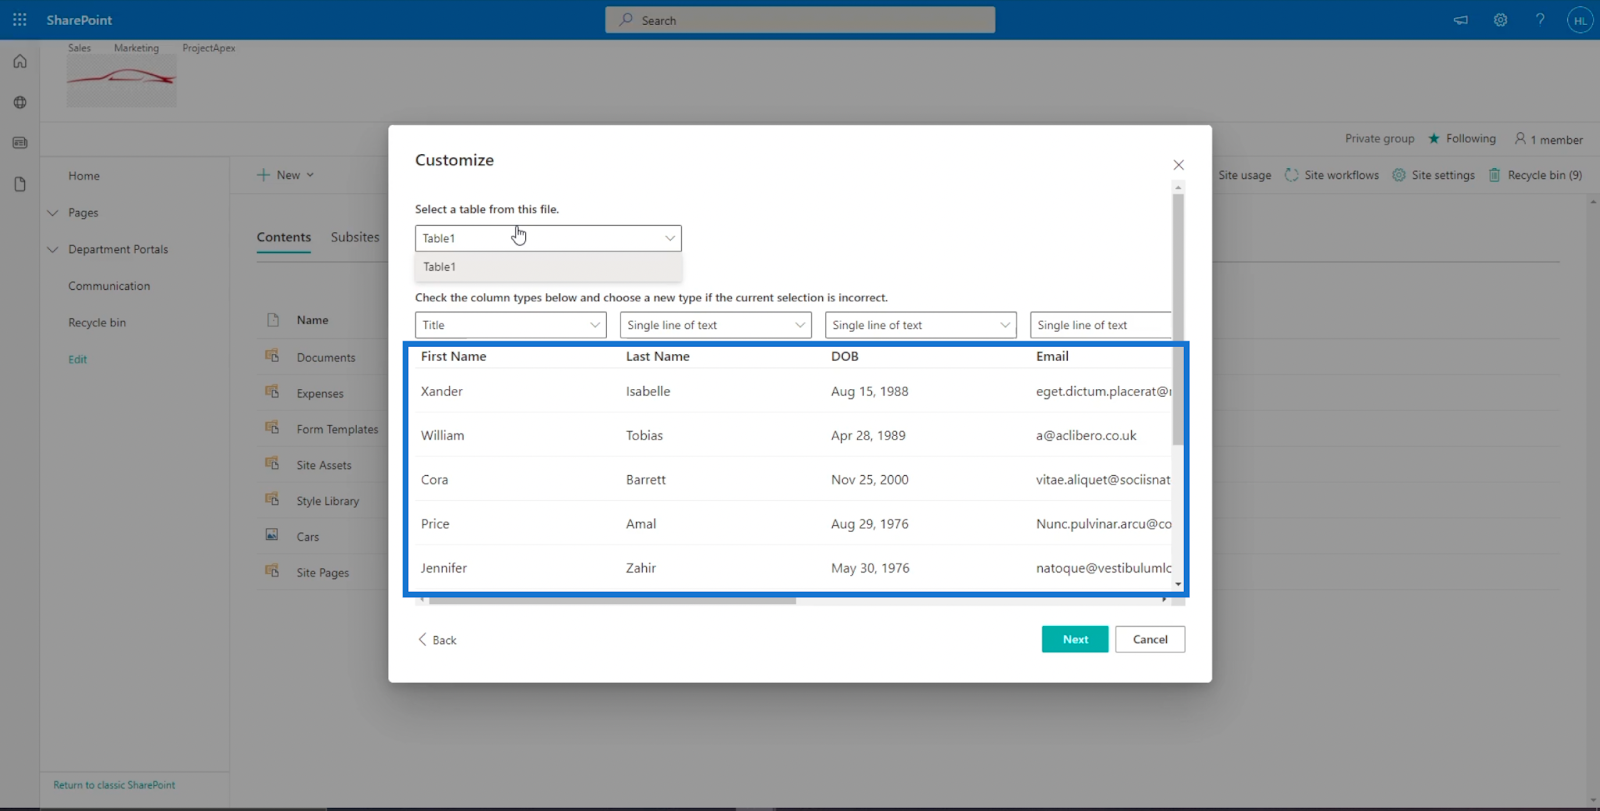
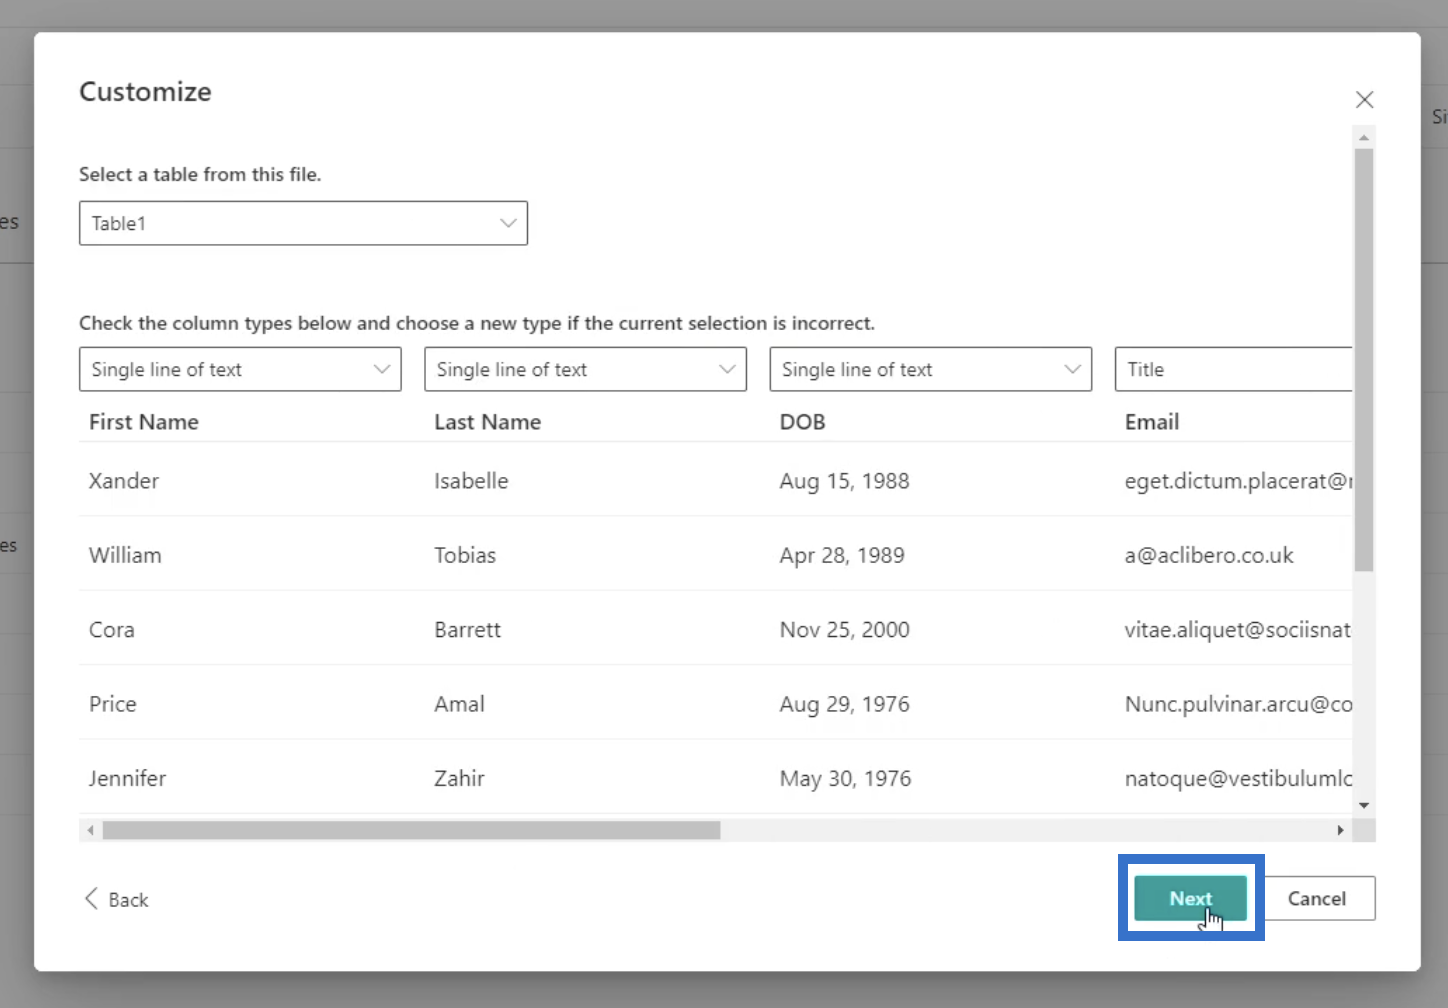
A new window will then appear. This is where you can customize the SharePoint list you are making. Also, you will see the data from the table in the Excel file.
Customizing Your SharePoint List
On the top right portion of the window, you will see a drop-down menu. Here, you can select the table you want to import. Since our Excel has only 1 table, you’ll only see Table1. But if you have multiple tables, you’ll see them included in the options.

Also in this window, you’ll see columns on top. You can use this to set the column type for the data you are importing.

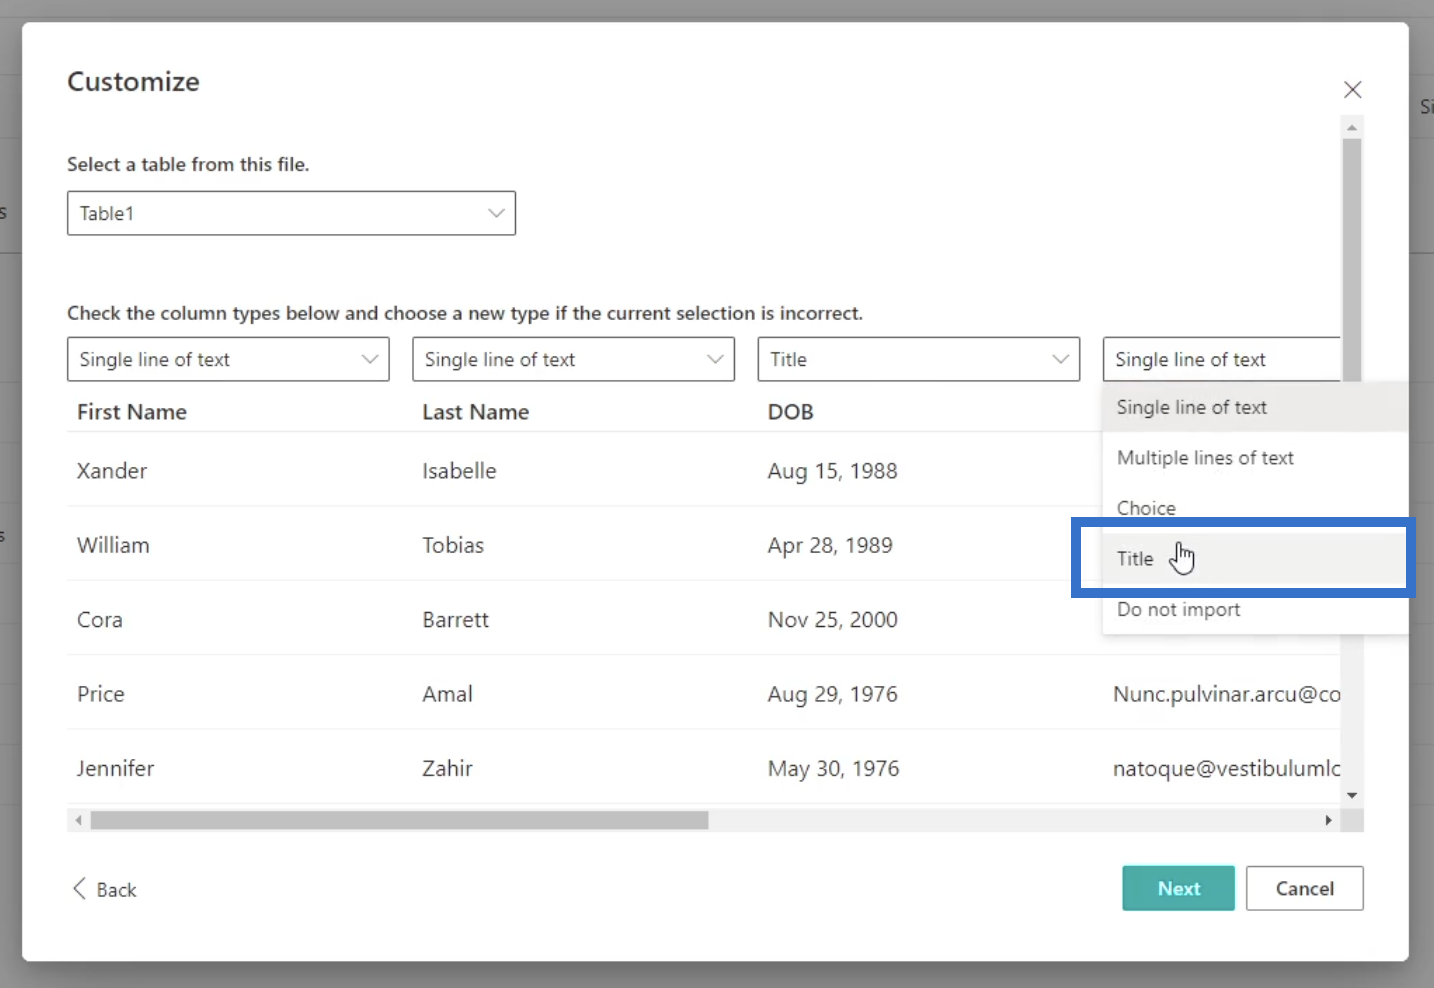
Take note that you can set it according to your needs. In our example, we are using contact data. Hence, it’s best to choose the title as something that’s unique. Instead of using the First Name for the title, we’ll choose the Email. So, let’s click the drop-down menu on top of the Email.
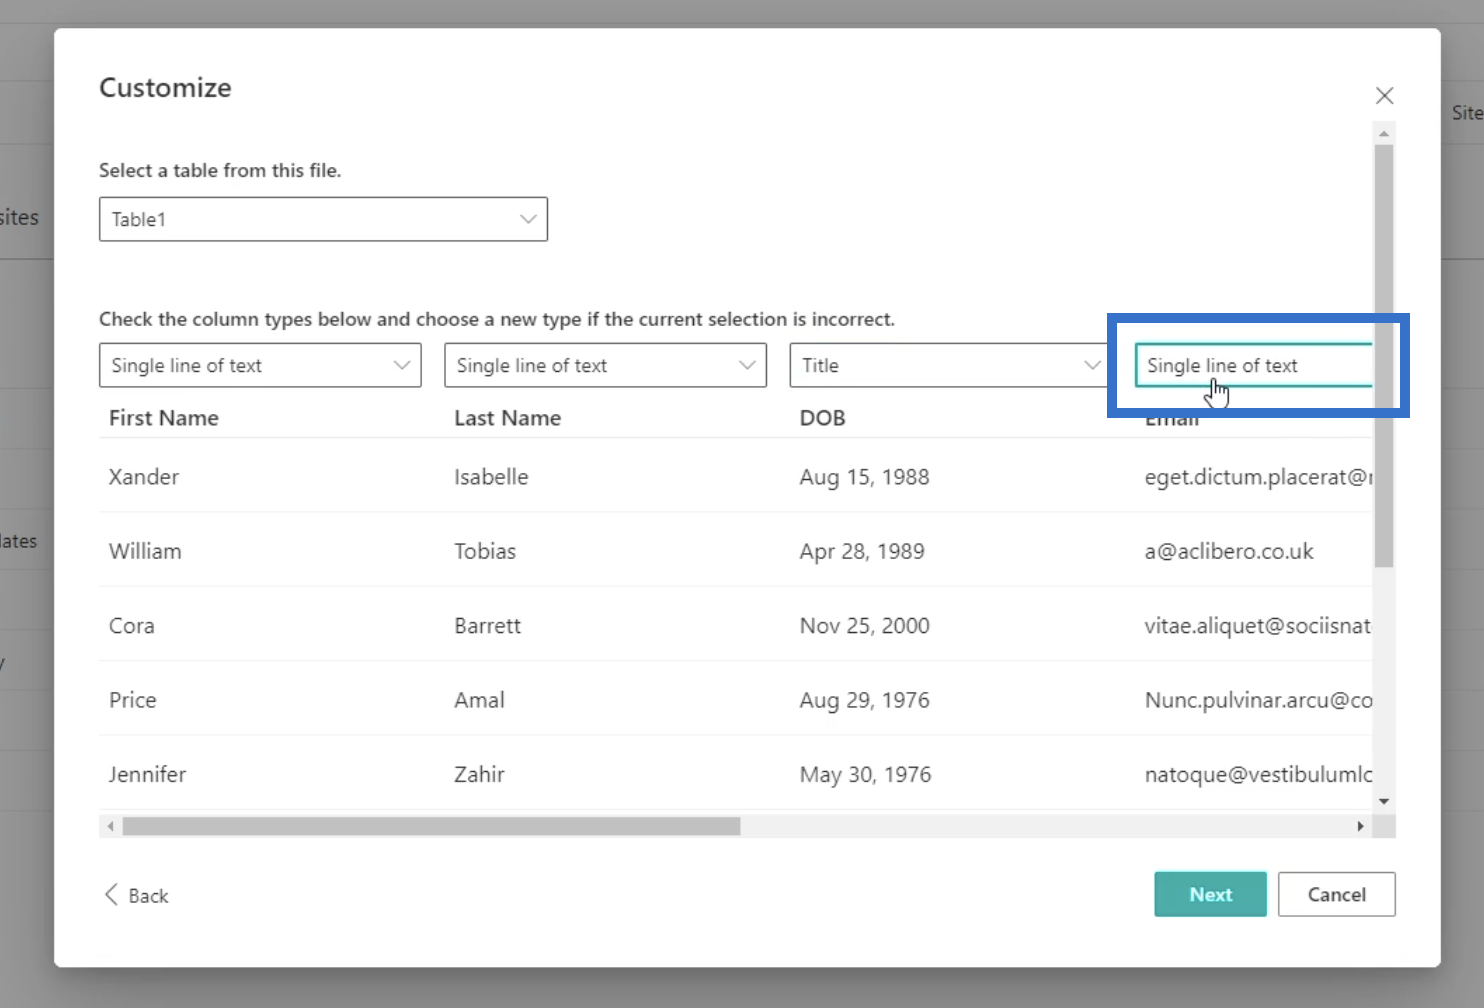
Then, choose Title from the list.

Keep in mind that you can’t have more than one title for the column type. After setting the title, we’ll set the column type of the other columns for our list. You will notice that there are multiple options for the column type.
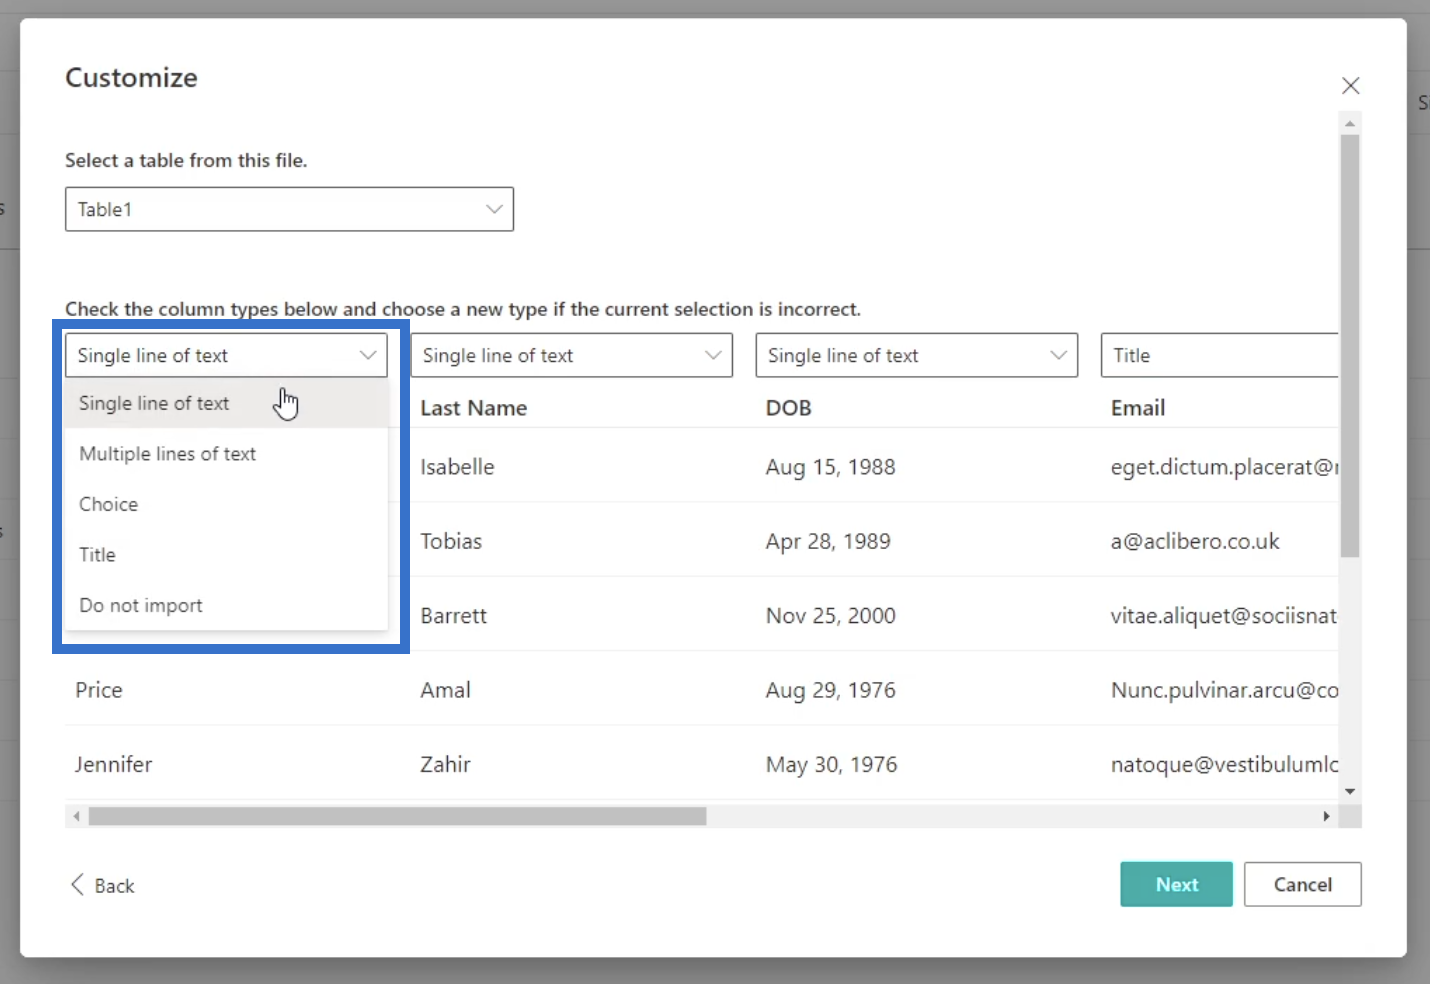
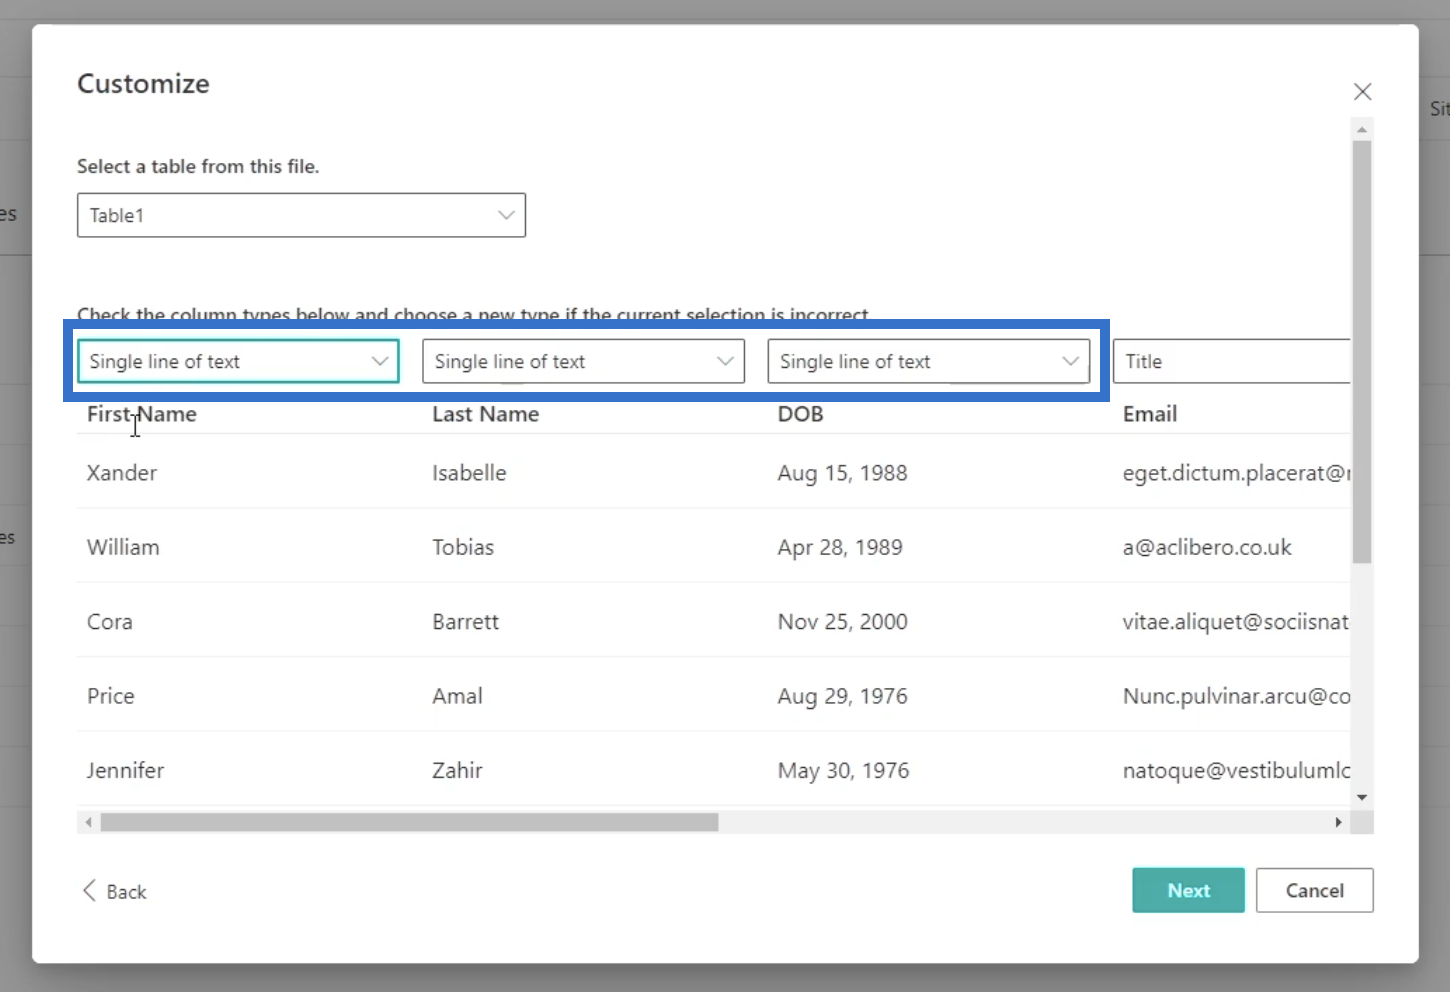
For the First Name and Last Name, we’ll use Single line of text. For the DOB, we want to use a date but we can’t use it yet so we’ll use Single line of text as well.
Next, for the Office and Current Brand, we’ll choose Choice so we can choose a set of options later on.
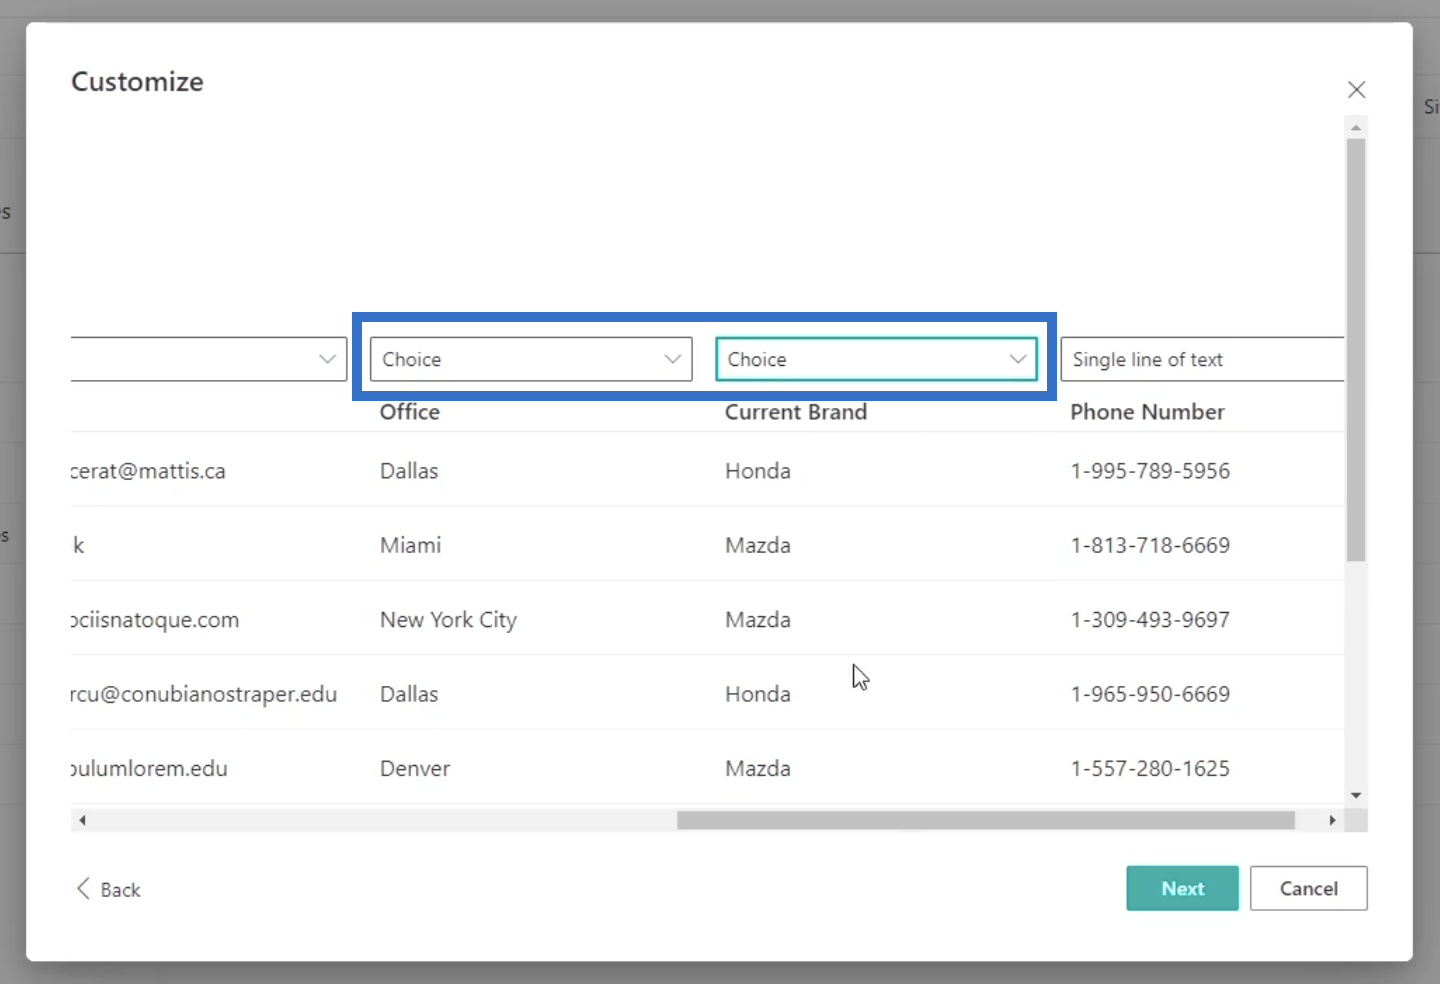
And for the Phone Number, we’ll also use Single line of text.
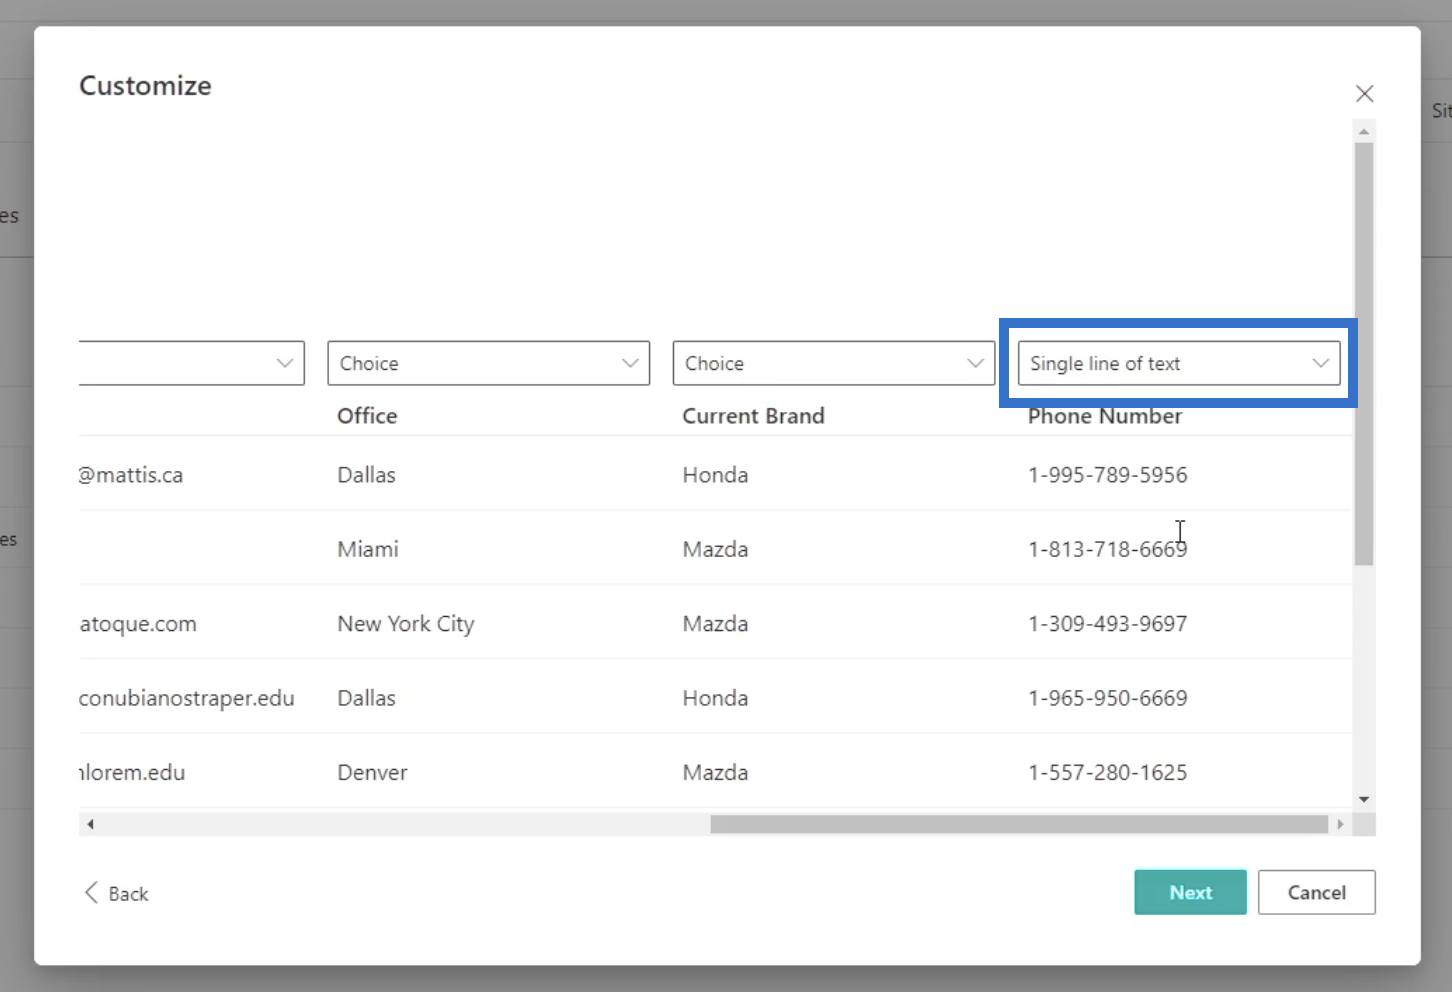
After that, click Next.
Configuring A List In SharePoint
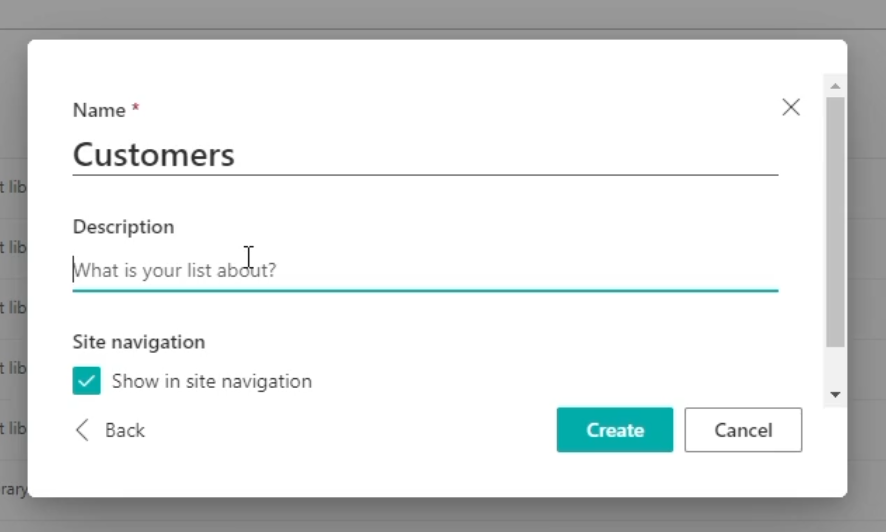
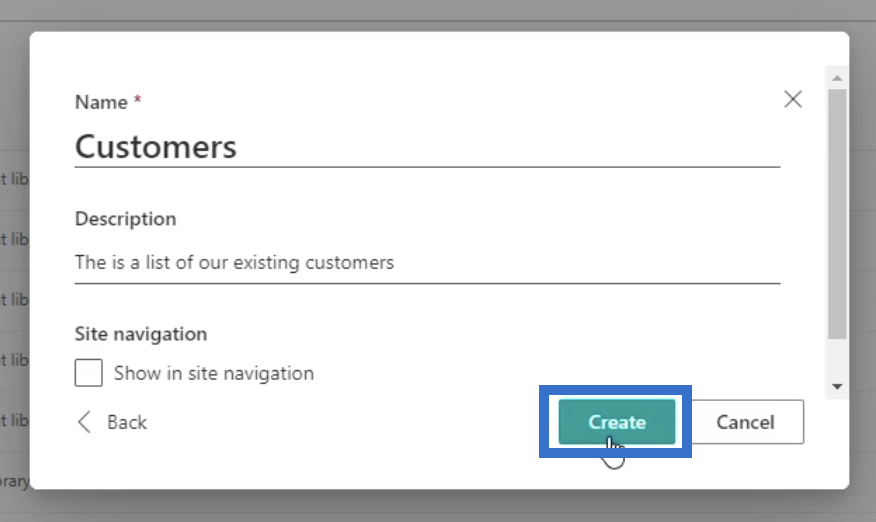
In our example, we’ll use “Customers” as its Name.

Next, we’ll type the description of the list we just made to help us identify what the list is about. For our example, we’ll type “This is a list of our existing customers” in the description field.
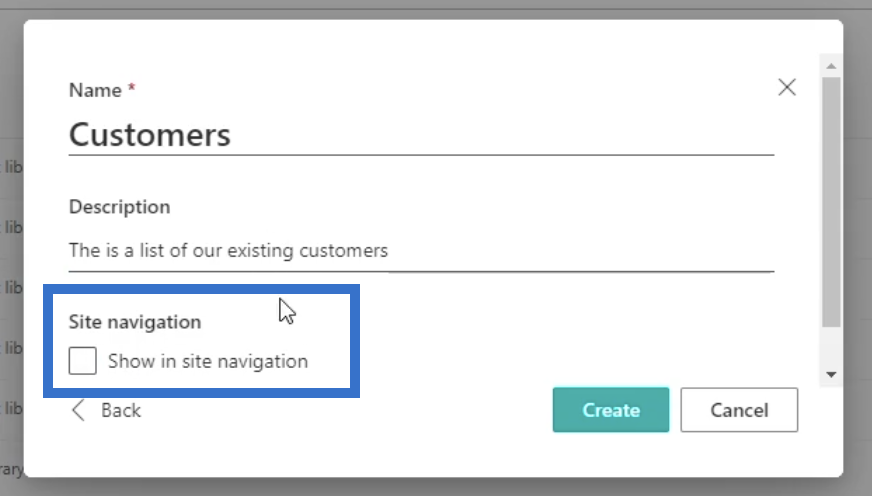
Then, we’ll uncheck the Site navigation so it won’t appear in the site navigation panel on the left.
Finally, click Create.
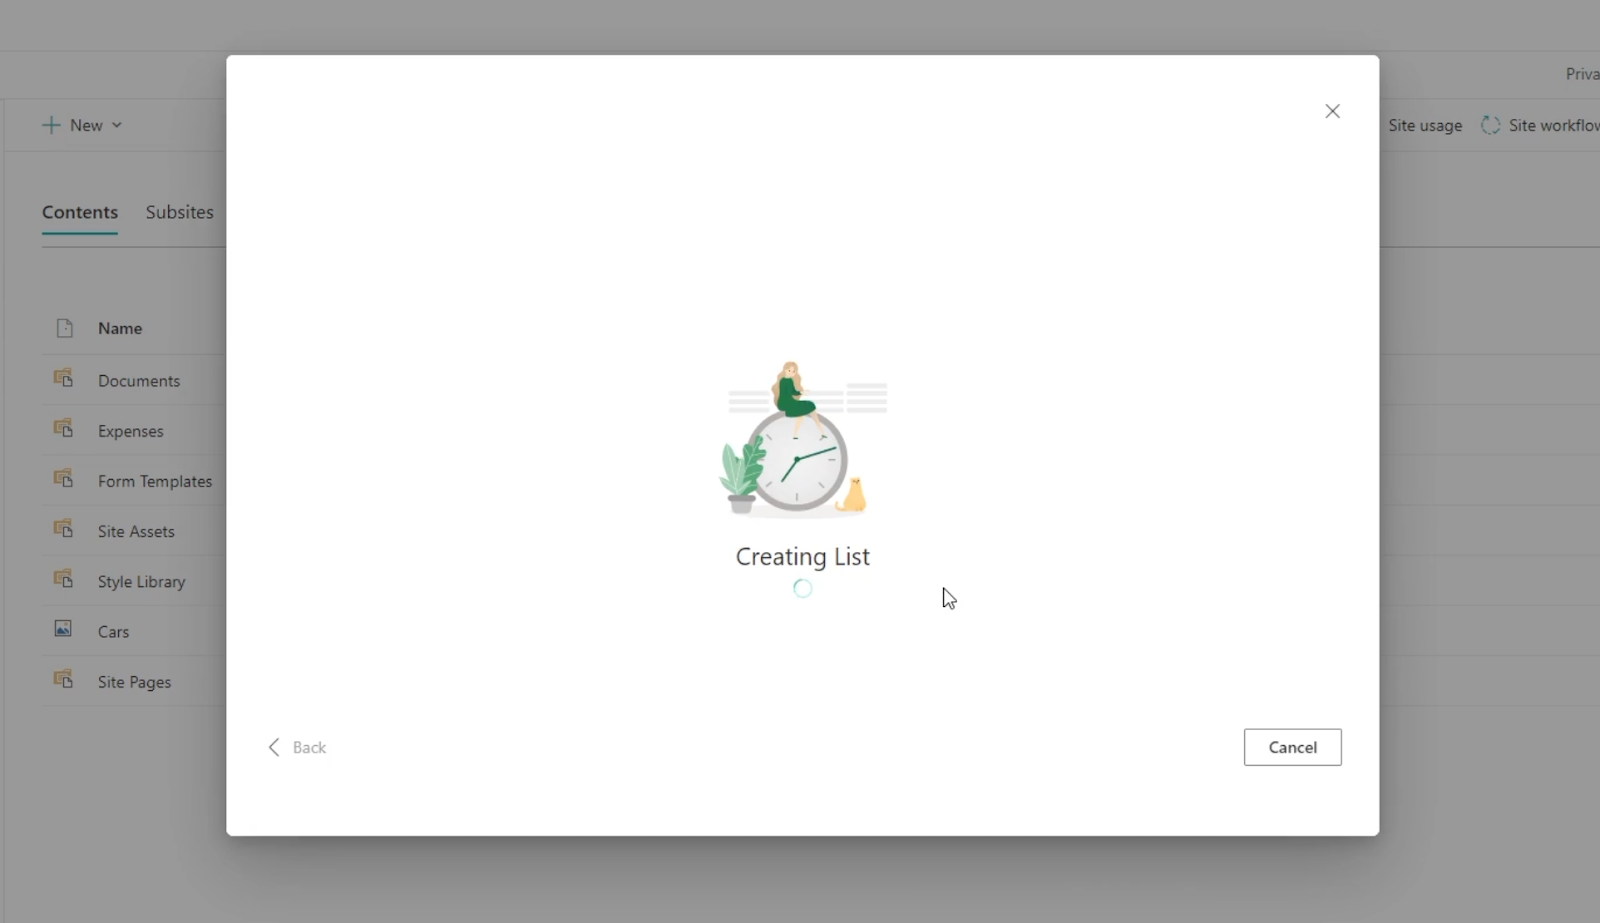
It’ll take us to the loading page, while SharePoint creates your list.
And once done, it’ll automatically redirect you to the list we just created.
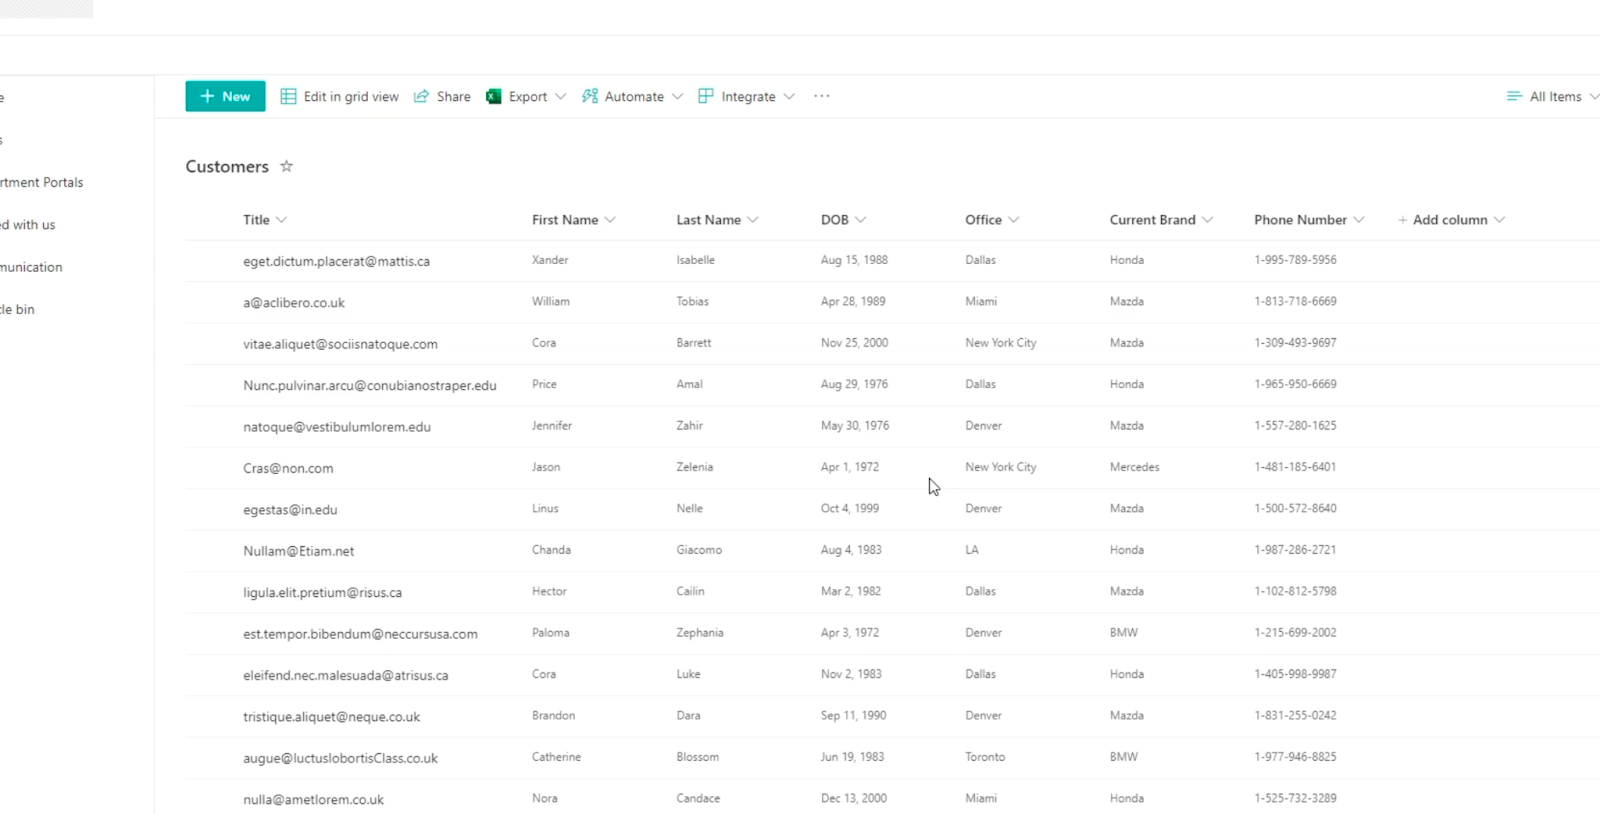
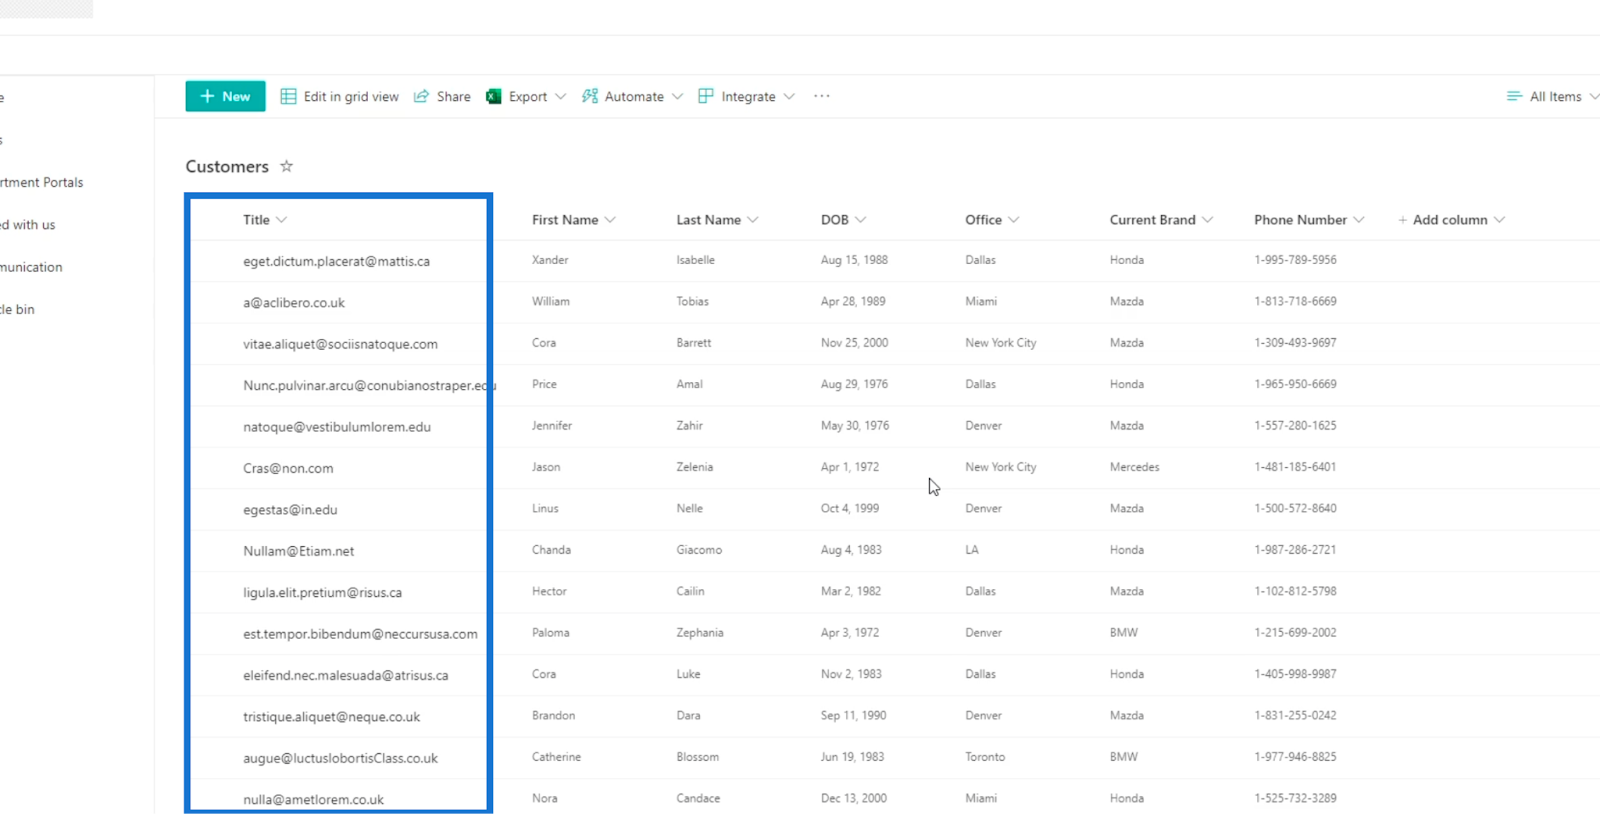
You’d notice that it automatically moves the Title to the beginning. This will help you identify what the data is about.
Also, all the data we imported is now complete.
Other Ways Of Creating SharePoint Lists
In this part, we’ll just show you what the other options would look like. Again, you can choose between Blank list, From Excel, and From existing list.
If you want to create new data, you’ll choose Blank list. Then a dialog box will appear asking for the list name, description, and if we want to add it to our site navigation.

If you already made a list and you want to make that list again, choose From existing list. A dialog box will then appear where we can choose the sites that have the existing list we can use.
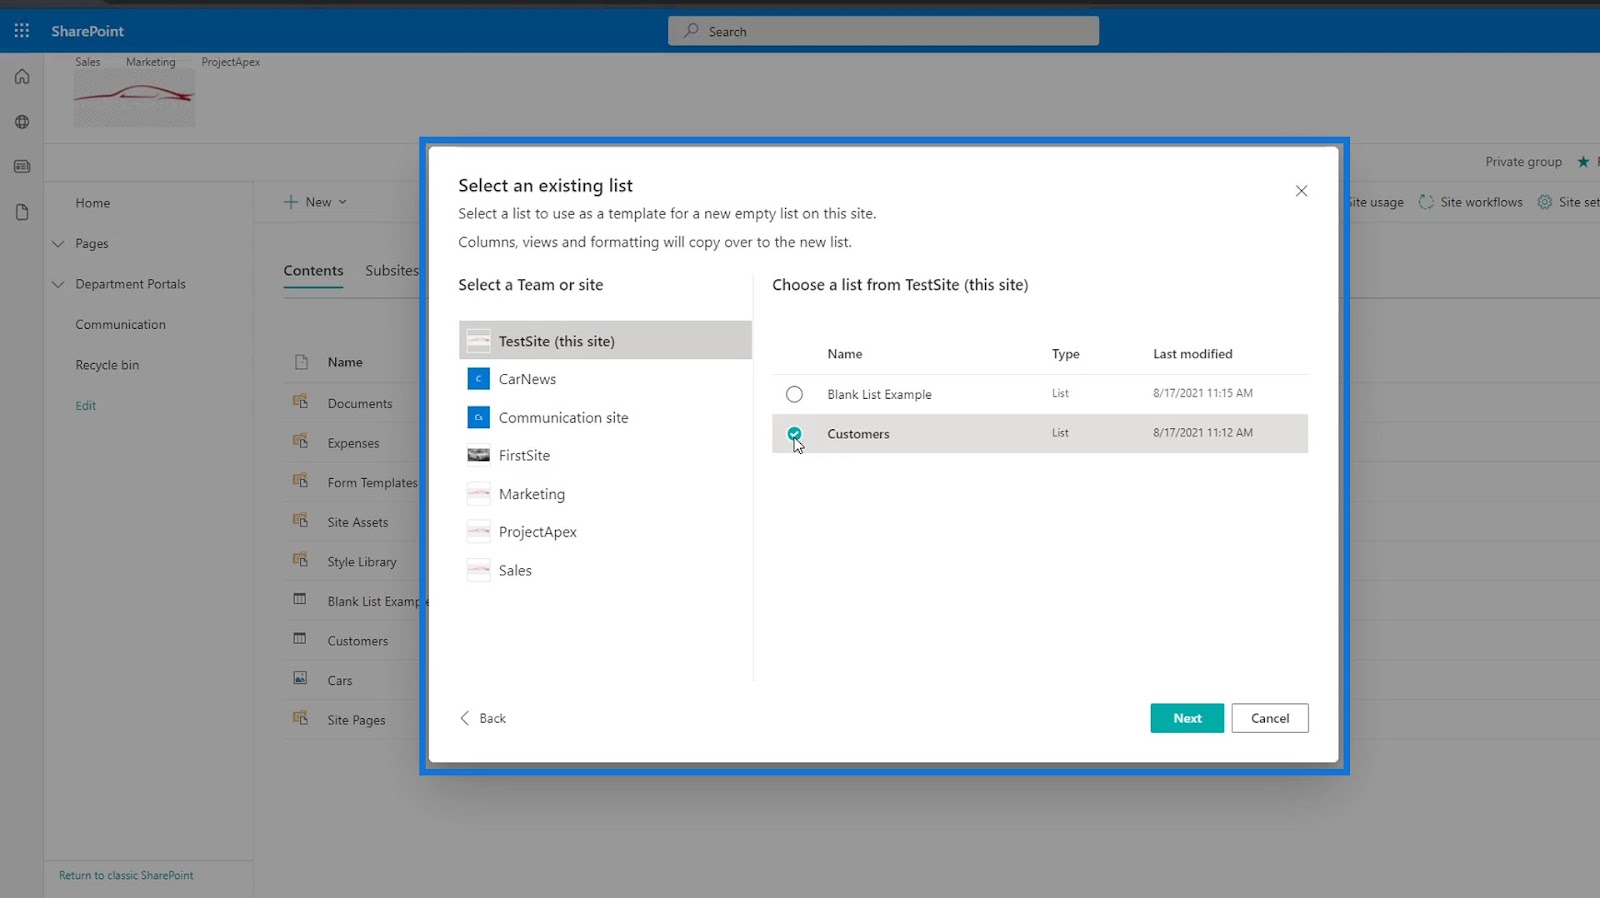
After selecting an existing list, another dialog box will appear where we can set the list name, description, and if we want to add it on our site navigation.

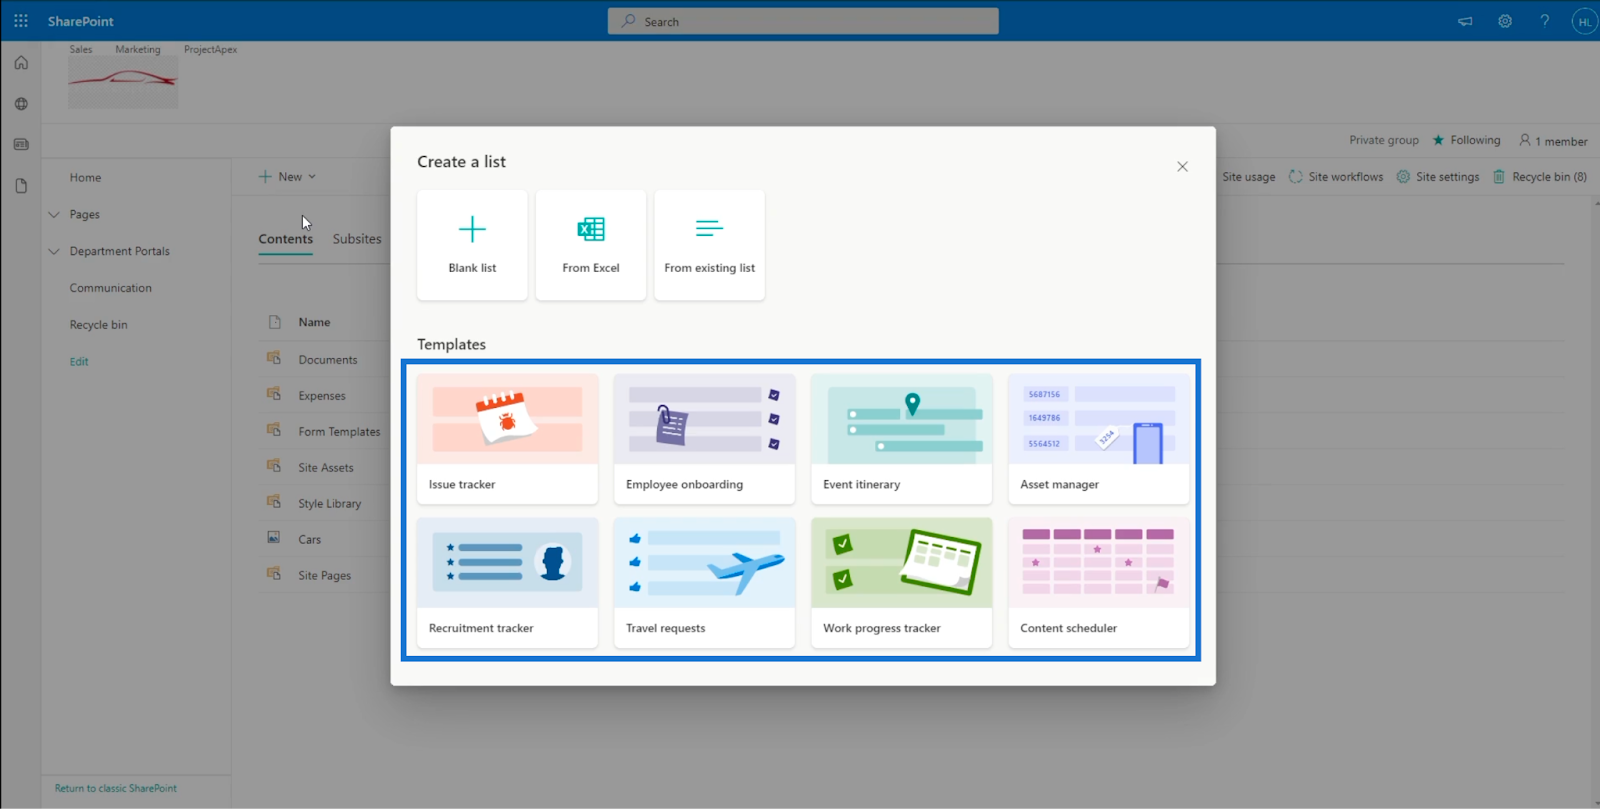
There are also some available templates for you to choose from. One of the best things about templates is that they have their own views and workflows.
***** Related Links *****
SharePoint Project Site: Creation And Configuration
Microsoft SharePoint | An Overview
MS SharePoint Tutorial: Account Creation
Conclusion
To sum up, we’ve learned how to prepare your Excel file before importing it to SharePoint. More importantly, we’ve learned how to create a list from an Excel file and the other ways of creating a list.

As long as you follow these steps, you’ll surely be able to get used to importing tables from your Excel files. Hopefully, this tutorial helped you understand the importance and usage of SharePoint lists as well.
All the best,
Henry


")