For today’s tutorial, I’m going to demonstrate how you can refresh Excel files in Sharepoint with Power Automate Desktop. You can watch the full video of this tutorial at the bottom of this blog.

This topic came from a request, which asked if there was a way to have a Power Automate open an Excel sheet in a SharePoint folder, refresh the Power Query, and then save the workbook. The request also asked whether it could be all done online in the background, without anyone opening the workbook.
So, I’m going to be creating a Power Automate Desktop flow using an Excel file in SharePoint. The only thing is that when you schedule this flow to run, or whenever this flow runs, you can’t do it in the background. The machine that you do this on will have to be awake so that it can perform the flow when you trigger it however you want to trigger it to begin the flow.
Creating A Flow To Refresh Excel file In SharePoint
Let’s hop on over to the Power Automate Desktop and set this up.
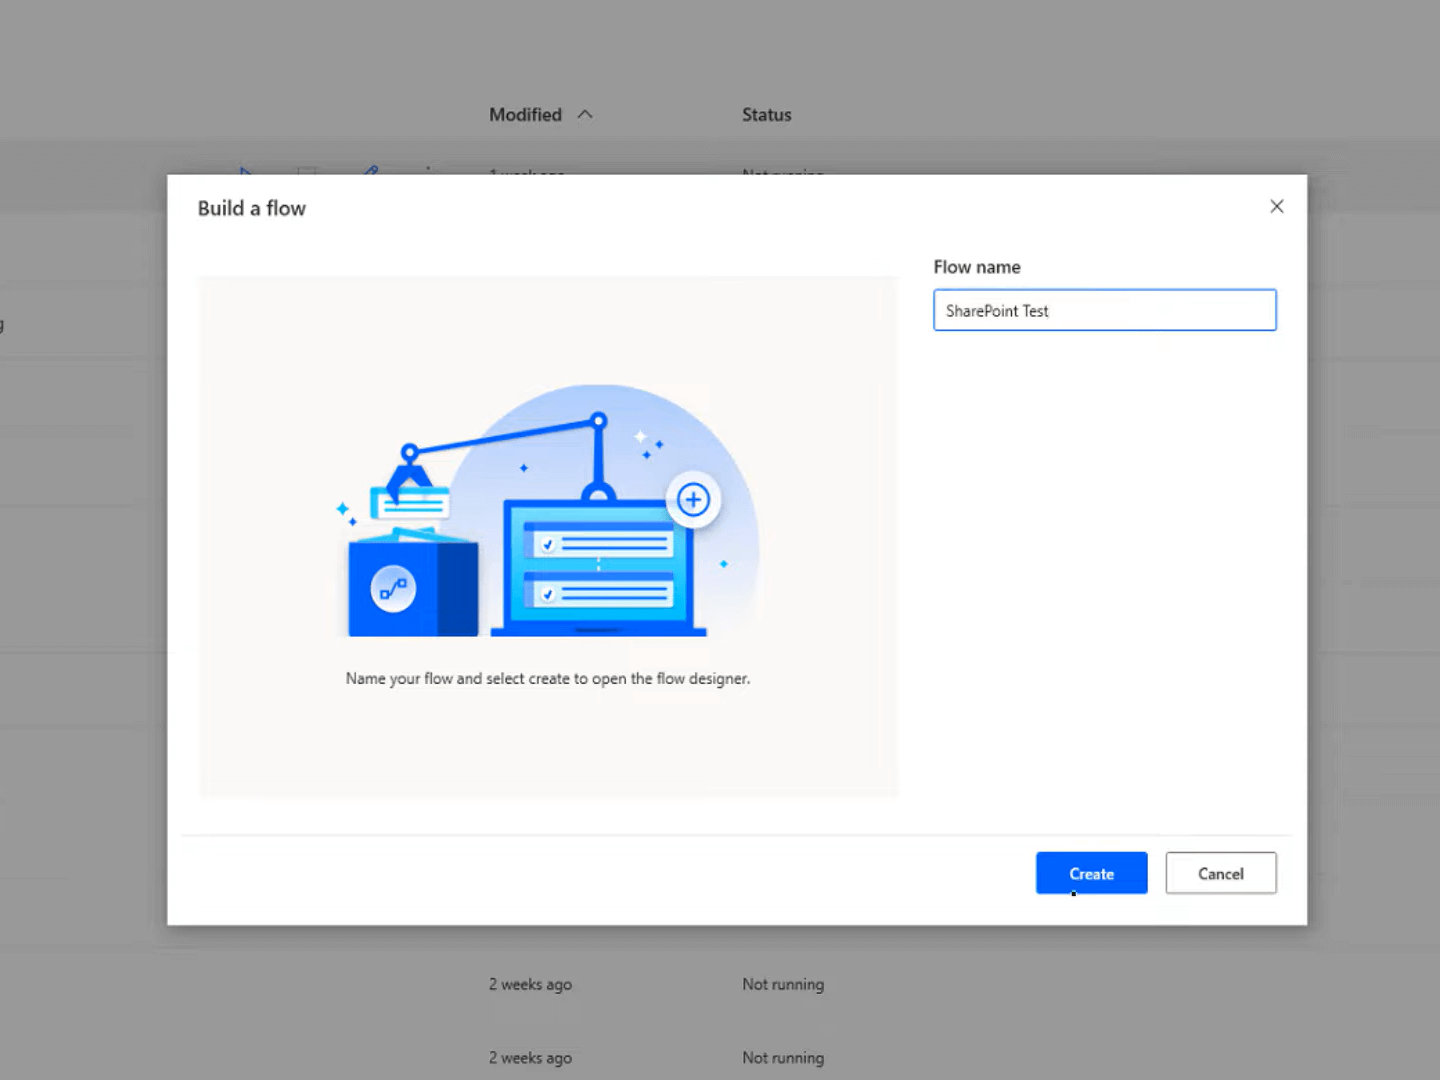
I’ll click on New Flow at the top left of the screen; we’ll just name this SharePoint Test for the sake of this demo. I’ll then hit Create.
This is very intuitive. Here it shows us all the different things that we can do in Excel that are actions from the screen here in Power Automate Desktop.
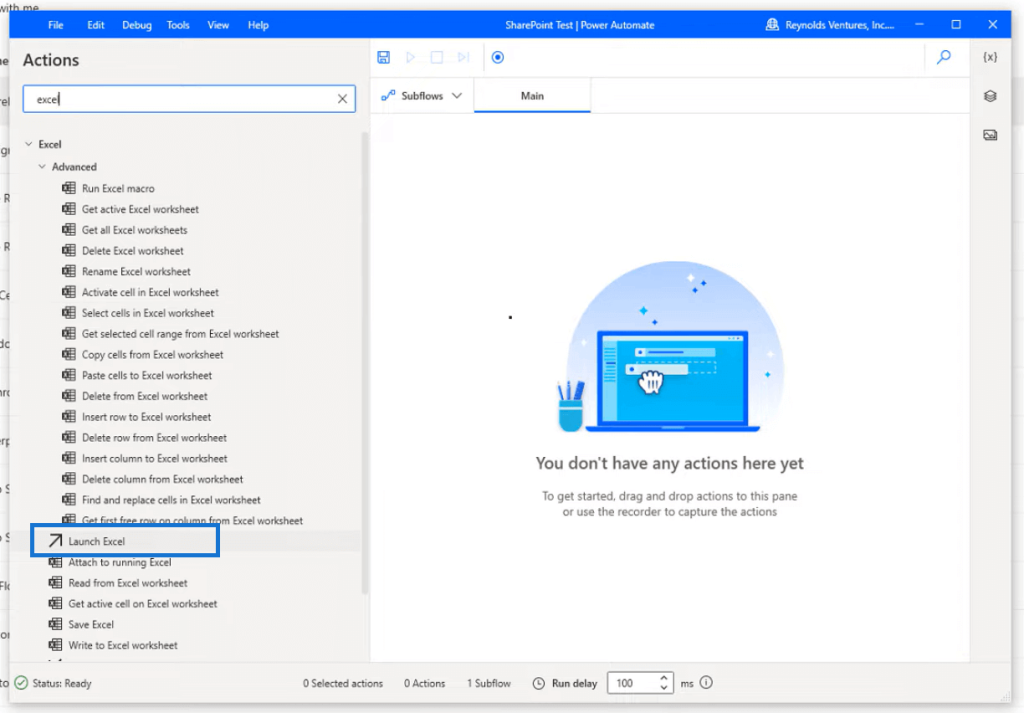
The first thing that we’re going to do is click on this Launch Excel. As I open that up, it automatically goes to a blank document. If you were going to open a blank document, you could do this, but in today’s case, I’m going to use a file that I have saved in SharePoint.
Once we select the file, we need to make sure that we have the Make instance visible turned on. We don’t want it to be read-only.
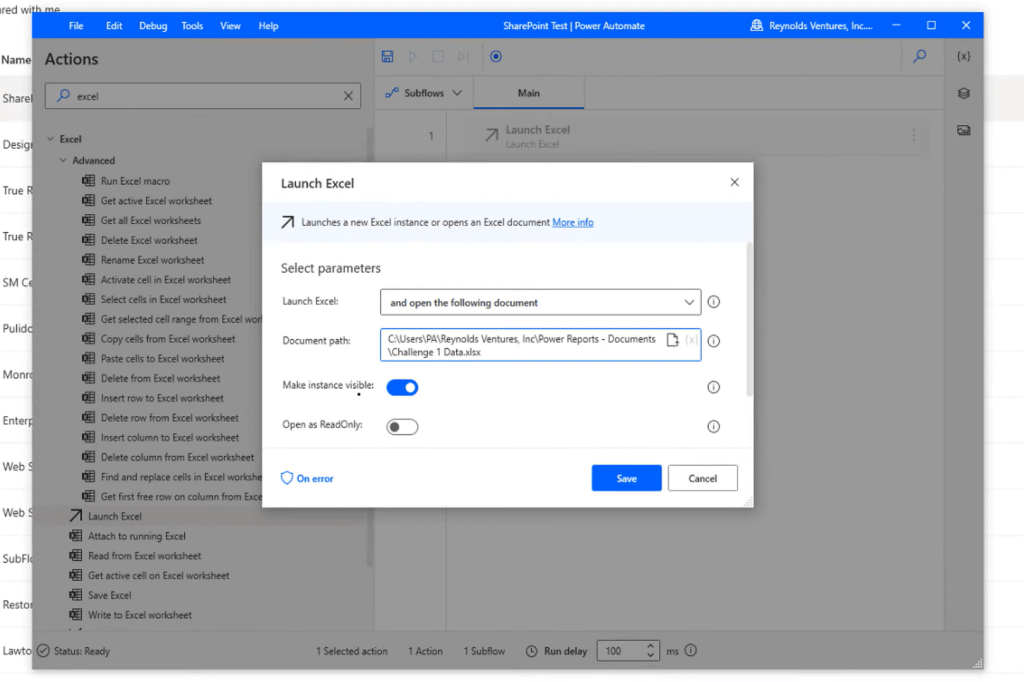
And then, we’re going to scroll down this list and click on the Advanced tab. If you have SharePoint, you’re going to have to enter the password to your SharePoint folder so that the file will open.
Now we have our first instance, so we’re going to launch an Excel file. The next thing I will do here is open this file so I can explain what I’m going to do before I actually create the steps in Power Automate Desktop.
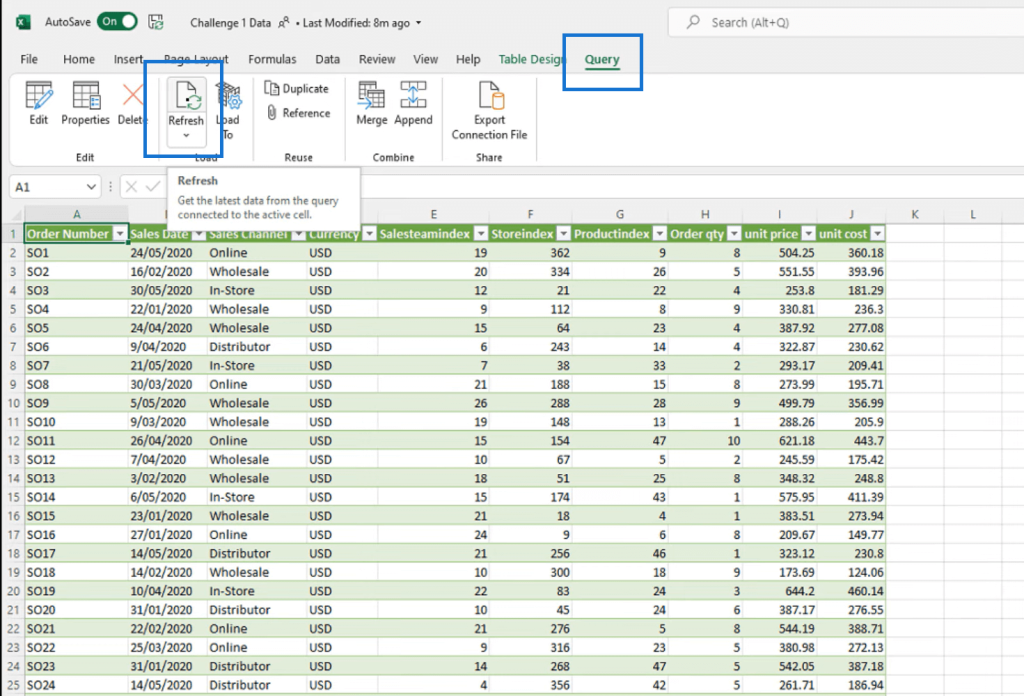
I’m going open my Excel file (Challenge 1 Data). As we can see here, we have all the data from the Enterprise DNA Challenge 1. Now, I’ll click on this Query tab and then click on Refresh. Then, the third step is to save the existing file. Finally, the last step is to close the Excel instance. Once I’ve completed this, I’ll run the flow so you can see it in action.
Back in the Power Automate Desktop, I’m going to click on UI automation. While these are not all the steps, they are the majority of the steps that you can use within a Word, an Excel file, or anything that’s UI and not web-based.
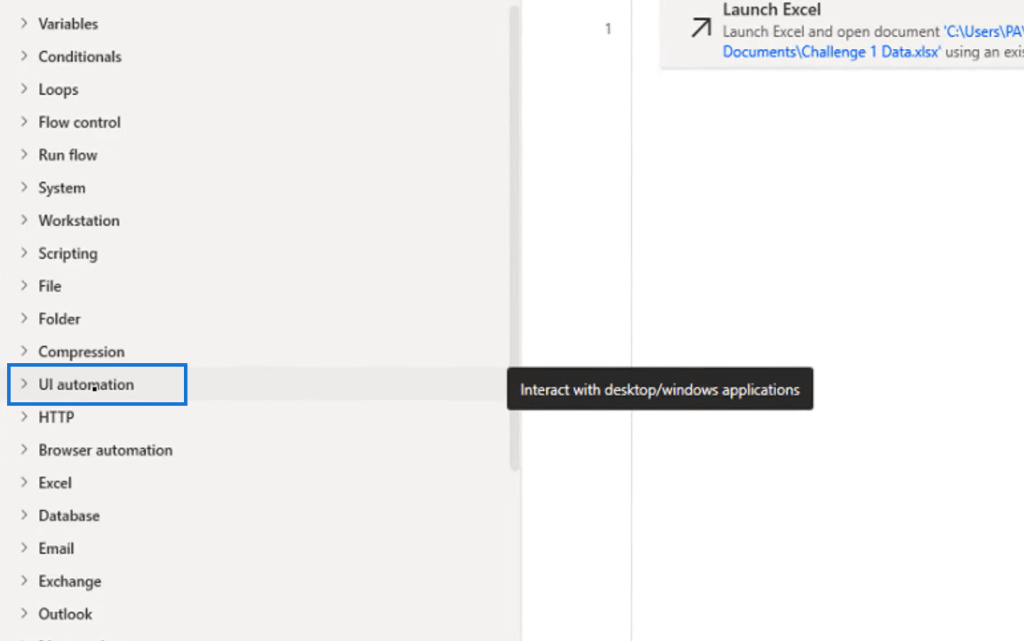
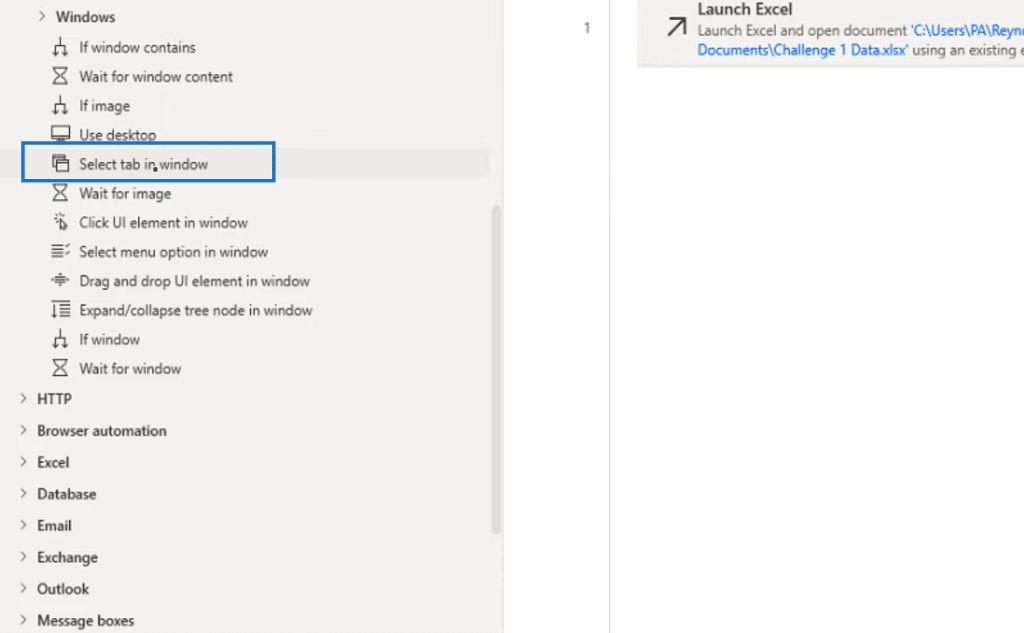
I’ll open that menu, scroll down, and click Select tab in window. To do this, we must have that Excel file open.
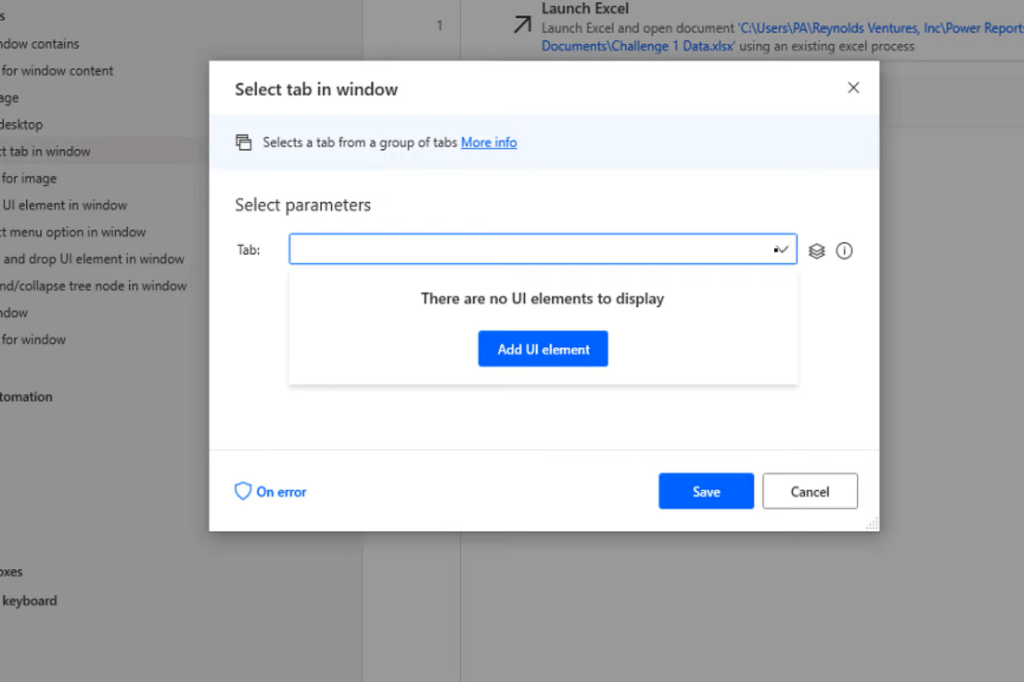
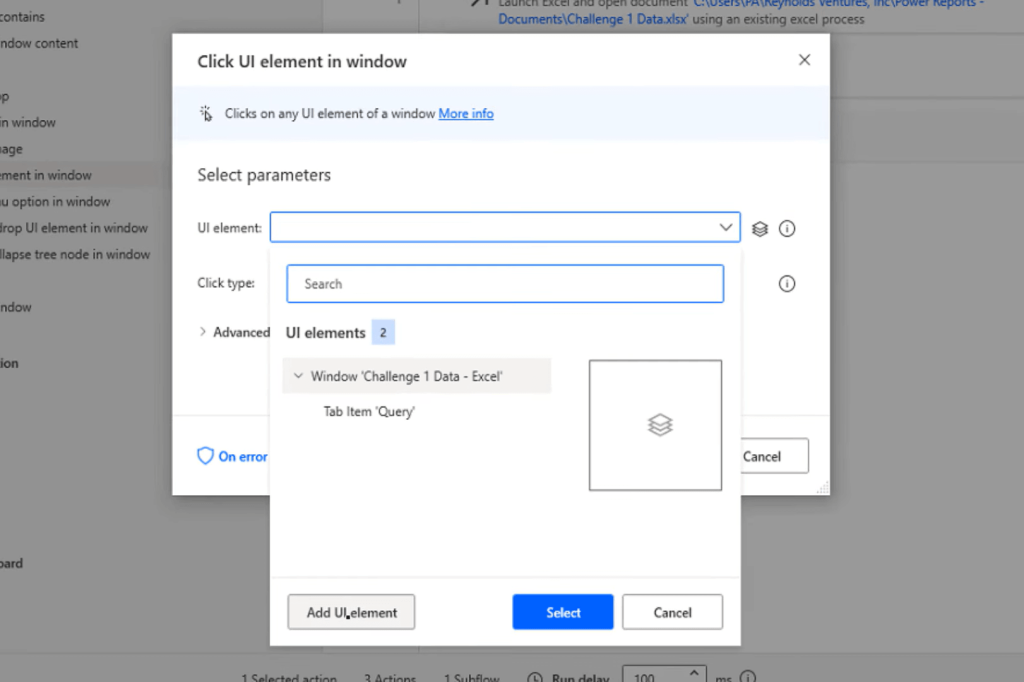
Then, it’s going to ask us to pick a UI element. So, we’re going to click on the Add UI element button.
Next, I’ll hover over the Query tab, then the control-left-click.
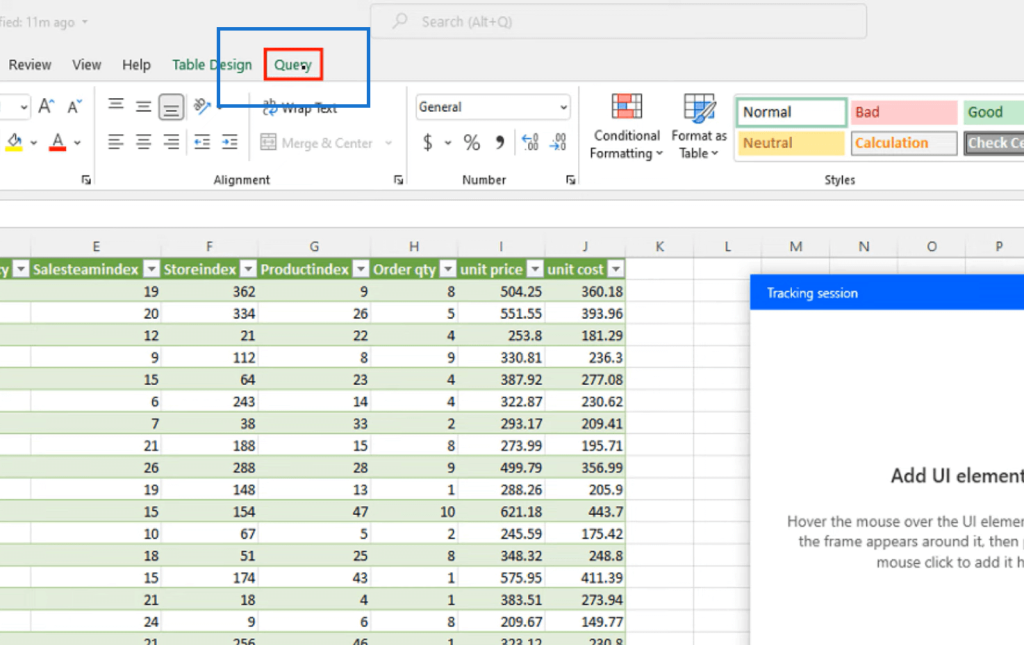
And then, click Save.
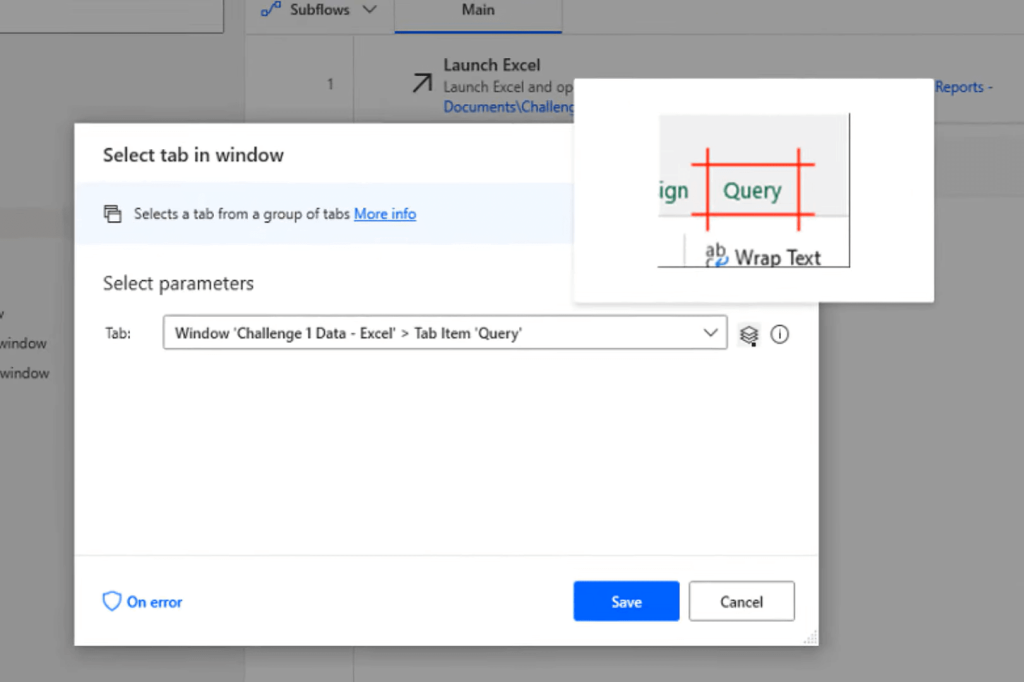
We wanted to select the tab in the window to open the Query Editor. So, the next step in our process is we’re going to click on the Refresh button now to refresh all the data.
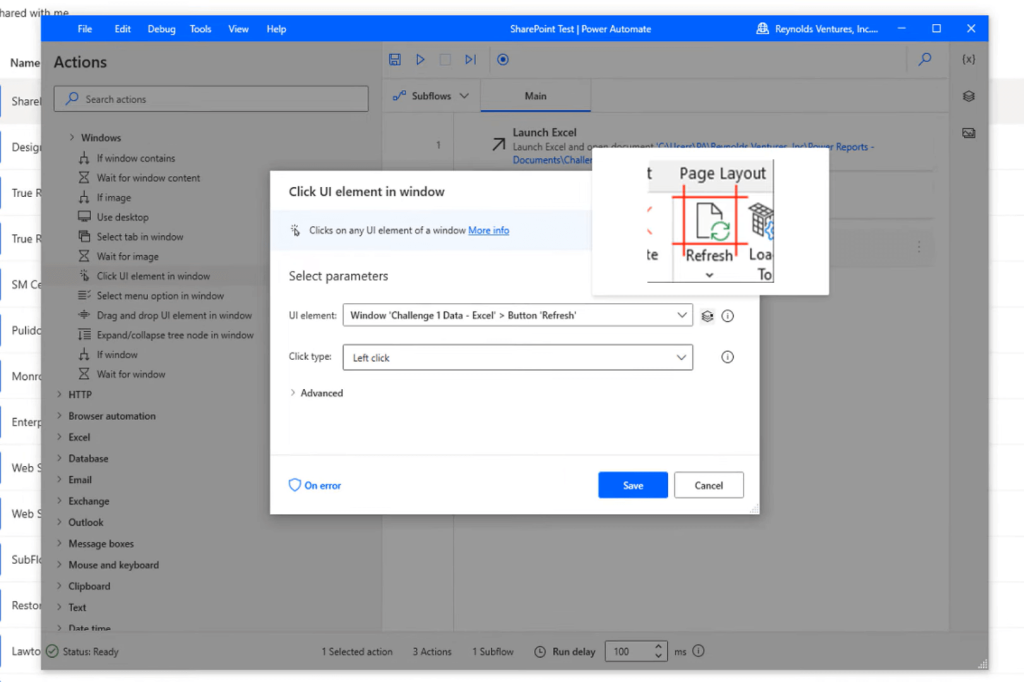
What I will use from this selection are the Click UI element in the window and the UI element. Then, we’re going to add another UI element.
I’ll just go over the Refresh button and control-left-click. Then save it.
Now that we have this done, and refreshed it, we just need to close and save the file, which is the final step. It’s not in UI automation, so I will just click on Excel again and select Close Excel.
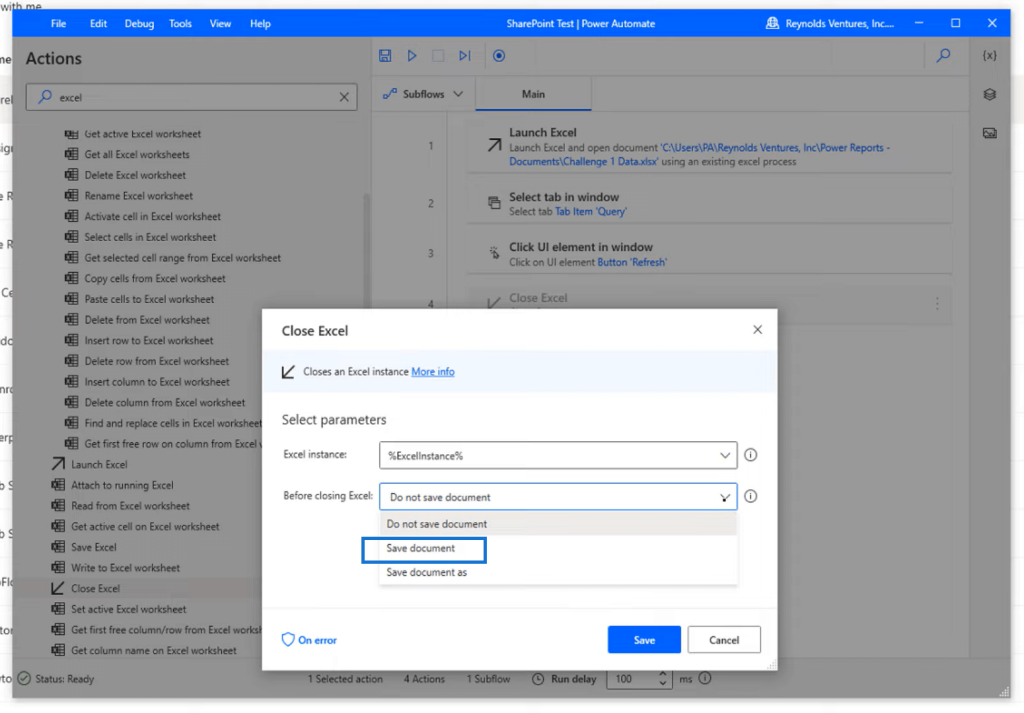
This is the instance that we have created from opening the original file in the flow, and then we just select Save document since this is already an existing document.
***** Related Links *****
Schedule A Desktop Flow To Run In Power Automate
Send Emails With Power BI & Power Automate Platform
Power Automate UI Flows: Creation And Setup
Conclusion
In my past tutorials, I usually did this by either extracting data from the web or with web functions. I get the question all the time, whether we can do this with Excel, Word, or any kind of document besides just doing it through the web.

The answer is yes!
So that’s what we’ve done today. I’ve shown you how to create a Power Automate Desktop flow to refresh Excel files in SharePoint.
I hope you’ve found this helpful. It’s very easy to do. You can watch the full video of this tutorial below and check out the links below for more related content.
All the best!
Jarrett
[youtube https://www.youtube.com/watch?v=4Qoh9t_ZvqI&t=22s&w=784&h=441]


