In this tutorial, we’re going to talk about how to create PowerApps business rules. We’re also going to cover a few other tools and concepts used in working with common data service.
Business rules are created to set specific rules about your data.
One common way of using it is to set specific boundaries or guidelines on how data can be added through your forms. That’s what we’re going to do in our example.
How Business Rules Work
To add a business rule, we just need to go to the Business Rules tab in Entities, then click on “Add business rule” on the upper left corner.
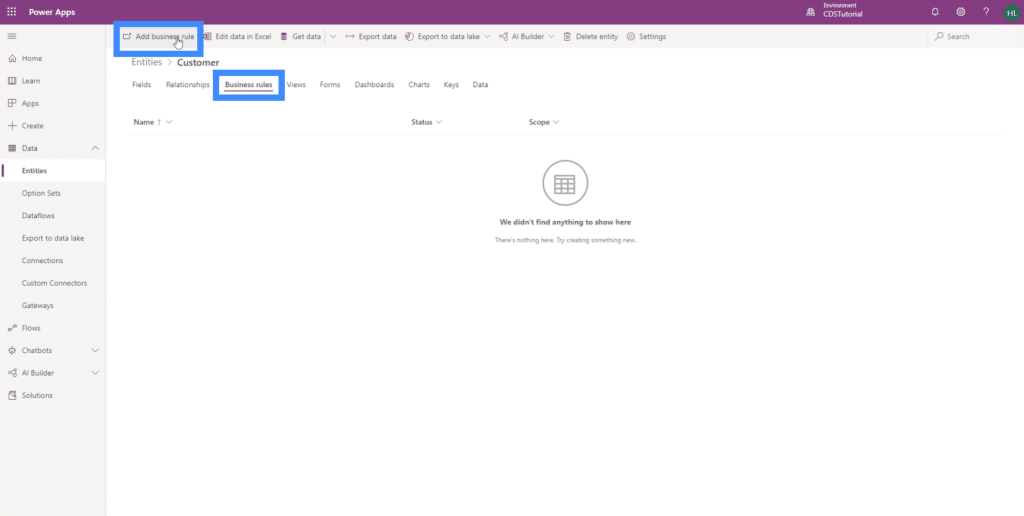
This is how the PowerApps business rules section looks like.
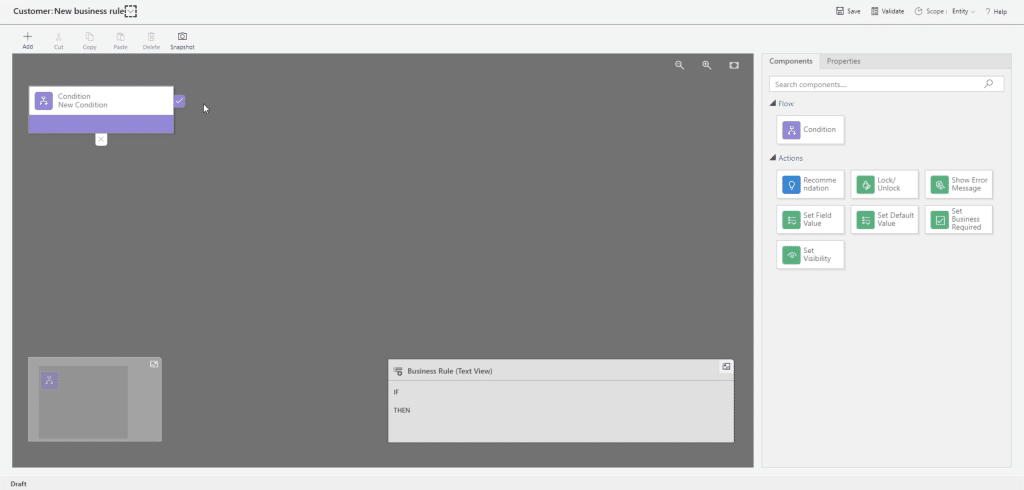
Business rules start with an IF statement or a condition.
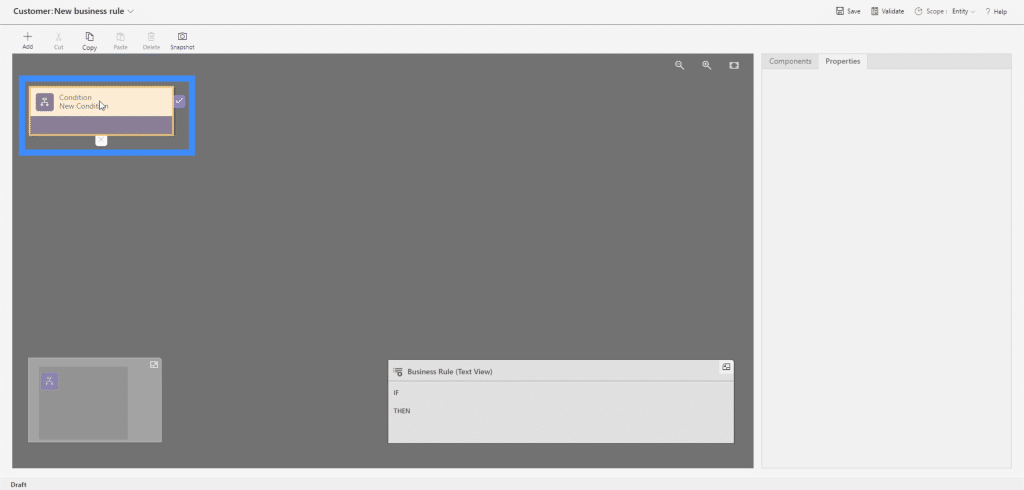
If the given condition is met, then it follows the series of actions and conditions connected to the check mark on the right. If not, then the path with the x mark below the condition is followed.
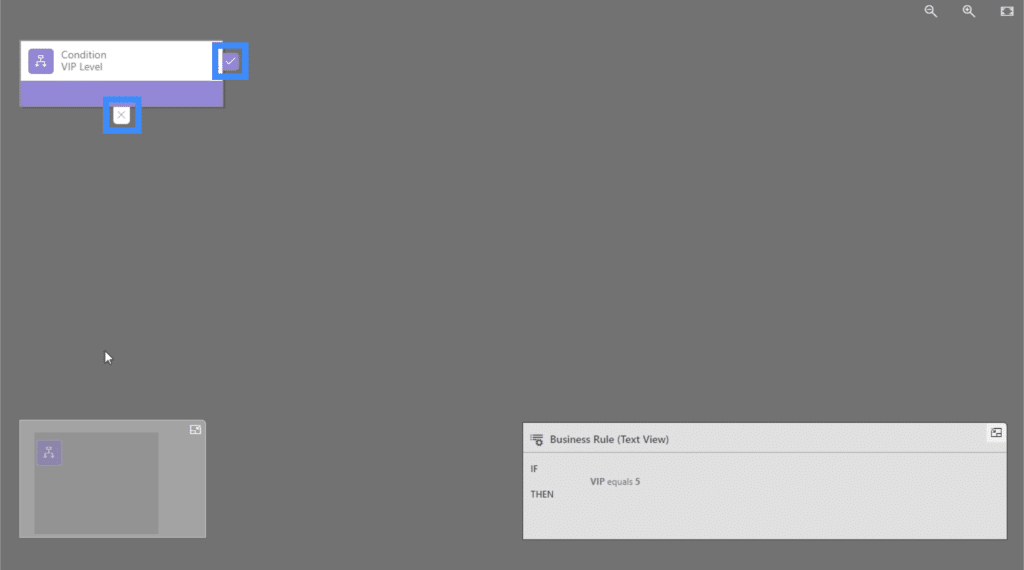
We can choose what happens next from these options on the right pane. So the next step could either be a flow where a new condition is set, or an action where we can show an error message, set the visibility, set the field value, etc.
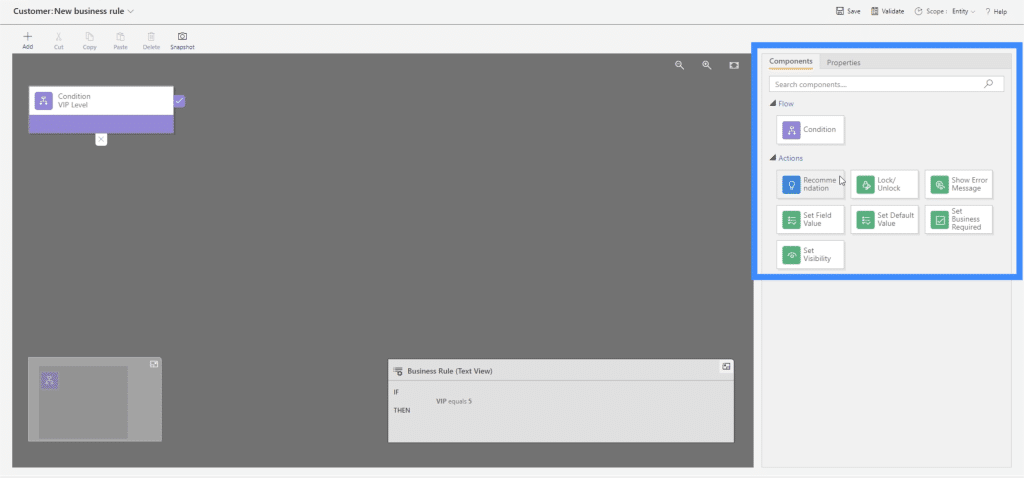
Again, we see here how easy it is to use PowerApps. You can choose not to do any coding to create business rules because it lets you drag and drop elements.
Now, let’s create a business rule.
Creating PowerApps Business Rules
We’re going to use the same data we’ve been using in this string of tutorials about PowerApps.
Let’s say we want to create a rule that will stop a user from adding a record if the customer is from South Korea and chooses VIP Level 5. We can create a rule that will produce an error message if anyone tries to add data like that.
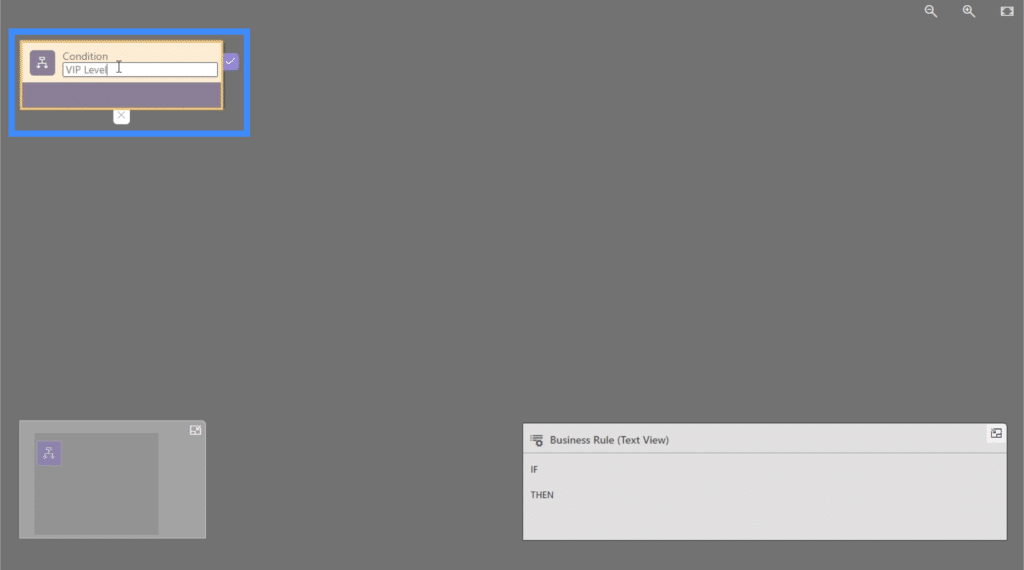
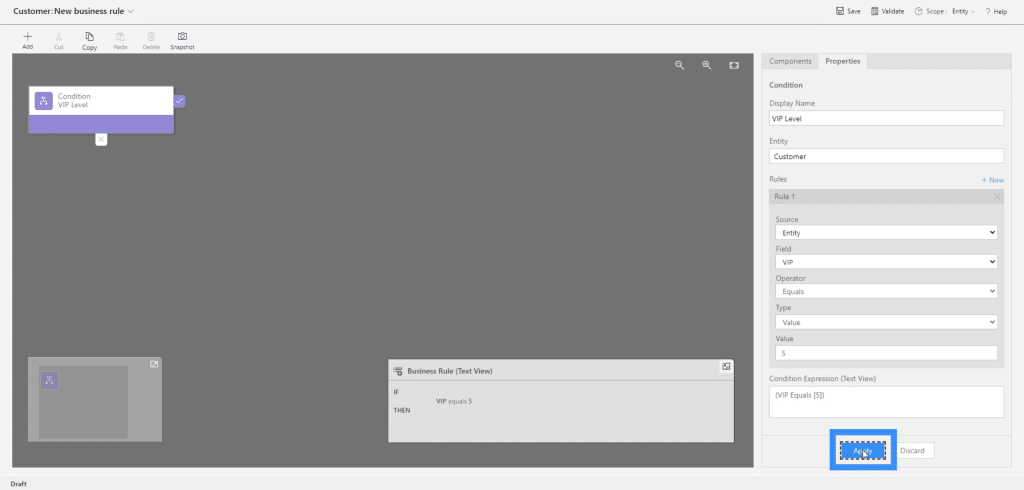
We’ll start by defining the condition. Let’s click on it and call it VIP Level.
We can also change the display name here on the right pane.
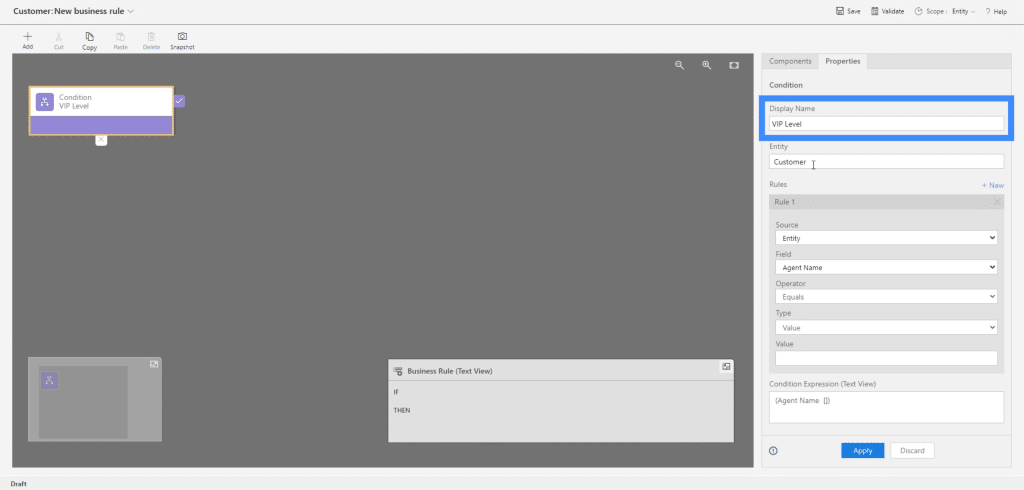
We set the conditions by choosing the right source, field, operator, type and value.
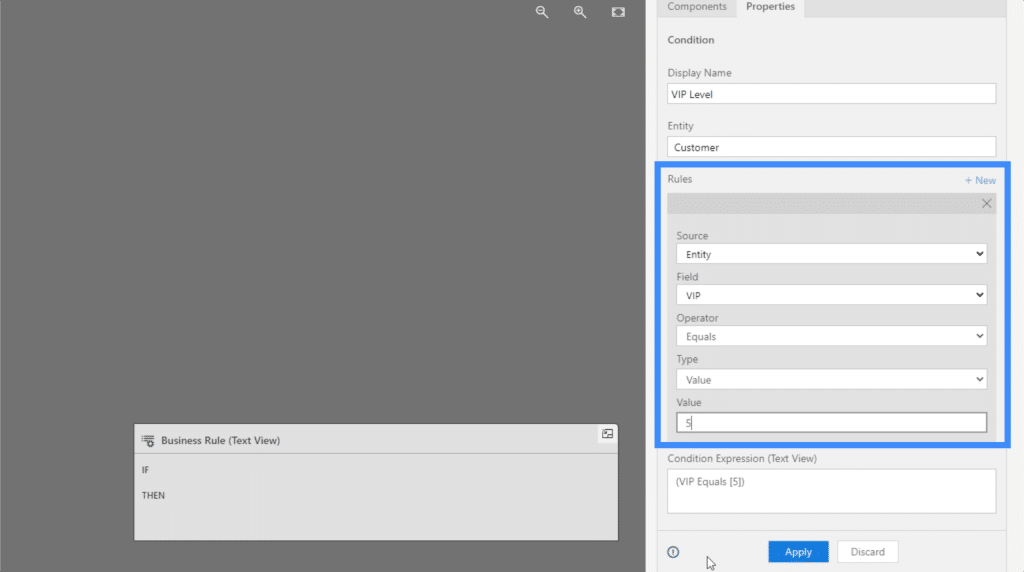
For this rule, we’re setting the condition that the VIP level should be equal to 5 for an action to happen. Let’s click Apply to save that condition.
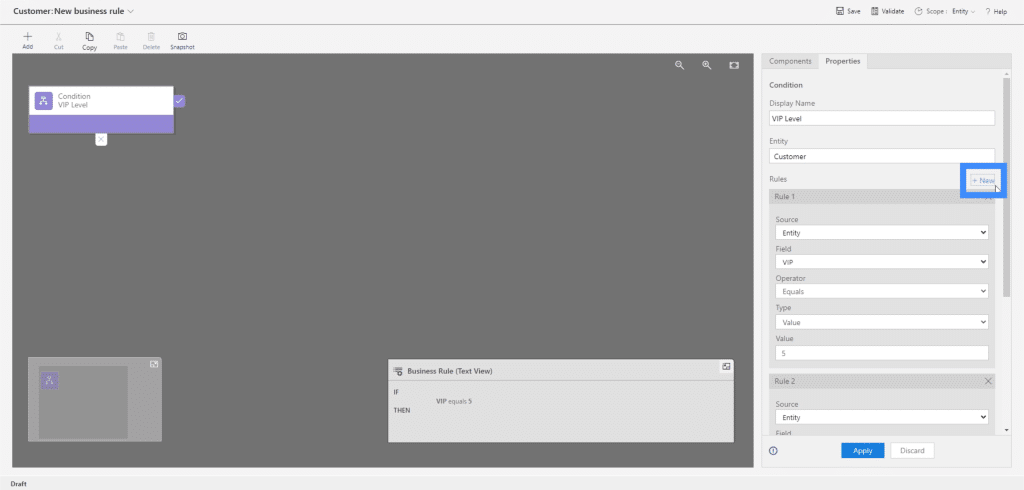
But aside from the VIP level, we also want to set the location. So we have to add another rule to this condition. We can do that by clicking on +New.
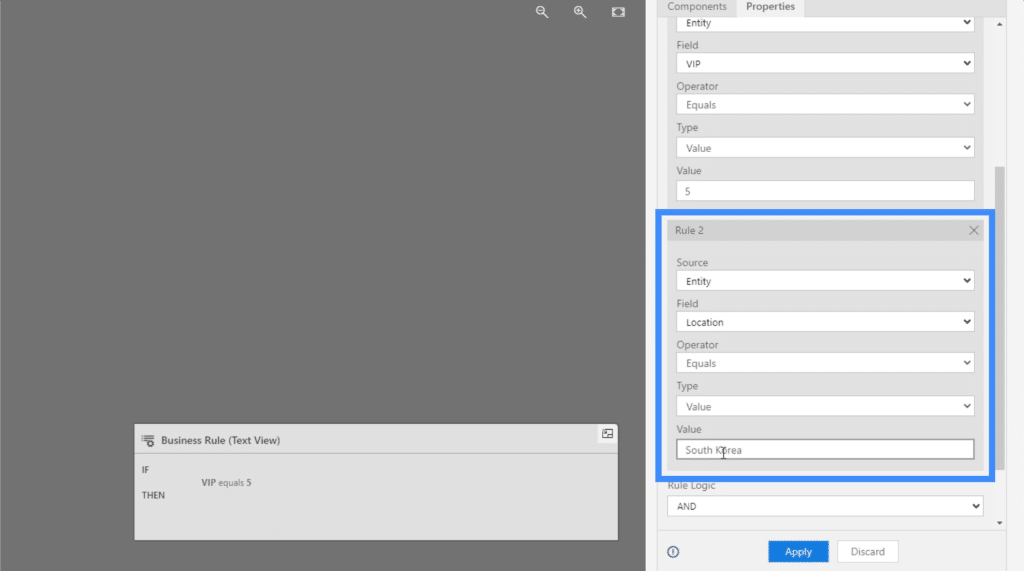
So in this rule, we want the action to happen only if the location chosen is South Korea.
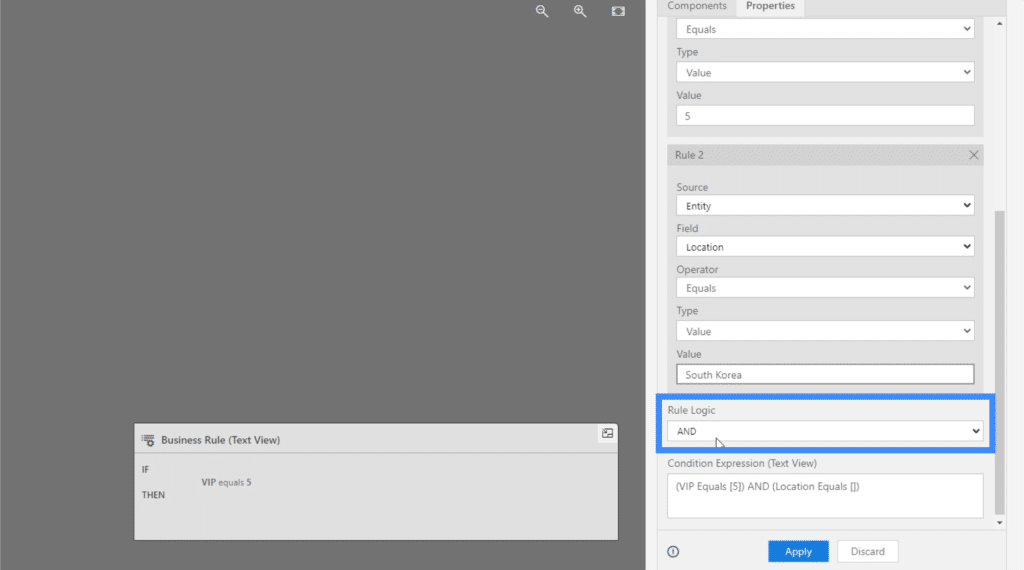
Now, we have two rules. We want to set the VIP Level to 5, then we want to see if the Location shows South Korea. Since we want both of those rules applied, we’re going to choose AND under Rule Logic.
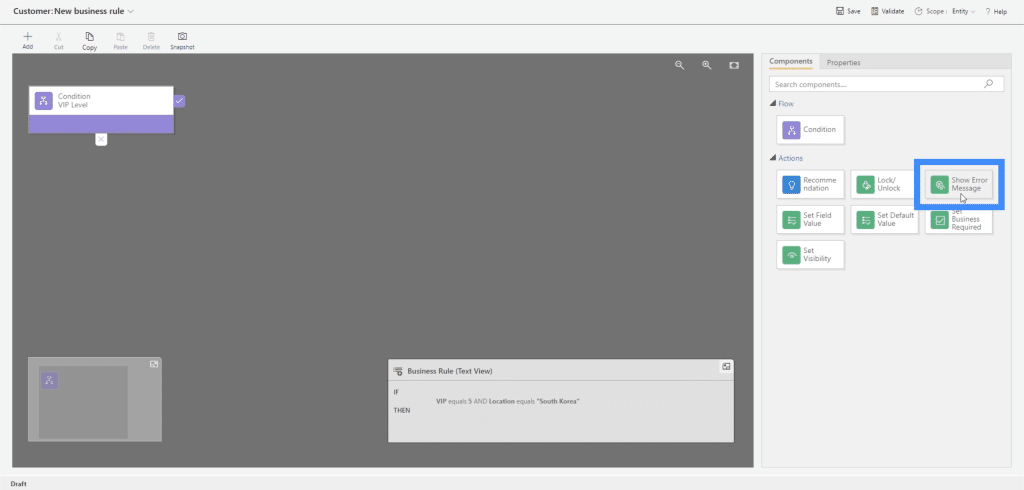
Once we’ve applied those rules, we’re going to choose an action next. Let’s drag Show Error Message into the flowchart.
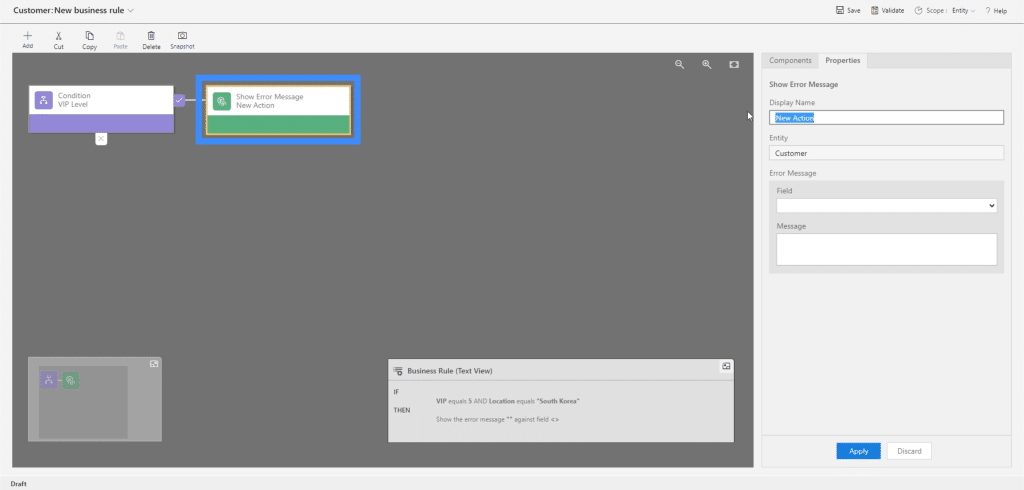
Let’s call this action Error by changing the display name on the right.
We can choose where the error message shows up and dictate what the error message says. So let’s have the error message show up at the location field. We’ll also advise the user to either choose a different country or change the VIP level.
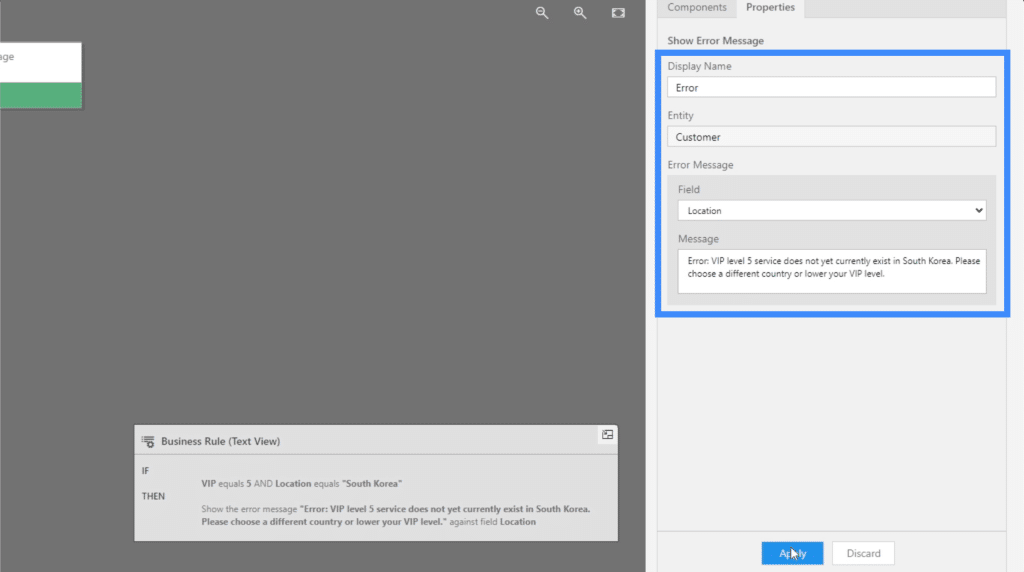
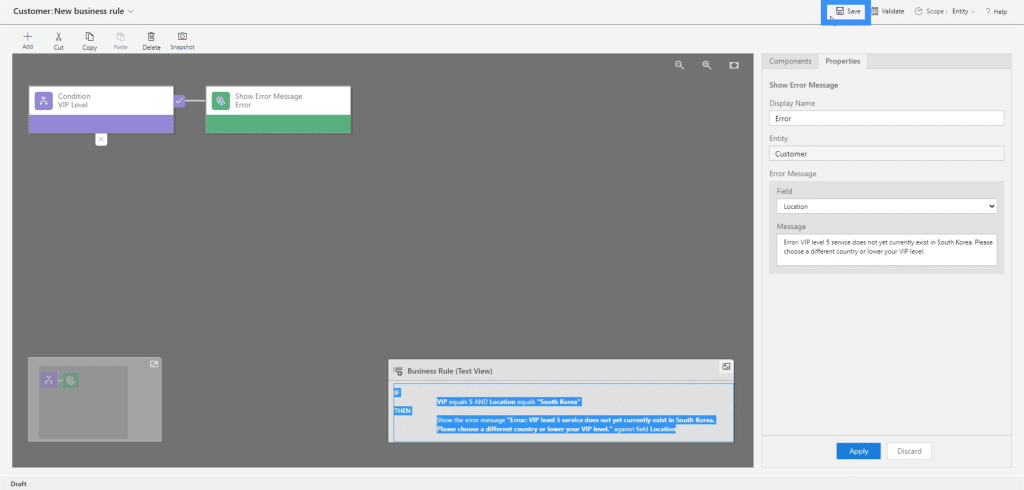
Once we click Apply, PowerApps is going to save those settings. We can see the text version of the same rule we created on the lower part of the screen.
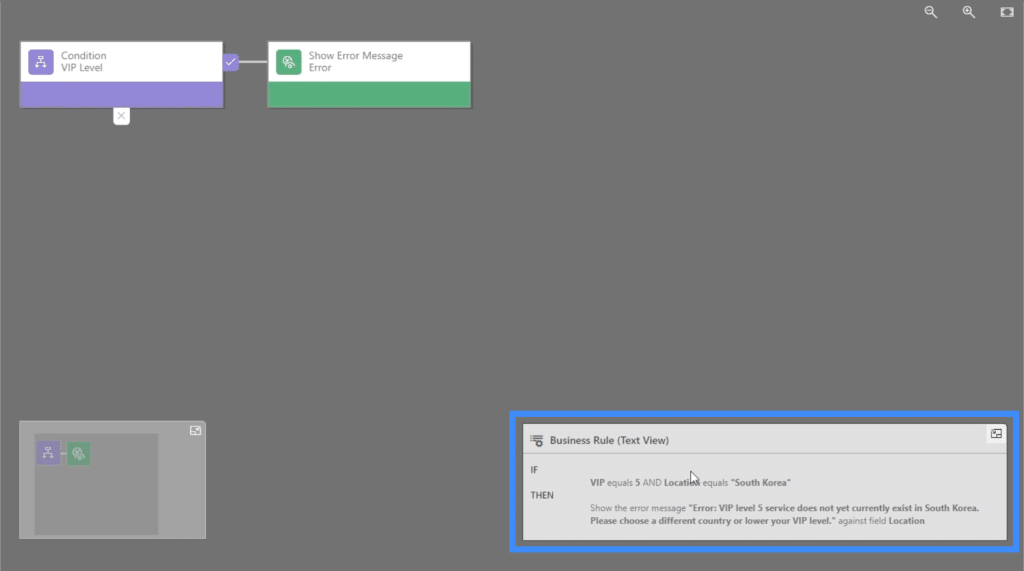
Once we’re satisfied with the rule, we can click Save on the upper right area.
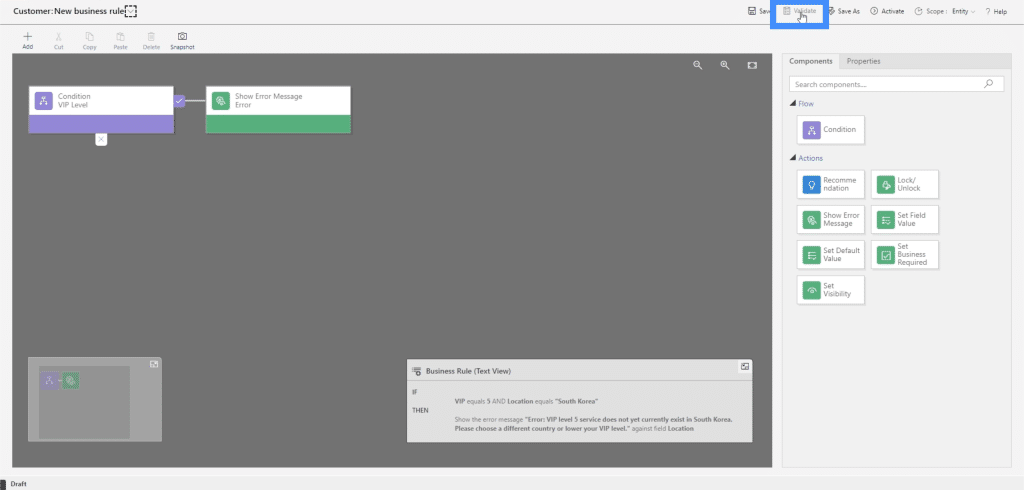
We can also click Validate if we want to check that the rule flows perfectly.
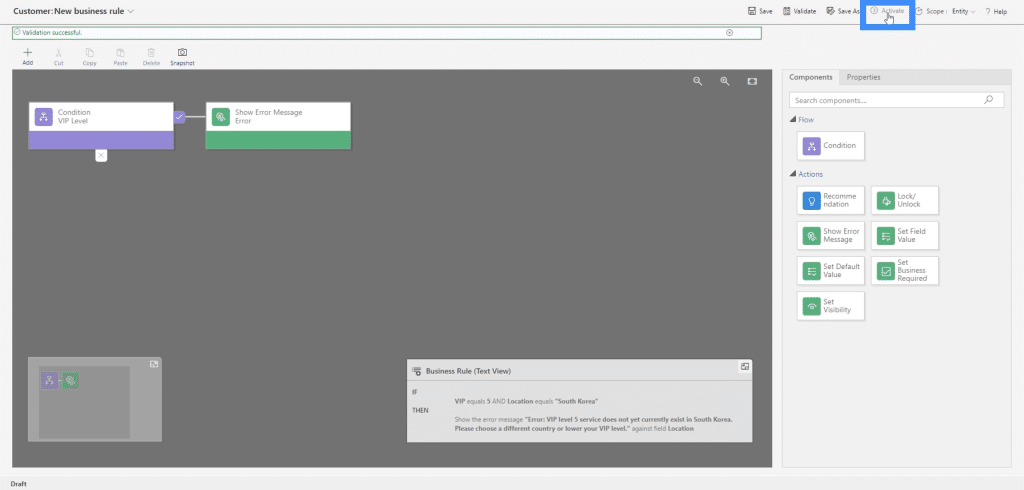
If we see no errors in our work, we can lock it in by clicking on the Activate button.
Once we do that, we’ll see a progress bar in the middle showing us that it’s applying the logic throughout all of the records.
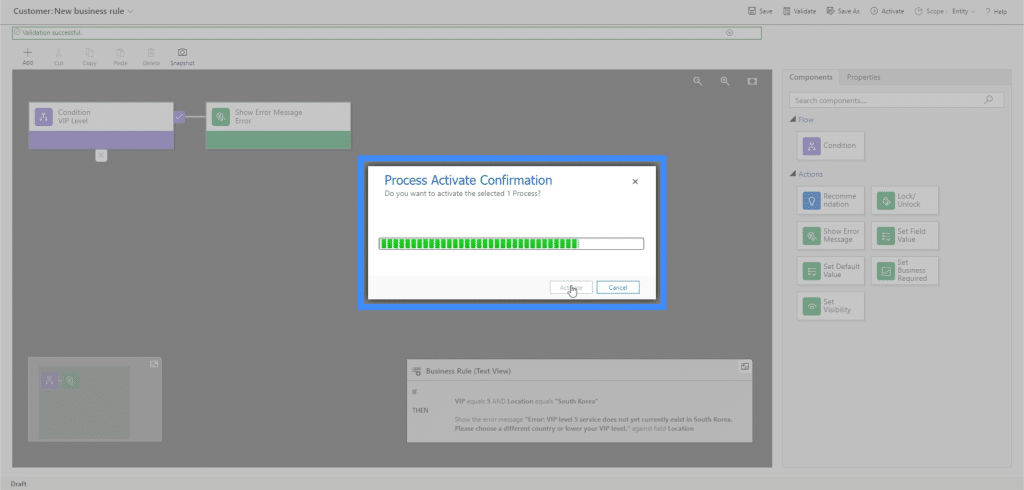
This window will go away once the activation process is done.
Checking On The Business Rule
Now, let’s look at the business rule in action.
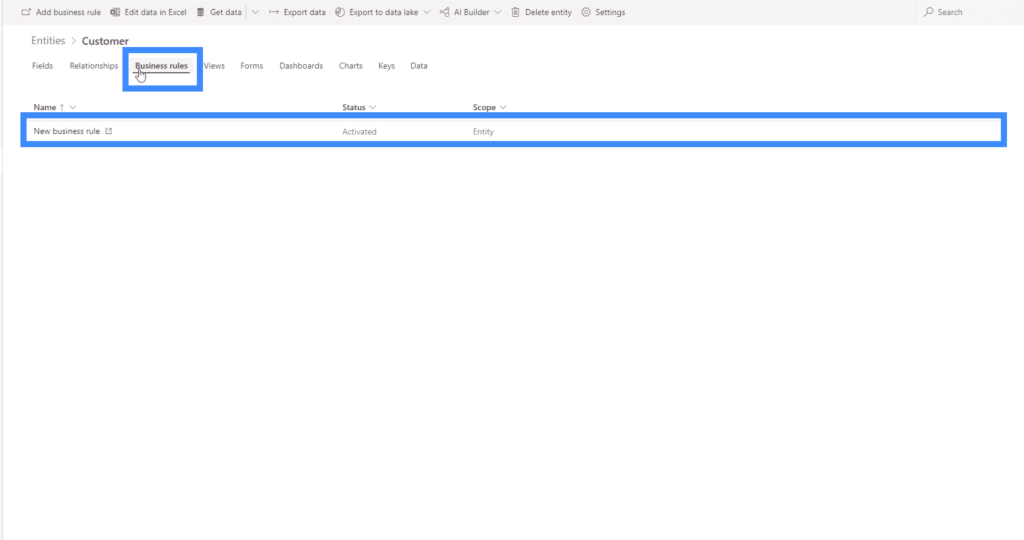
If we go back to the Business Rules tab under Entities, we can see the new business rule we created.
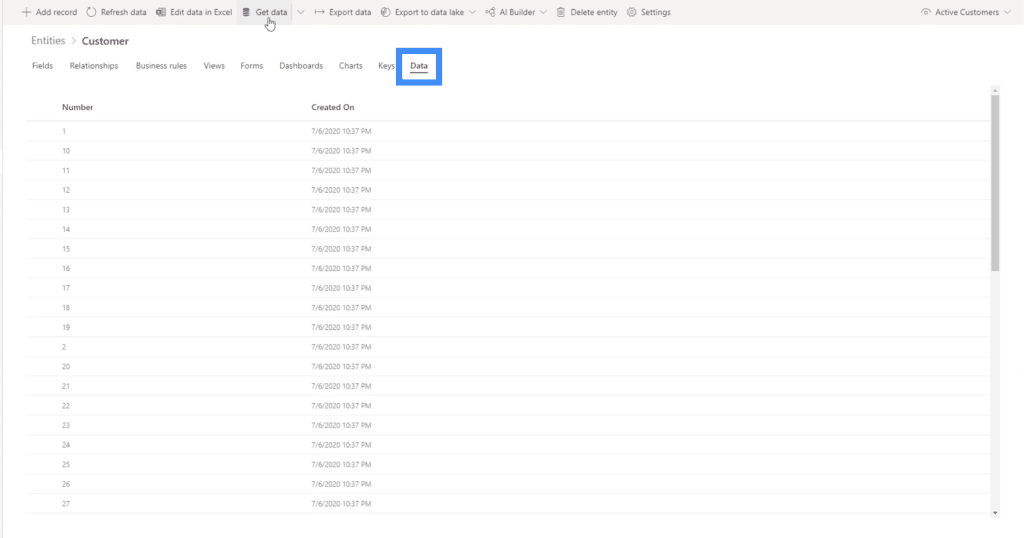
To see if this business rule is working properly, let’s add a new record. Let’s go to the Data tab.
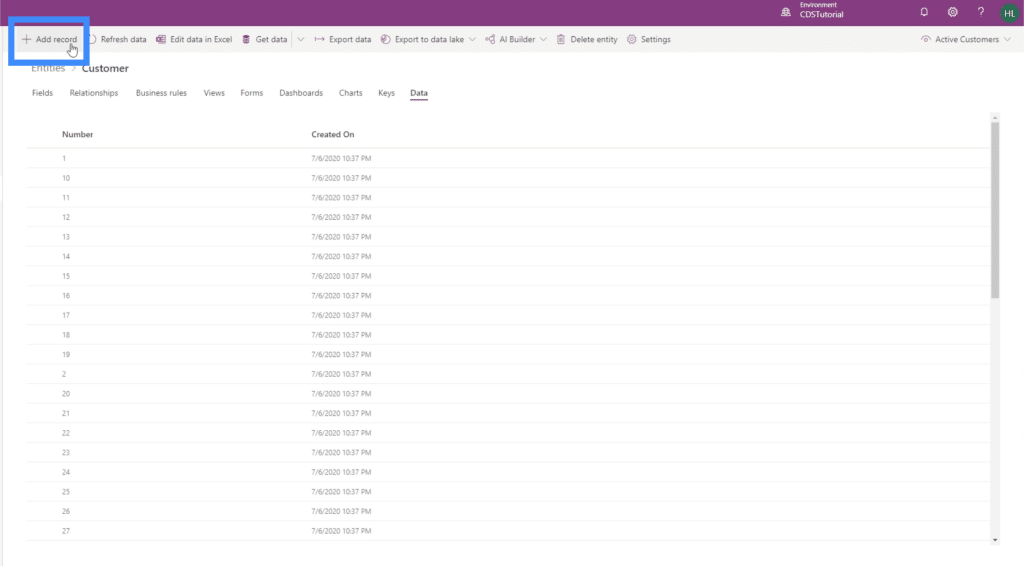
Then, we’ll click on +Add record here on top.
This will open up the form that we created in a previous tutorial.
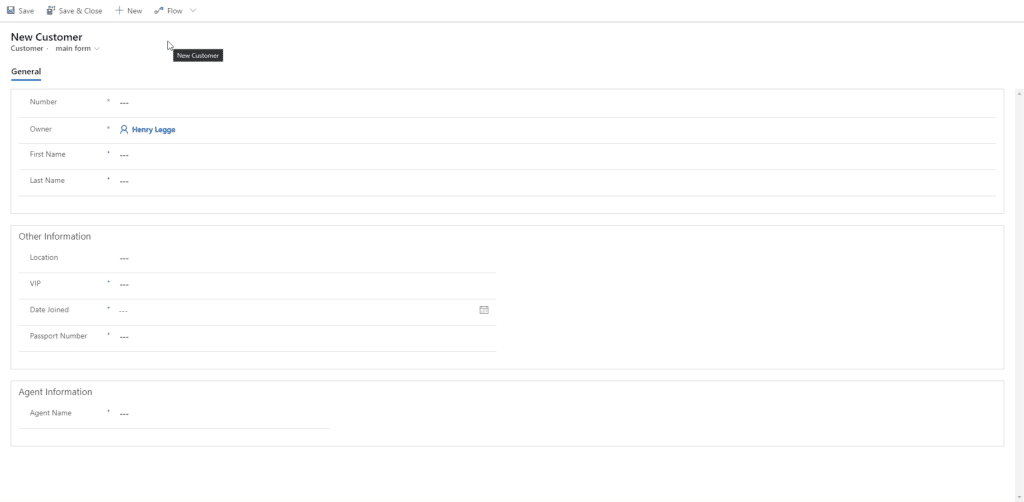
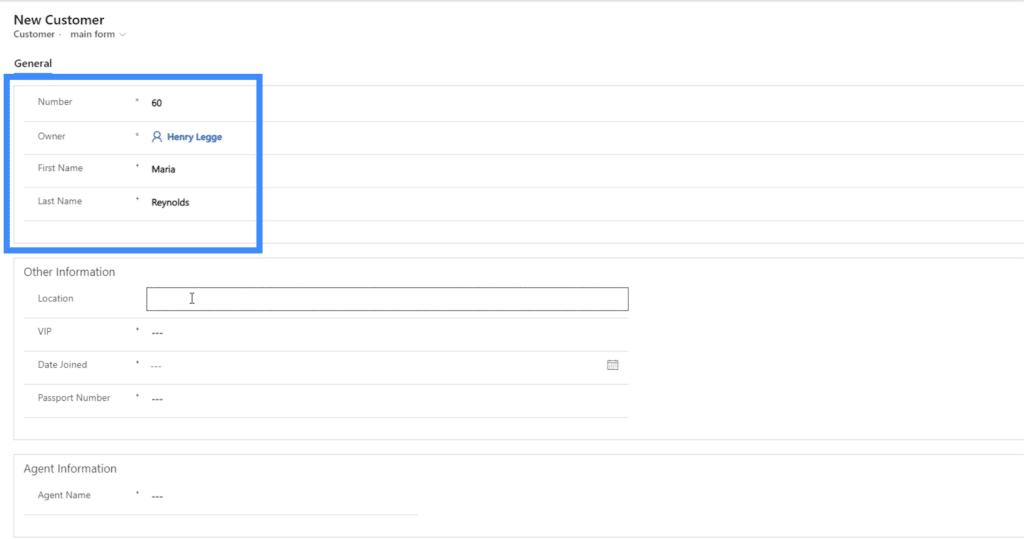
Let’s start by filling out the General section of the form, which contains the customer number, the first name and the last name.
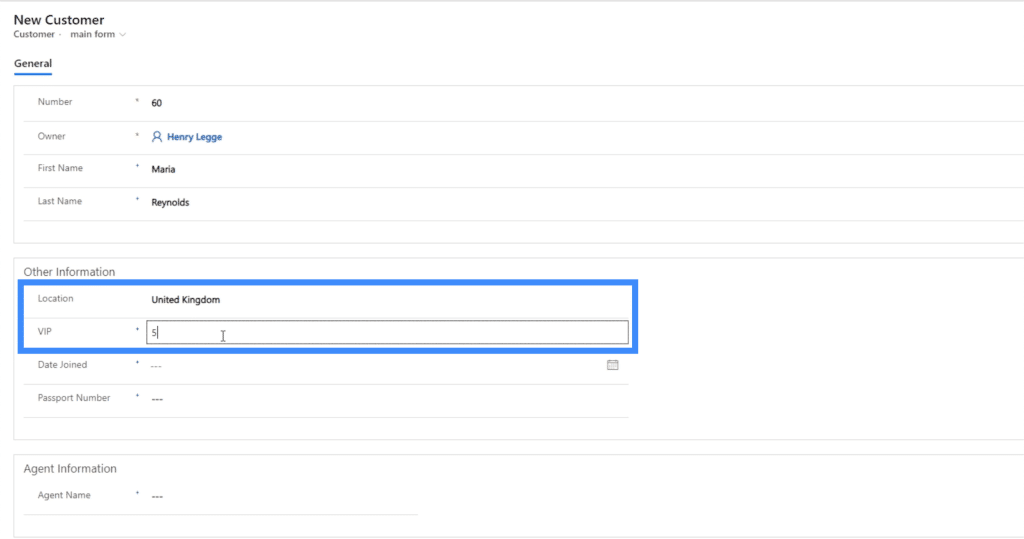
Next, we’ll add a location and a VIP level. For now, let’s write United Kingdom and set it to VIP level 5.
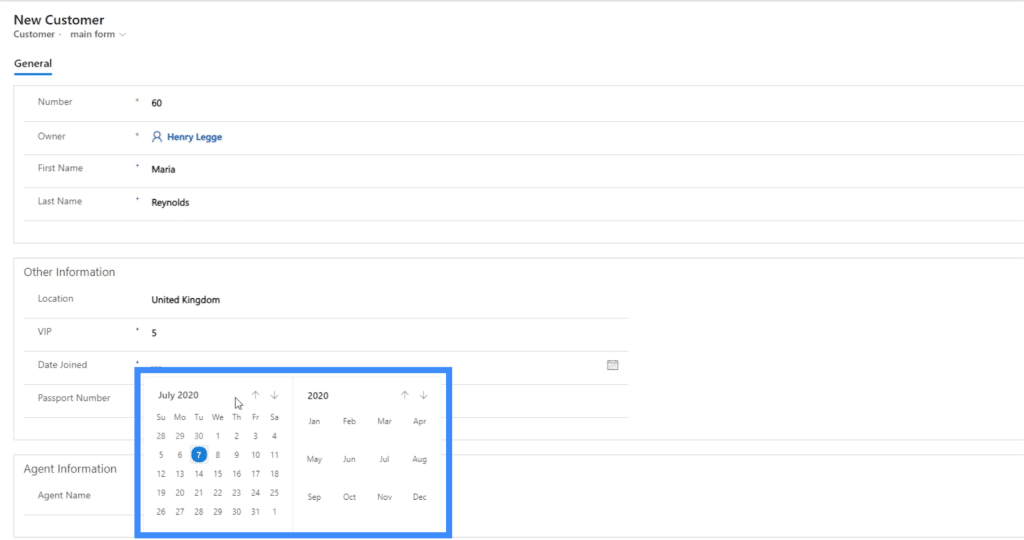
The next field is Date Joined. To make things easier for the end user, PowerApps uses a calendar that allows us to just choose the exact date instead of having to type in the information.
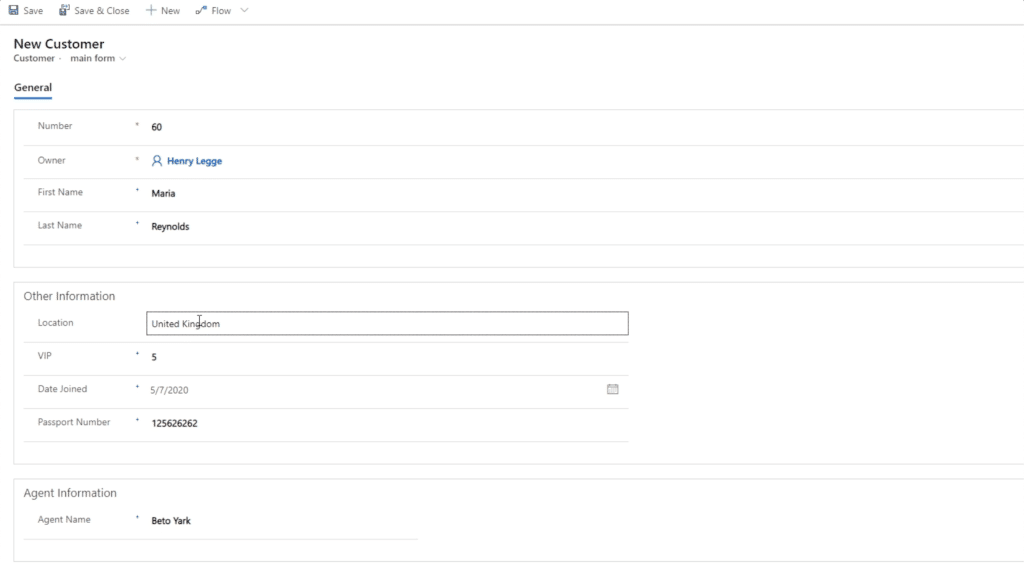
We’ll finish up the form by completing the other details, like the passport number and the agent name. As you can see, no errors came up.
This time, let’s change the location and set it to South Korea and leave the VIP level to 5. Remember that these are the two conditions that we set in our business rule.
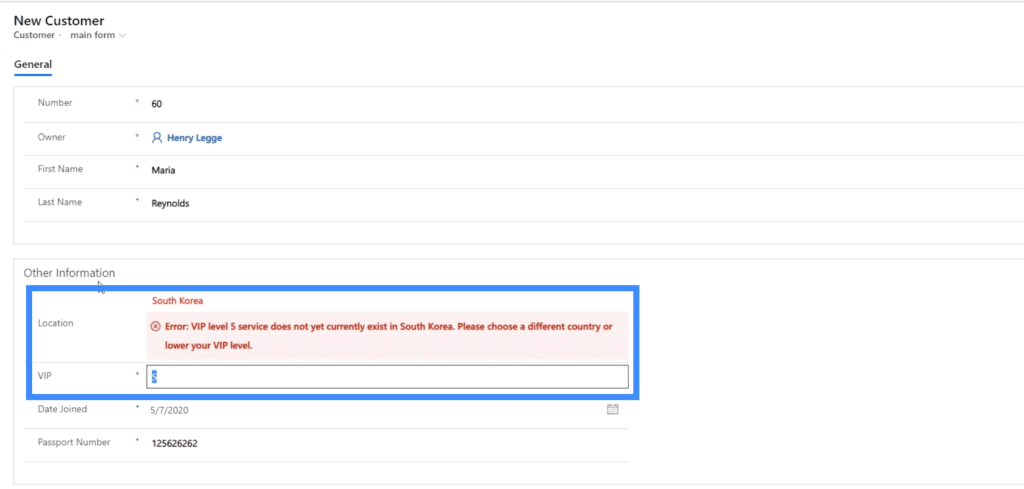
Because the conditions meet the requirements set, the error message pops up.
But if we change the VIP level and make it 4, the error message disappears.
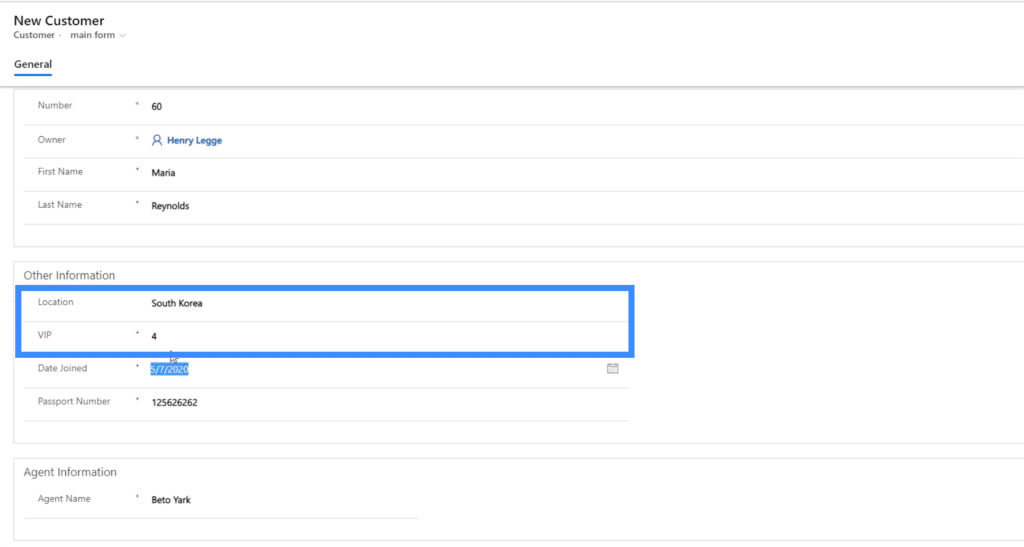
This shows that our business rule is indeed working perfectly.
Other Common Data Service Concepts
Business rules in PowerApps make it even easier to work with Entities especially in terms of bringing in new data. But aside from Entities, there are other powerful tools and concepts used in common data service.
Although we’re not going to dive into each one of them in detail, let’s cover these concepts briefly just in case the need to use them comes up in the future.
Dataflows is one powerful tool that we can use. They automatically load common data service into the current data.
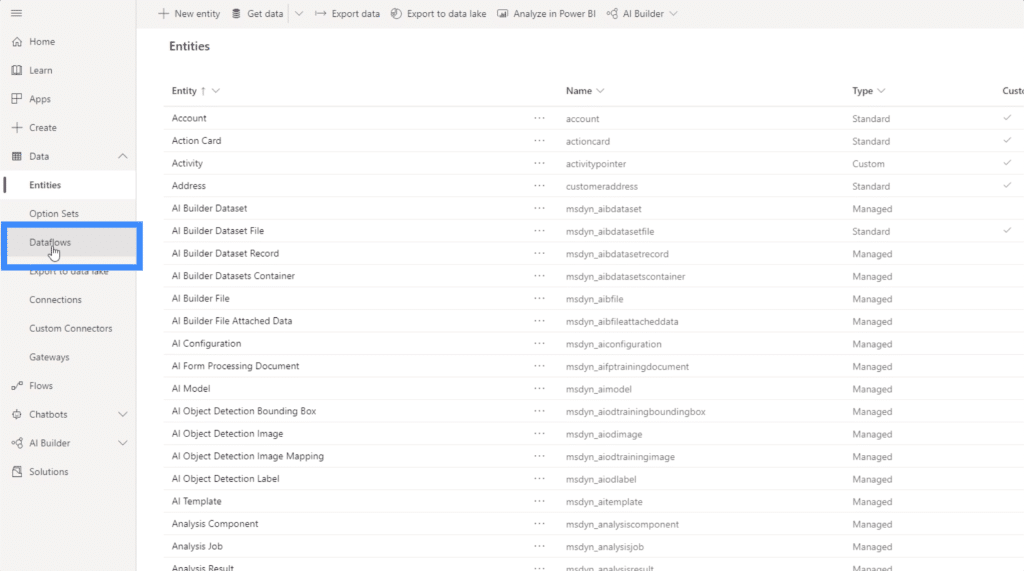
For example, if you run a restaurant, you can have your point-of-sale data directly fed into entities. This can be done by creating a dataflow.
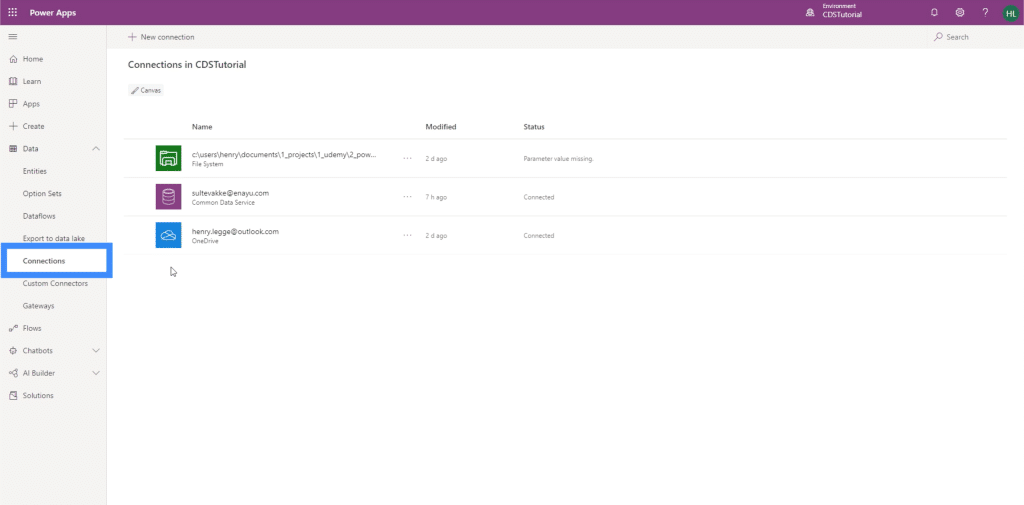
Connections is another important part of common data service. It works the same way as our connections when using canvas apps. This is where we can add a OneDrive connection, for instance.
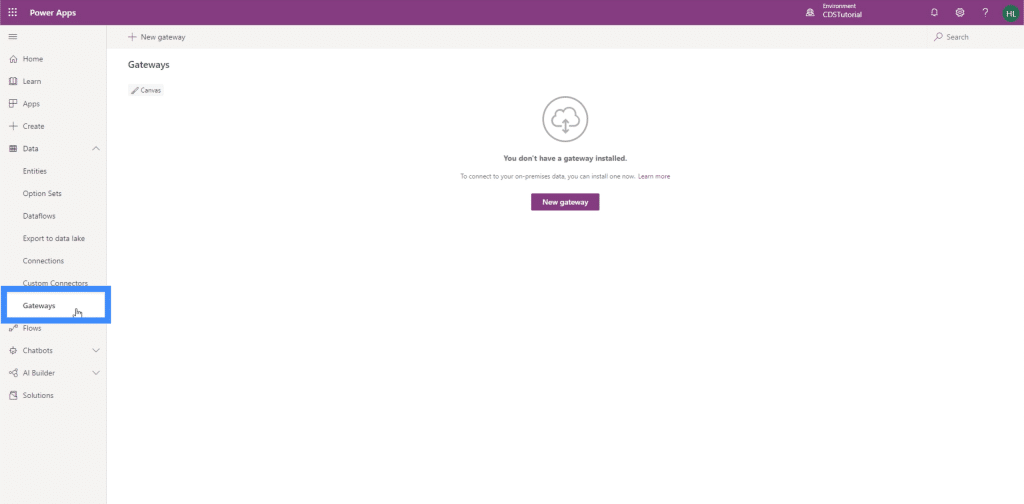
Gateways are also important. They allow us to communicate with different databases.
If you want to explore each of these areas more, you can check out the Microsoft Document that cover them in great detail.
***** Related Links *****
Power Apps Introduction: Definition, Features, Functions And Importance
Power Apps Environments: Setting Up The App Elements Properly
PowerApps Functions and Formulas | An Introduction
Conclusion
PowerApps business rules show how dynamic this platform truly is. It makes almost anything possible, especially if you want your data to be presented in a specific manner. It also helps you keep your data as clean as possible.
The example we worked on is just the beginning. It’s actually possible to work on more complicated rules where a mix of different conditions and actions work together. You can also choose to create these rules by coding them in instead of using the drag-and-drop flowchart system we used. It all depends on your skill level and preference.
As for the other concepts we touched on, these are definitely worth looking into if you want to really master what PowerApps can do. Just note that 99 out of 100 times, you’ll probably be working with Entities more than any other area within the platform.
All the best,
Henry


