

Calculated columns in SharePoint or Sharepoint Online are powerful tools that allow users to generate and display data based on the values of other columns within a list or library. Formulas, which consist of equations that perform calculations on these values, serve as the framework of calculated columns and normally begin with an equal sign (=).

Adding a calculated column to a SharePoint list or library allows users to perform a variety of functions, such as calculating sales tax, determining expiration dates, or computing the total cost of items source.
These calculations are useful in a wide range of applications and enable more efficient data management and notifications.
When creating a calculated column, users can choose from numerous predefined functions or create custom formulas using standard mathematical operations, such as addition, subtraction, multiplication, and division. This flexibility makes calculated columns a valuable feature for SharePoint users who need to generate dynamic, data-driven content in their lists and libraries.
We cover some further into about Sharepoint in the below video; it’s definitely worth a watch for all of you power apps enthusiasts!
Understanding Calculated Columns
Calculated columns in SharePoint are a powerful tool for performing automated calculations based on the data within a SharePoint list or library.
In this section, we will explore the concept and purpose of calculated columns, calculated fields, and calculated values, along with their applications within the SharePoint platform.
Before we jump into an example, let’s get the basics out of the way.
Concept and Purpose
Calculated columns are essentially formulas that perform calculations using data from other columns within the same list or library item.
Utilizing calculated columns can enhance data consistency by ensuring that calculated values are always up-to-date and in sync with the source data on which they depend. In addition, calculated columns can help reduce manual data entry and potential human error by automating calculations.
Applications in SharePoint
Calculated columns can be implemented in various scenarios within SharePoint to perform tasks such as:
- Displaying a simple calculation based on values from two or more columns within the same item, like the example of calculating the total by multiplying quantity and price.
- Applying conditional formatting or logic, such as using the IF, AND, and OR functions to calculate and display results based on specific conditions or column values
- Validating data entries by comparing the data in one or more columns and ensuring it meets predefined criteria.
- Using date-related functions to calculate deadlines, due dates, or the difference between two date columns.
- Manipulating text, such as retrieving a portion of a text string or combining values from multiple text columns.
Overall, calculated columns in SharePoint offer extensive functionality to enhance the efficiency and consistency of data management within your lists and libraries.
Now let’s create and add a column.
How to Easily Create a Sharepoint Calculated Column
This is pretty straightforward, we will finish off the article with a visual example to help you understand better.
Defining Column Settings
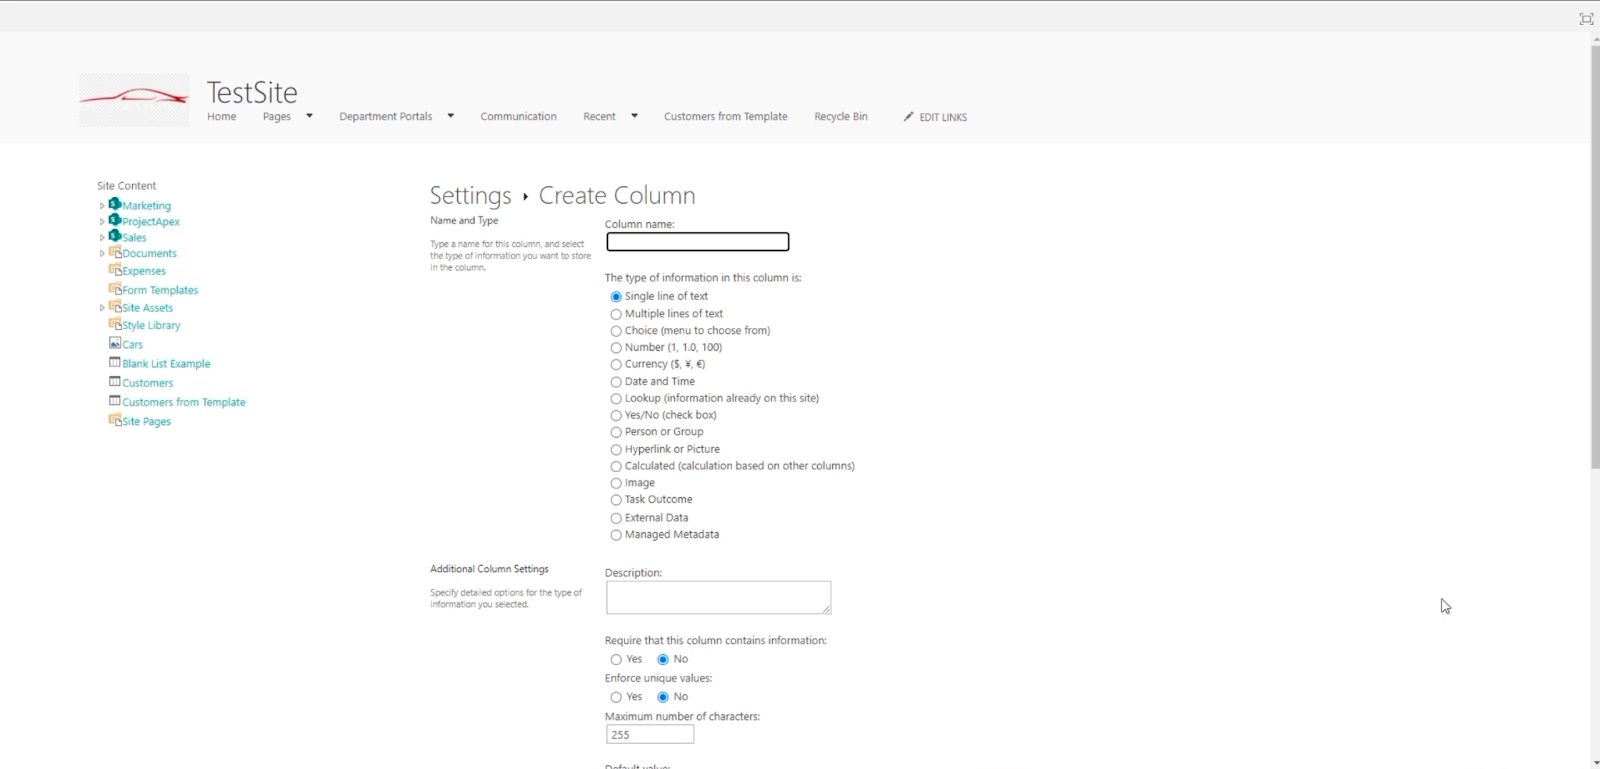
To create a calculated column in a SharePoint list or library, first, open the list or library where you want to add the column. Click on “Settings” near the top right corner of your browser window and then select “Create Column” under the Columns section.
When you define the settings for your new calculated column, start by giving it a name and choosing the “Calculated (calculation based on other columns)” radio button. This will allow you to use data from other columns in the list or library as part of your calculation.
Now it is time to enter a column formula.
Using Column Formulas
After selecting the “Calculated” column type, you’ll be prompted to enter a formula that calculates the value of your new column based on existing columns in the list or library. SharePoint uses a syntax similar to Excel formulas, allowing you to create complex calculations using functions such as IF, AND, and SUM.
To write a formula, begin by typing an equal sign (=) followed by a combination of functions, column names, and mathematical operators. Be sure to enclose column names in square brackets ([ ]) and use double quotes (” “) for text strings (SharePoint Stack Exchange).
Here’s an example formula:
=IF([Status]="Completed", [Hours]*[Rate], 0)This formula calculates the total cost for a project based on its status, hours, and rate. If the project is marked as “Completed”, the cost is calculated by multiplying the hours and rate; otherwise, the cost is zero.
Once you’ve entered your formula, click “OK” to create the calculated column. It will automatically update its value whenever data in the referenced columns changes.
Voila!
Now let’s run through some common functions.

Common Functions and Formulas
This section covers some common functions and formulas used in SharePoint calculated columns, divided into two subsections: Arithmetic and Logical Functions, and Text and Date Functions.
Arithmetic and Logical Functions
Arithmetic functions enable you to execute basic mathematical operations, while logical functions help you make decisions based on certain conditions.
Some commonly used arithmetic and logical functions are:
- ADD: Adds two numbers. Example:
=Column1+Column2 - SUBTRACT: Subtracts a number from another. Example:
=Column1-Column2 - MULTIPLY: Multiplies two numbers. Example:
=Column1*Column2 - DIVIDE: Divides a number by another. Example:
=Column1/Column2 - IF: Performs a conditional test. Example:
=IF(Column1>Column2, "Greater", "Lesser") - AND: Checks if all conditions are met. Example:
=AND(Column1>0,Column2>0) - OR: Checks if any condition is met. Example:
=OR(Column1>0,Column2>0)
Now, let’s check out some basic text and date functions.
Text and Date Functions
Text functions allow you to manipulate text strings, while date functions let you handle date and time values. Some common text and date functions in SharePoint calculated columns are:
- CONCATENATE: Combines two or more strings. Example:
=CONCATENATE(Column1, Column2) - LEFT: Extracts a specified number of characters from the start of a text string. Example:
=LEFT(Column1, 5) - RIGHT: Extracts a specified number of characters from the end of a text string. Example:
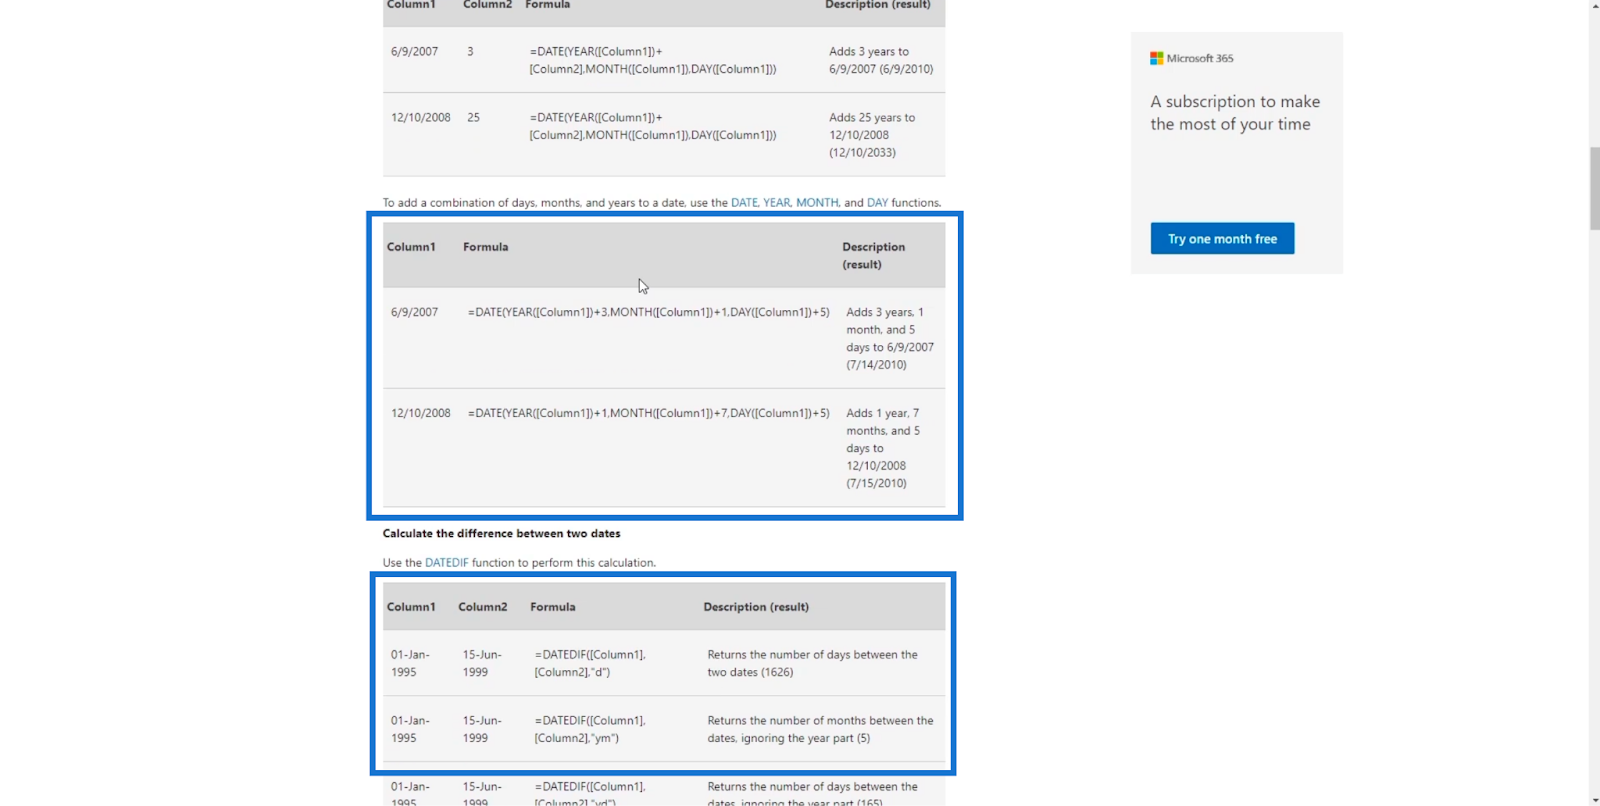
=RIGHT(Column1, 5) - DATE: Returns a date based on a day, month, and year. Example:
=DATE(Year(Column1), Month(Column1), Day(Column1)+7) - TODAY: Returns the current date. Example:
=TODAY() - DATEDIF: Calculates the difference between two dates. Example:
=DATEDIF(Column1, Column2, "d")
These are just a few examples; there are many more functions and formulas available. You can refer to the Microsoft SharePoint Foundation formula guide for more information.
Or, if you are really serious about diving into Sharepoint in Power BI and learning about conditional formulas, document libraries, list settings and more, check out this SharePoint Intro Course; it’s great! It truly is one of the best ways to learn.
SharePoint Best Practices
Here are a few key things to help you navigate Sharepoint
Naming Conventions
When working with calculated columns, it’s essential to follow proper naming conventions. This will help maintain a clean, organized, and more accessible SharePoint environment. Some naming conventions to consider for calculated columns include:
- Use descriptive names for columns, indicating the purpose or calculation being performed. For example, instead of using “Col1,” use “TotalSales” for a calculated column that sums up the sales figures.
- Avoid using special characters or spaces in column names, as they may cause compatibility issues with some SharePoint features.
- Consider using camelCase or snake_case for column names, for better readability and consistency with development practices.
Error Handling
Calculation errors can occur, and they do, believe me! Ensuring proper error handling can result in fewer errors and more reliable performance. Some best practices for error handling in calculated columns include:
- Use the ISERROR function to check for calculations that return errors. This allows you to display an informative message or default value instead of an error. For example:
=IF(ISERROR([Column1]/[Column2]), "Error Message", [Column1]/[Column2]) - Make sure to handle division by zero errors, as this is a common calculation error. Use an IF or IFERROR function to avoid a #DIV/0! error when dividing by zero.
- Be mindful of the data types used in your calculations. Mismatched data types can cause calculation errors. Ensure that you use appropriate data types and convert data if necessary before performing calculations.
Following these best practices for naming conventions and error handling will lead to a more efficient, robust, and maintainable SharePoint environment.
Sure, there are a few limitations, they are…
Limitations and Alternatives
SharePoint Calculated Column Limitations
Some limitations include:
- Calculated columns are not available for use with multiple lines of text or person or group fields.
- You cannot use lookup fields, managed metadata fields, or external data columns in calculated column formulas.
- Lastly, some functions are not supported, such as networked days and today’s date functions.
Now you have got a feel for everything, let’s run through some examples.
A Step-by-Step Guide to Calculated Columns In Sharepoint/Sharepoint Online
One of the main advantages of using calculated columns is that the data you need can be set automatically. And it is not limited to simple computation, because it can also do complicated calculations.
For these examples, we’ll focus on making calculated columns with a simple formula. But at the end of the blog, we’ll give you resources on where you can know more formulas that you can use for your calculated columns.
Adding A Column In A SharePoint List
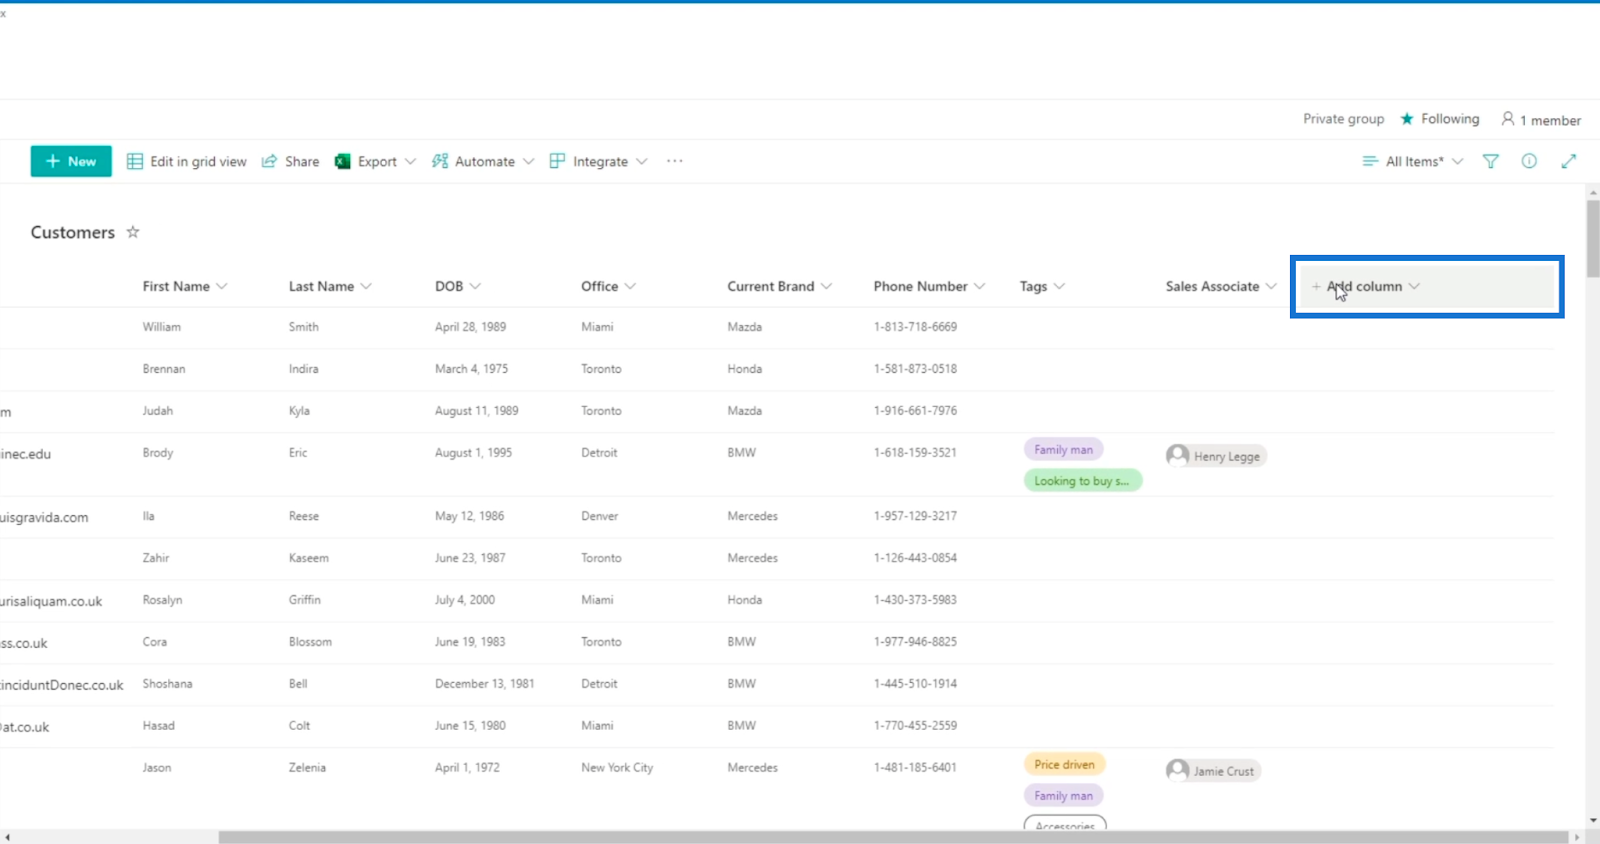
Before we can proceed, let’s start first by adding another column that will be based on the calculated column. So, click Add column.
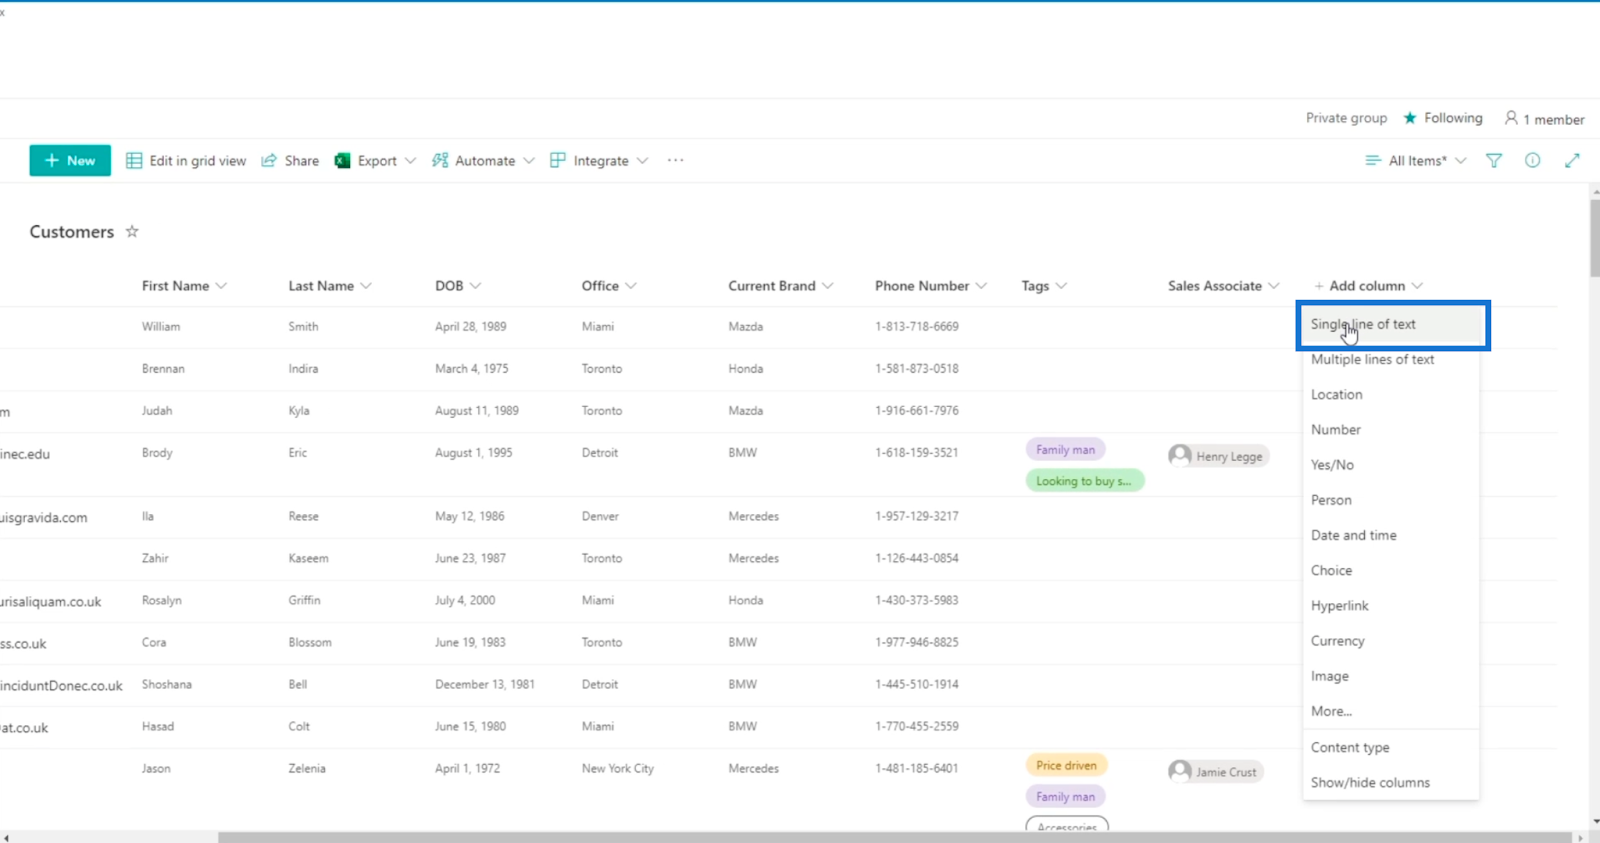
Next, choose Single line of text.
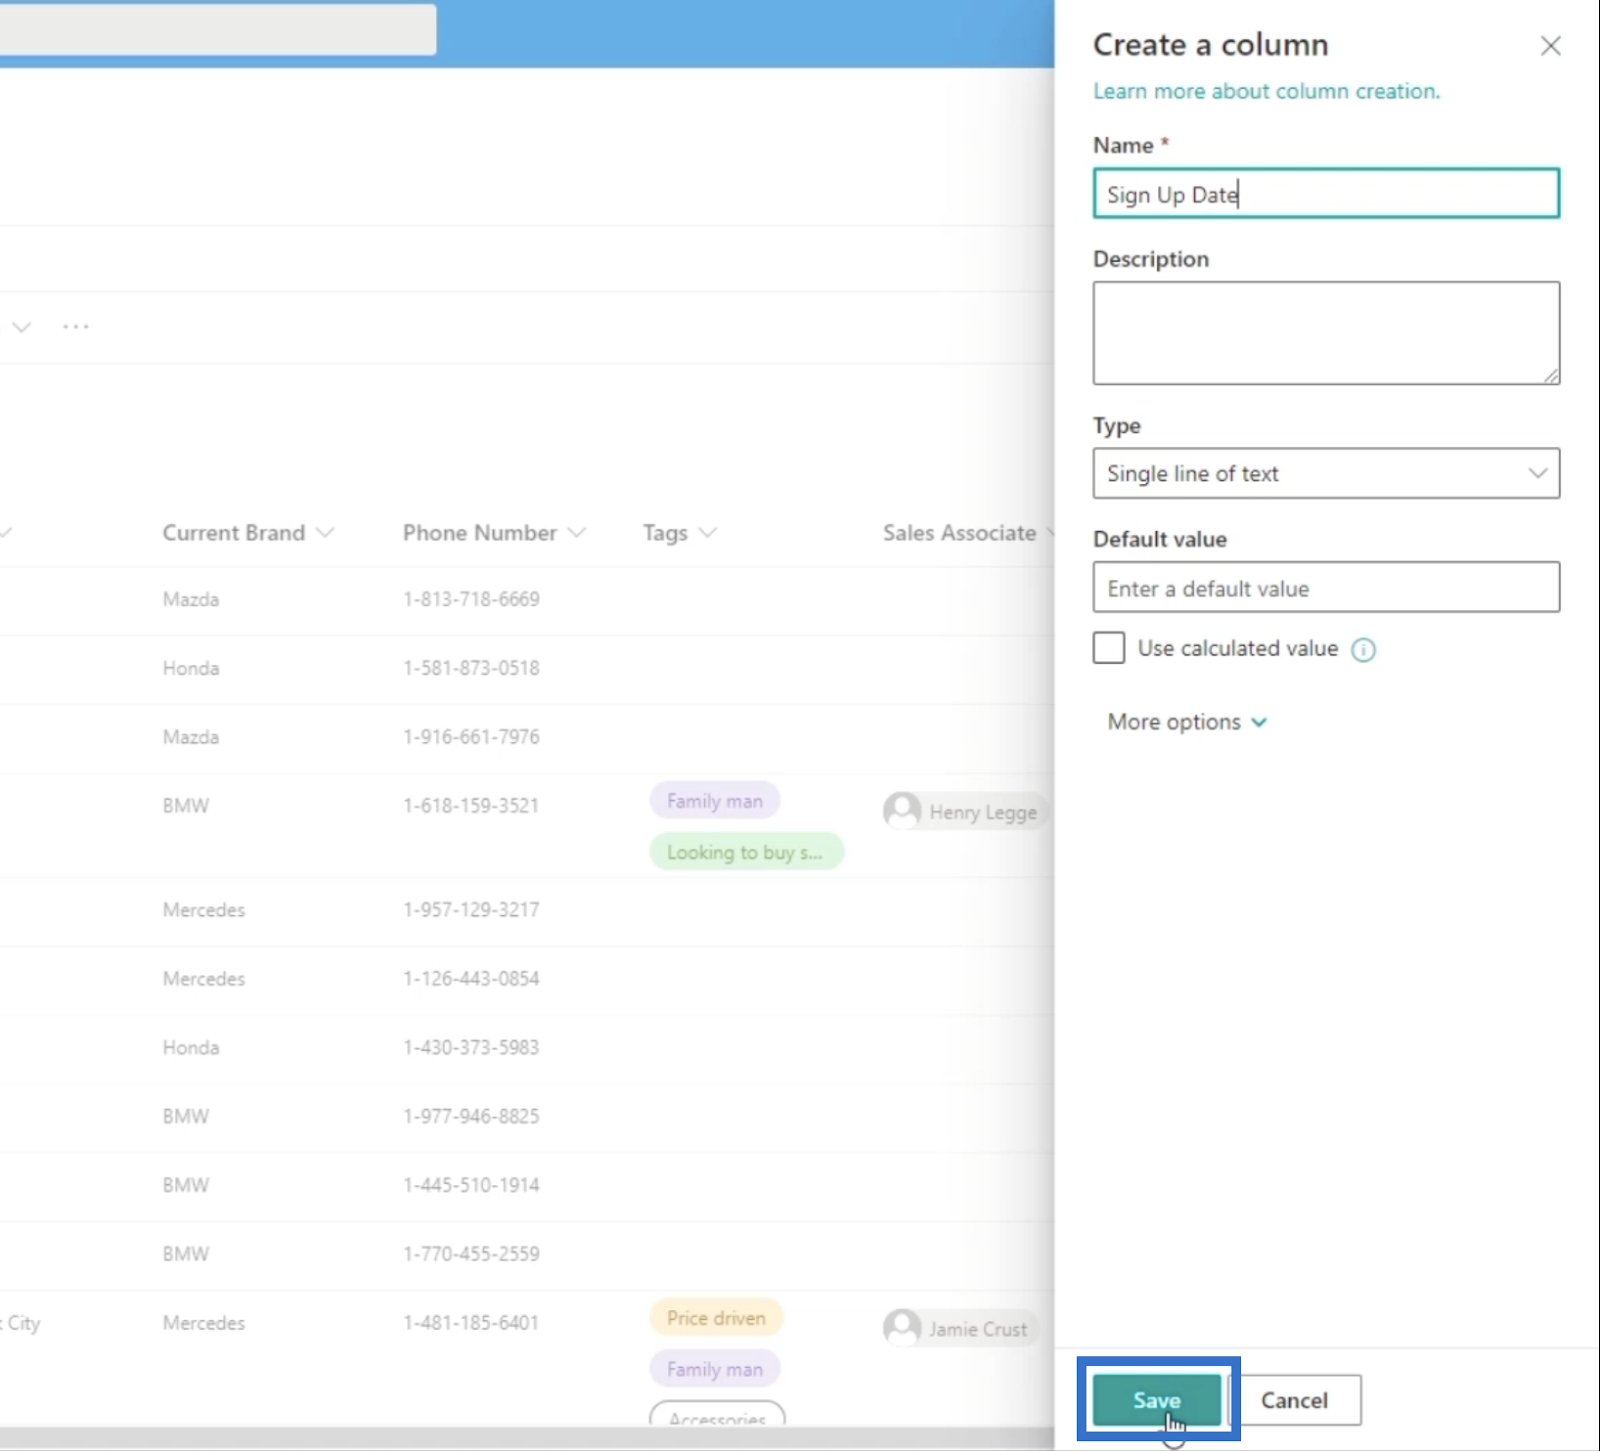
It will then display the Create a column panel.
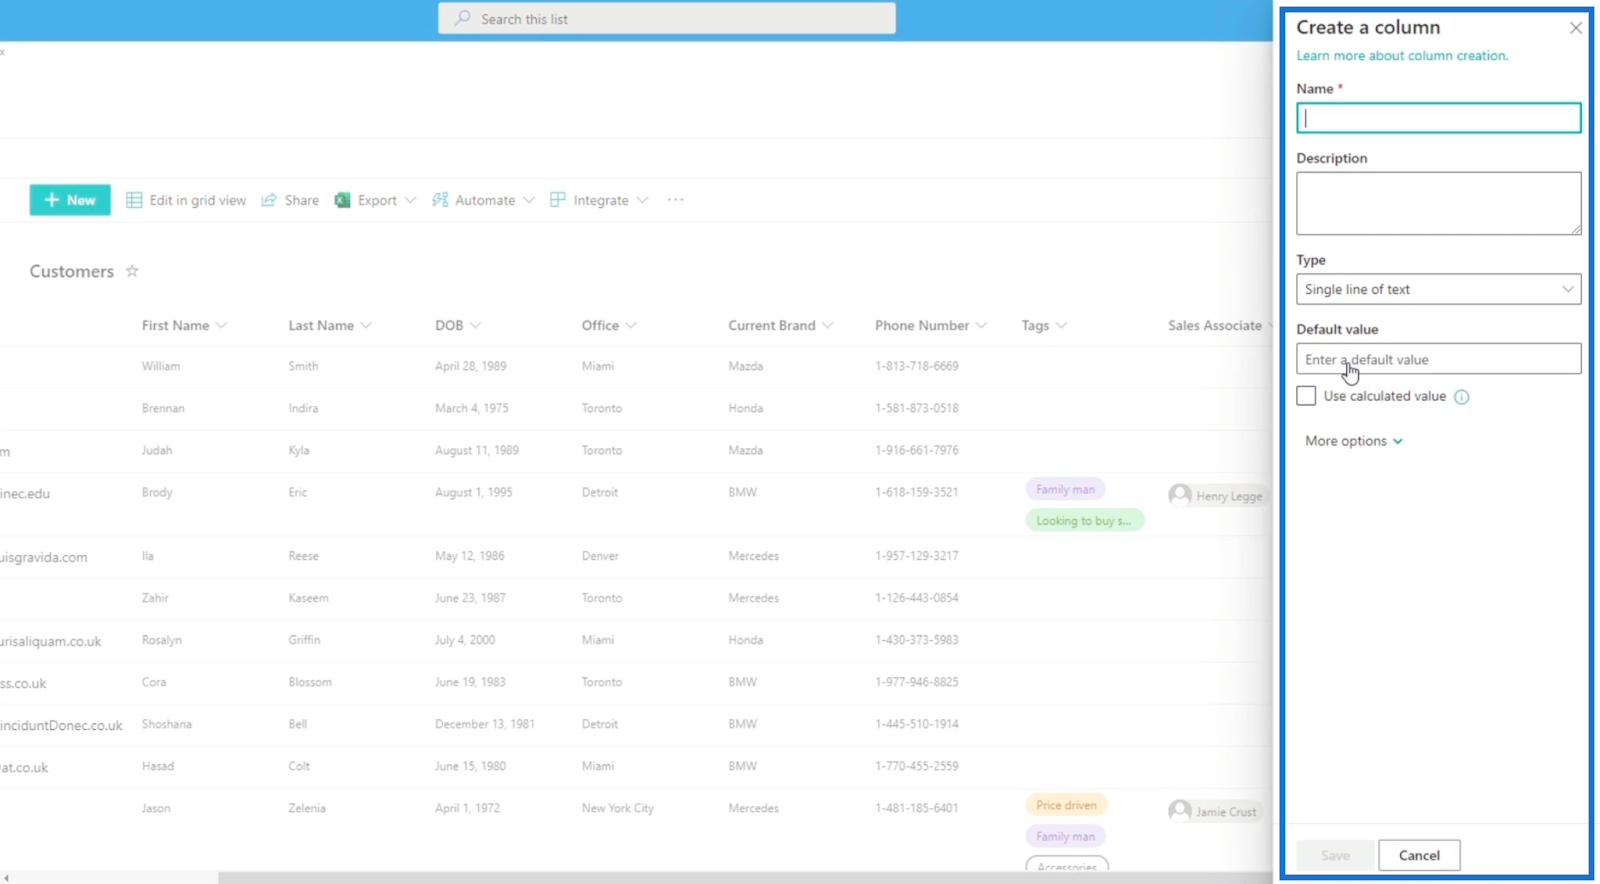
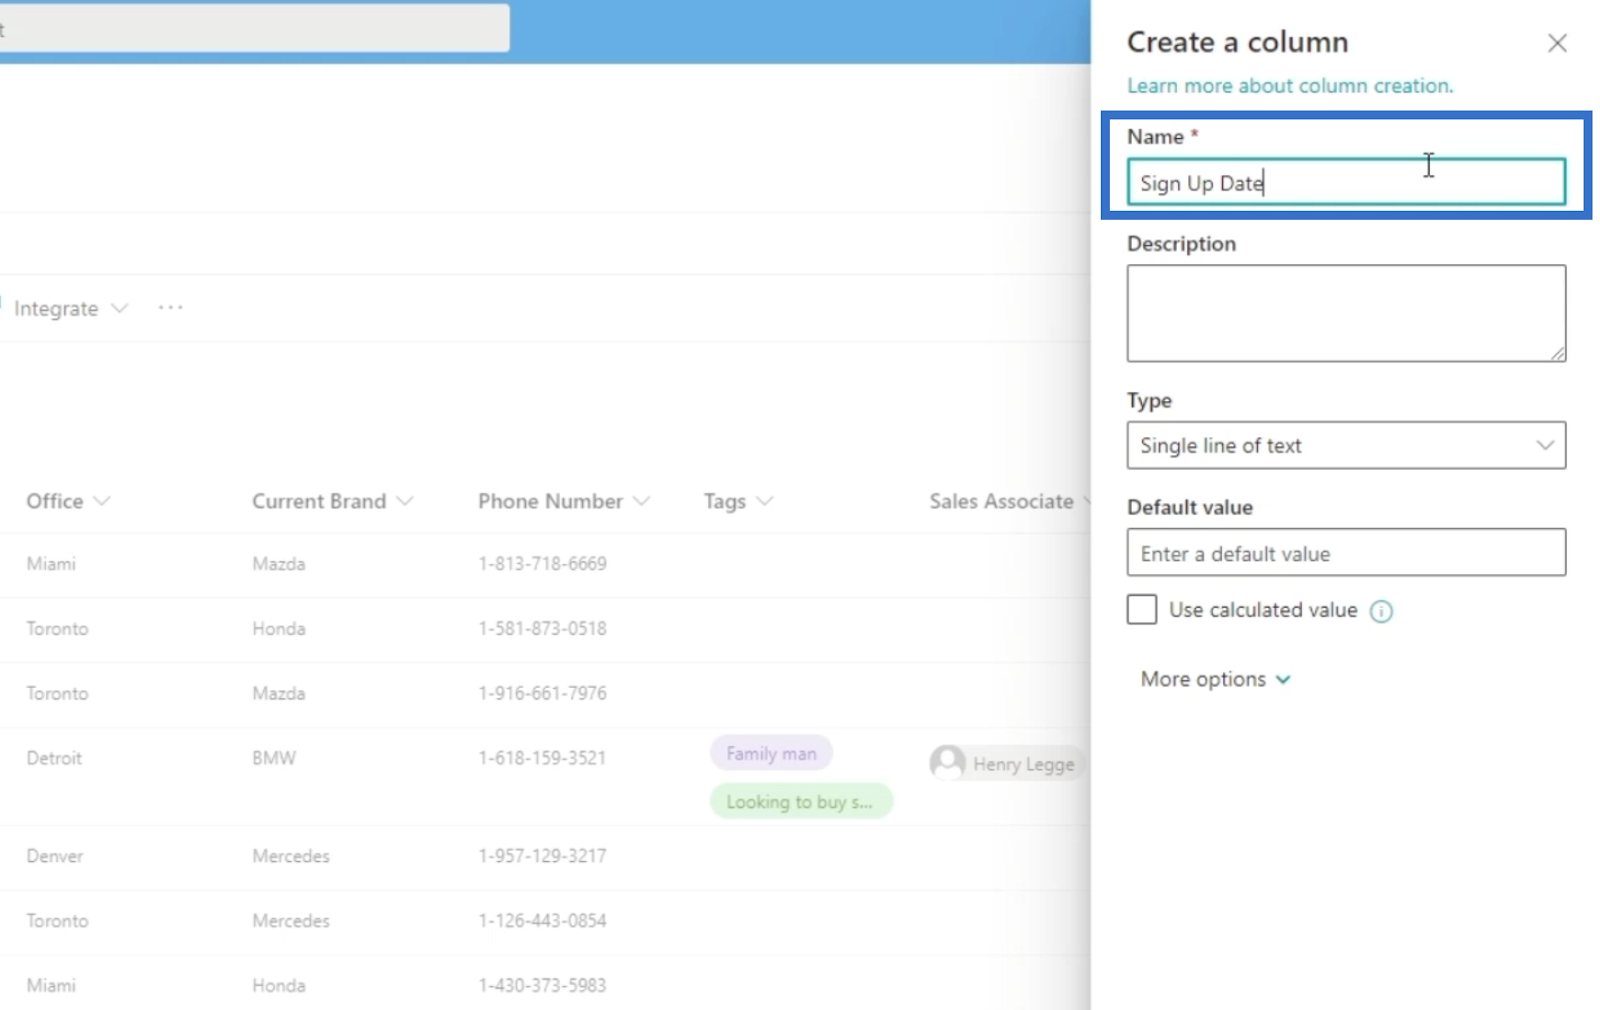
We’re going to type “Sign Up Date” on the Name field.
The default value will be nothing.
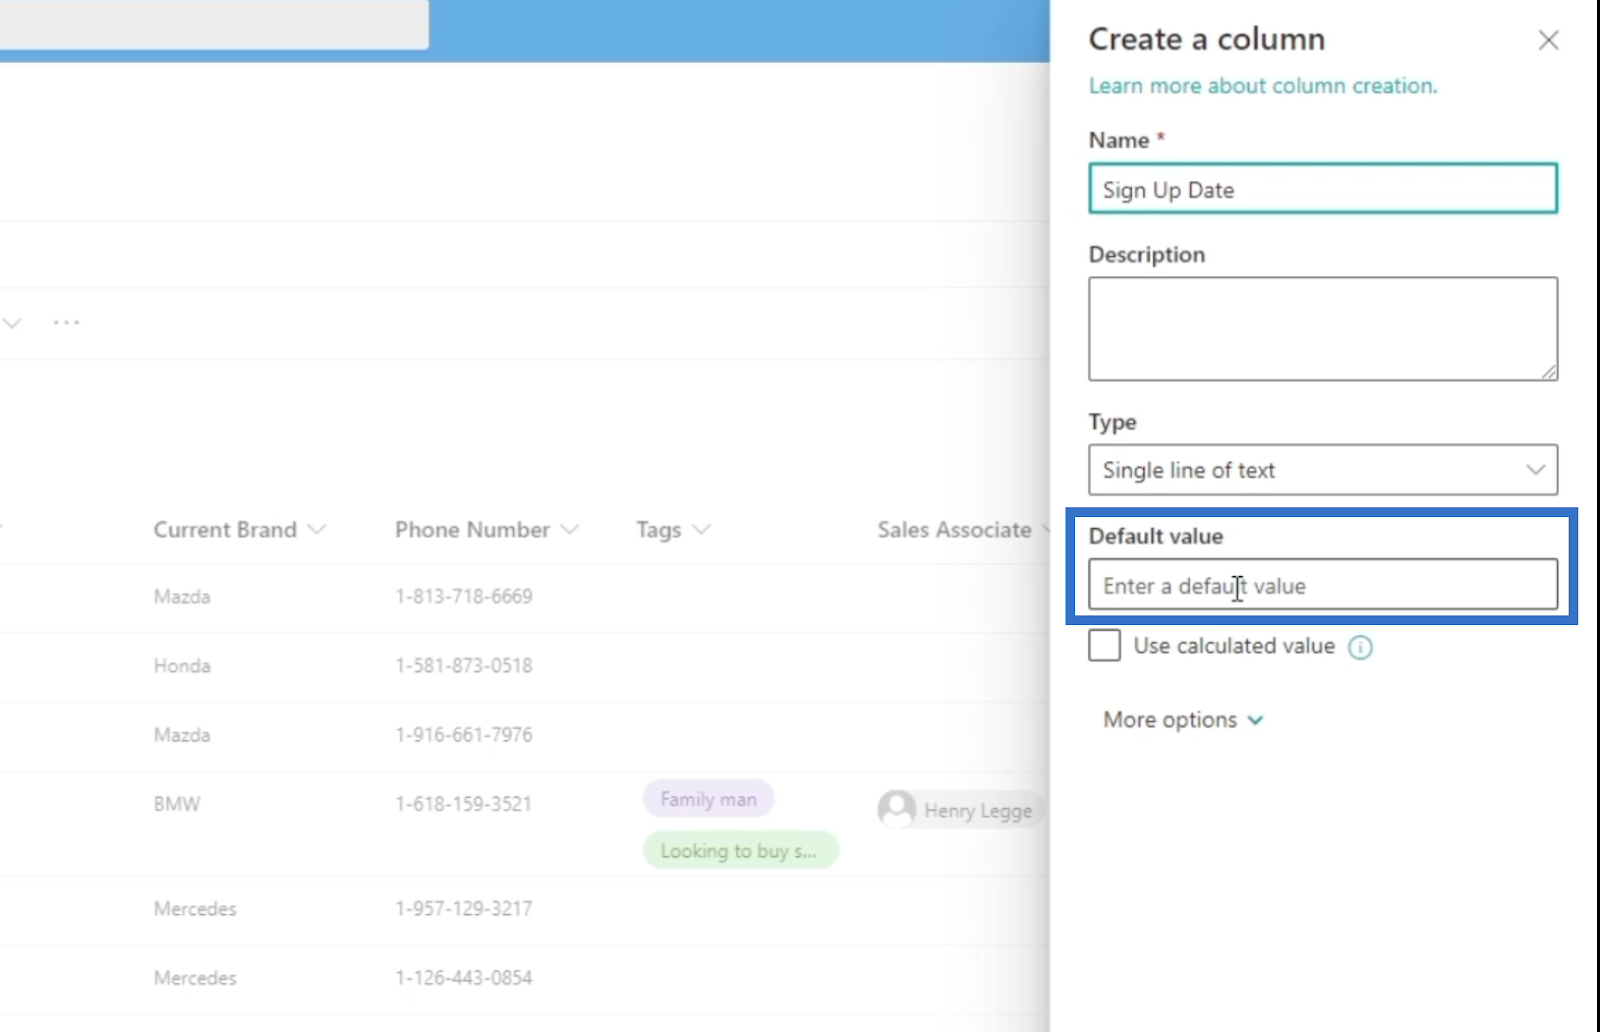
Then, click Save.
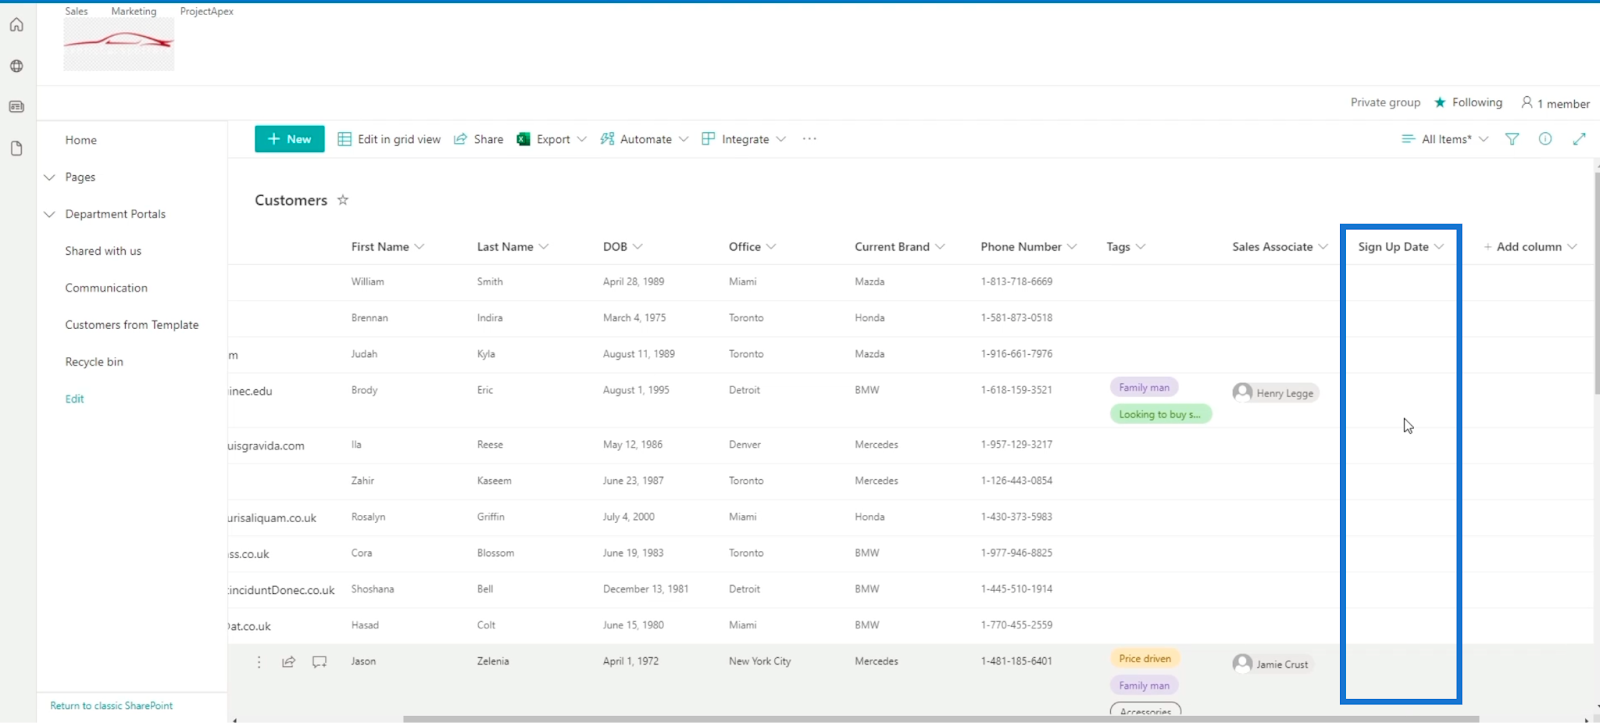
Next is to refresh the page, and you’ll see the added column on your SharePoint List.
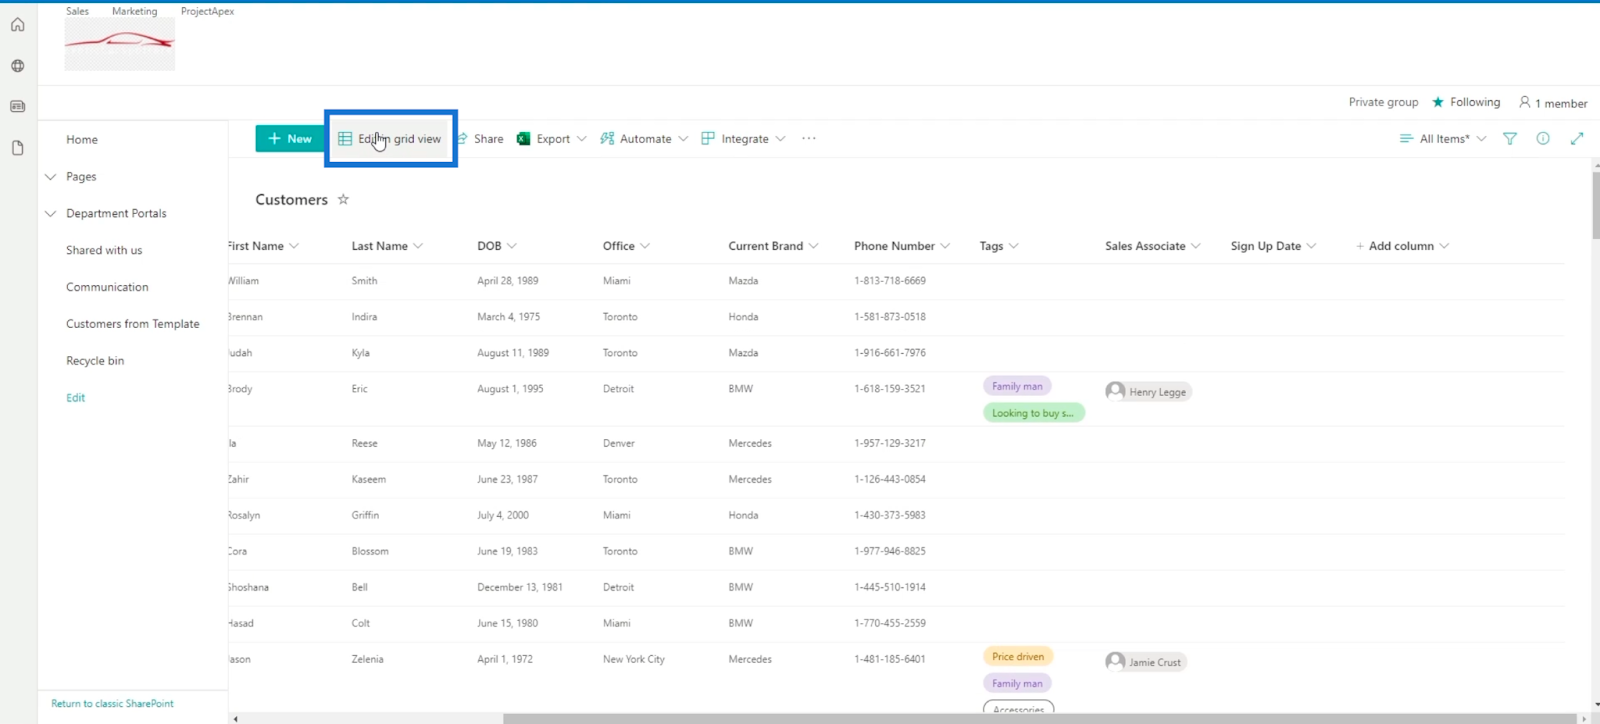
Then we’ll click Edit in grid view.
Next, we’ll go to the Excel file from the resources provided in this blog.
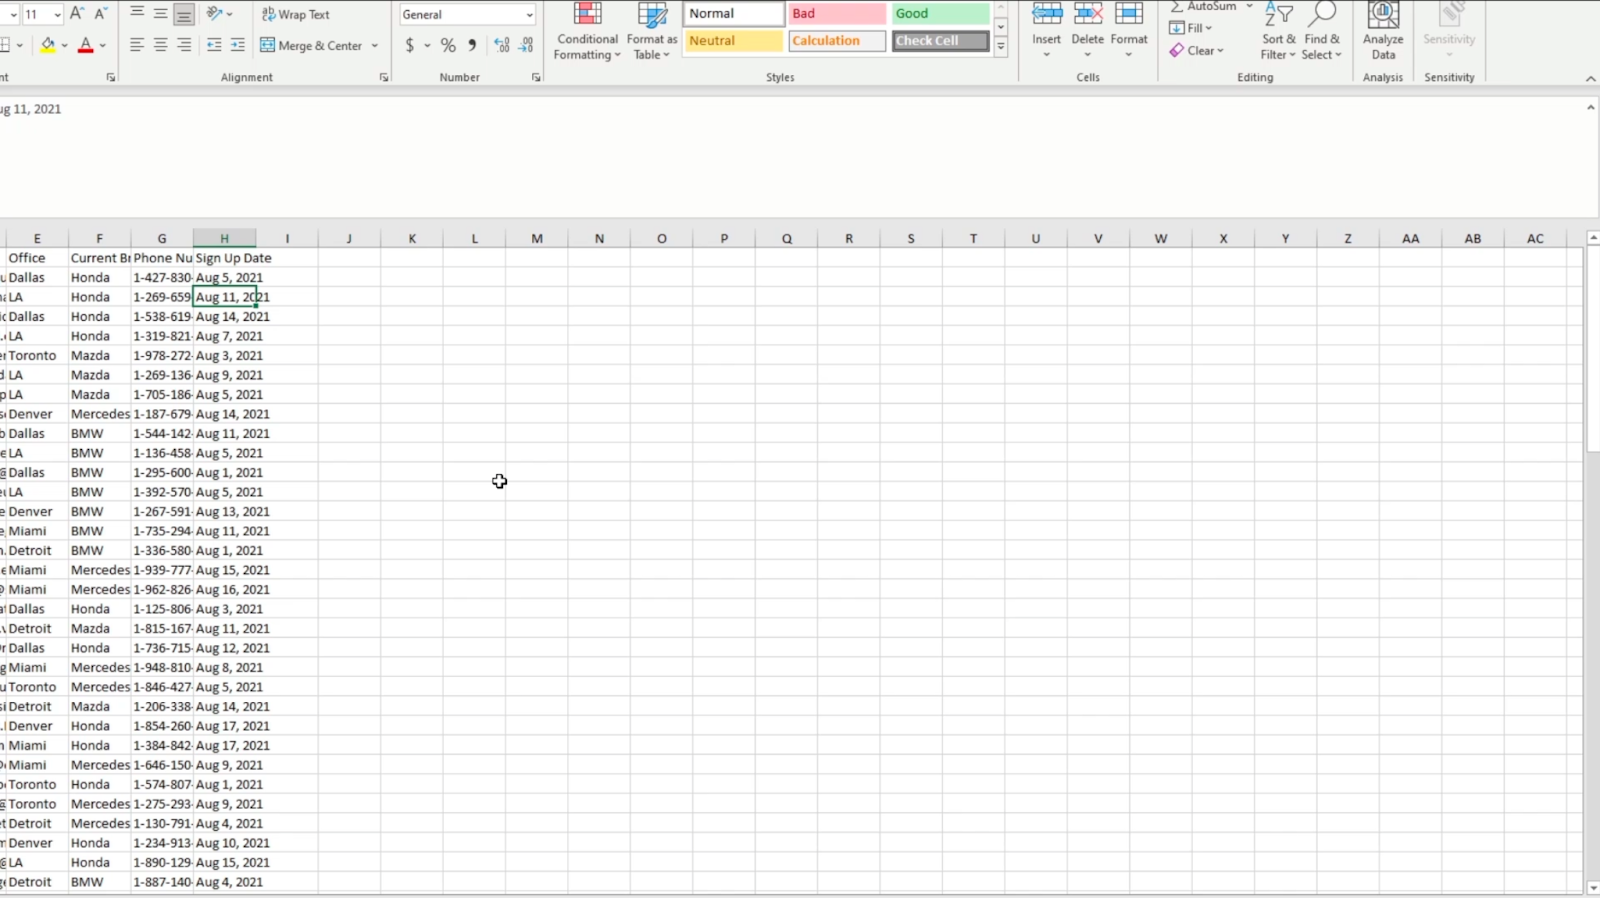
From there, we’re going to copy all the data in column H.

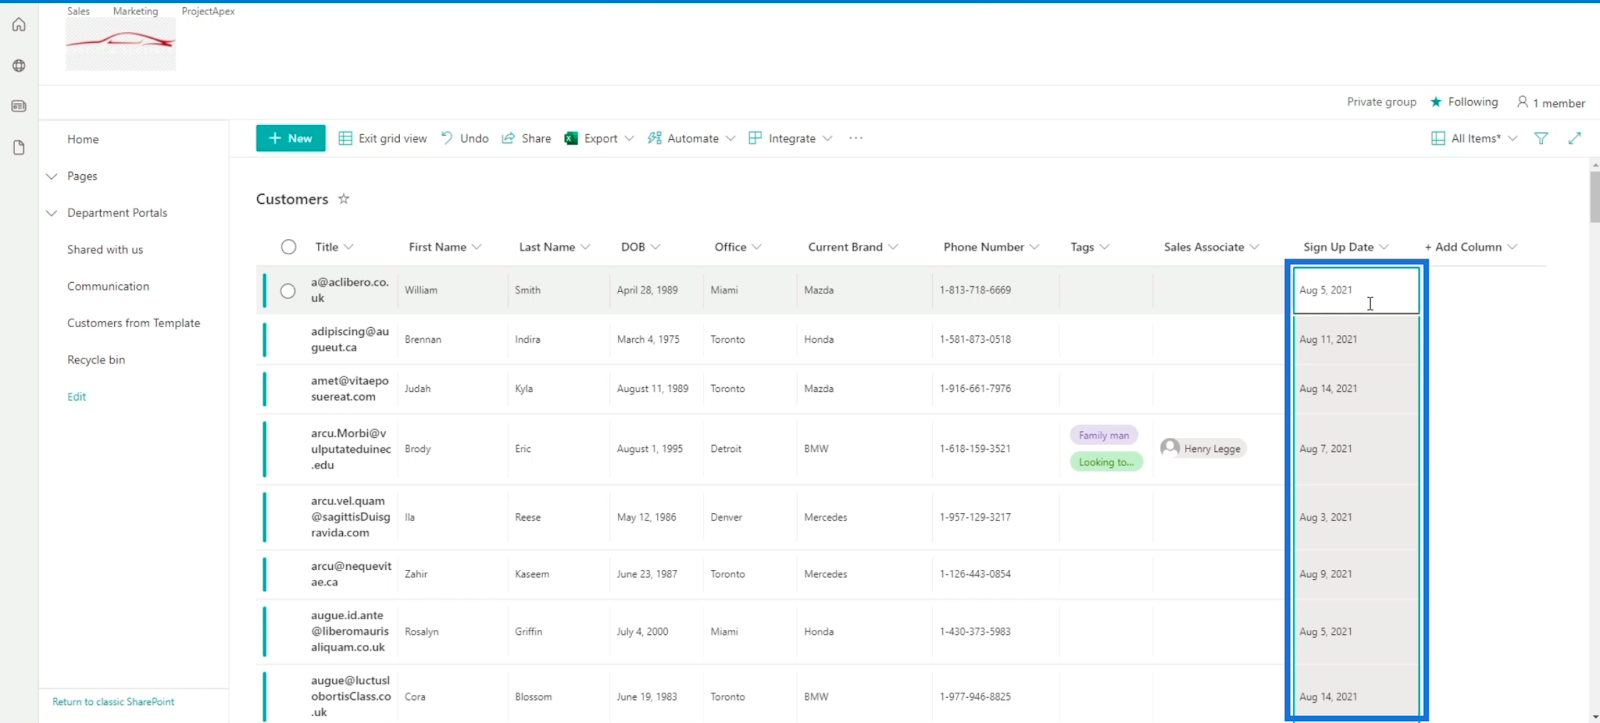
Then, go back to our SharePoint List, and select the top cell on the Sign Up Date column.

Next, paste the data from the Excel file we copied.
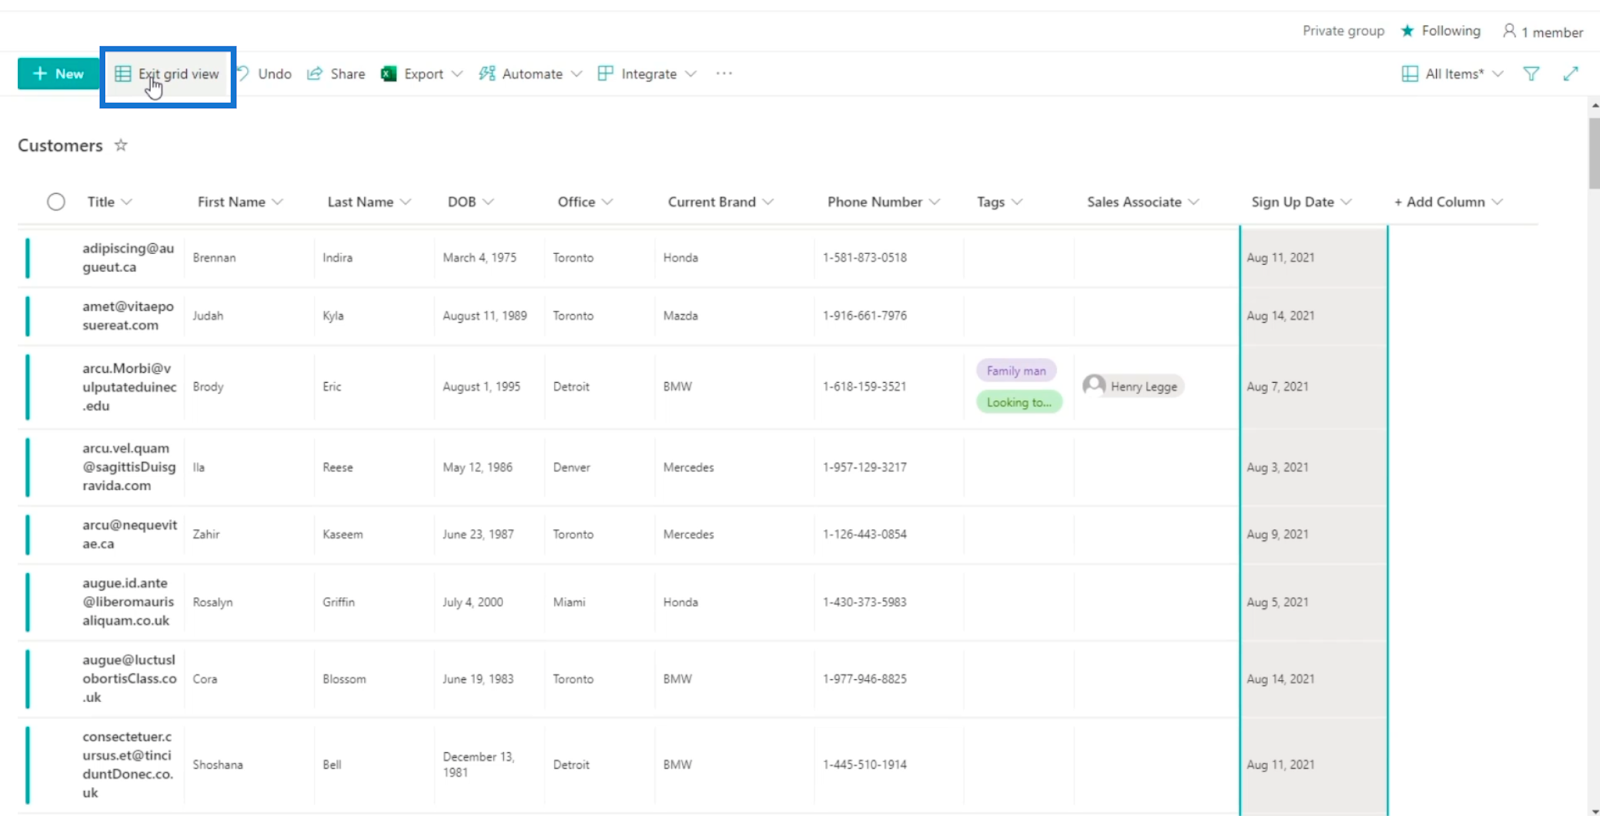
Finally, click Exit grid view to save.
Changing The Column Type To Date And Time In SharePoint
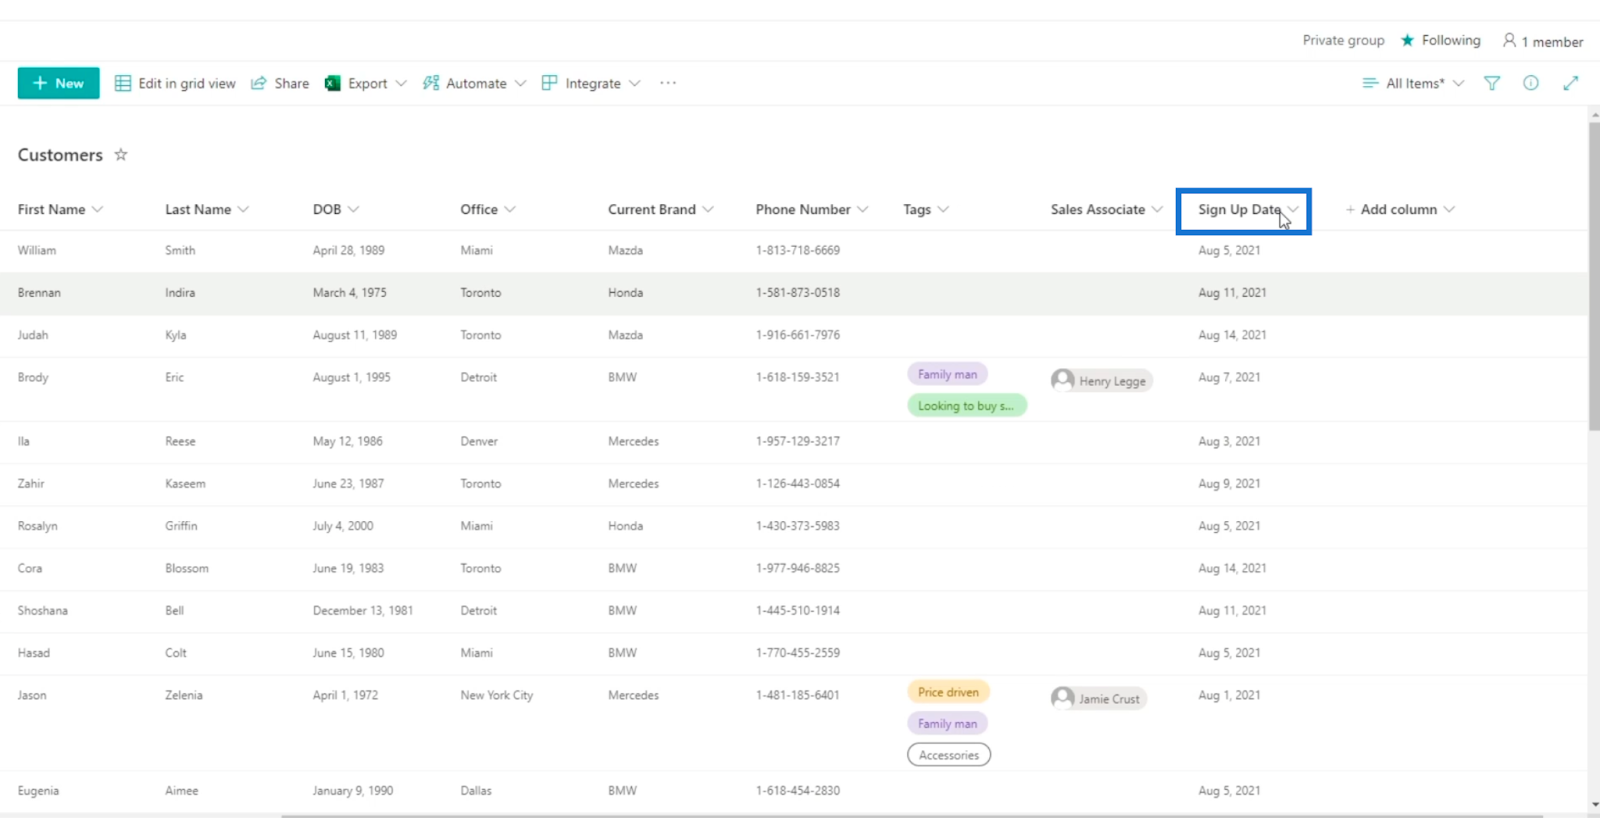
Click the Sign Up Date column. Take note that you might need to scroll to the right to see it since we have a lot of columns.
Then, select Column settings.

And click Edit.
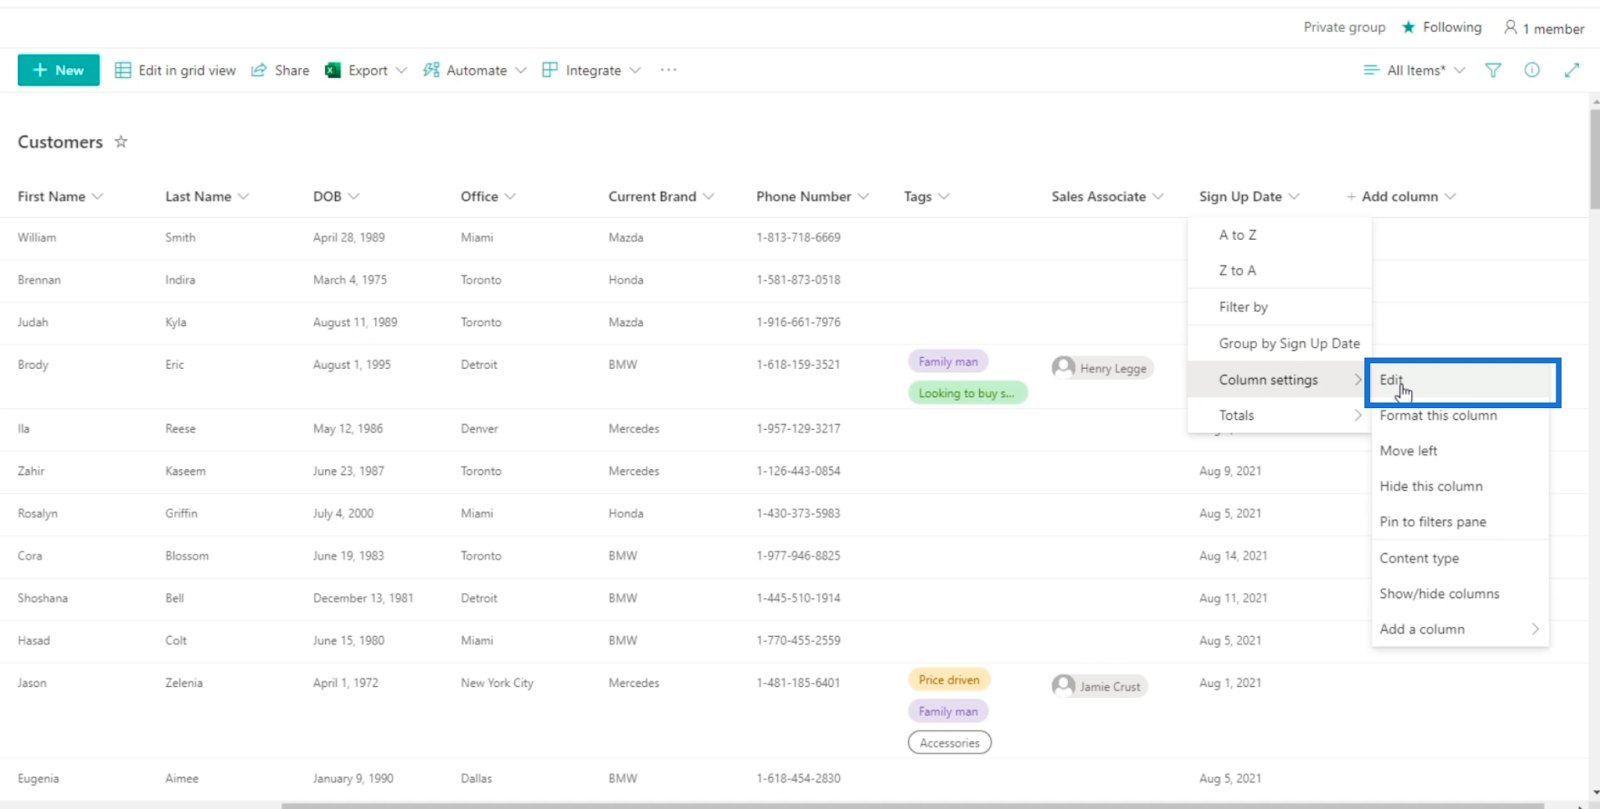
The Edit column panel will then appear where you can edit the column.
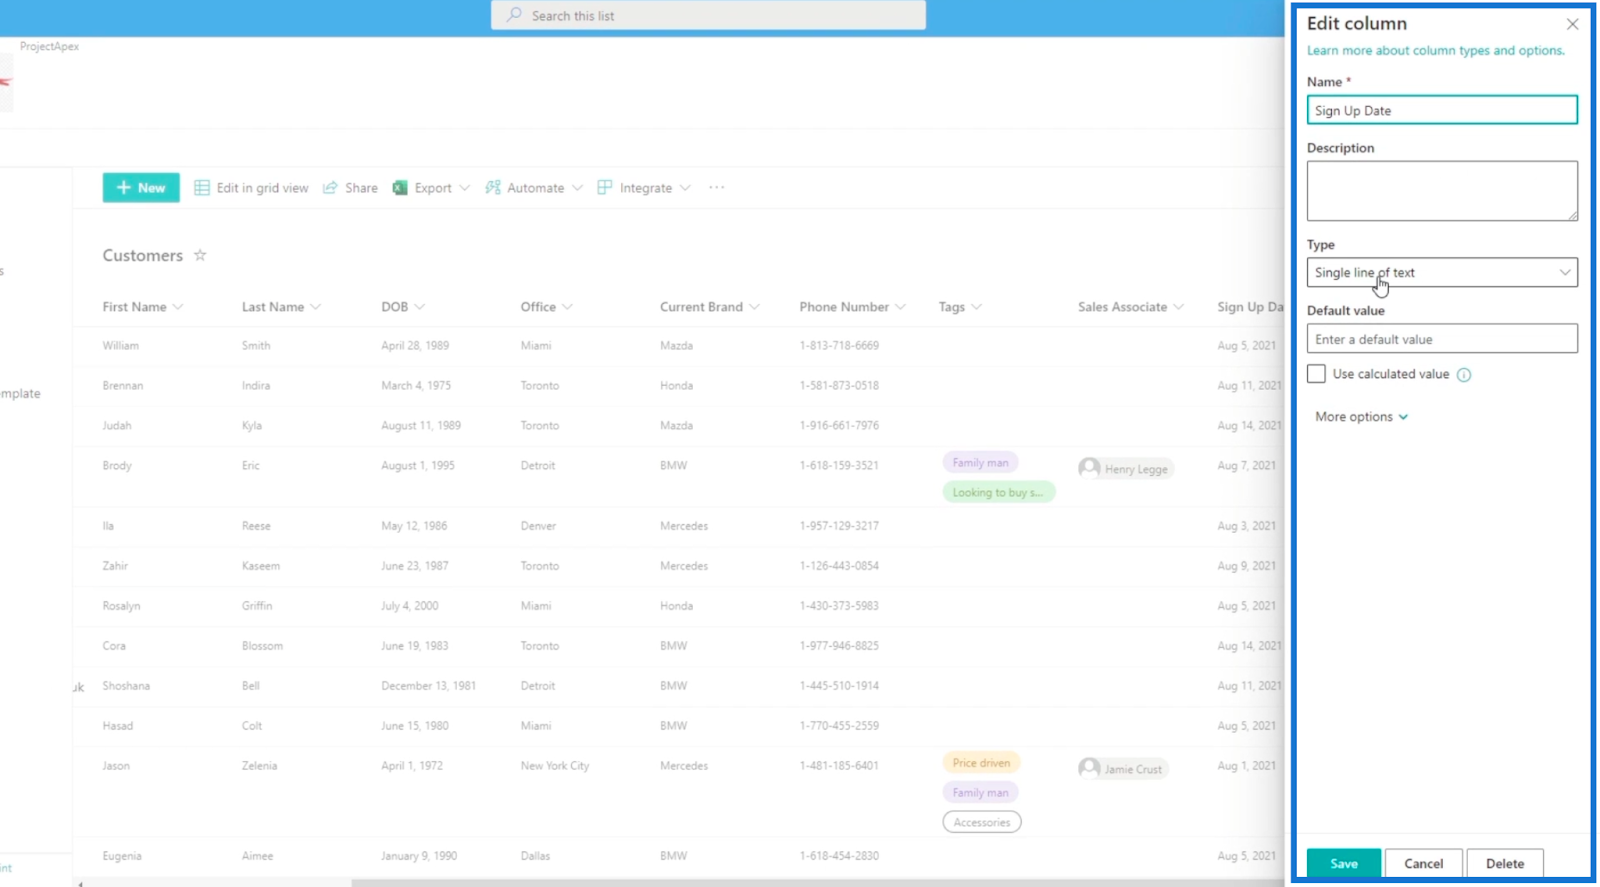
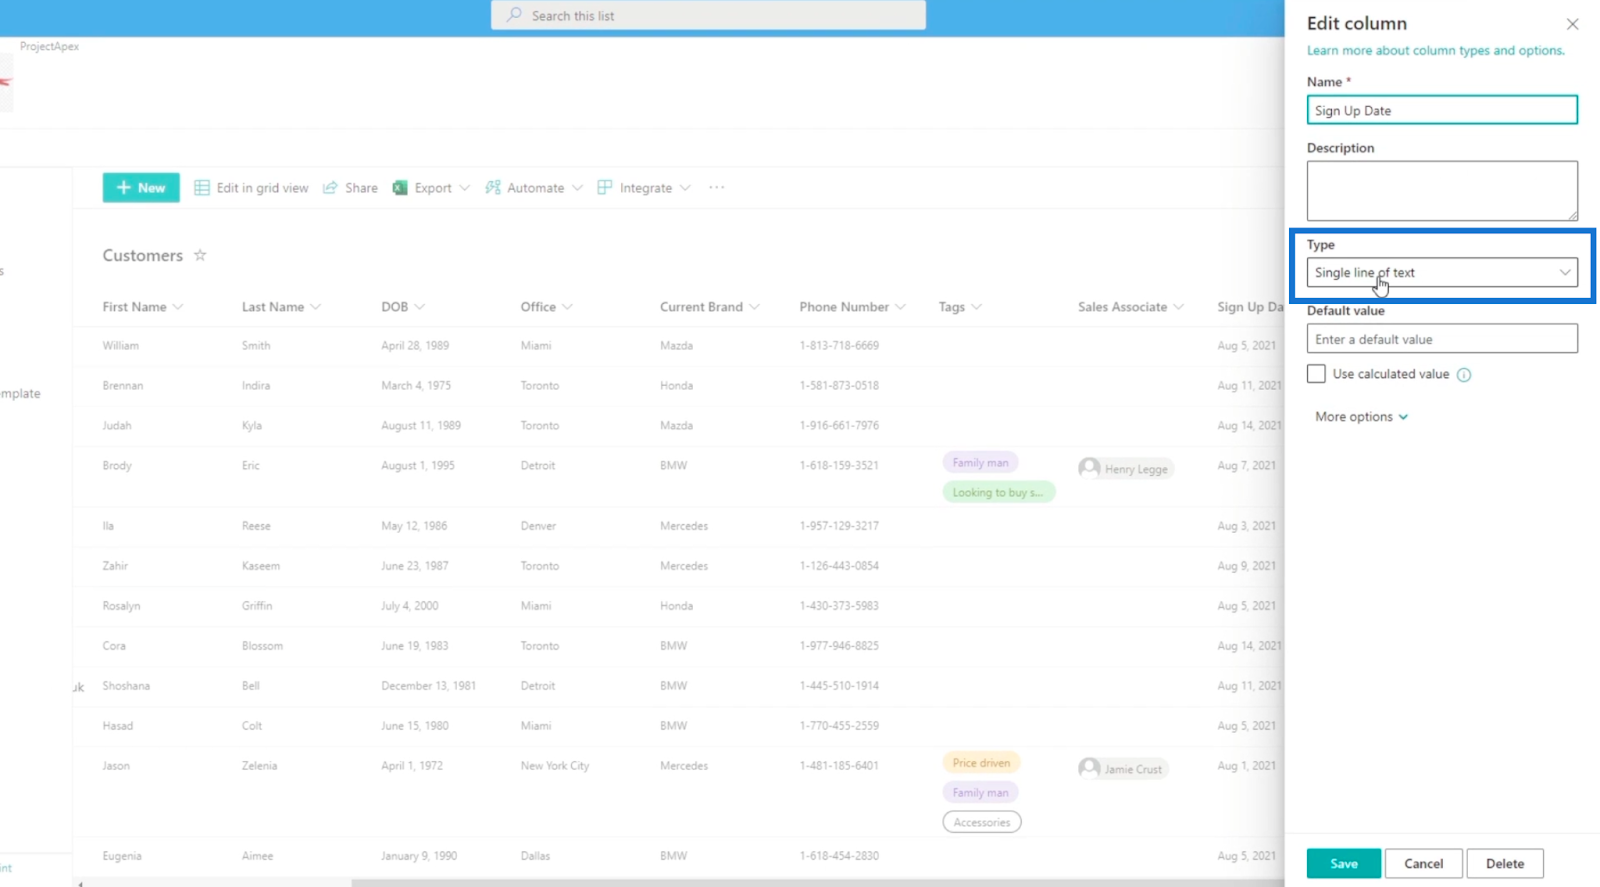
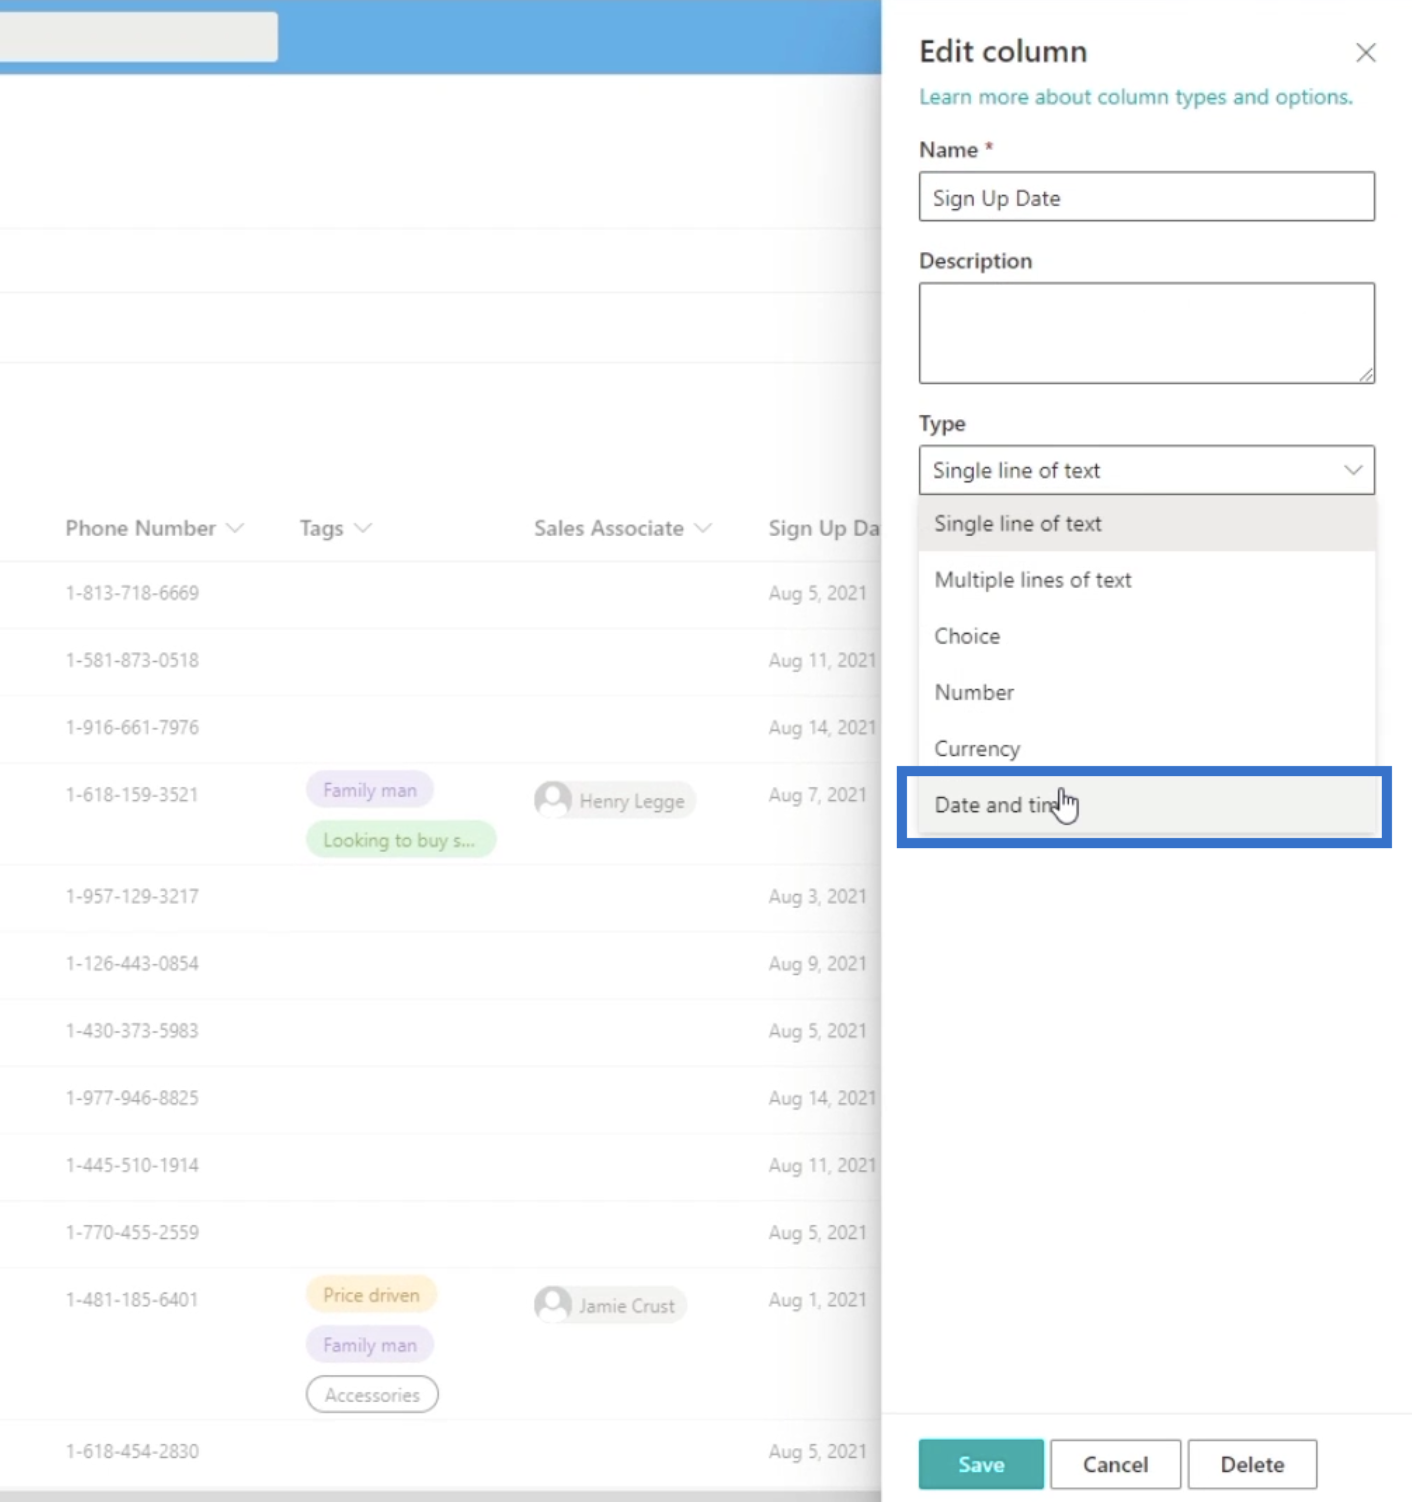
From there, click the Type dropdown menu.
Then, choose Date and time.
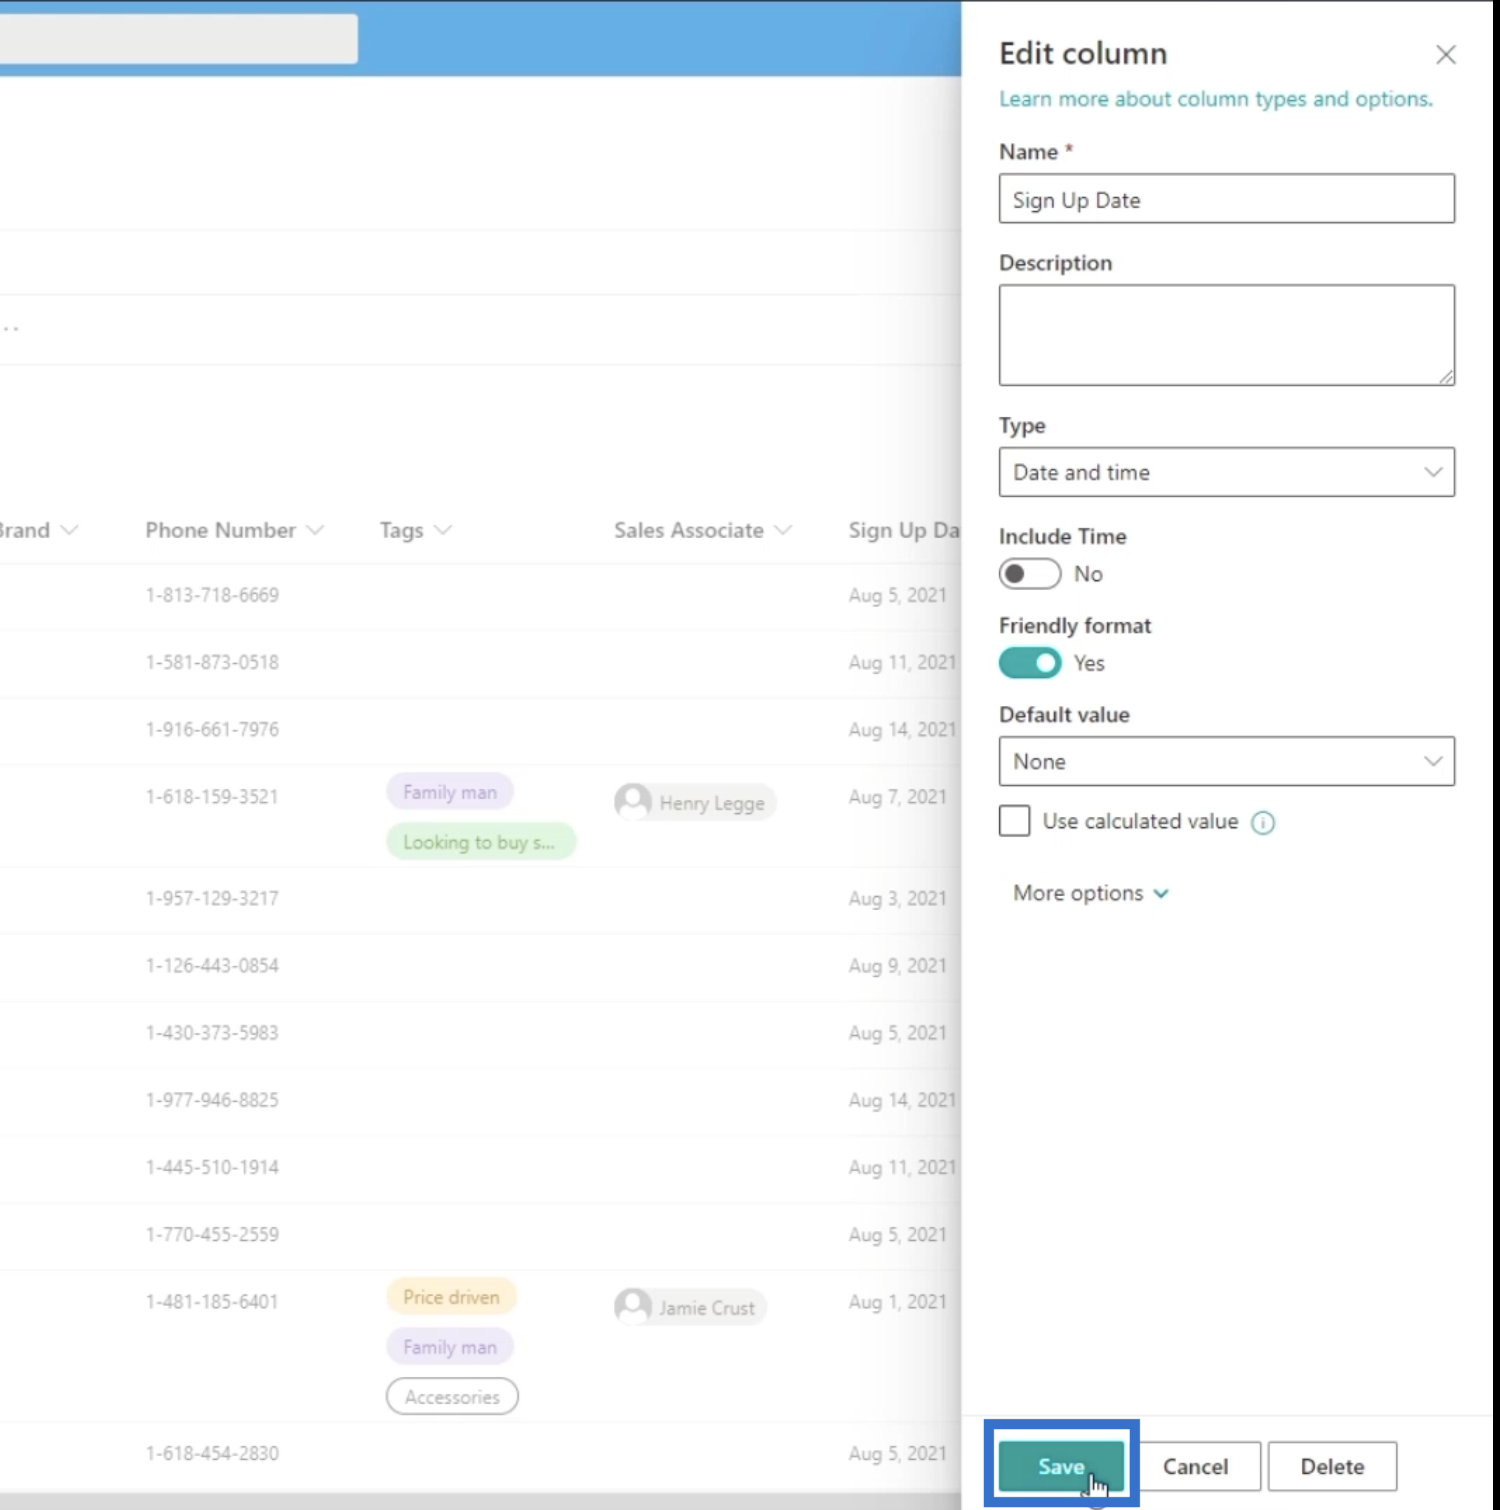
Next, we’ll set the Friendly format to Yes.
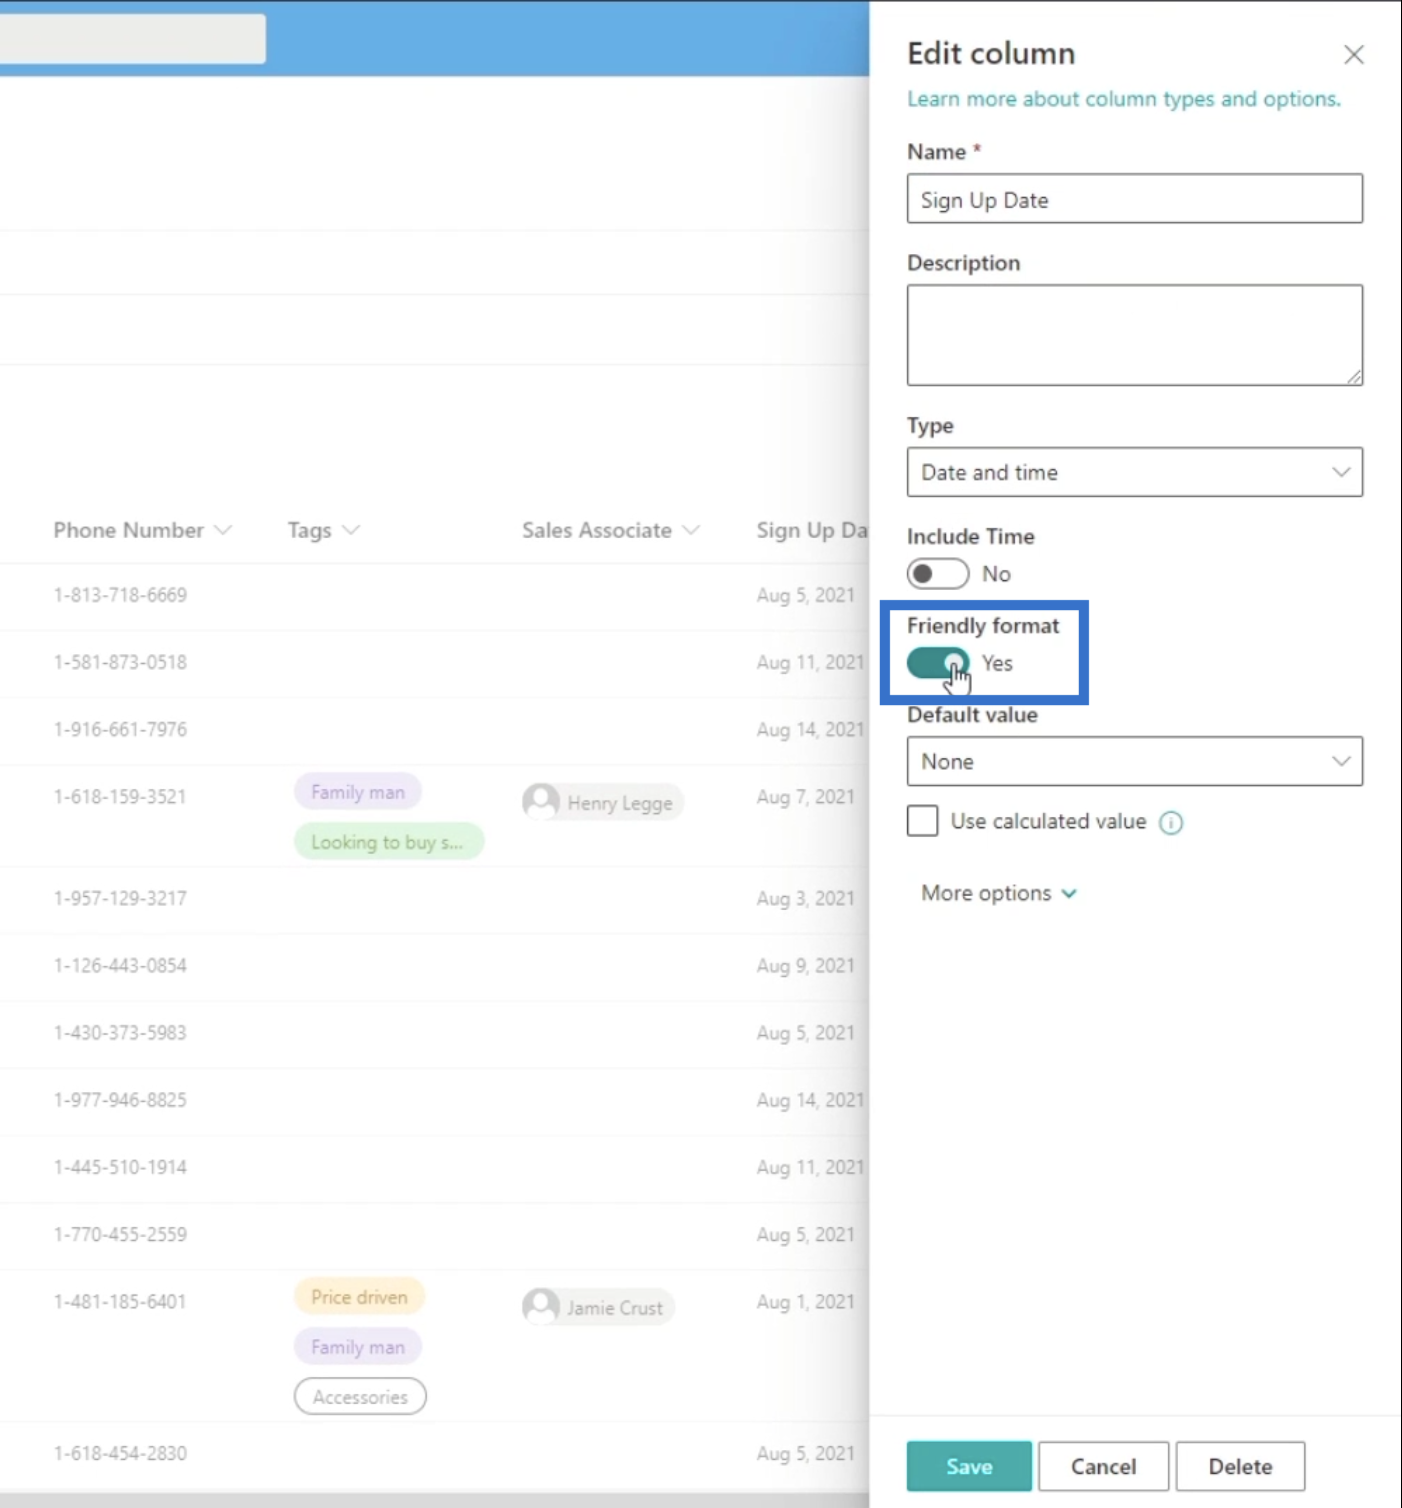
Finally, click Save.
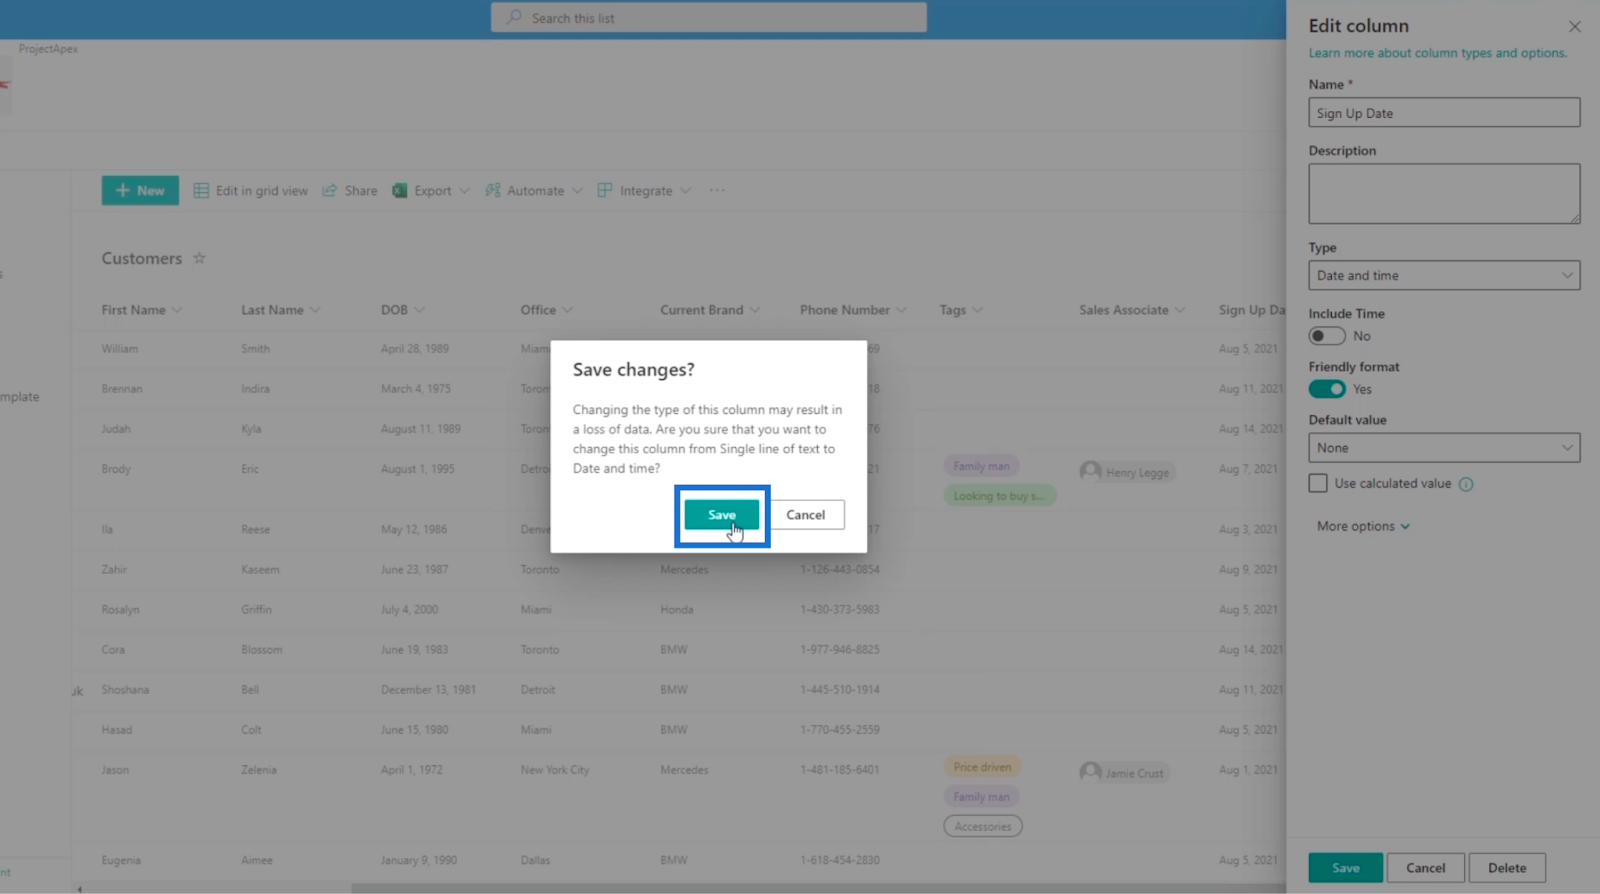
In the prompt that will appear, click Save.
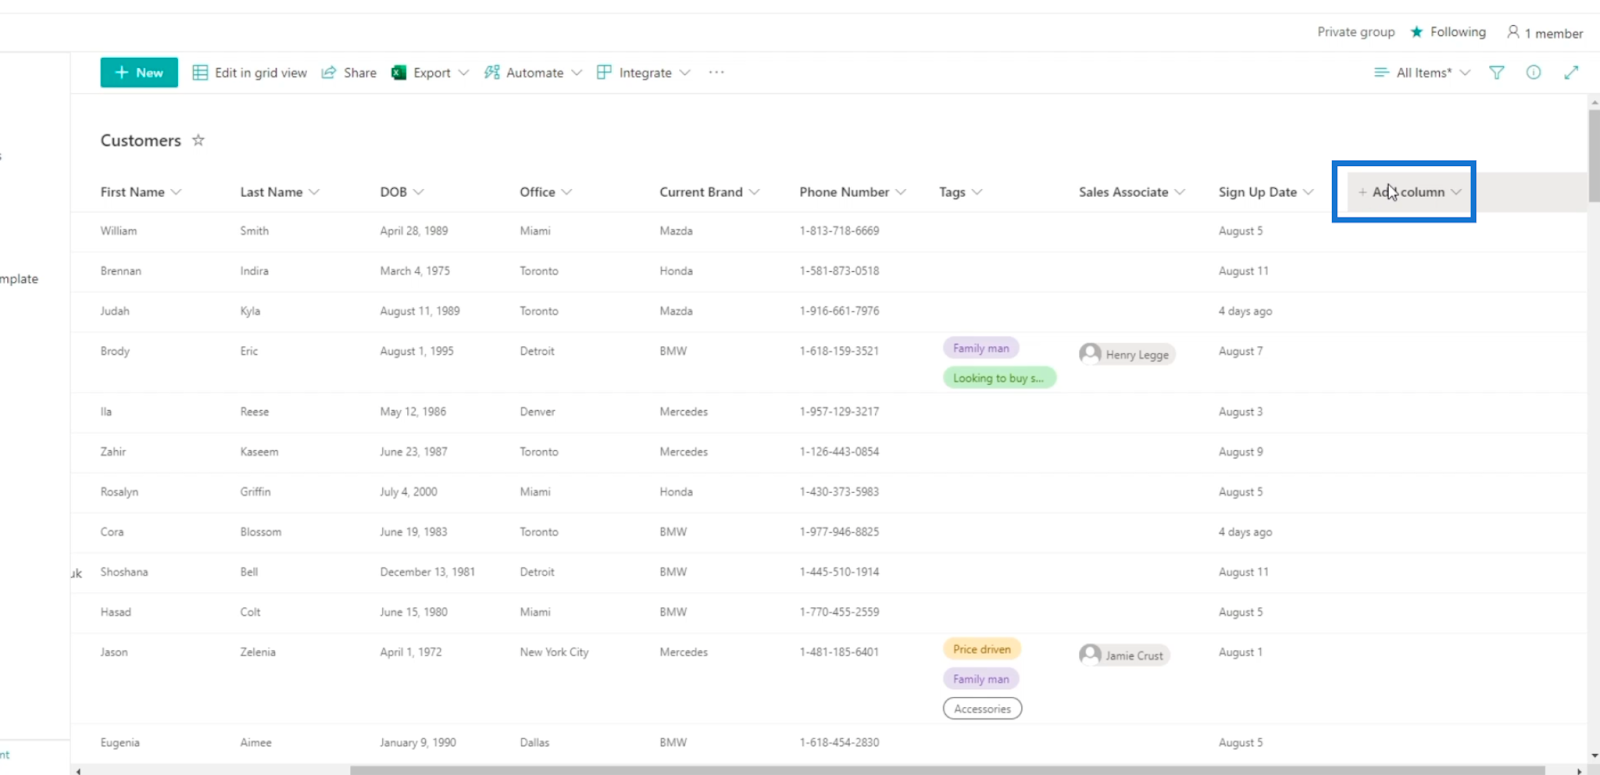
This is a very user-friendly format, as you’ll see some data indicating that it was 4 days ago instead of displaying the date format itself.

Adding Calculated Columns In SharePoint
First, click the Add column.
Next, click More…
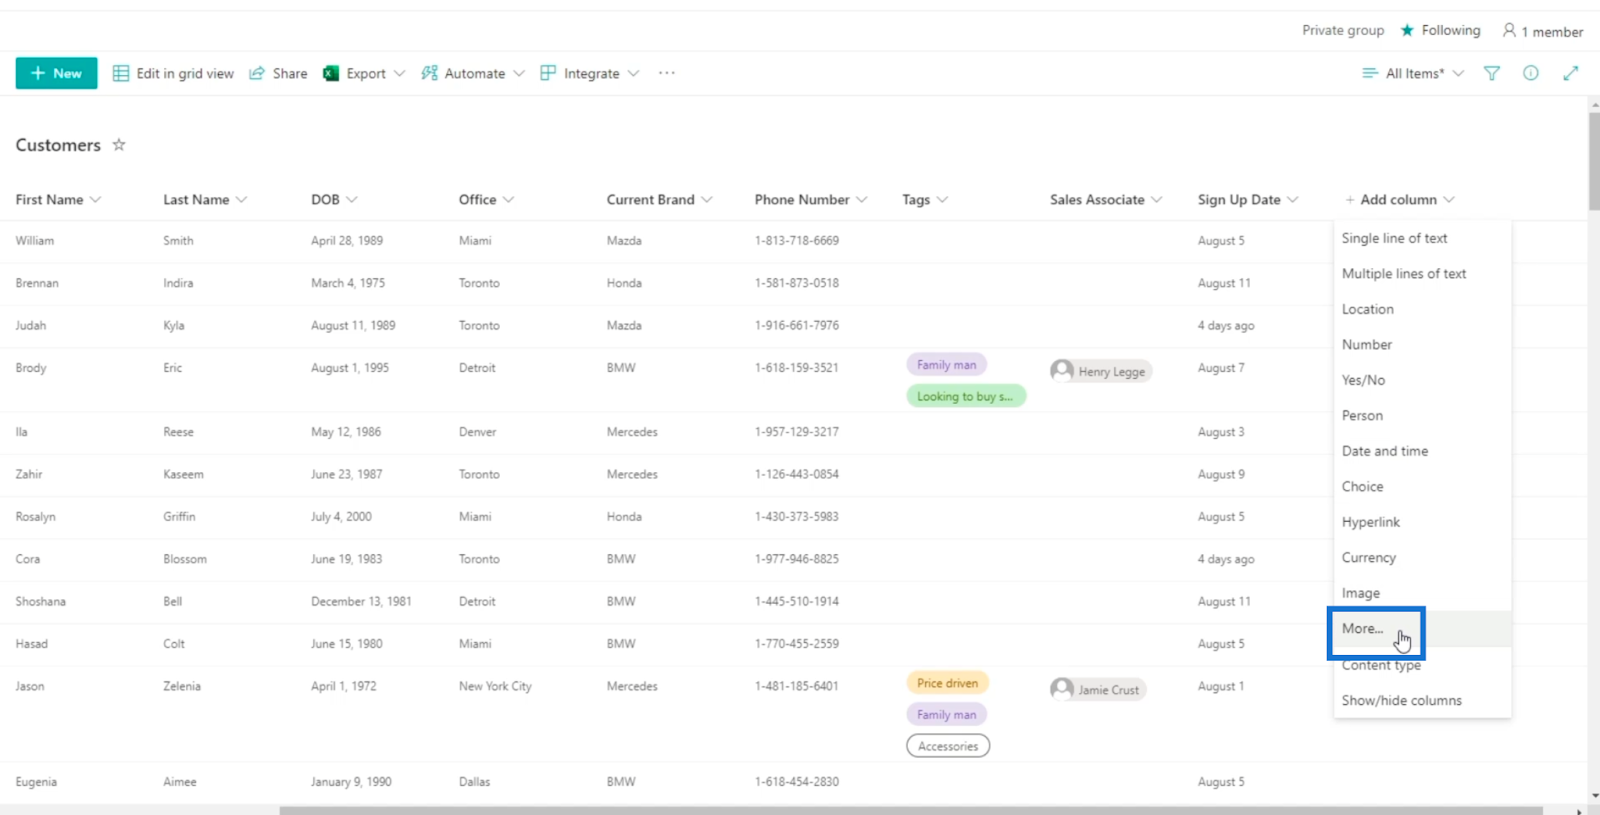
This will take us to the Settings then Create Column. As you can see, adding a calculated column can only be done in the classical view and not in the modern view.
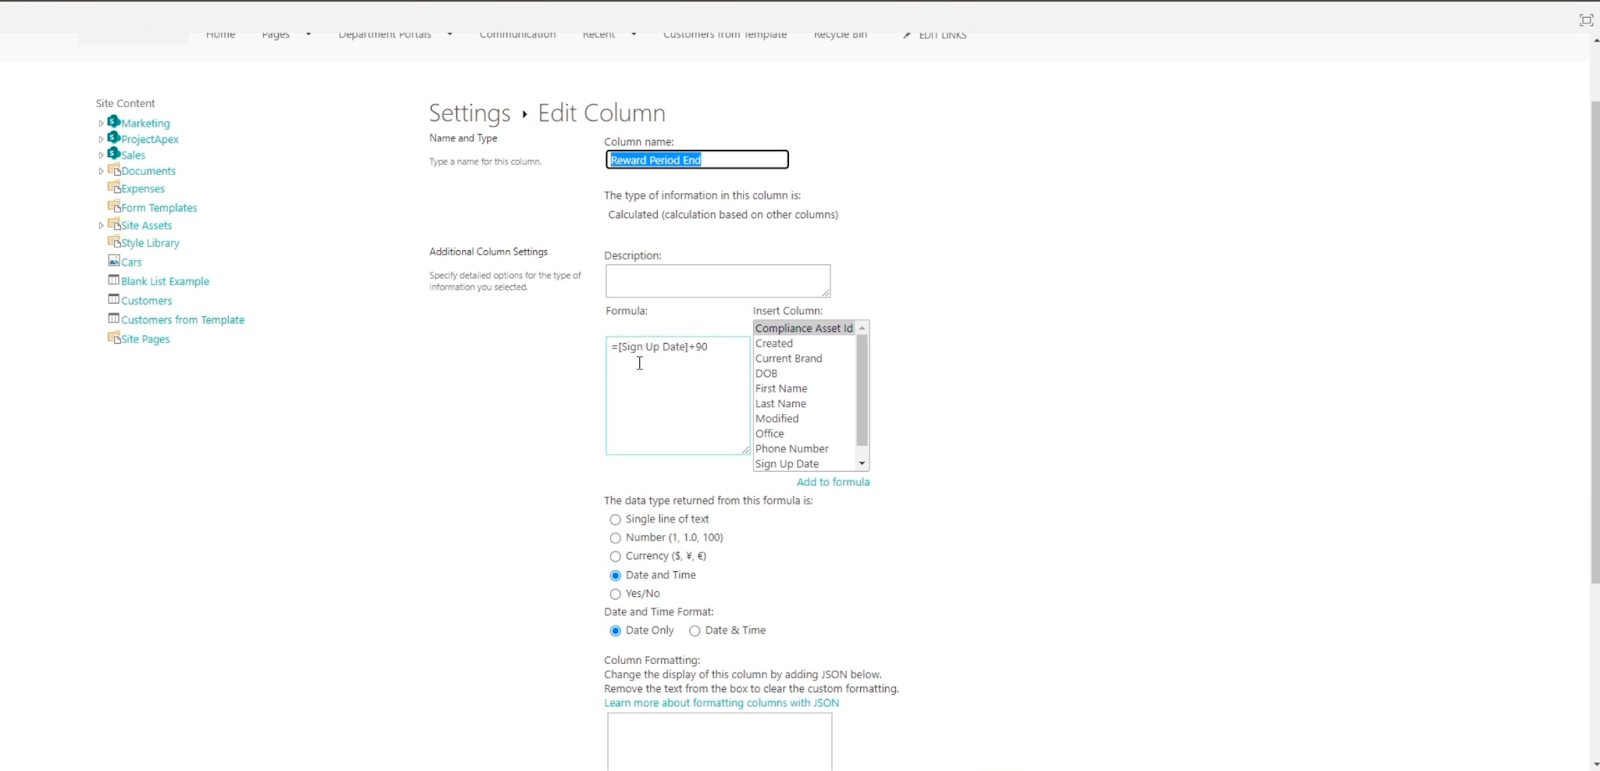
We’ll type in a full name for this column. In this example, we’ll use “Reward Period End”. After the customers have signed up, they’ll have (number of days) 90 days to get discounts or other offers you could think of.

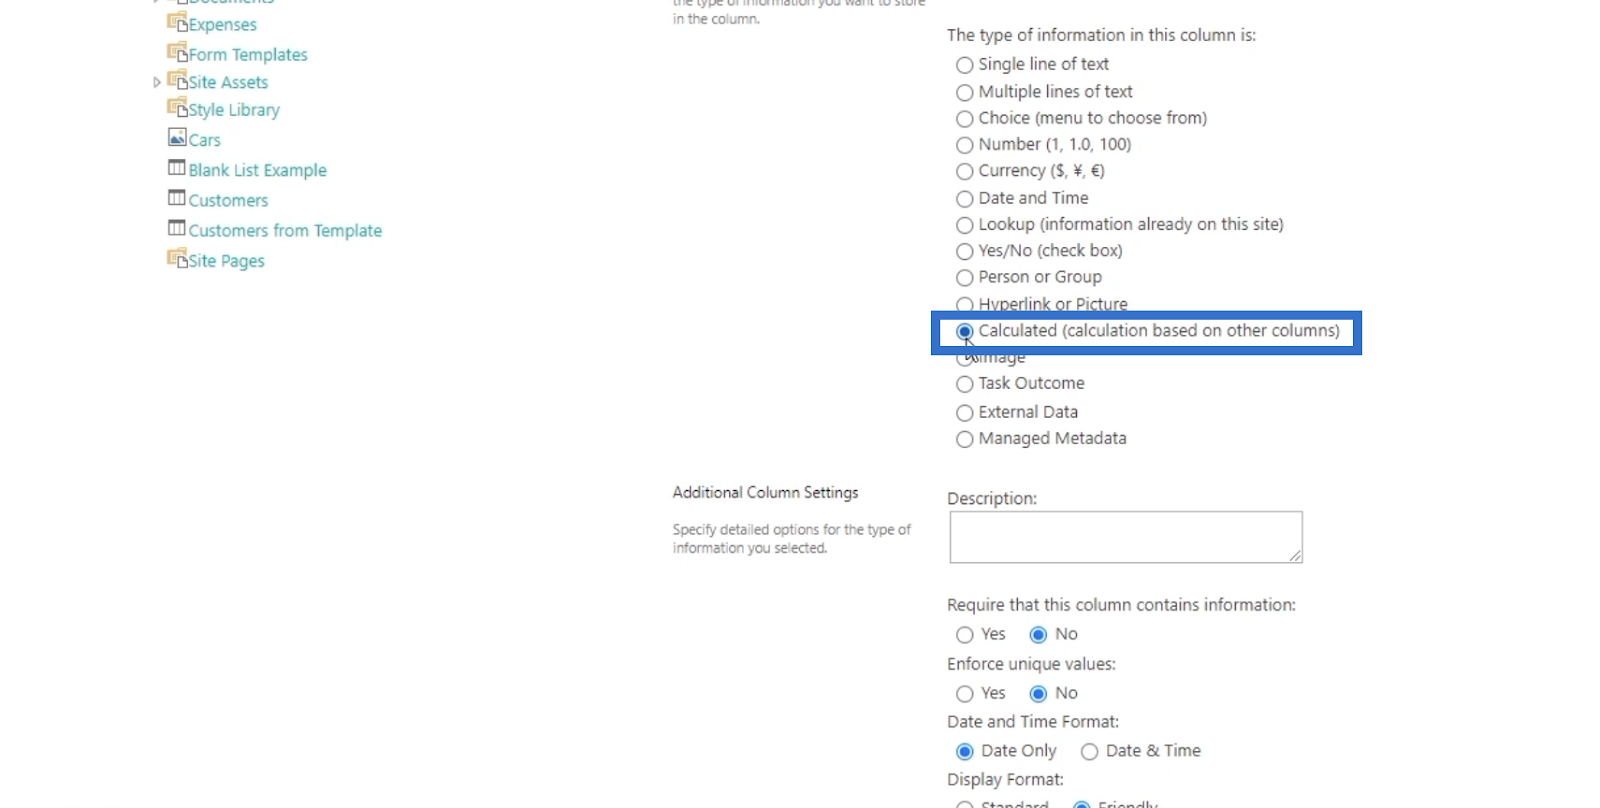
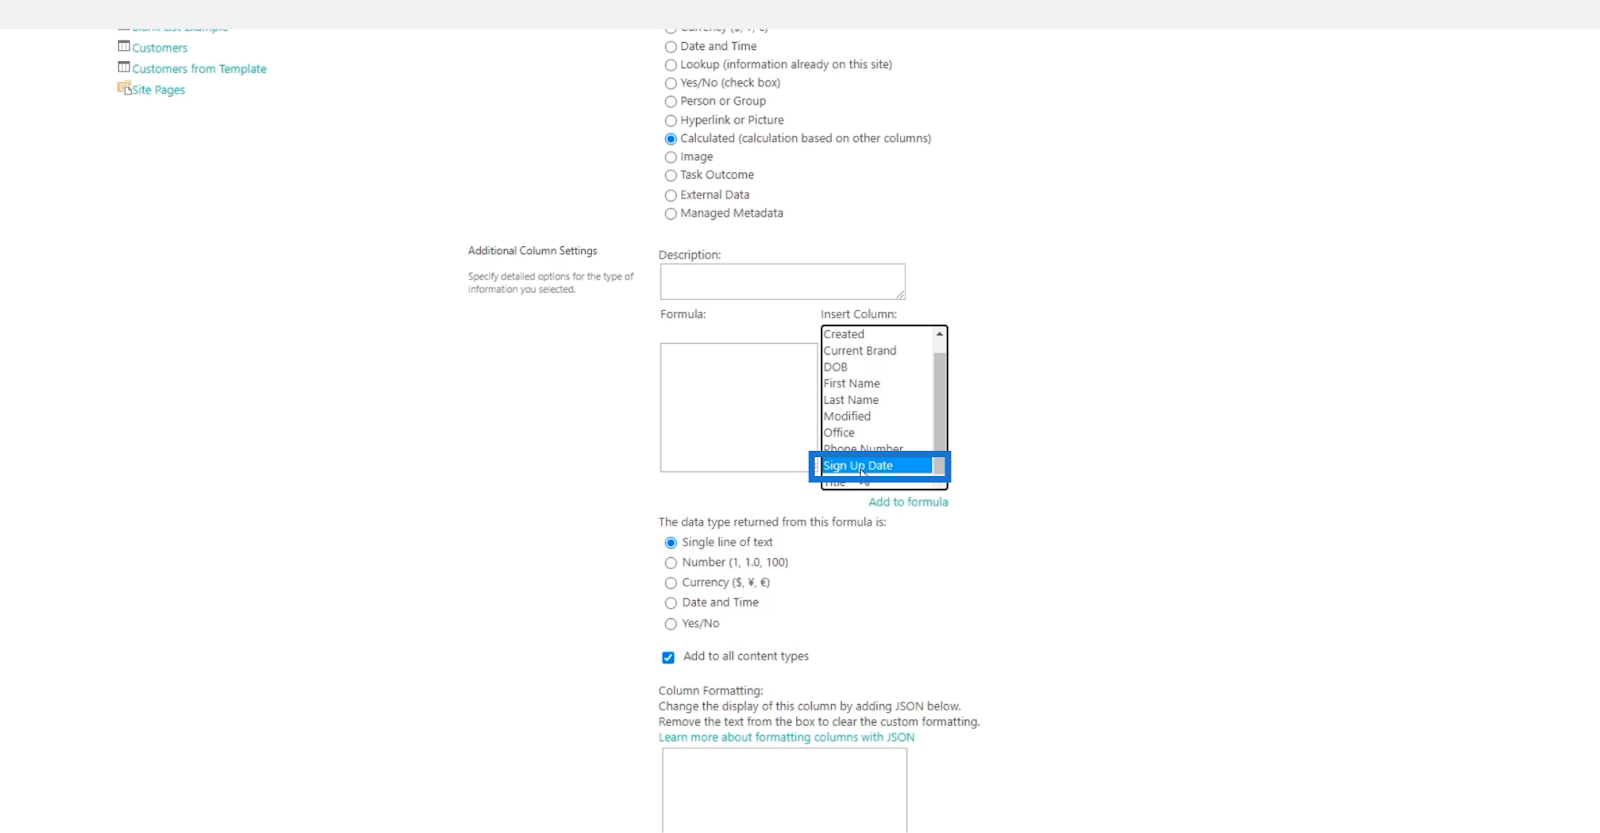
Next, we’ll set the type as Calculated (calculation based on other columns).
For the Description in the below screenshot, we’ll not put anything for now.
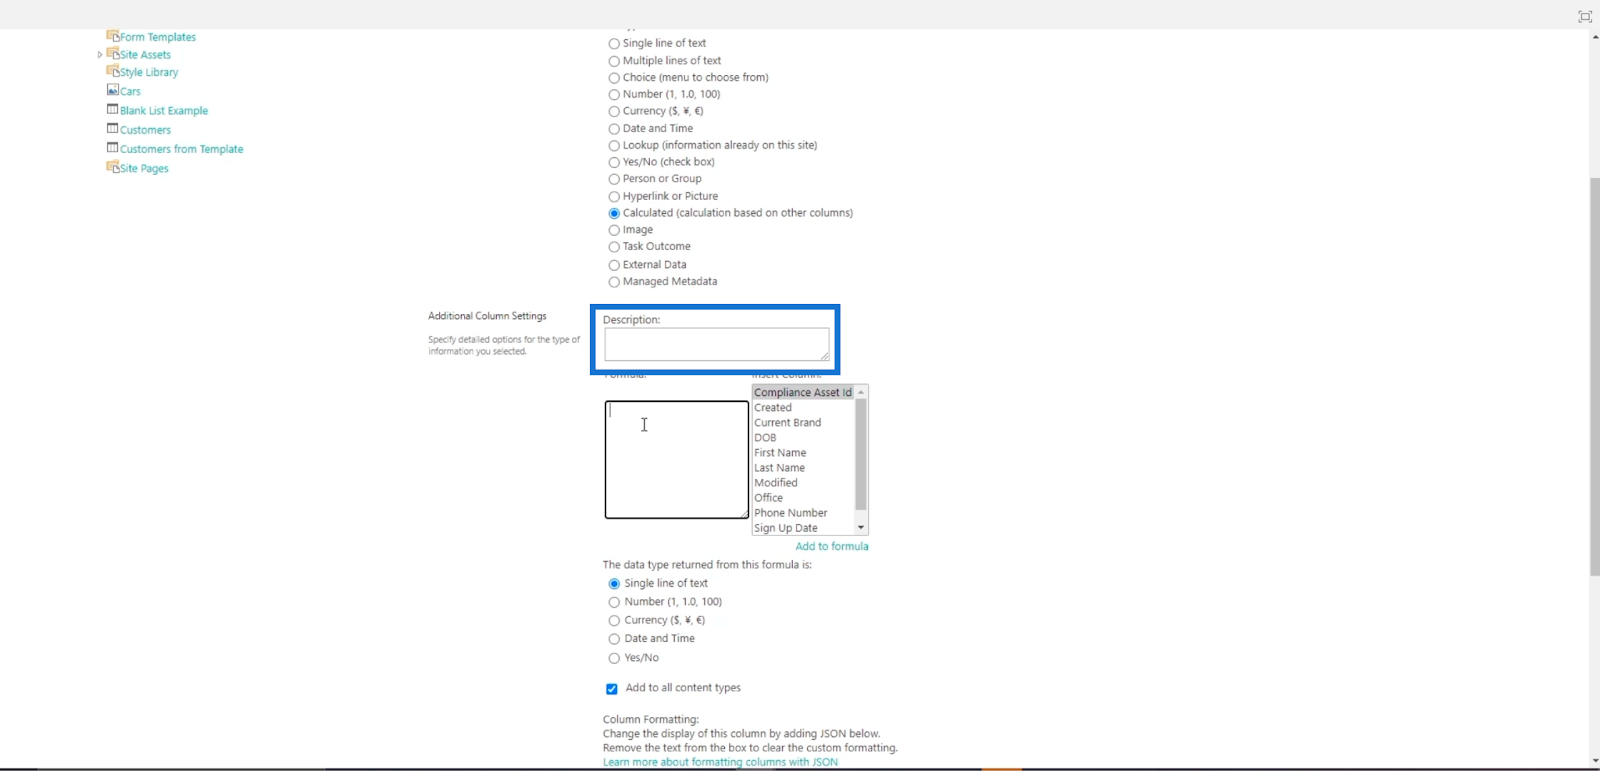
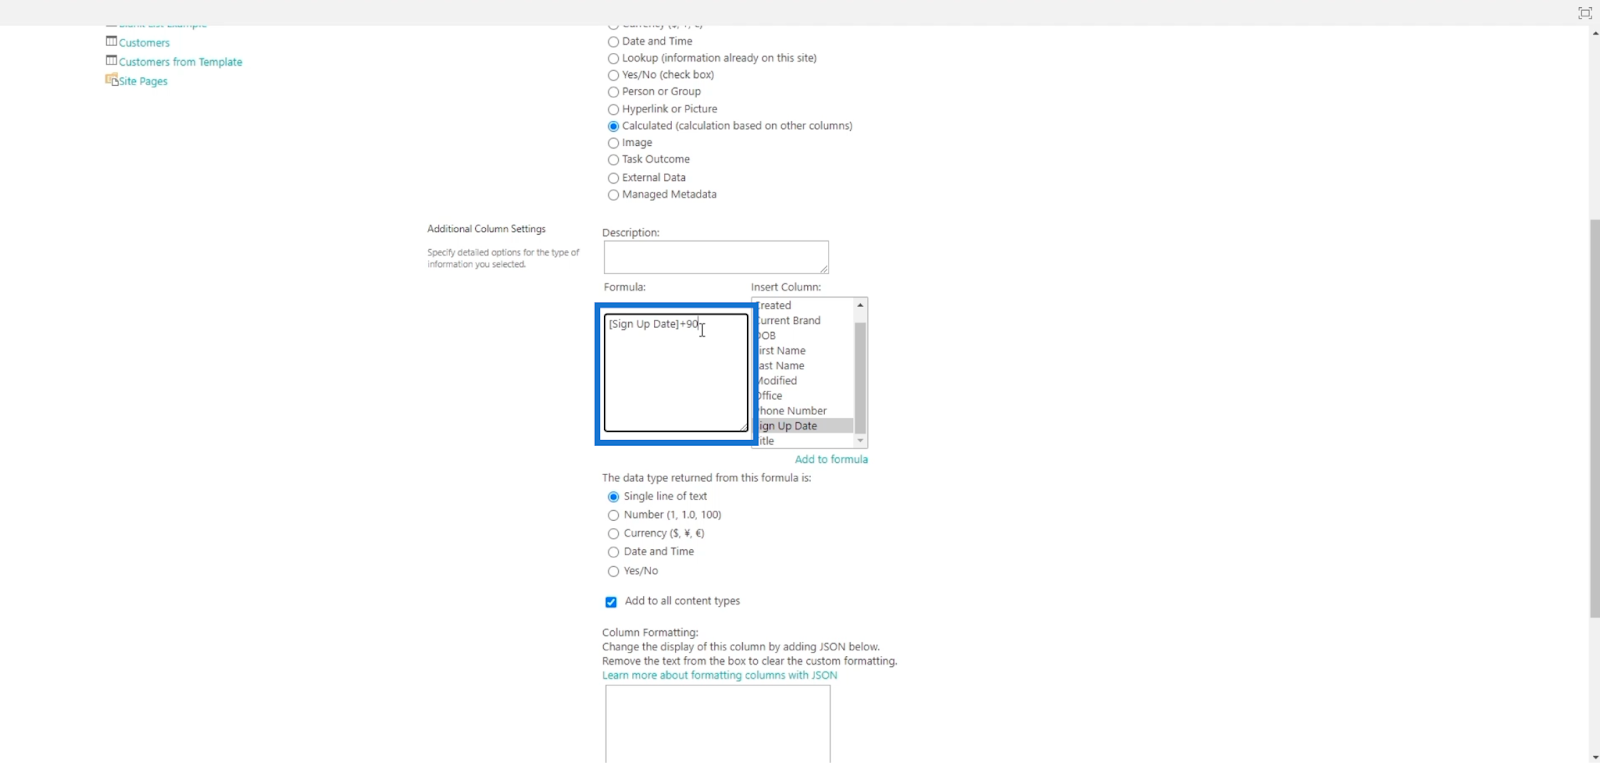
In the Formula text box, we want it to be equal to their sign-up date plus 90 days. Additionally, we want it automated. So on the Insert Column options, we’ll choose Sign Up Date.
Then, in the Formula field, you’ll notice that it has “[Sign Up Date]”. So, we’ll add “+90” next to it.
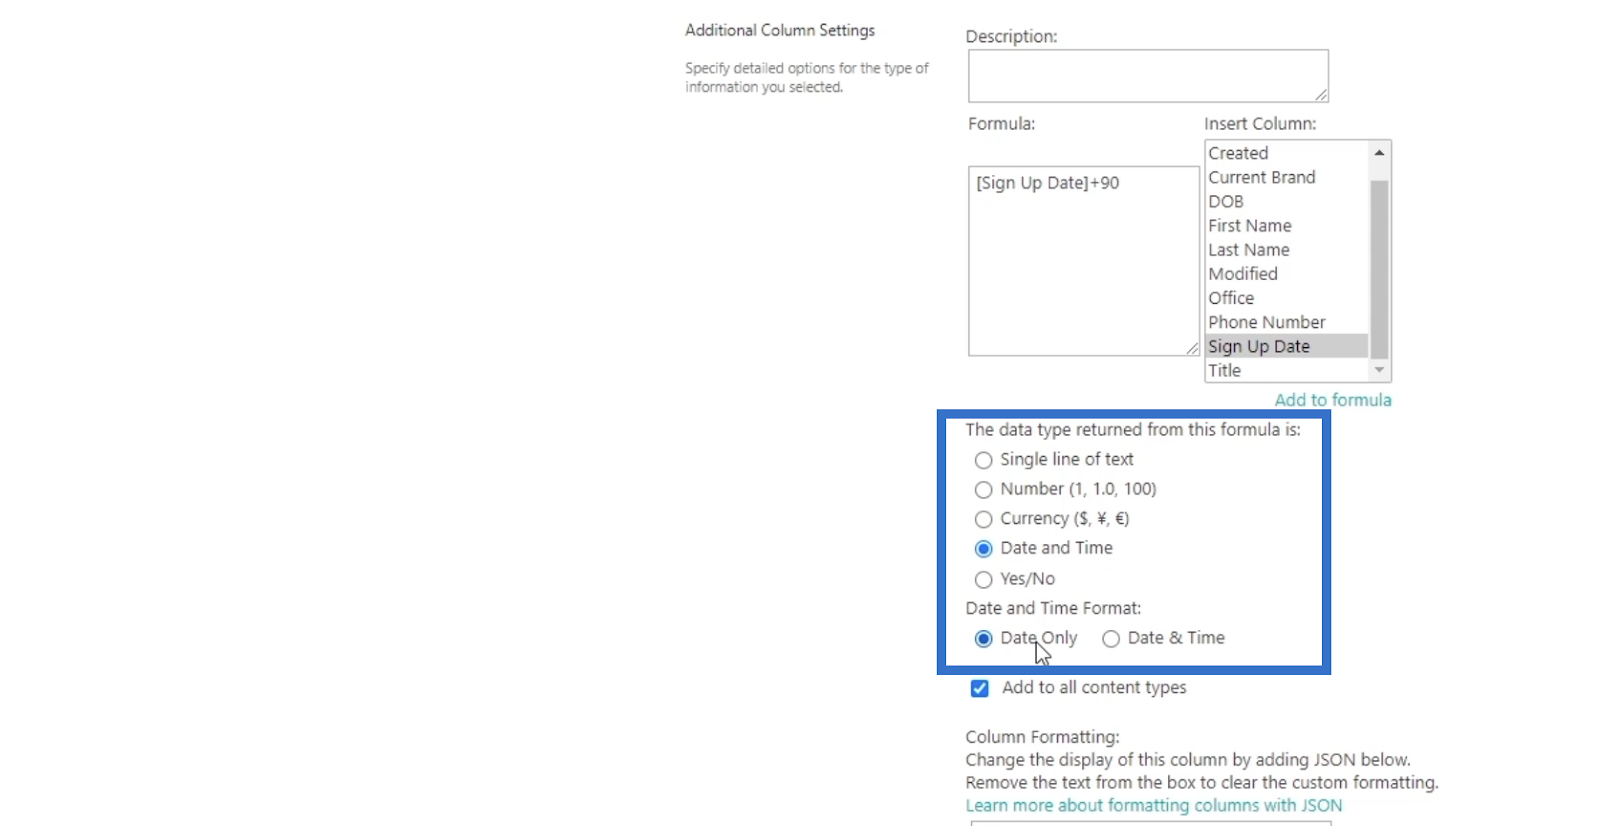
Next, below the Formula text box, you’ll see options for The data type returned from this formula is: We’ll choose Date and time, then, Date Only.
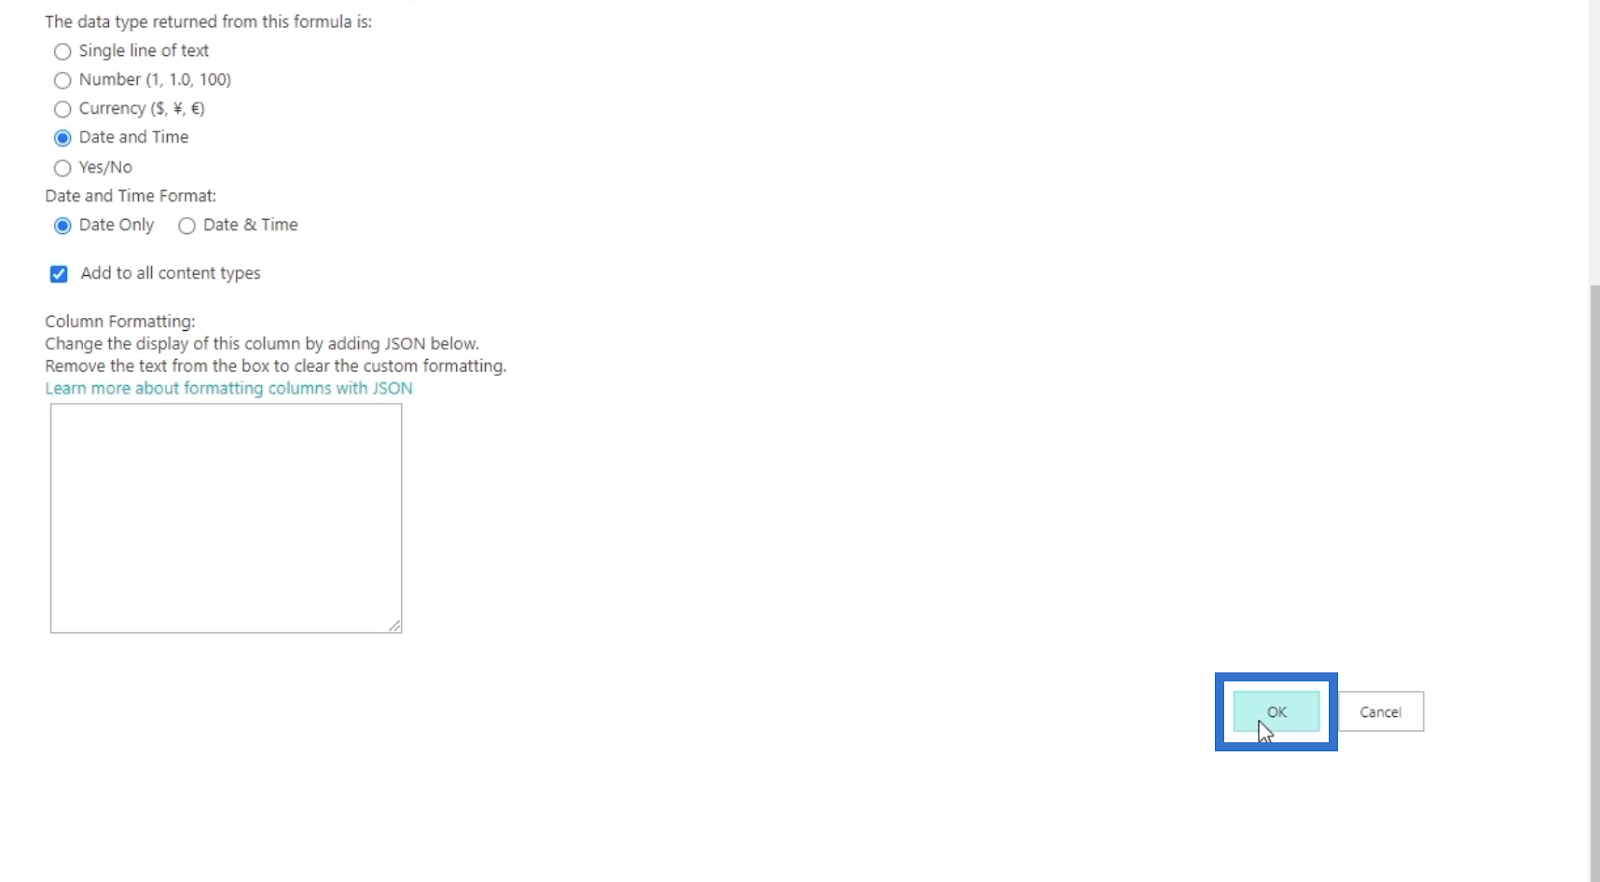
Finally, click OK.
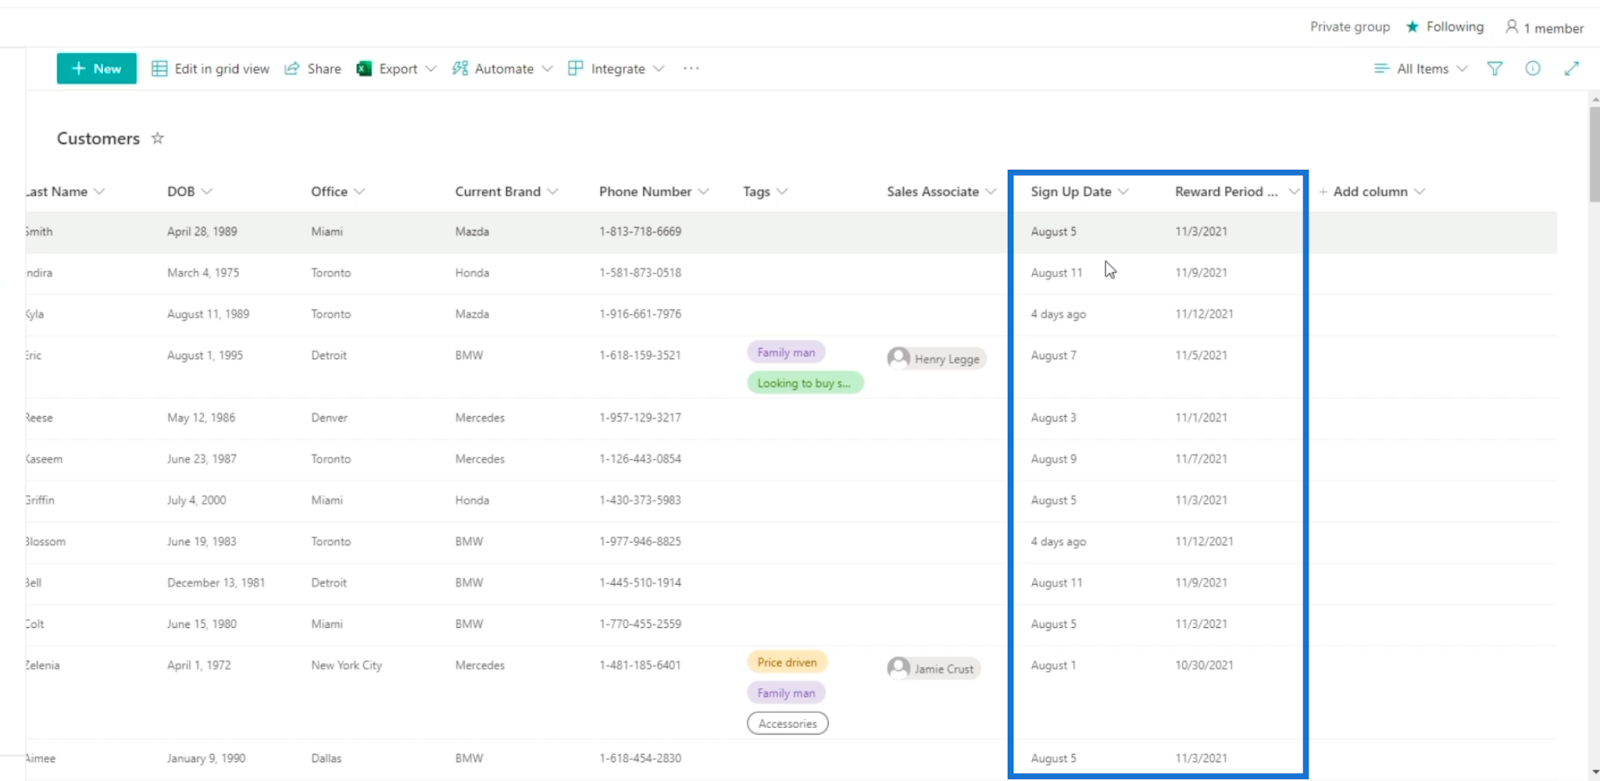
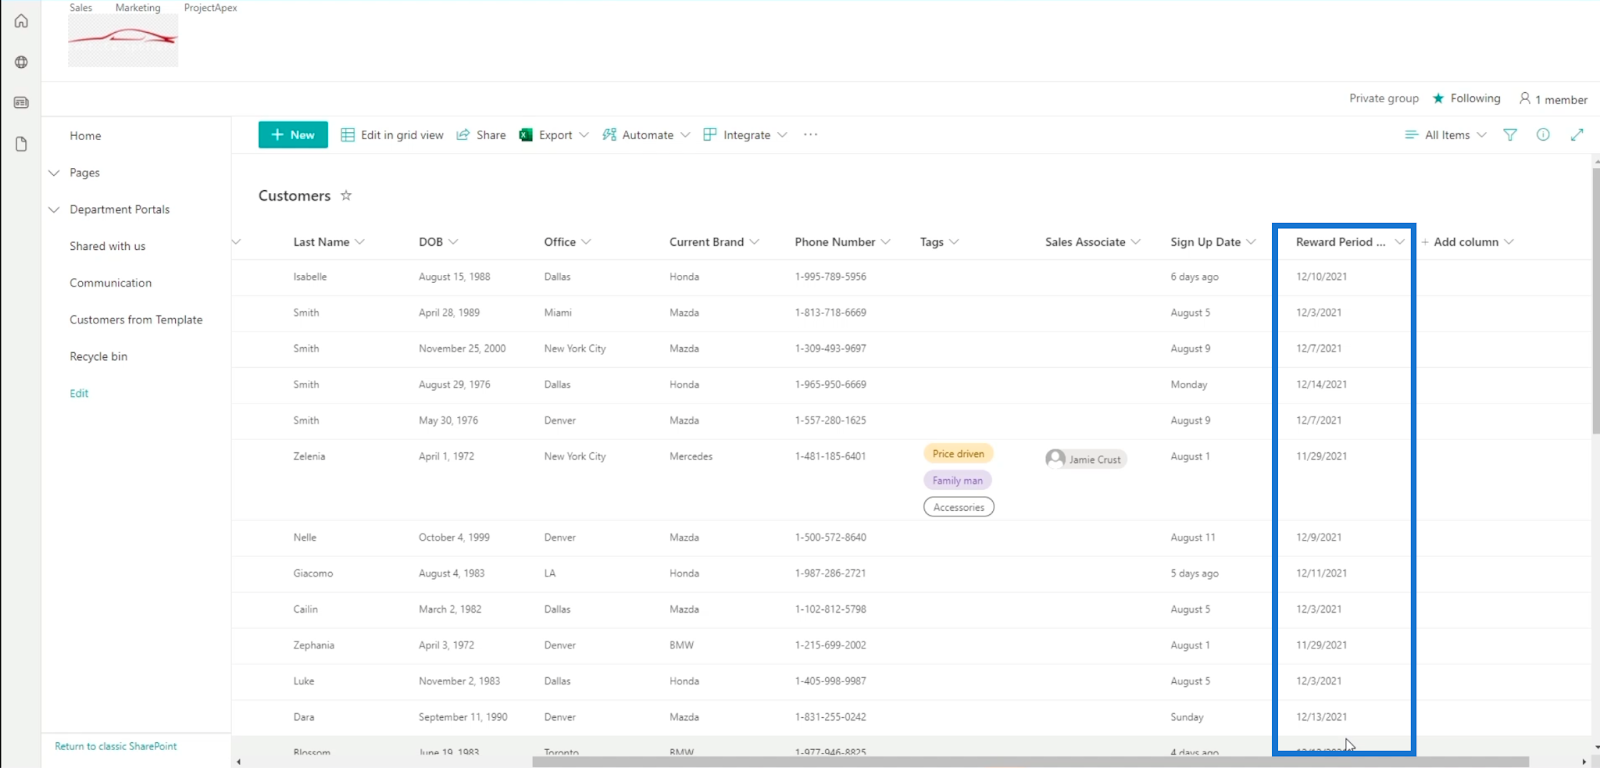
And on the right side of the page of our SharePoint list, we’ll see the Sign Up Date (start date) and Reward Period End columns. The Reward Period End column shows 90 days after their Sign Up Date.
Editing Calculated Columns In SharePoint
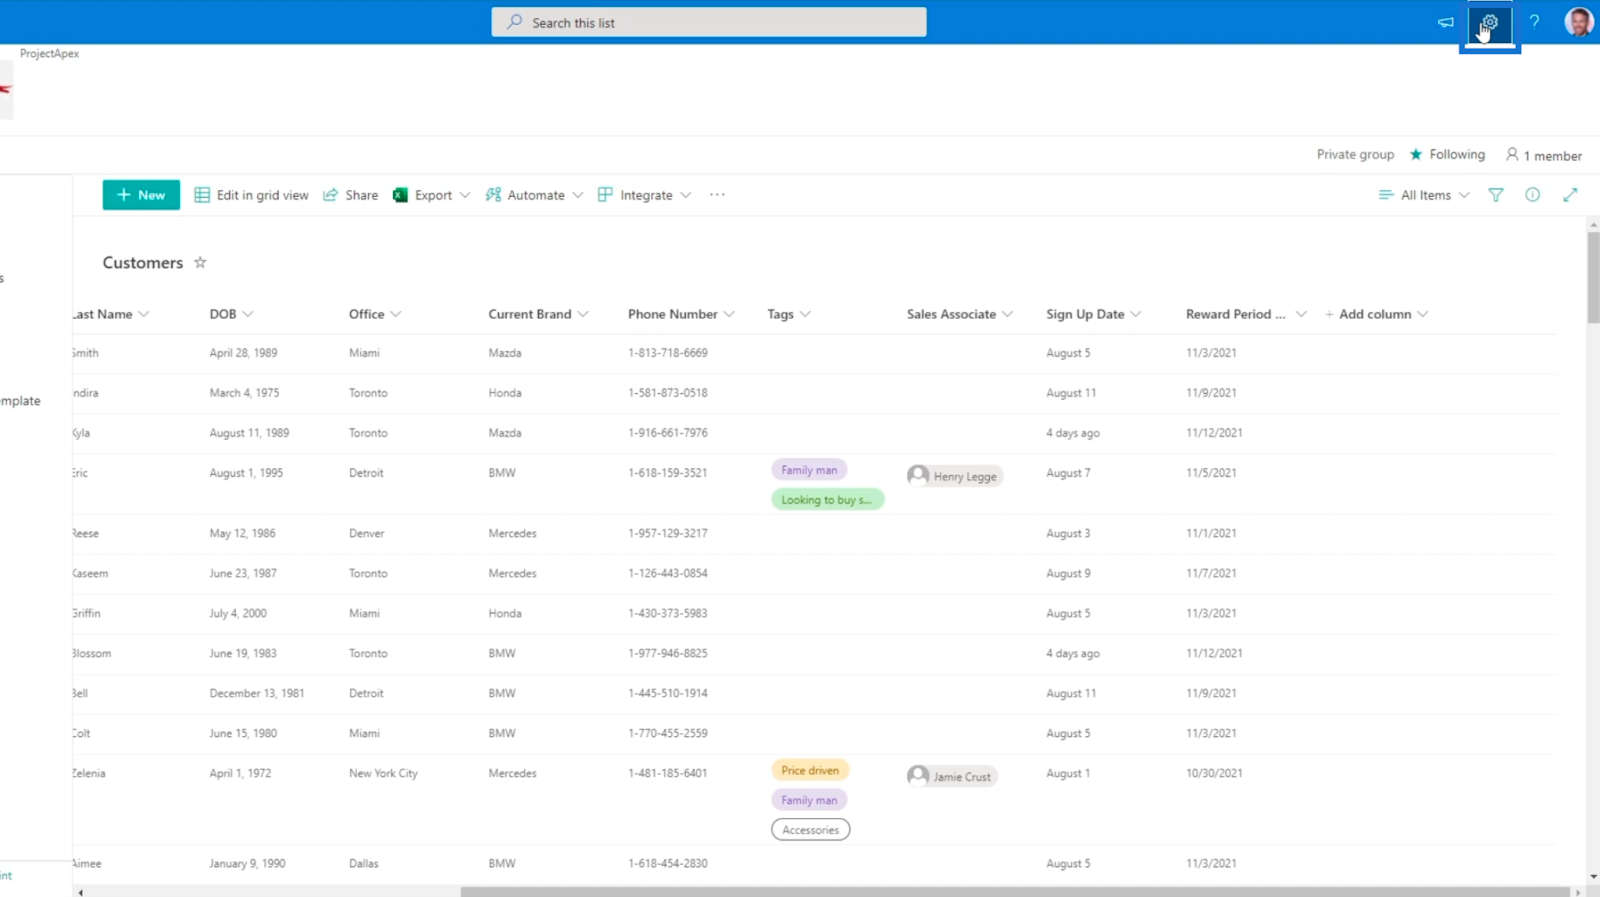
Keep in mind that we can no longer edit the Reward Period End column directly here in the modern view because we’ve created it on the classical view. Instead, we can click the gear icon on the top right.
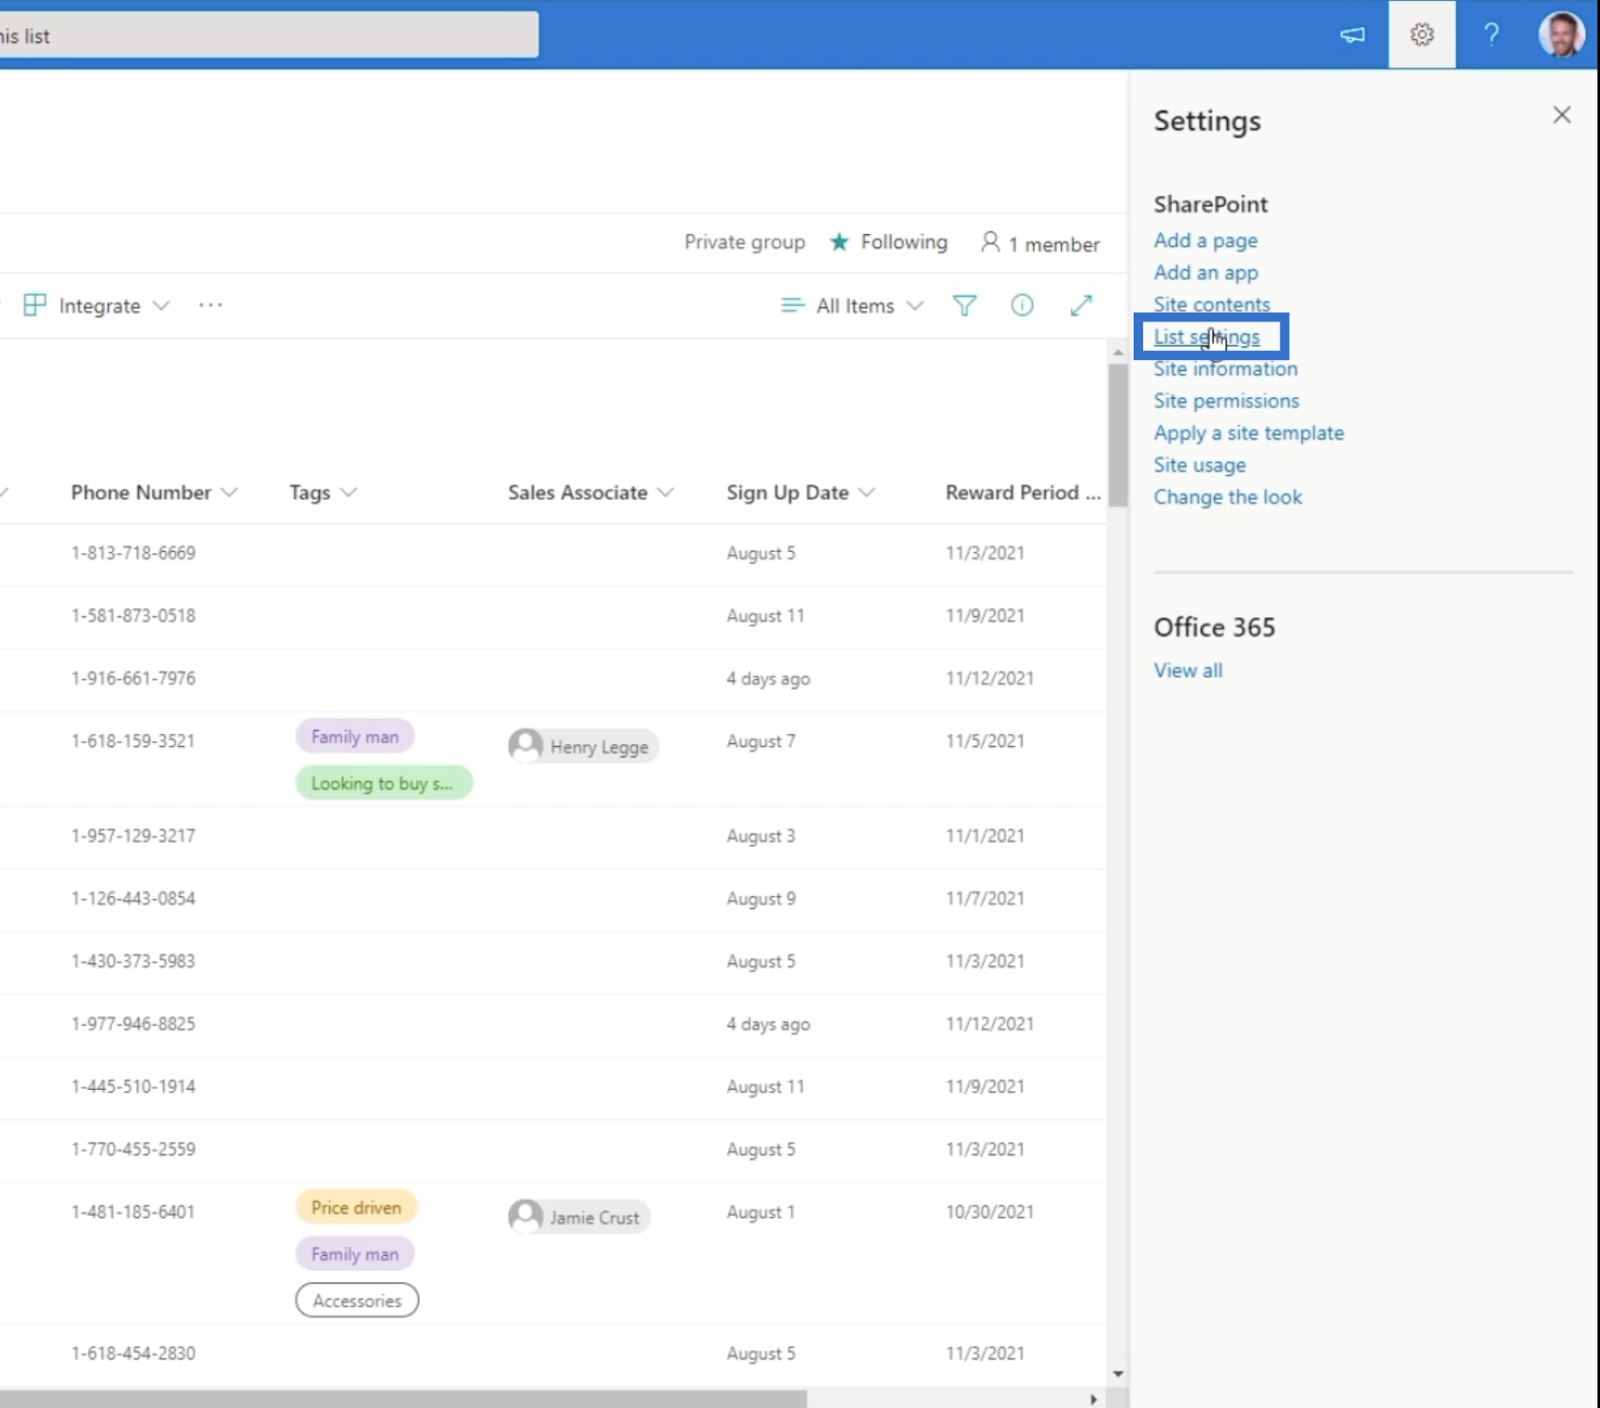
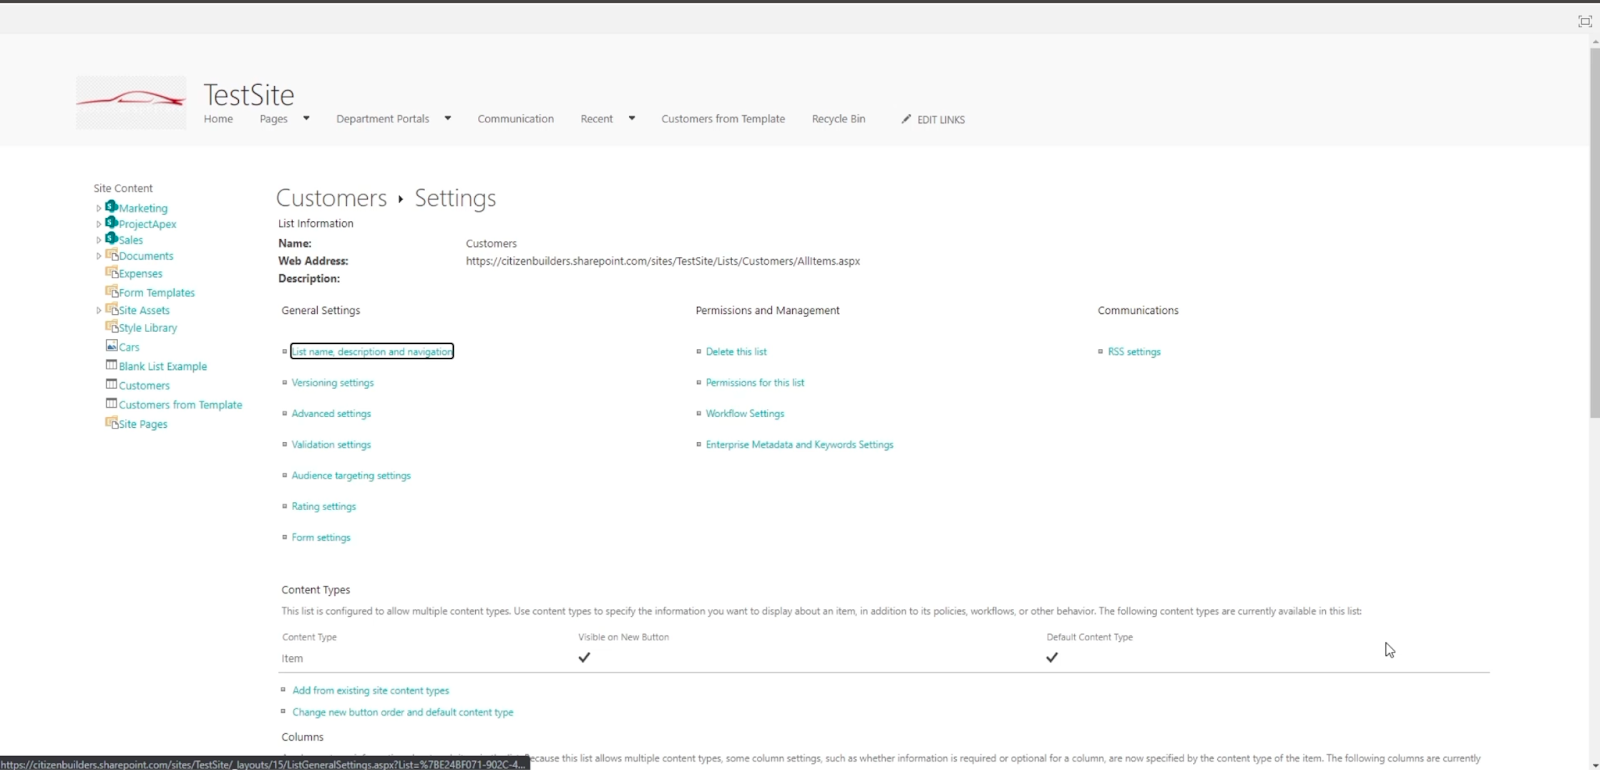
Next, click List settings.
We’ll be redirected to the Settings page.
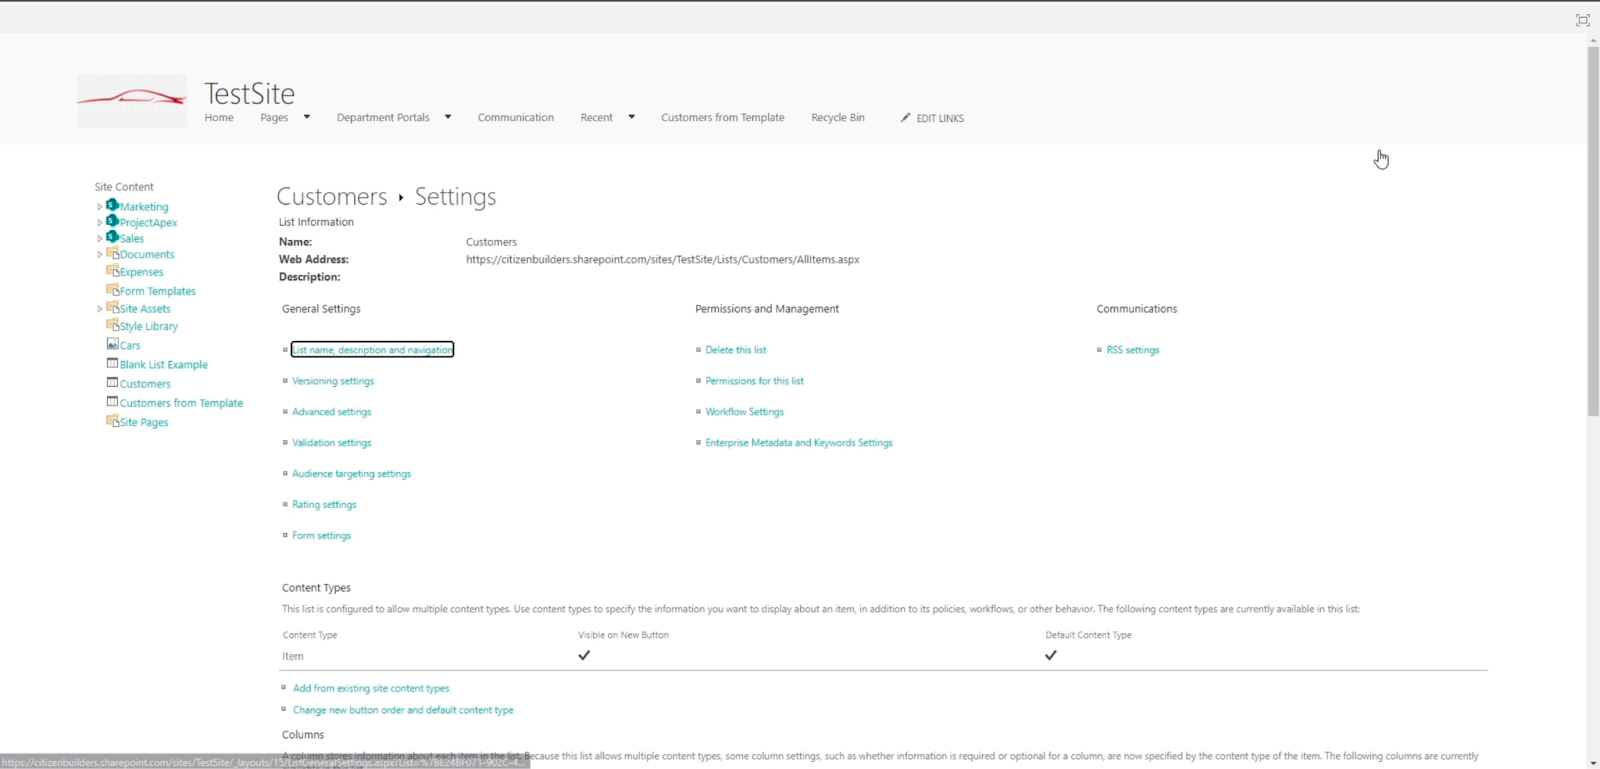
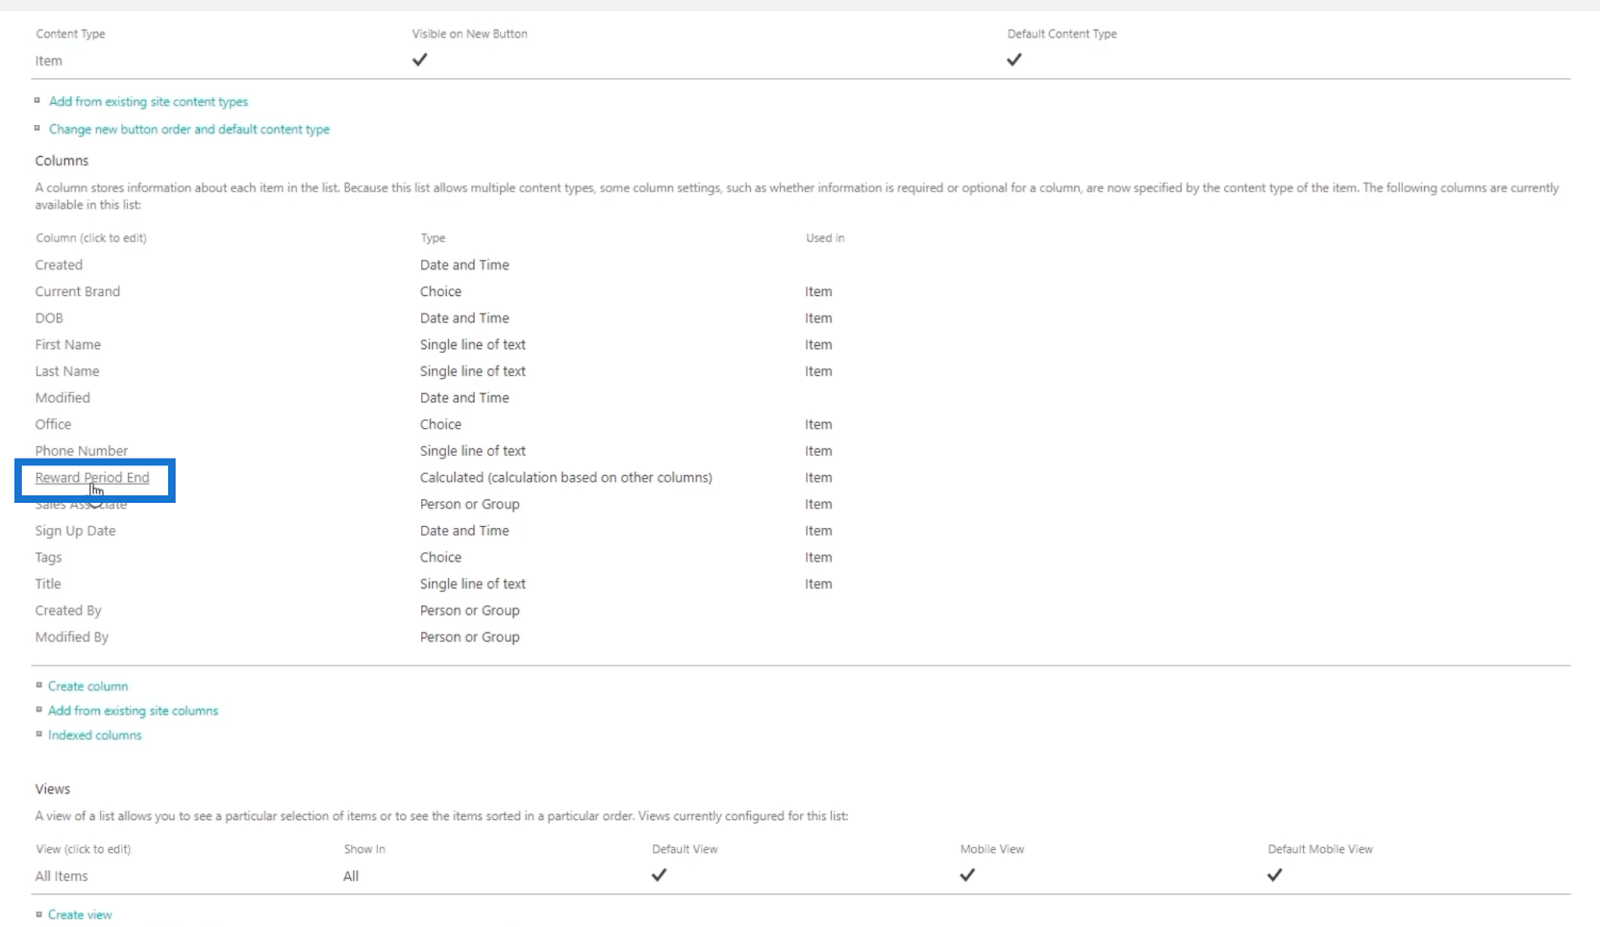
Scroll all the way down, and we’ll see all our different columns under the Columns section.
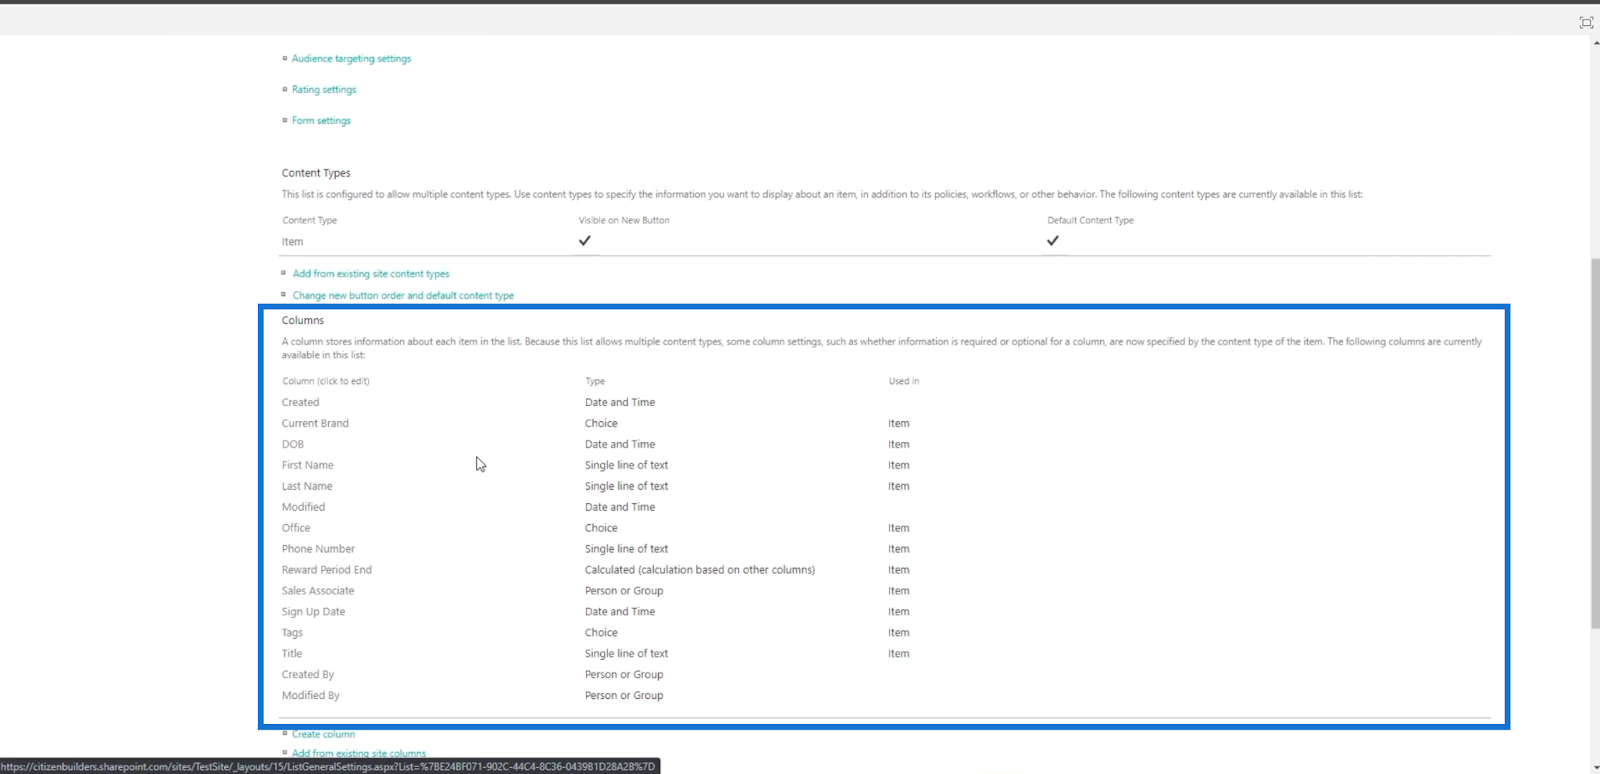
Next, we’ll click Reward Period End.
We’ll be redirected to the page where we can set the column up once again.
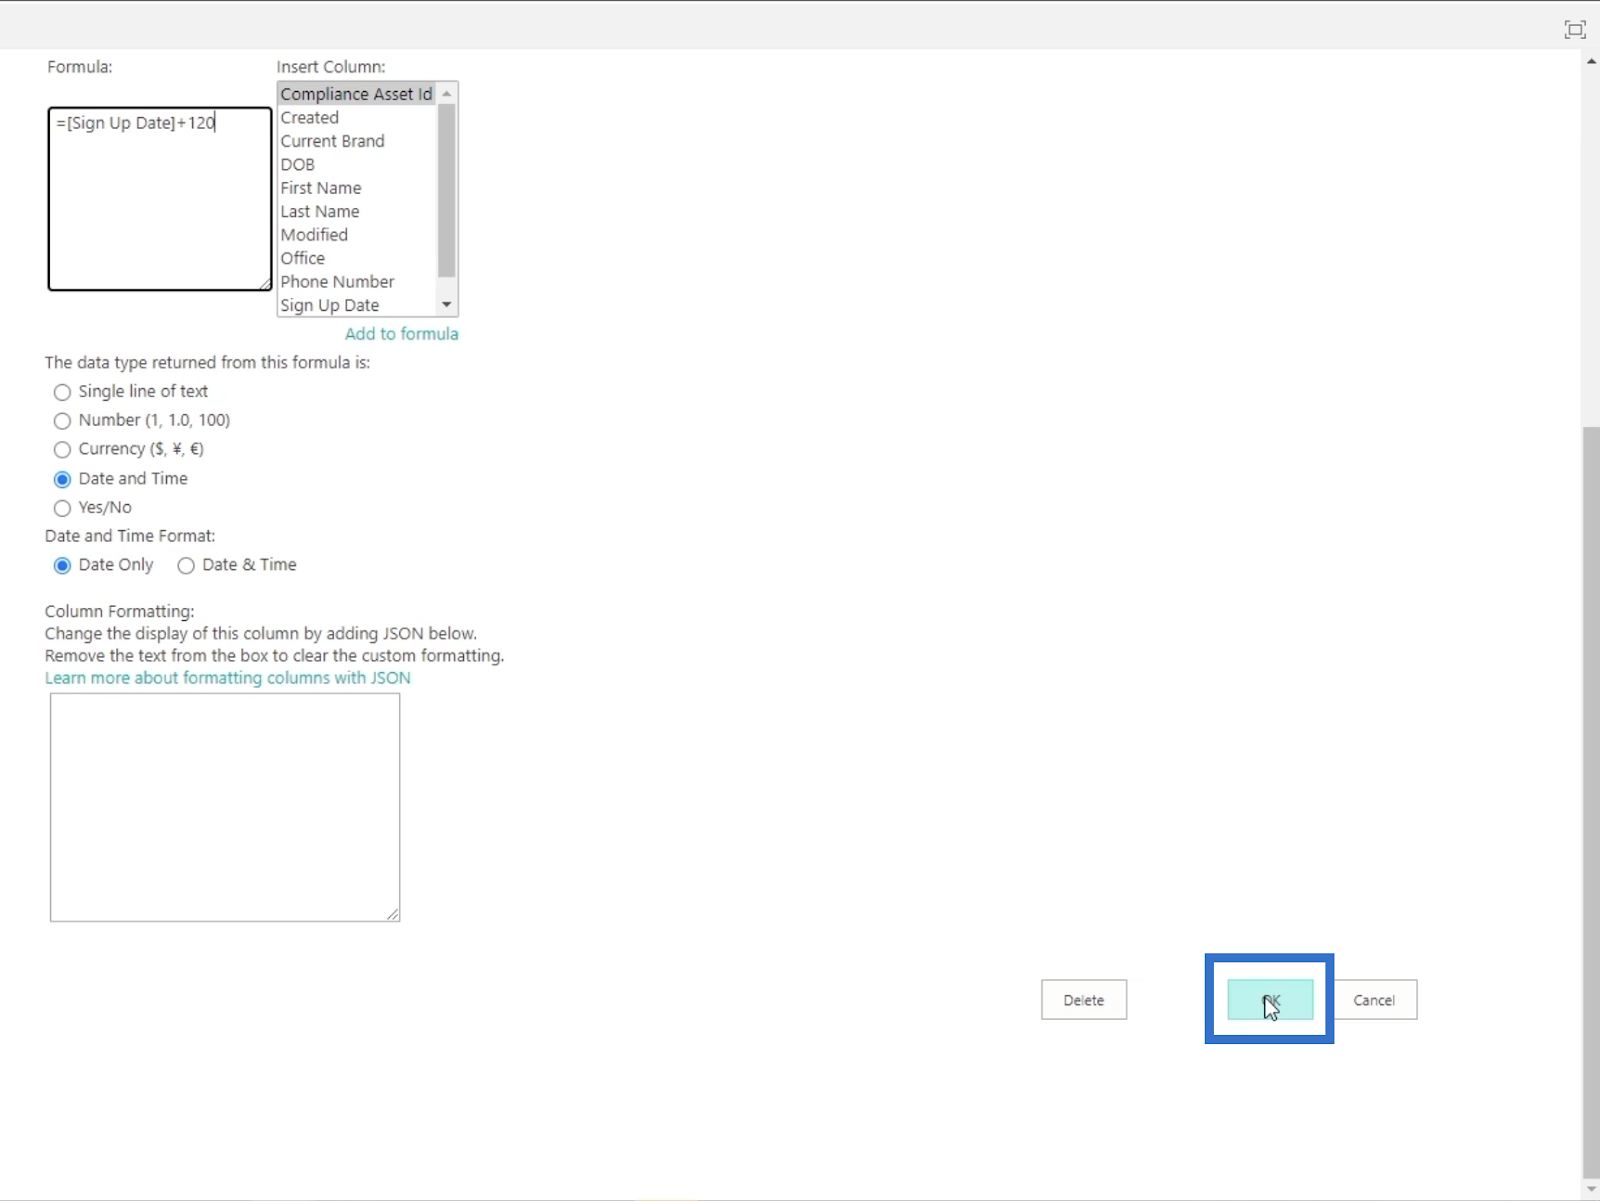
In this example, we’ll change the formula to “=[Sign Up Date]+120”, instead of “=[Sign Up Date]+90”.
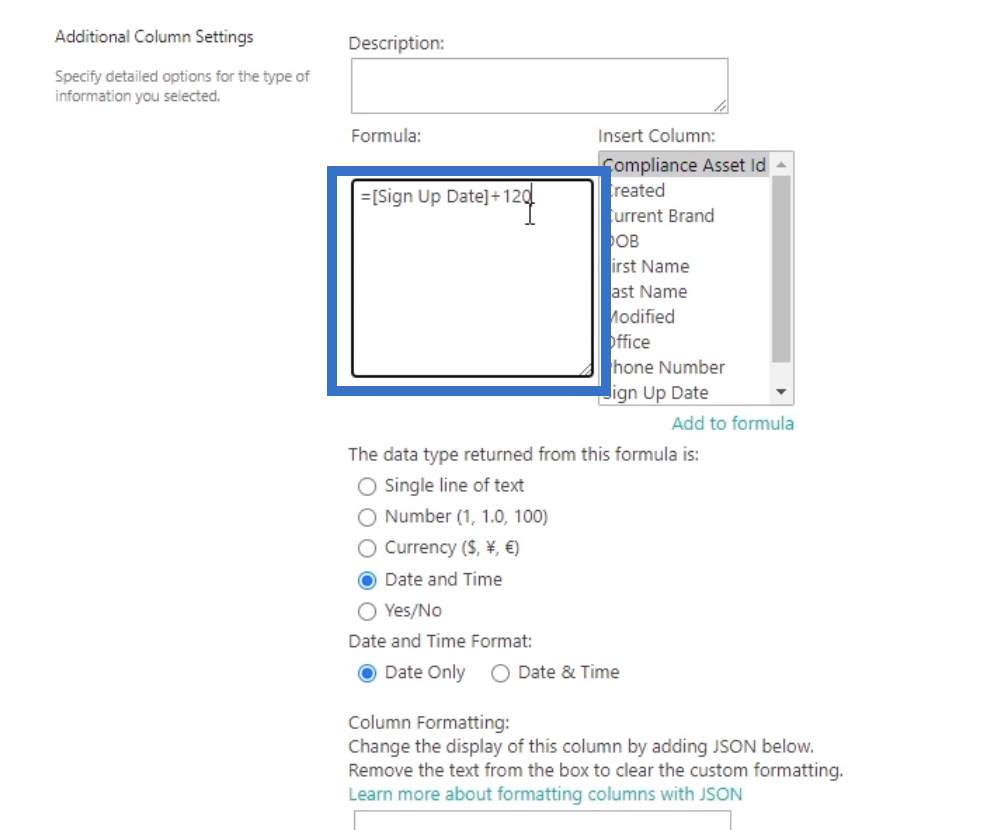
Finally, click OK.
You’ll be redirected to the previous page.
Click Customers to return to our SharePoint online list.
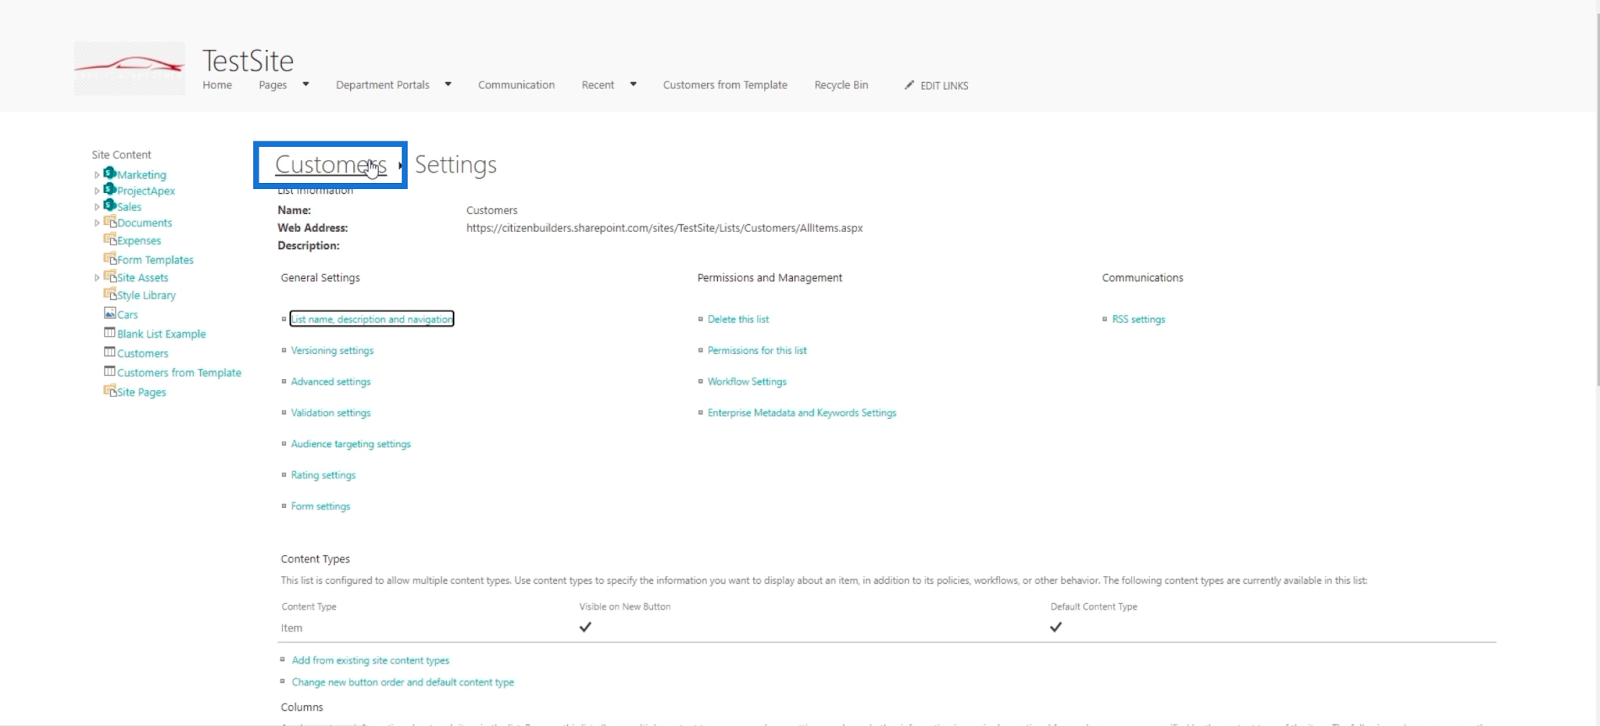
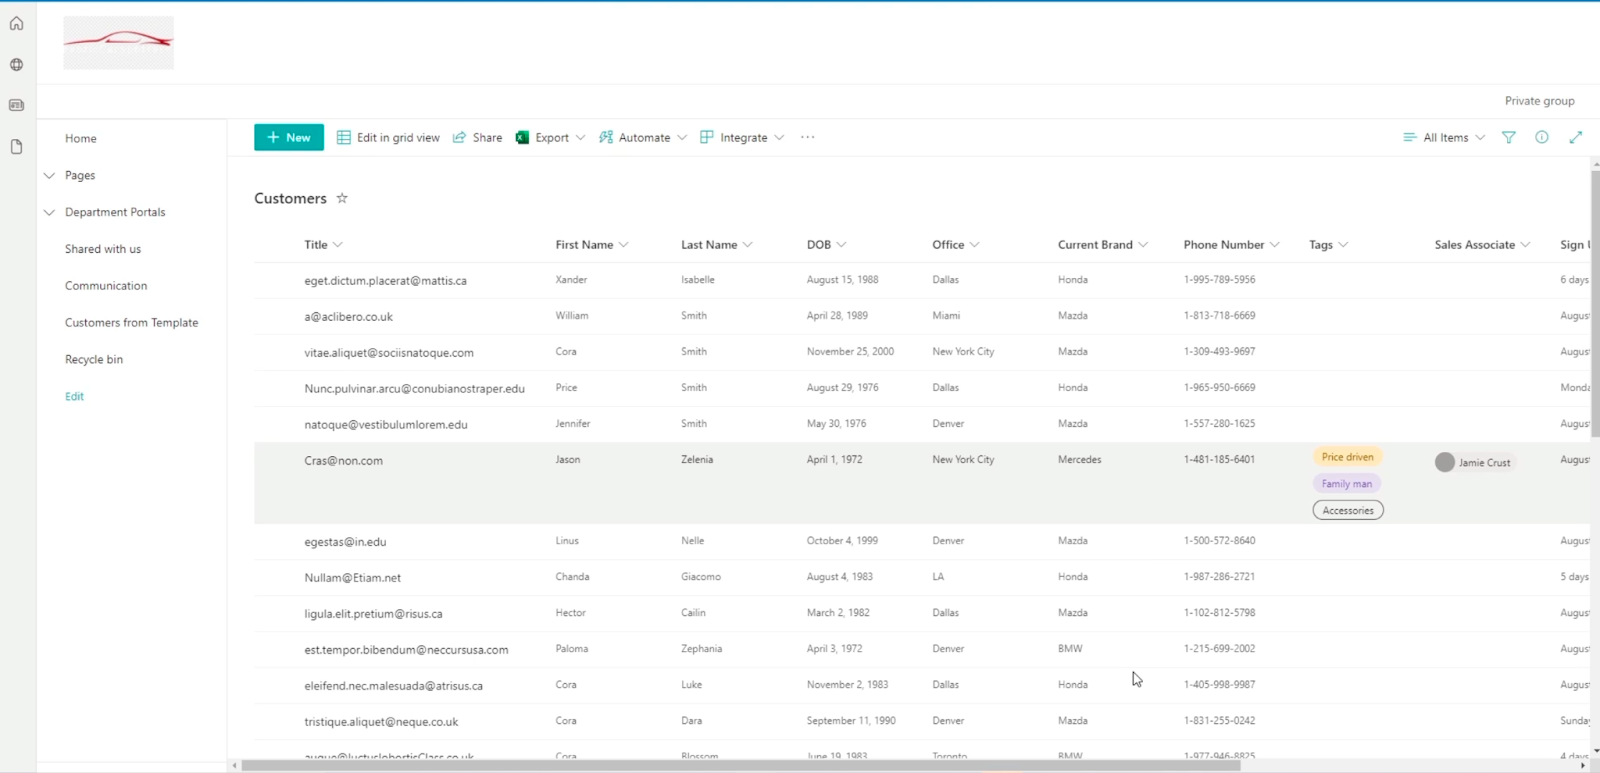
You’ll see that the Reward Period End column has changed since we updated it to 120.
Keep in mind that the only way to edit a calculated field/ calculated column is through this way. It’s because we can only create a calculated column in the classical view settings. But of course, you can change the Sign Up Date column.
Checkout the below tipe to become a confident Sharepoint designer!
Tips For Great Function Resources
The best thing about calculated columns is that you don’t need to stick to basic formulas. In fact, you can use a lot of formulas to make your SharePoint list more functional and convenient to use.
If you’re unfamiliar with the formulas you can use, you can find them here.
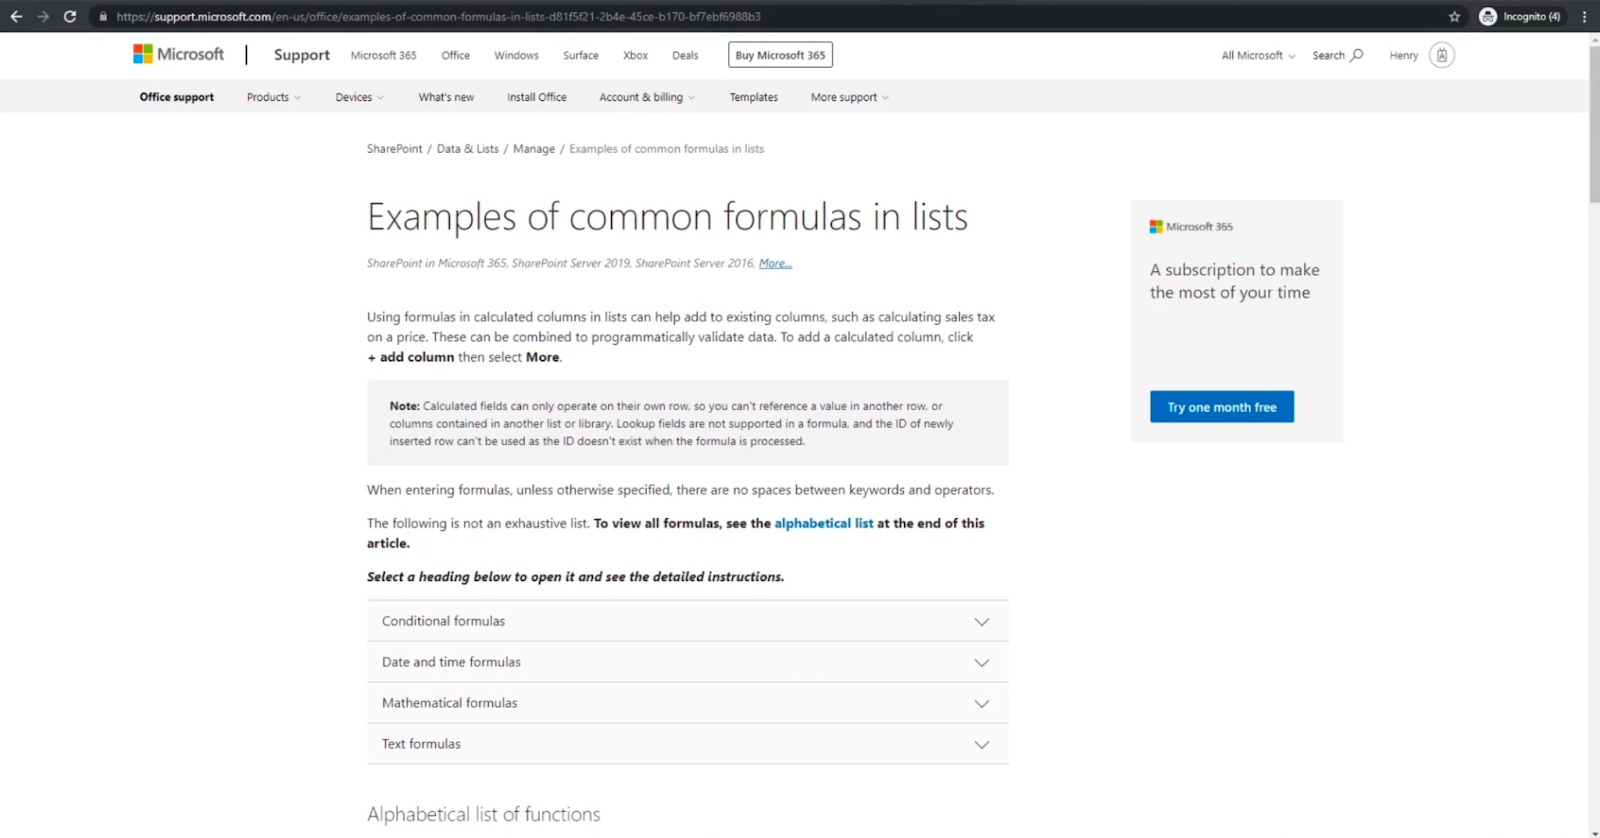
On this site, you’ll find plenty of formulas that you can use in your calculated columns.
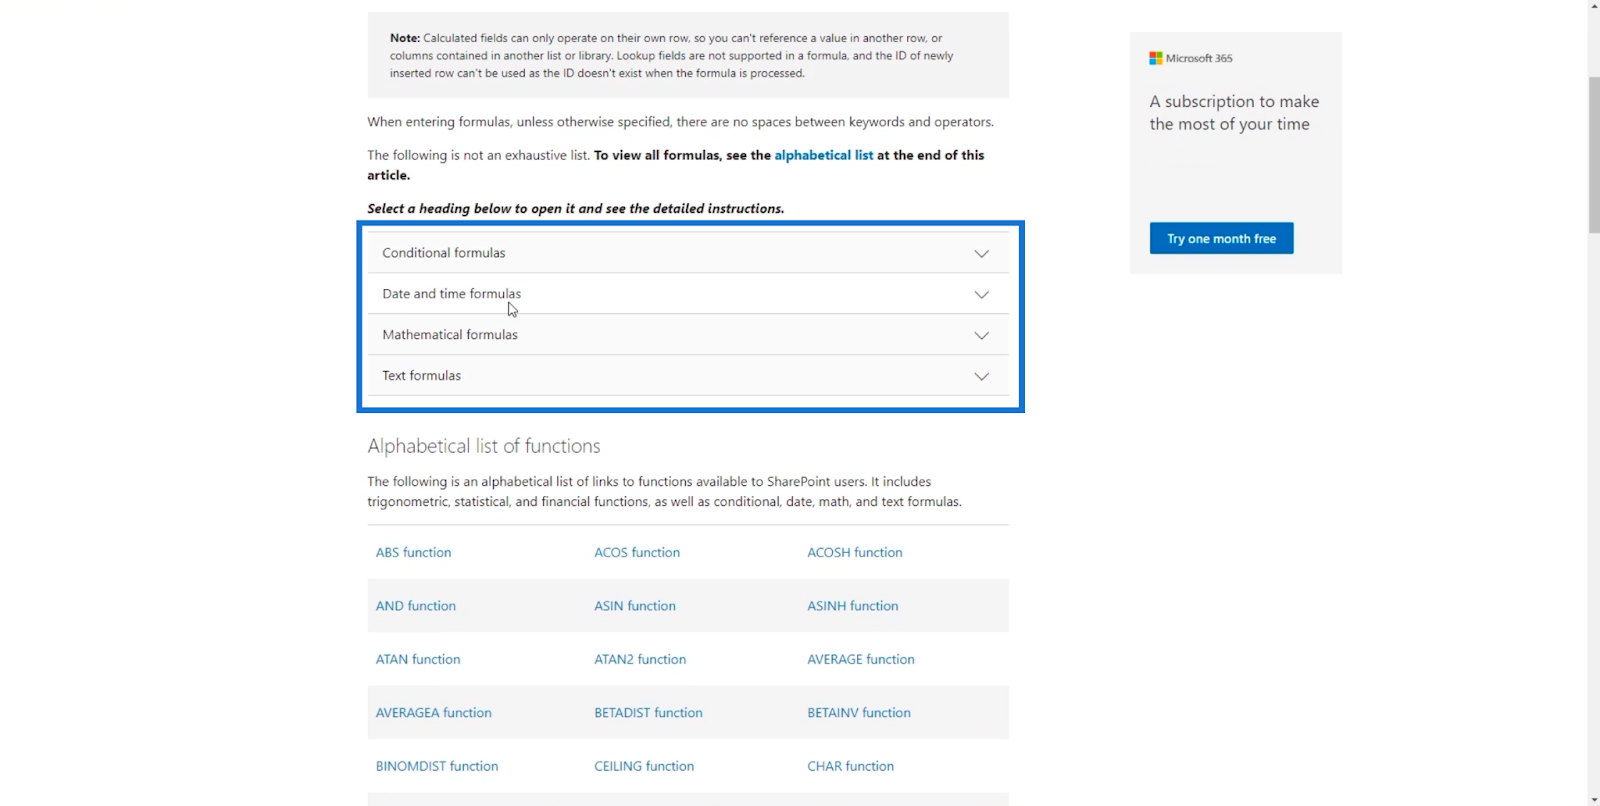
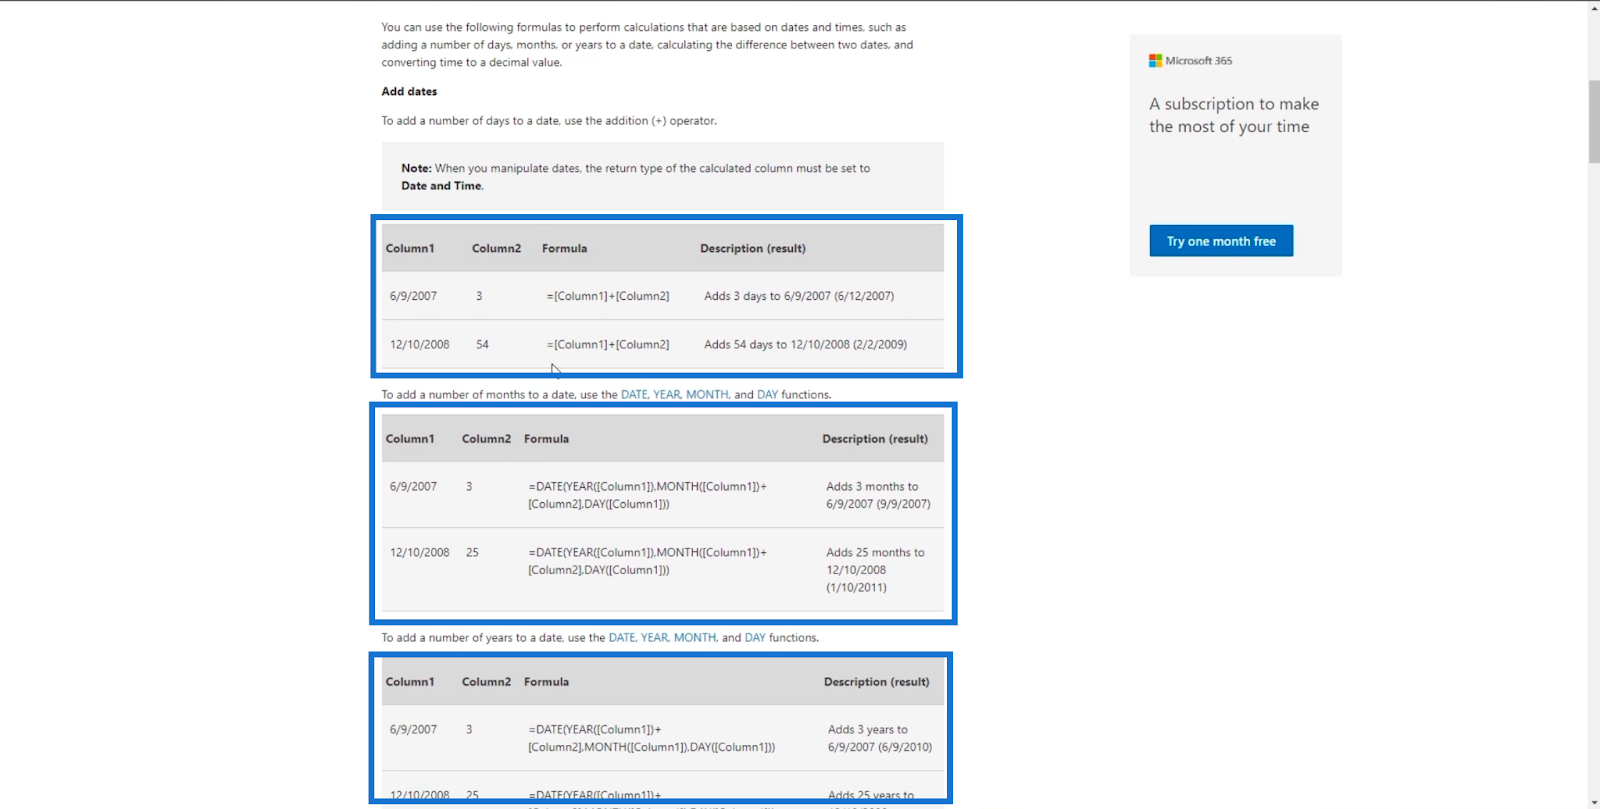
Also, you’d be able to see functions that you can use on your SharePoint lists.
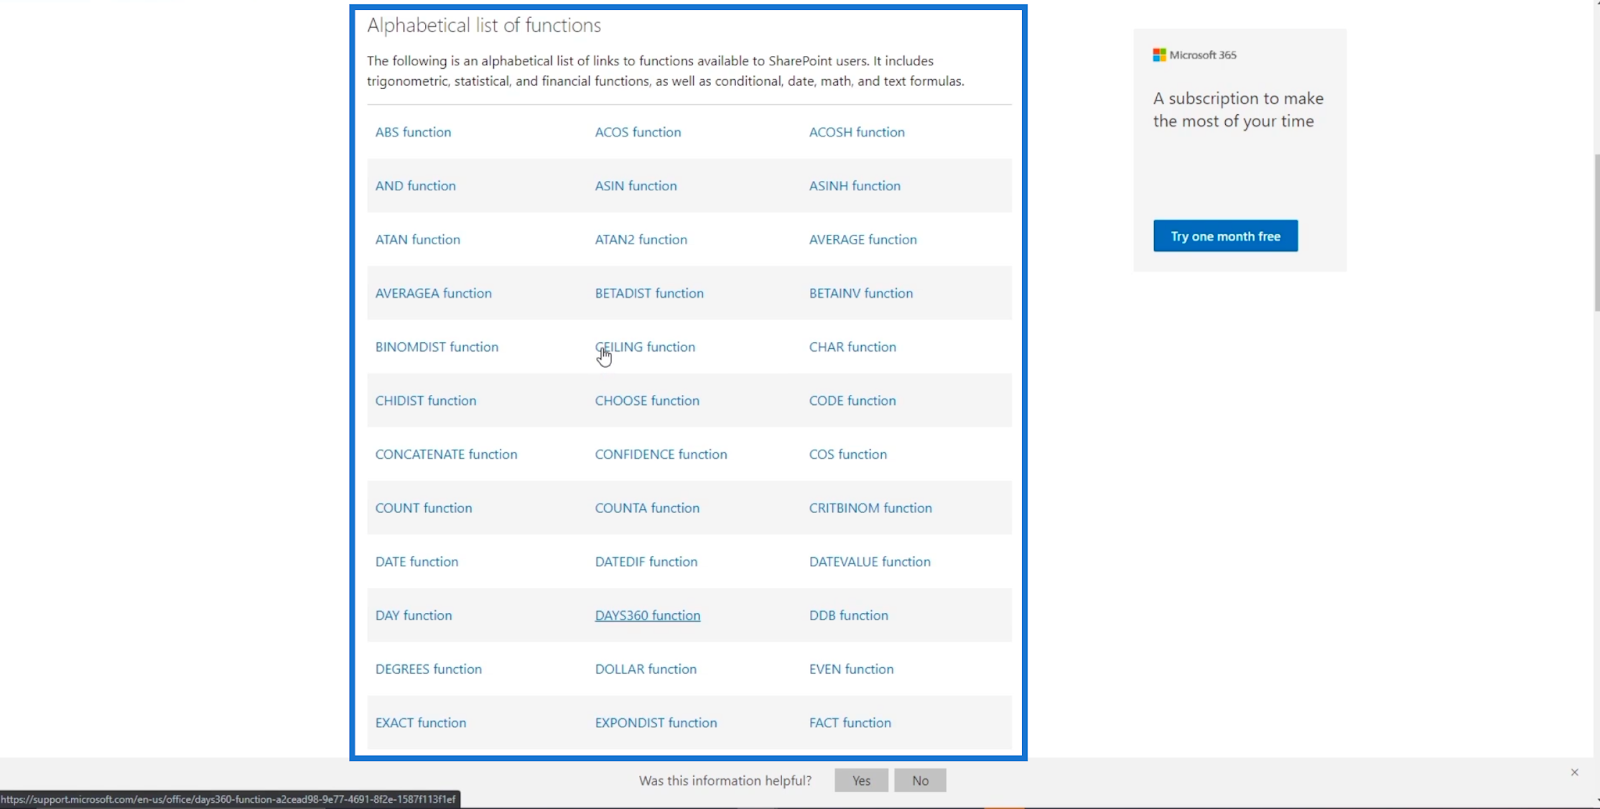
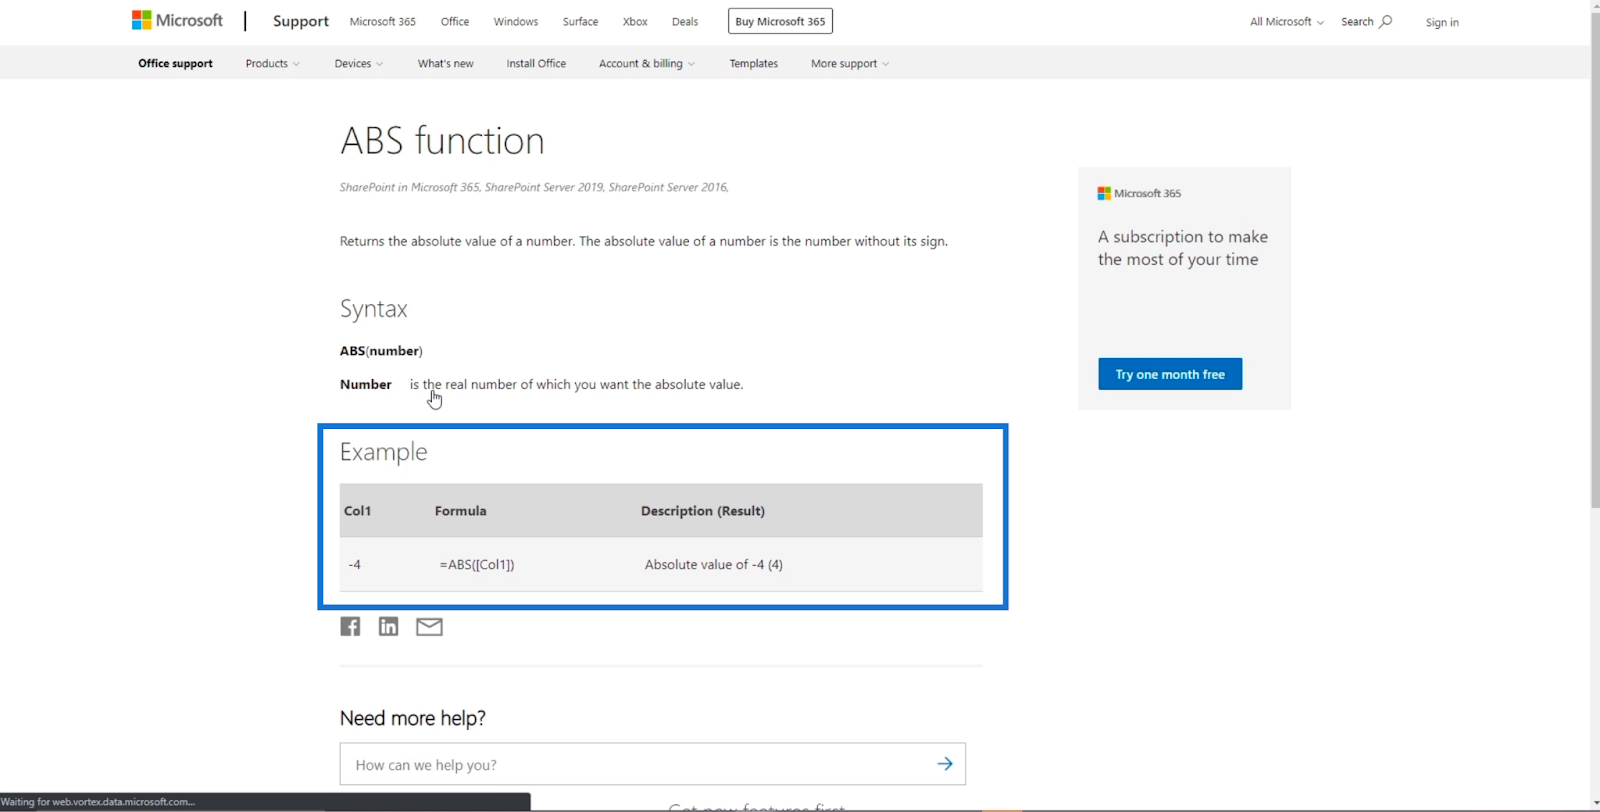
One example is the ABS function.
Aside from this list, you can also rely on Google and Stack Overflow. When you search for formulas on the internet, type in “for Excel” instead of “for SharePoint” because SharePoint list is very much similar to Excel.
This means even conditional formatting will work on your calculated columns.
***** Related Links *****
SharePoint List Item: Editing Single And Multiple Items
SharePoint Lists: An Overview
Adding Metadata In SharePoint Using Columns
The Final Word
To sum it all up, we’ve learned how to create calculated columns in SharePoint by following the guide above.
The formula we used might be a basic one, but you’ll improve along the way, especially when you use the given resources where you can get formulas for your calculated column.
Keep in mind that a calculated column is not limited to using dates. You can also use it for certain formulas. For example, if a user types in a certain city or office, the zip code will be automated. This means there are a lot of ways that calculated columns can make your SharePoint list more manageable and convenient.
All the best,
Henry


")